Consuming FXRMotionControllerData in Blueprint
important
Unreal Engine versions 5.2, 5.3, and 5.4 are limited to
FXRMotionControllerData since at the time of their release no
FXRHandTrackingState was available.
Also please keep in mind that, while FXRMotionControllerData is pretty much
usable and functional in Unreal Engine 5.5, it is recommended to utilize
FXRHandTrackingState instead. This is because this version of UE has
deprecated FXRMotionControllerData in favor of the
FXRMotionControllerState and FXRHandTrackingState structs. Prior to
version 5.5, FXRMotionControllerData handled both motion controller and
hand tracking data. From 5.5 onward, these responsibilities have been
separated into the two distinct structs, providing clearer and more
specialized handling of each.
Before continuing this section, please ensure you've studied the Consuming FXRMotionControllerData section, first.
Drawing and Animating Virtual Hands
-
Create a new Virtual Reality project based the Unreal VR Template.
-
Make sure the SenseGlove UnrealEngine plugin is installed and enabled inside your new project.

-
You could use either hand-tracking or a SenseGlove device as the input data, or both of the inside the same project. Whether you would like to use hand-tracking or a SenseGlove device, please make sure the required steps are taken for each of those first.
-
You could add the required Blueprint code for drawing virtual hands to either your Level Buleprint or the VRPawn Blueprint Class located at
/Content/VRTemplate/Blueprints/VRPawn. In this guide we are going to add the code to our VRPawn. -
Add a new function named
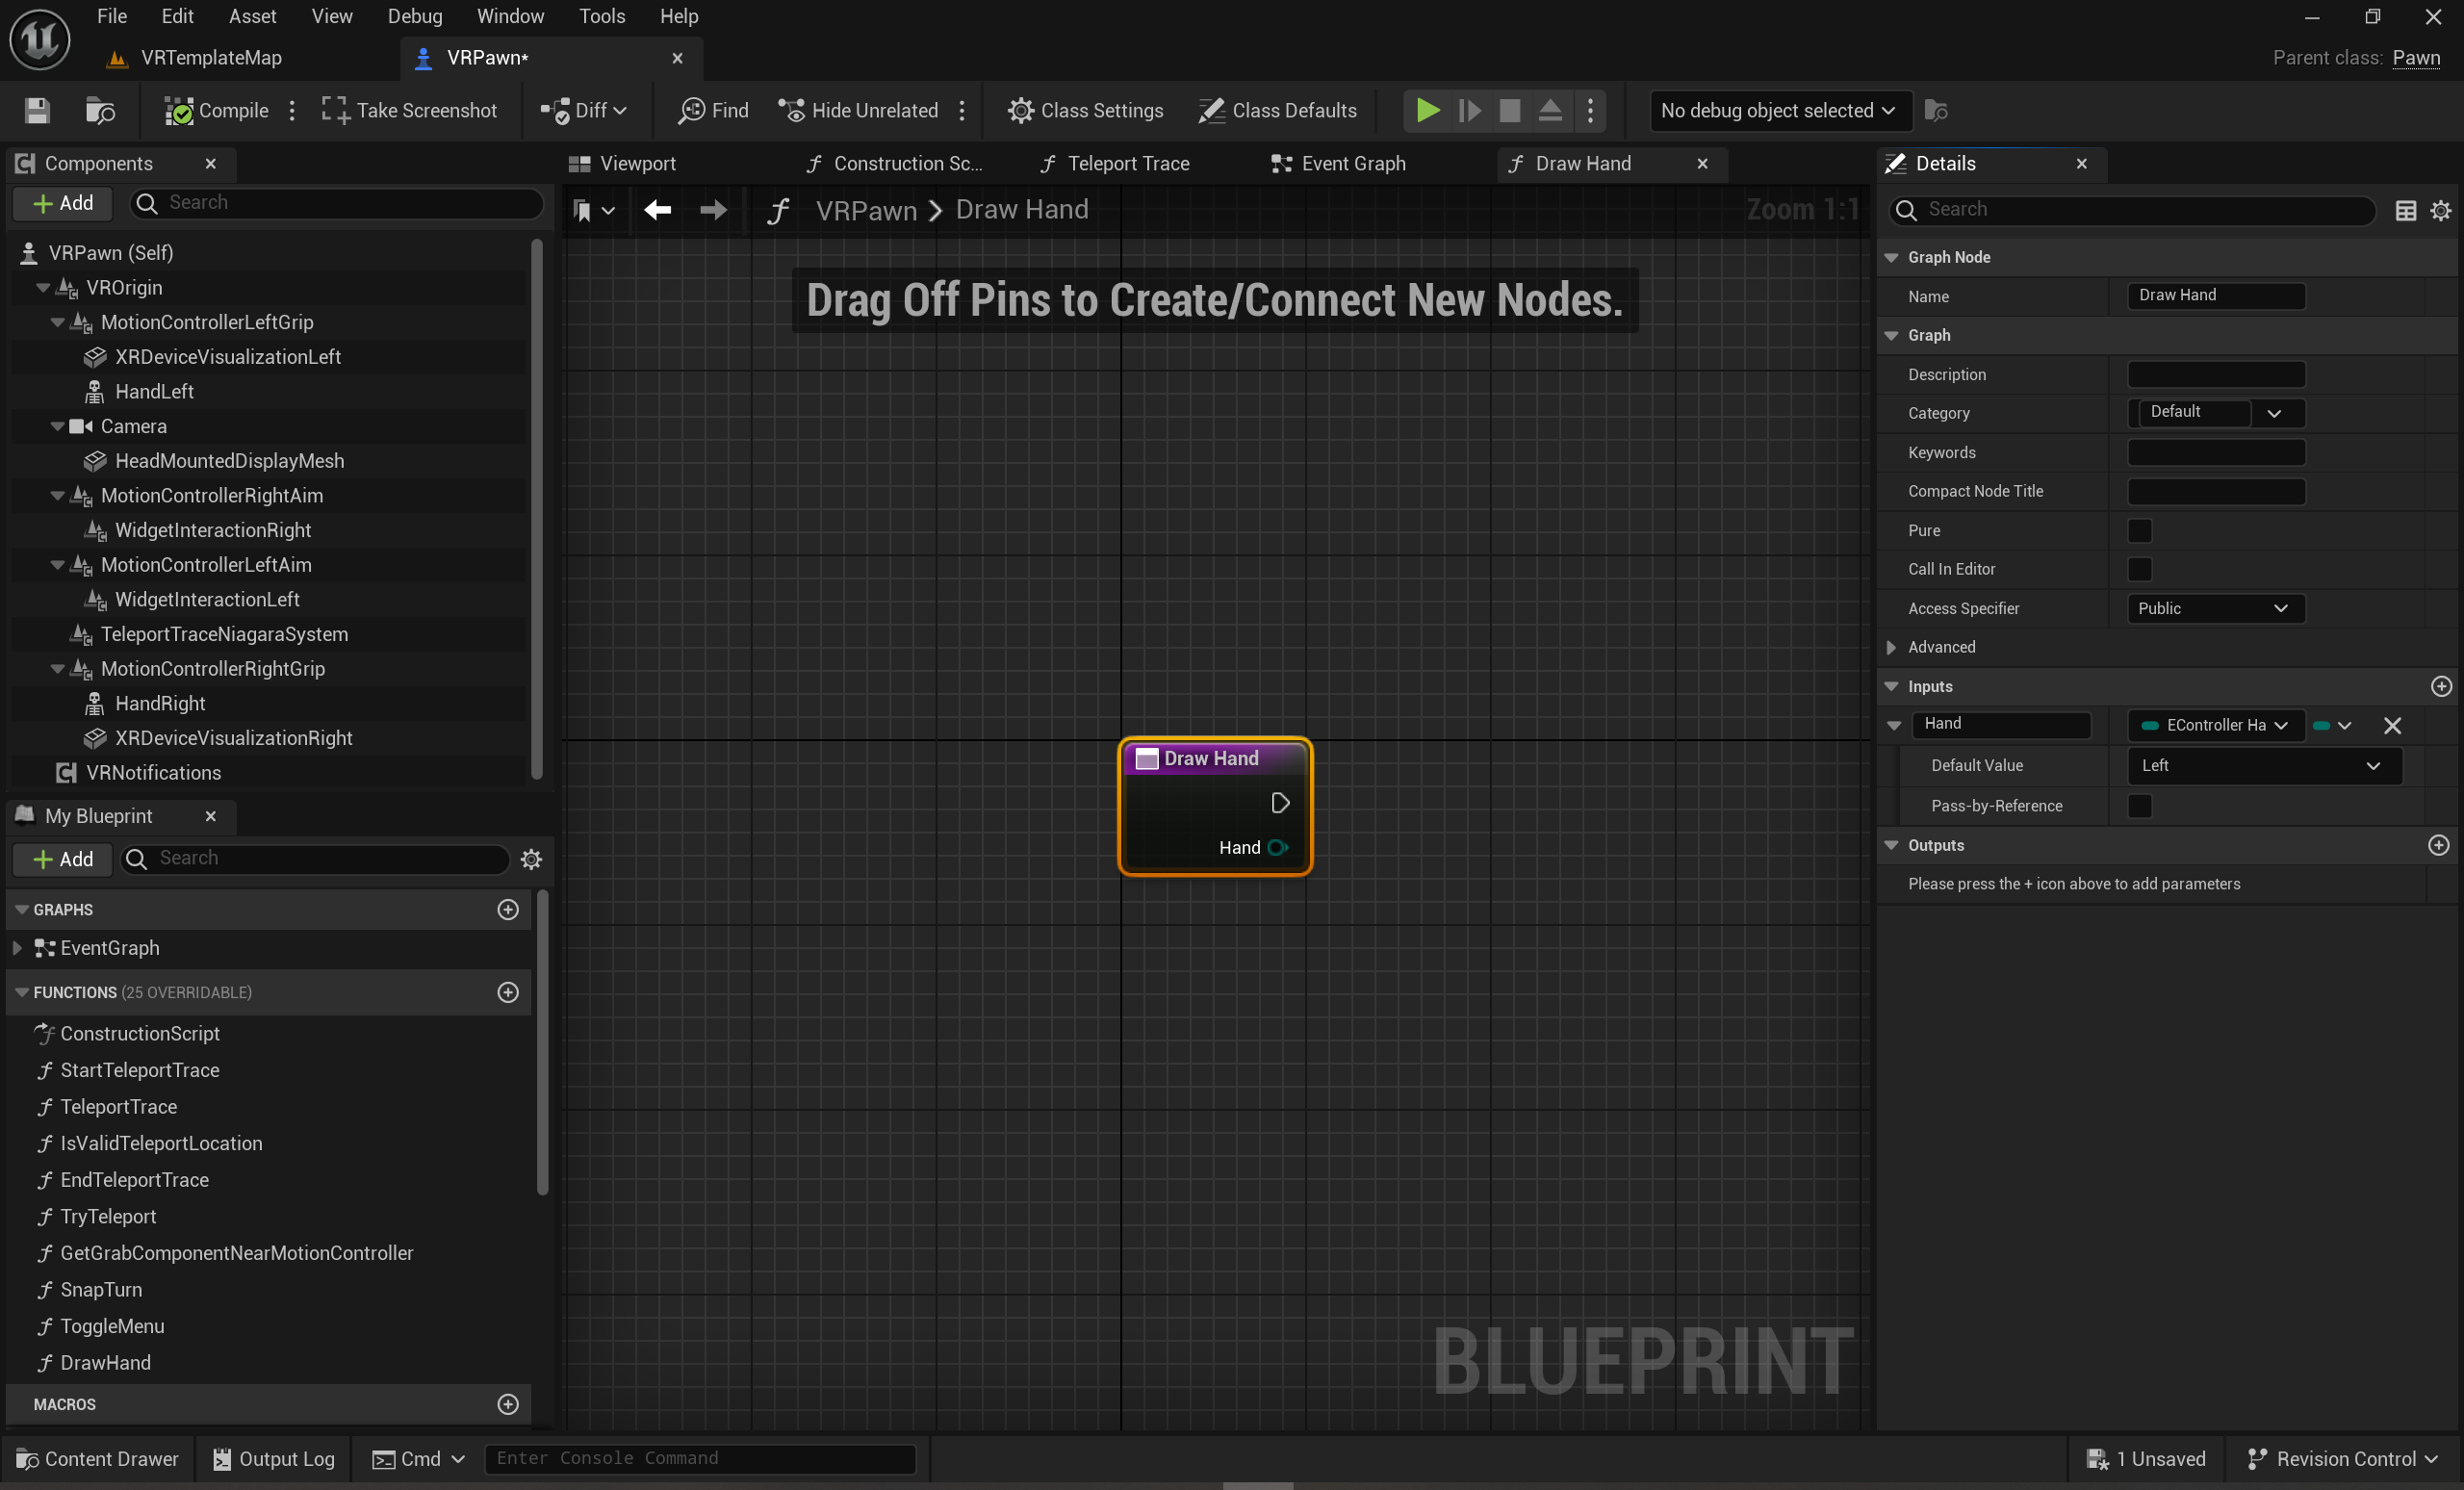
Draw Handwith an input parameter of typeEController HandnamedHand.
- Inside this function's event graph add a
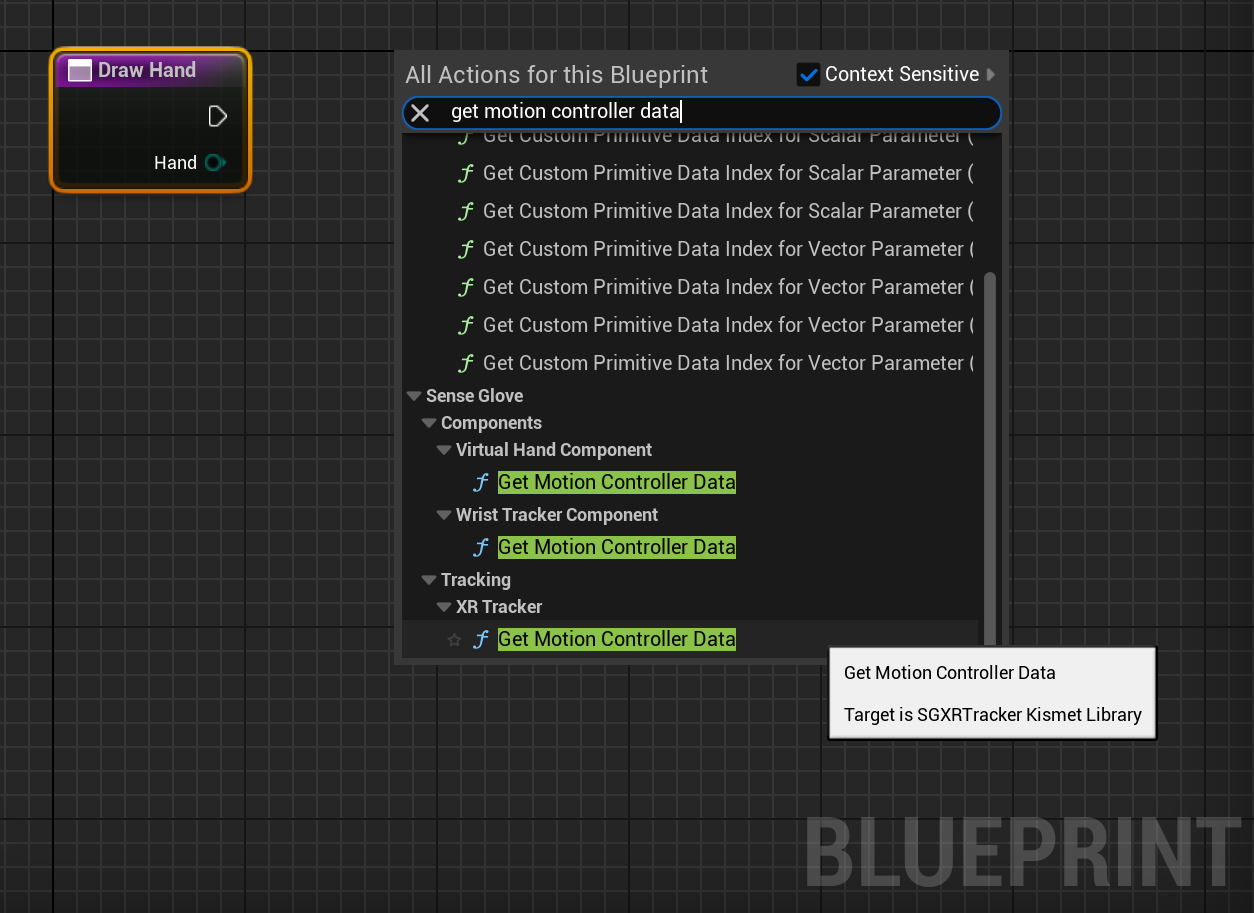
Get Motion Controller Datanode fromSenseGlove > Tracking > XR Tracker > Get Motion Controller Data.
- Then connect the functions
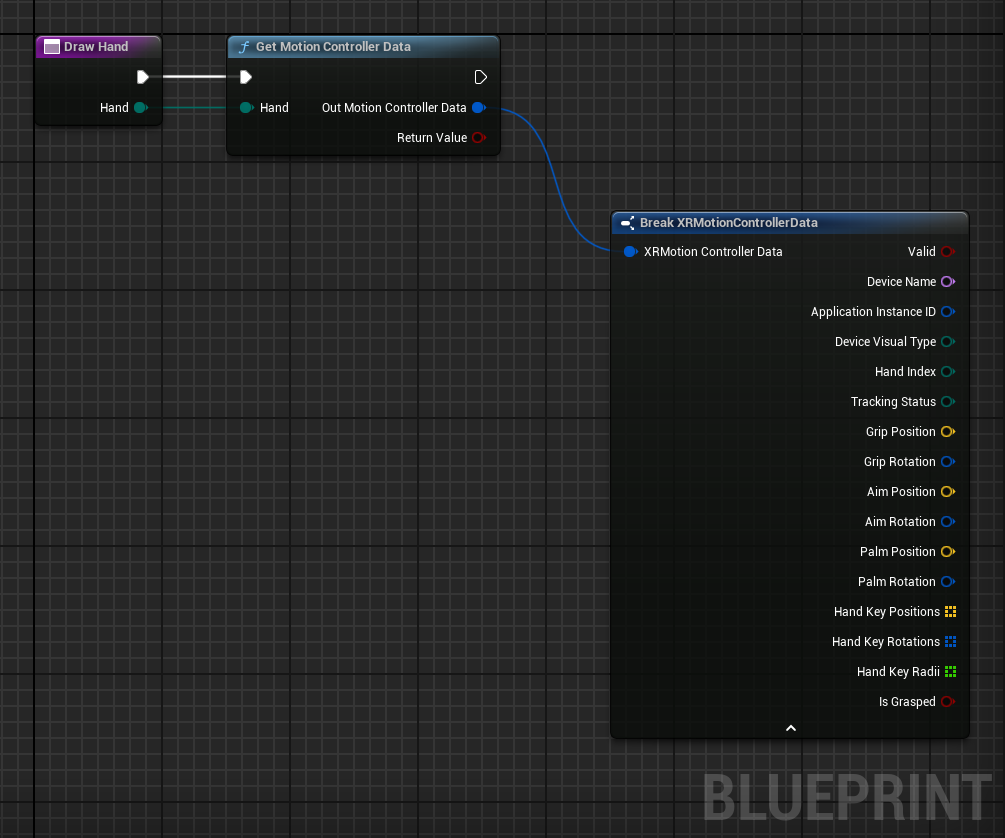
Handinput parameter to theGet Motion Controller Data'sHandinput and right-click on theOutMotionControllerDataparameter and use theBreak XRMotionControllerDatanode to break the struct to it's fields.
- After this, we need to perform data validation by checking the return status of the
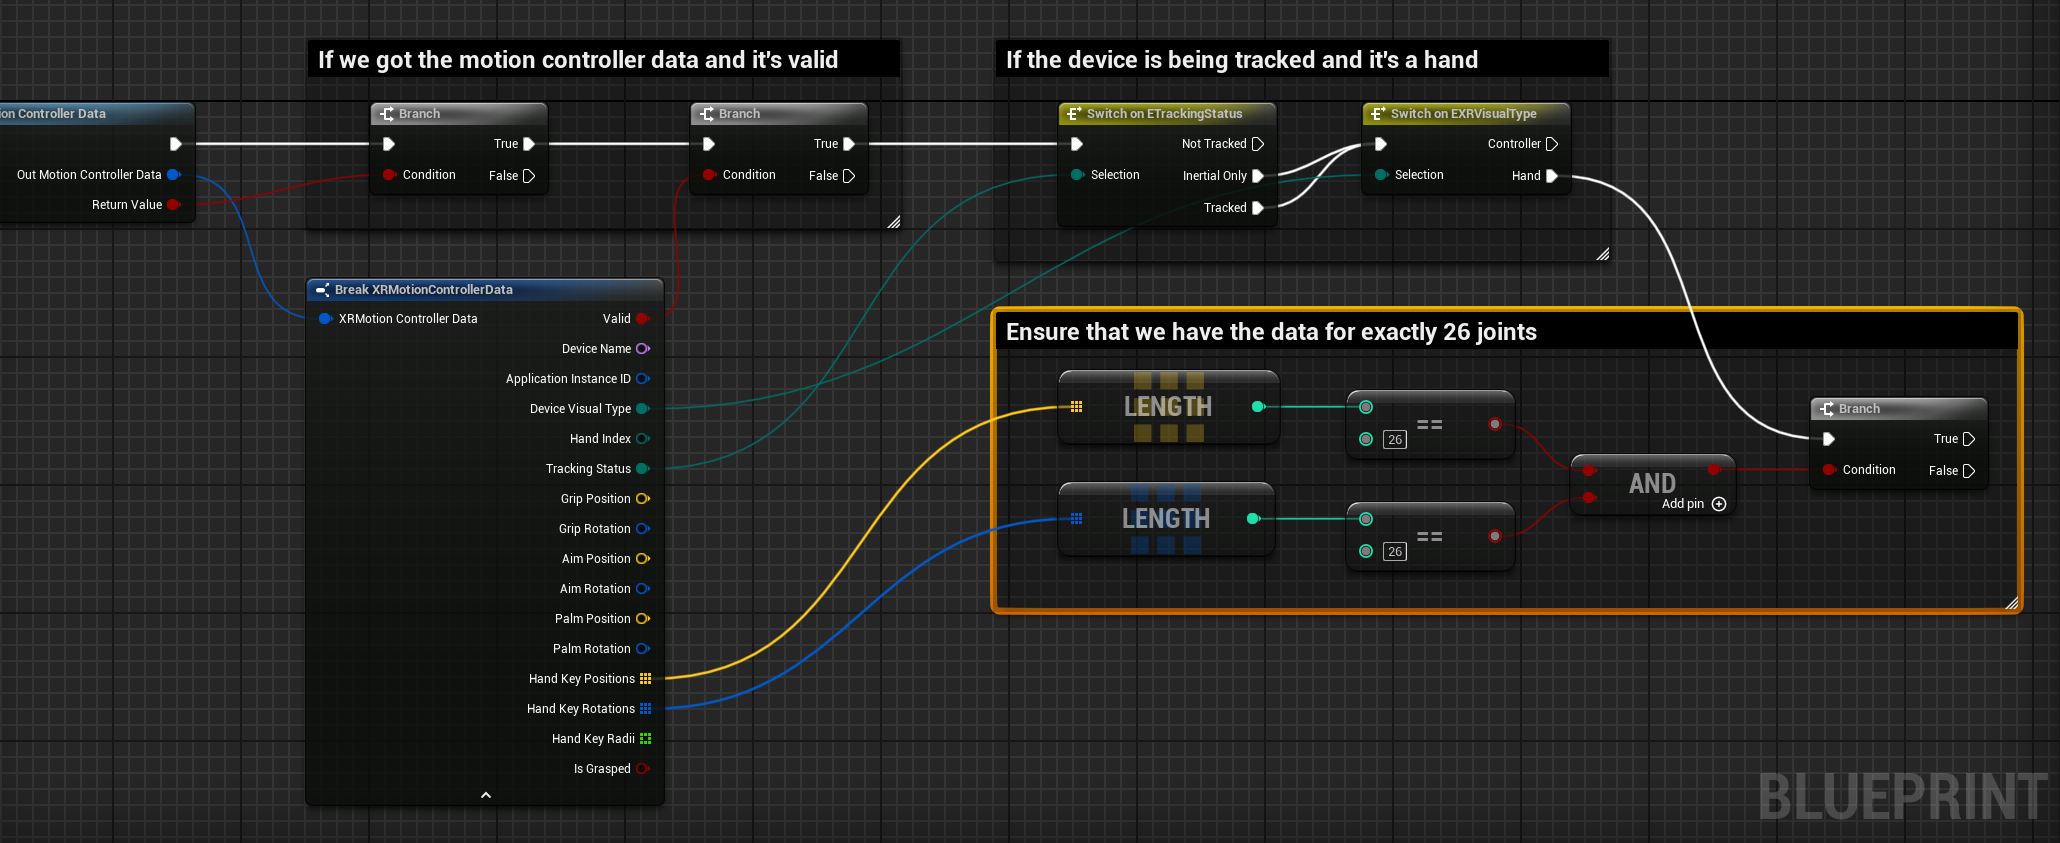
Get Motion Controller Datafunction andFXRMotionControllerData'sValidfield. Then, we check if the motion controller device is being tracked and indeed coming from a hand-tracking source. And, finally, we check whether we have the positions and rotations for exactly26joints or not.
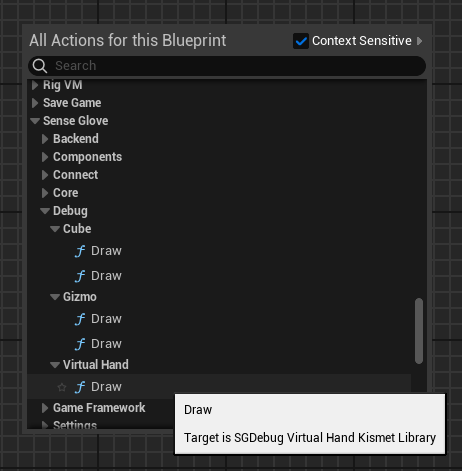
- OK, now it's time to draw the joints! If we check out the SenseGlove Debug module's draw option, we notice there are various ways to draw the debug virtual hand. Drawing a cube or a gizmo per joint, or draw the whole hand all at once by passing the retrieved
FXRMotionControllerDatato theDebugVirtualHand::Drawfunction! But, since the point of this tutorial is to learn how to consume theFXRMotionControllerDatawe ignore the last option. Between the debug cubes or gizmos, we are going to choose the gizmos since they better represent the rotations than the cubes.
- In the last step inside the
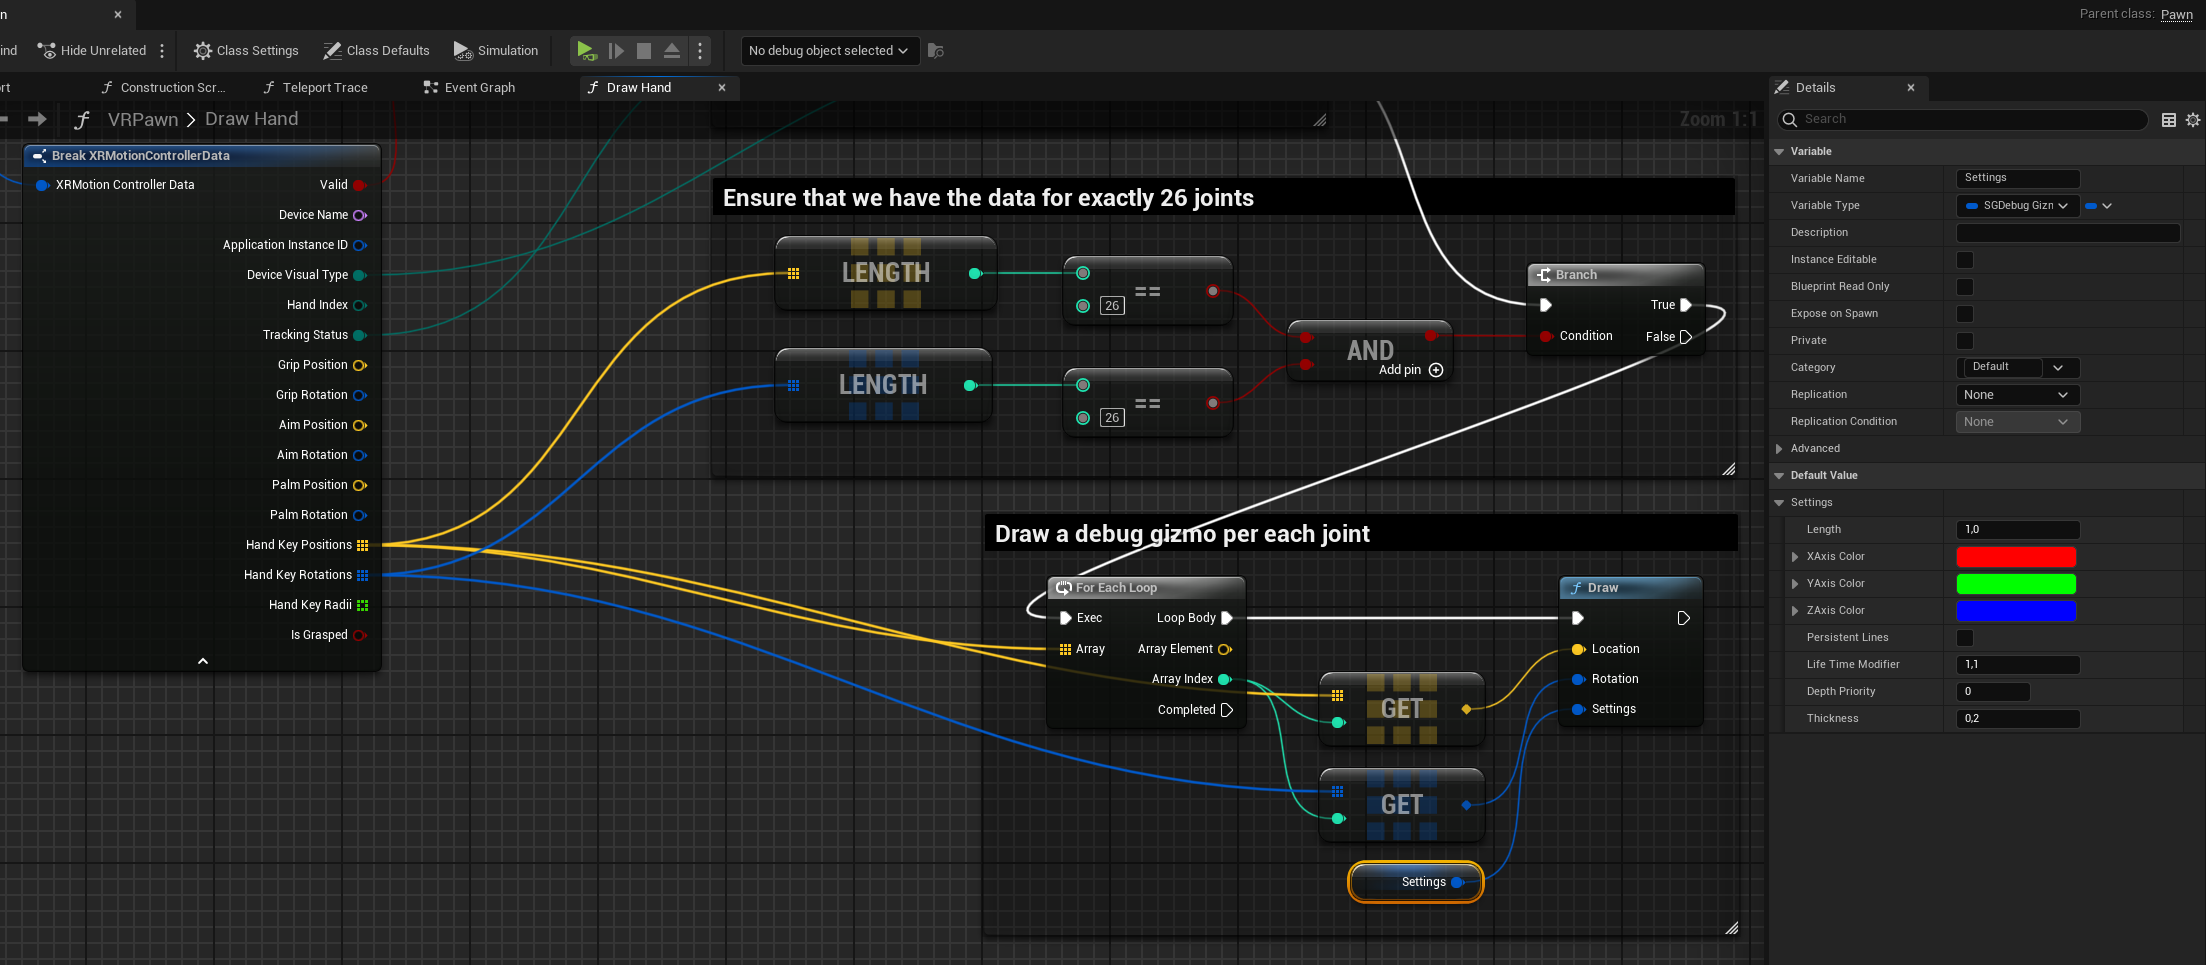
Draw Handfunction, in order to draw a virtual hand with26joints, we have to first iterate through either of theHand Key PositionsorHand Key Rotationsarrays from theFXRMotionControllerDatastruct. Since we made sure both arrays have26elements before we reached this step, it's safe to just iterate over one and use theArray Indexinside aFor Each Loopor aFor Loopto access the position and rotation of every joint. Then we use each arrayGet (a ref)method to access the position and rotation data inside the loop and call theDrawfunction fromSenseGlove > Debug > Gizmoper every joint. Please note that there are twoDrawfunctions and the only difference between the two is that one accepts anFQuatand the other aFRotatorfor itsRotationinput parameter. In this case, we use theFQuatvariant to avoid an extra conversion toFRotator. Also, please adjust theThicknessoption for theSettingsparameter from1.0to0.2, as the default value might be too thick for drawing a joint gizmo.
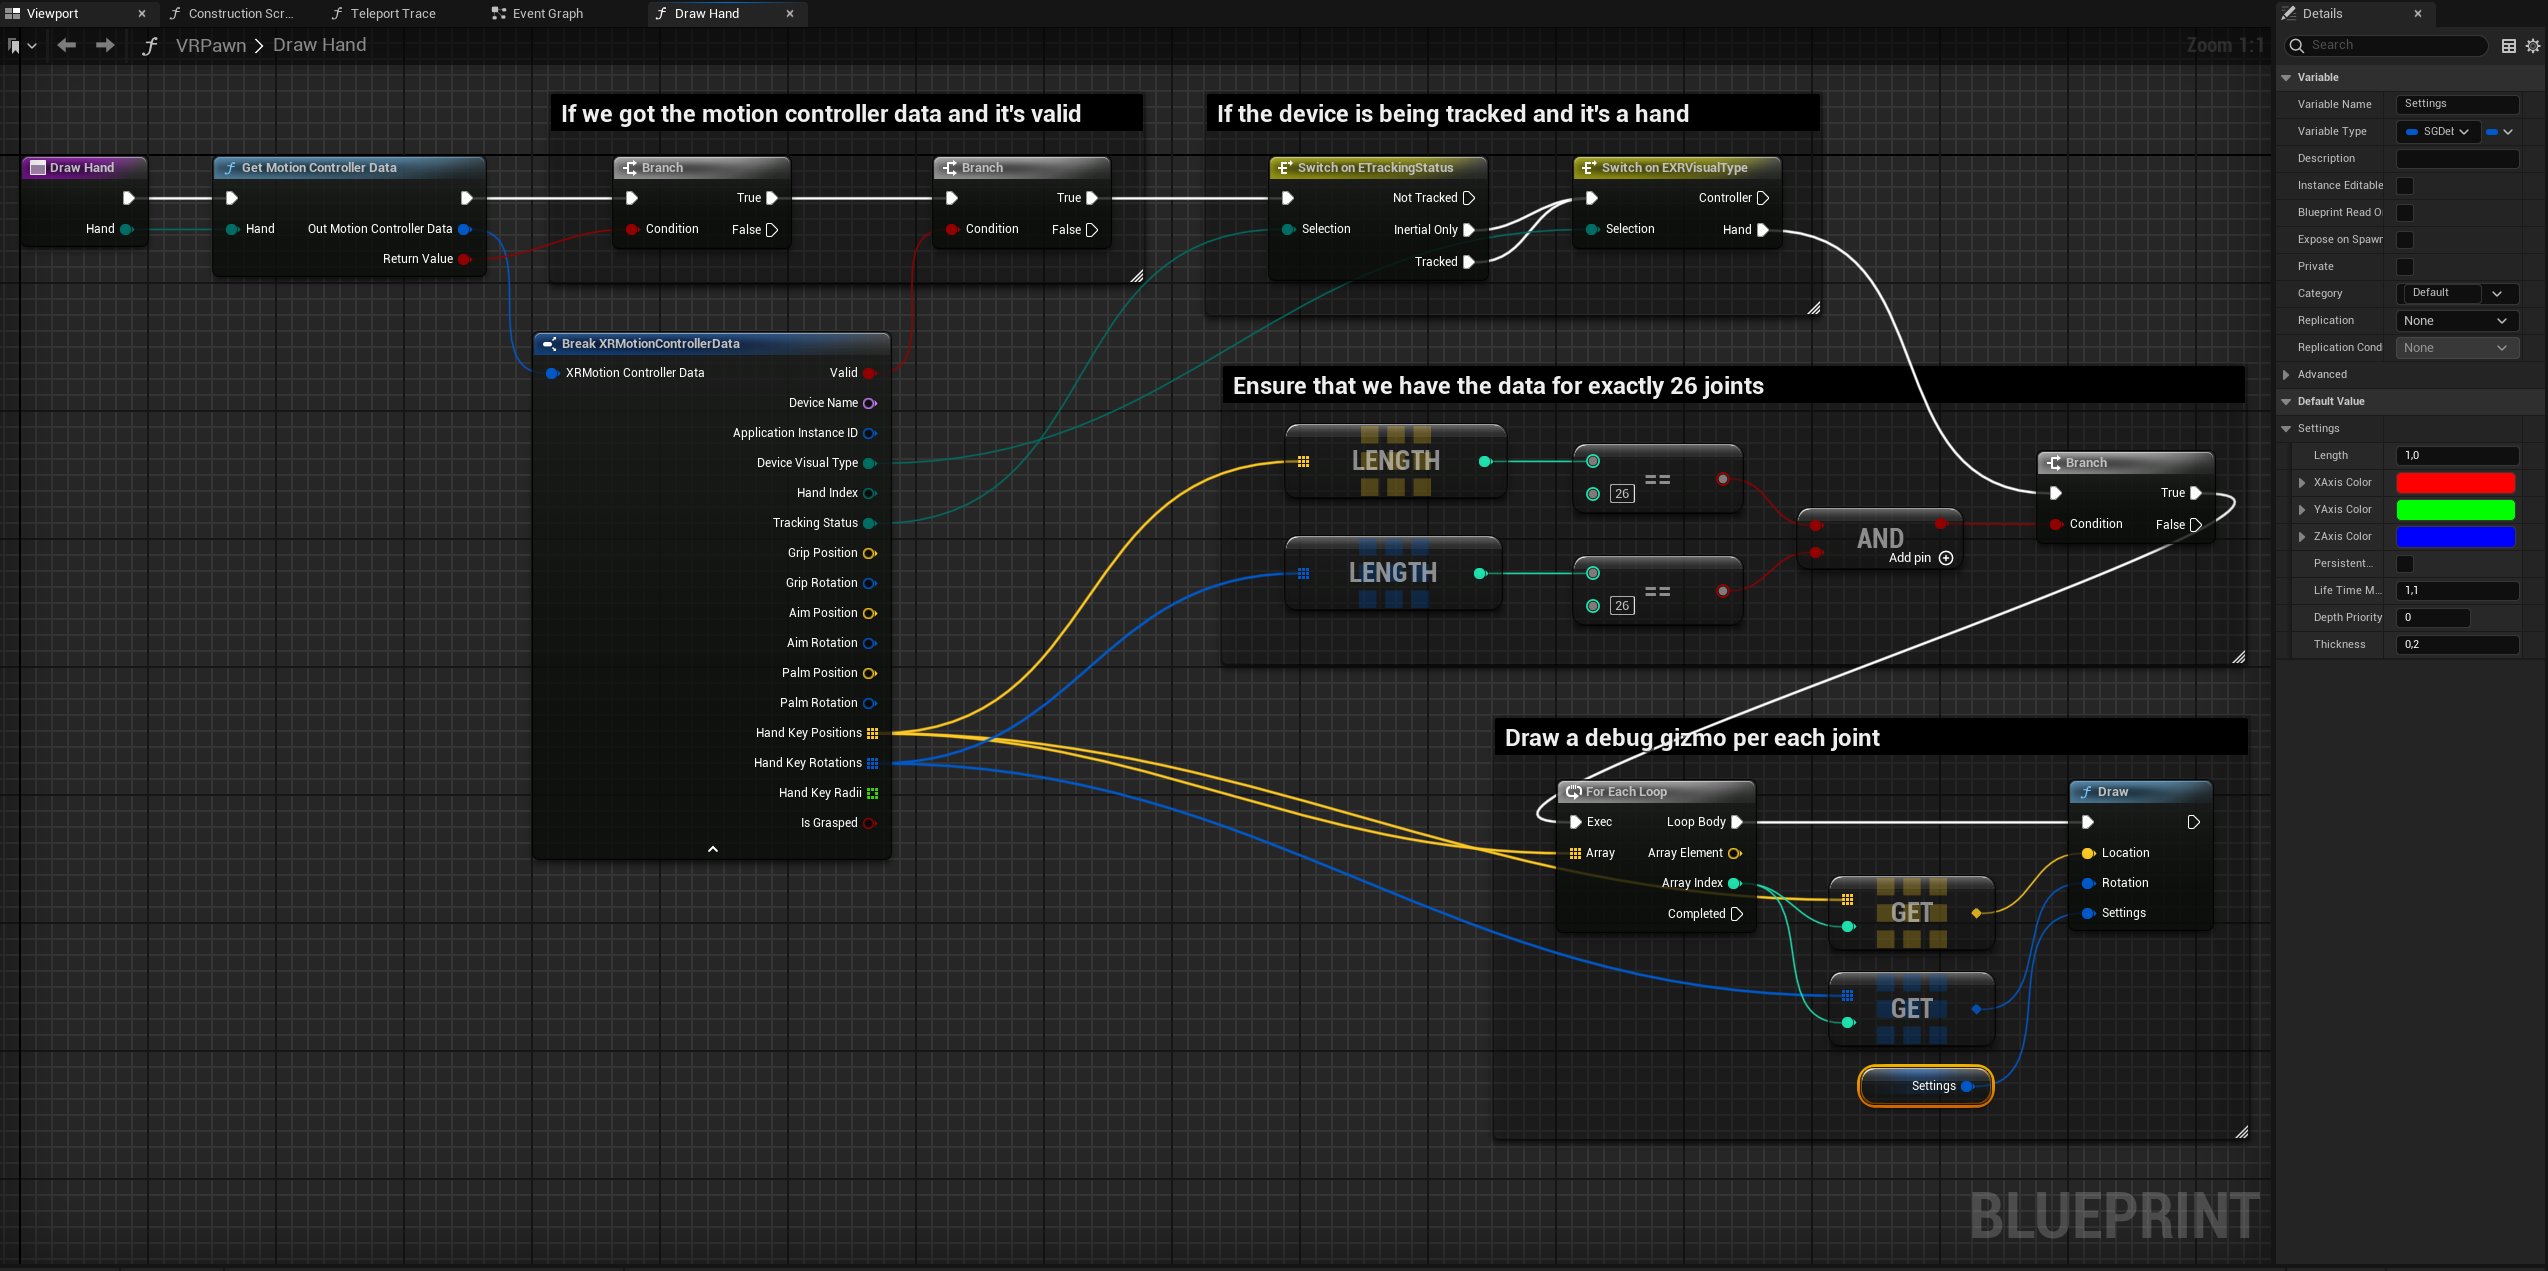
- Well, now the full implementation for the
Draw Handfunction insde theVRPawnshould look something like this:
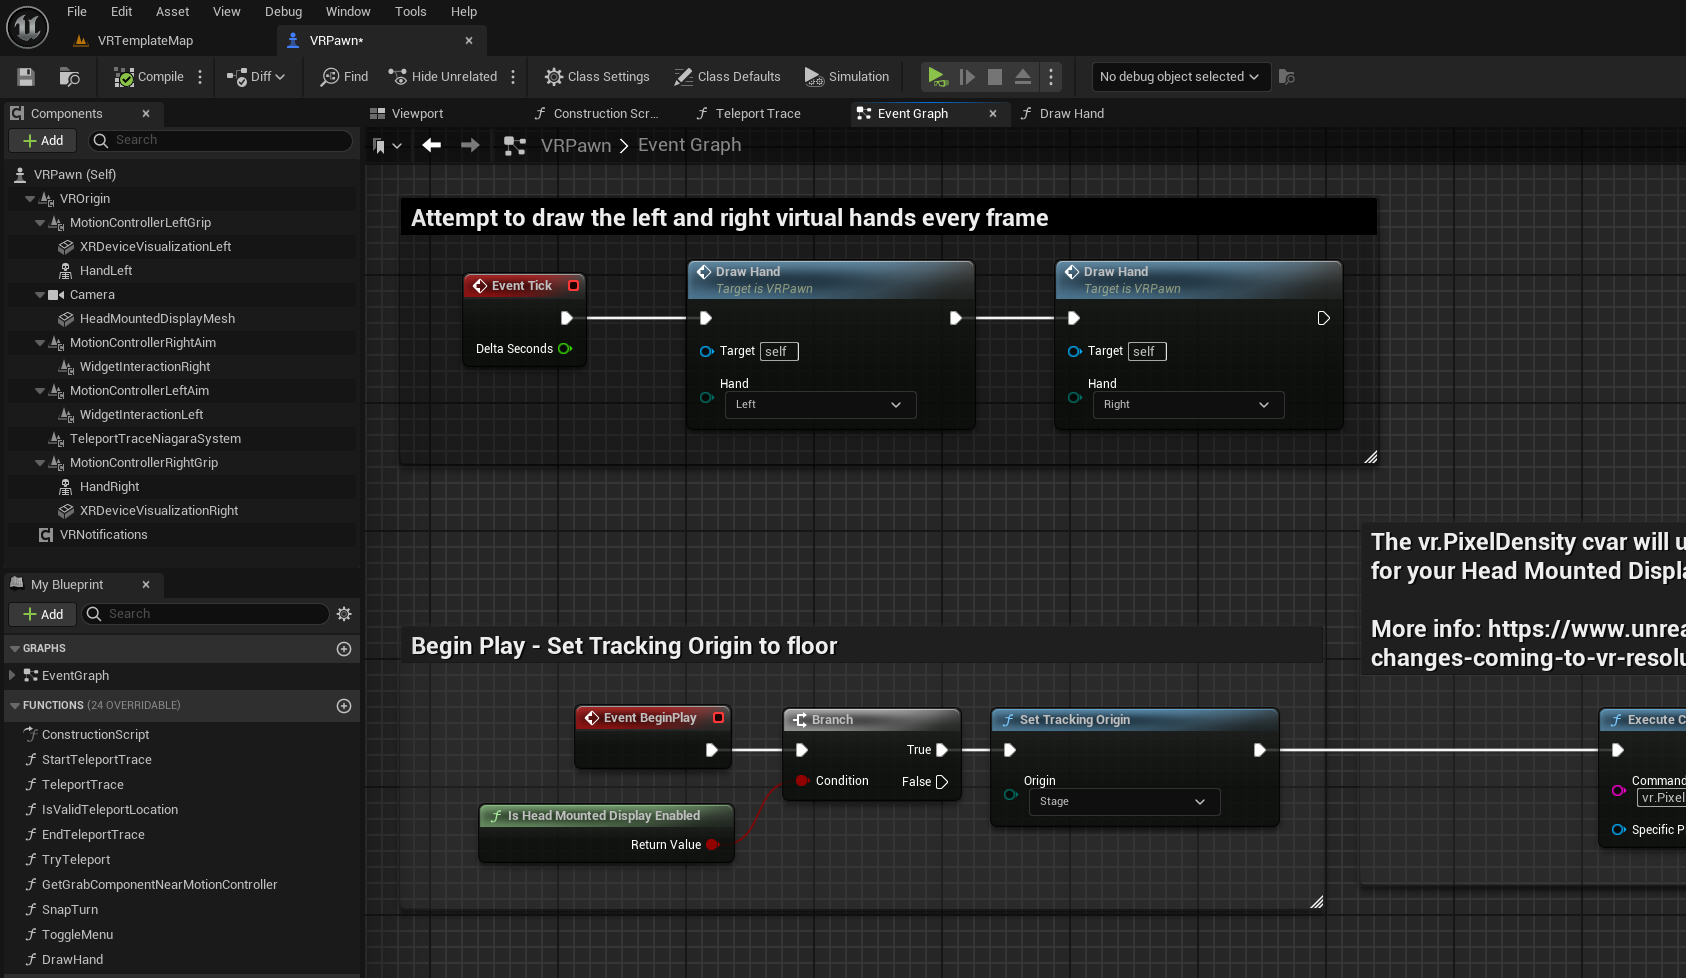
- Finally, go back to
VRPawn's event graph and the following code to theTickevent. Basically what we do here is call our newly implementedDraw Handtwice, once for each hand.
- Now, go back to the
VRTemplateMapand use the VR Preview button to run the game. If everything's done correctly, you should be able to see the virtual hands inside your VR simulation.
![]()