Introduction
Welcome to the documentation for the SenseGlove Unreal Engine Plugin (a.k.a. The SenseGlove Unreal Handbook)!
This handbook is an ongoing effort and a work in progress to document the SenseGlove Unreal Engine Plugin. Feel free to visit this handbook on a regular basis.
Due to superior formatting and frequent updates, we recommend the online version of the handbook; nonetheless, it's also available in PDF and ePub formats as well.
Tip
Feel free to check out the SenseGlove Unreal Engine Plugin landing page on Fab as well.
Overview
To help you navigate the SenseGlove Unreal Engine Handbook, we have organized the content into several key sections. This structured layout aims to simplify your journey through the SenseGlove Unreal Engine Plugin, providing clear and detailed guidance at every step.
🚀 Getting Started
This section covers the basics of the SenseGlove Unreal Engine Plugin:
- Installation
- Enabling and Verifying the Plugin Version
- SenseCom
- Enabling XR_EXT_hand_tracking on VR Headsets
- Setup SenseGlove Default Classes
- Setup the Virtual Hand Meshes
- Setup the Wrist Tracking Hardware
- Setup the Grab/Release System
- Setup the Touch System
⚙️ Plugin Configuration
This section provides detailed information on configuring the plugin:
💡 Miscellaneous
Toipcs that do not fall under any specific category:
- SenseGlove Console Commands
- Deploying to Android (Standalone)
- Upgrade Guide
- Optimizing for Higher FPS
🛠️ Advanced Topics
For users familiar with the basics, this section explores advanced features of the plugin:
🔌 Low-Level API
This section delves into the SenseGlove low-level API:
📑 Appendix
The appendix contains various extra useful information:
- Platform Support Matrix
- Planned Features Completion Status
- Changelog
- Directory Structure
- Extra Resources
📜 License
- SenseGlove Unreal Engine Plugin License
- SenseGlove Unreal Engine Handbook License
- Third-Party Licenses
Plugin Installation
The SenseGlove Unreal Engine Plugin could be installed using various methods:
- Via the Epic Games Launcher by navigating to the SenseGlove Unreal Engine Plugin landing page on Fab.
- Via the SenseGlove Unreal Engine Plugin Microsoft Azure DevOps repository.
In the following chapters, we discover each of those methods:
Video Tutorials
We also have older videos demonstrating both installation methods on Microsoft Windows and GNU Linux in more detail.
Plugin Installation via the Epic Games Launcher
Before beginning the plugin installation via the Epic Games Launcher, ensure you have signed into your Epic Games account on the Epic Games Launcher and that you have a supported version of Unreal Engine installed. Supported engine versions can be found in the Platform Support Matrix.
- Run the Epic Games Launcher.
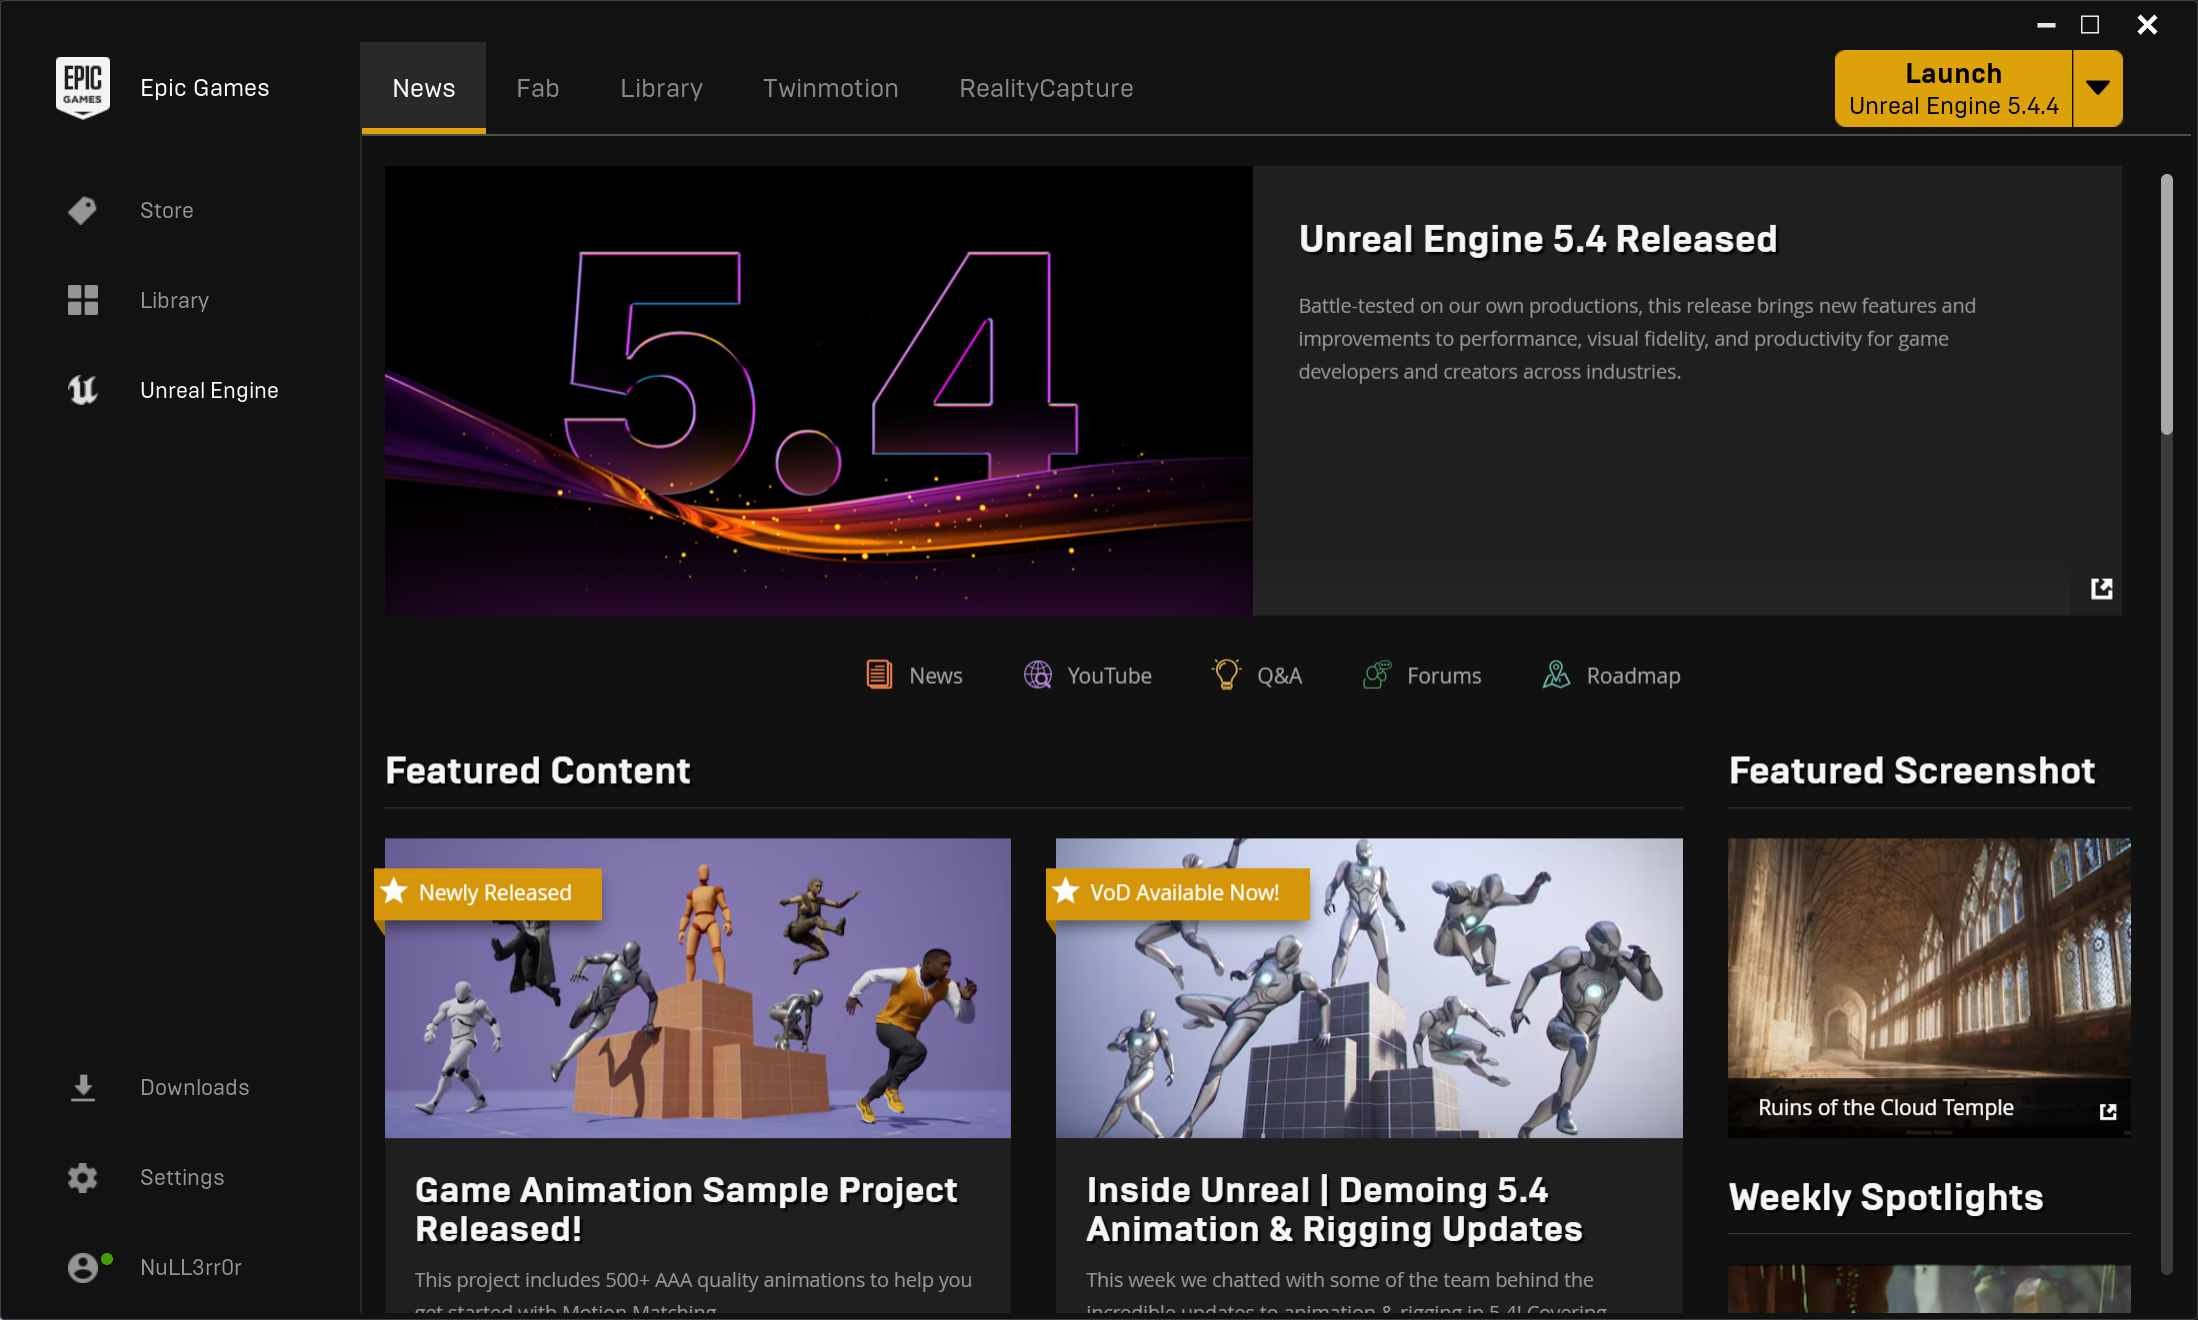
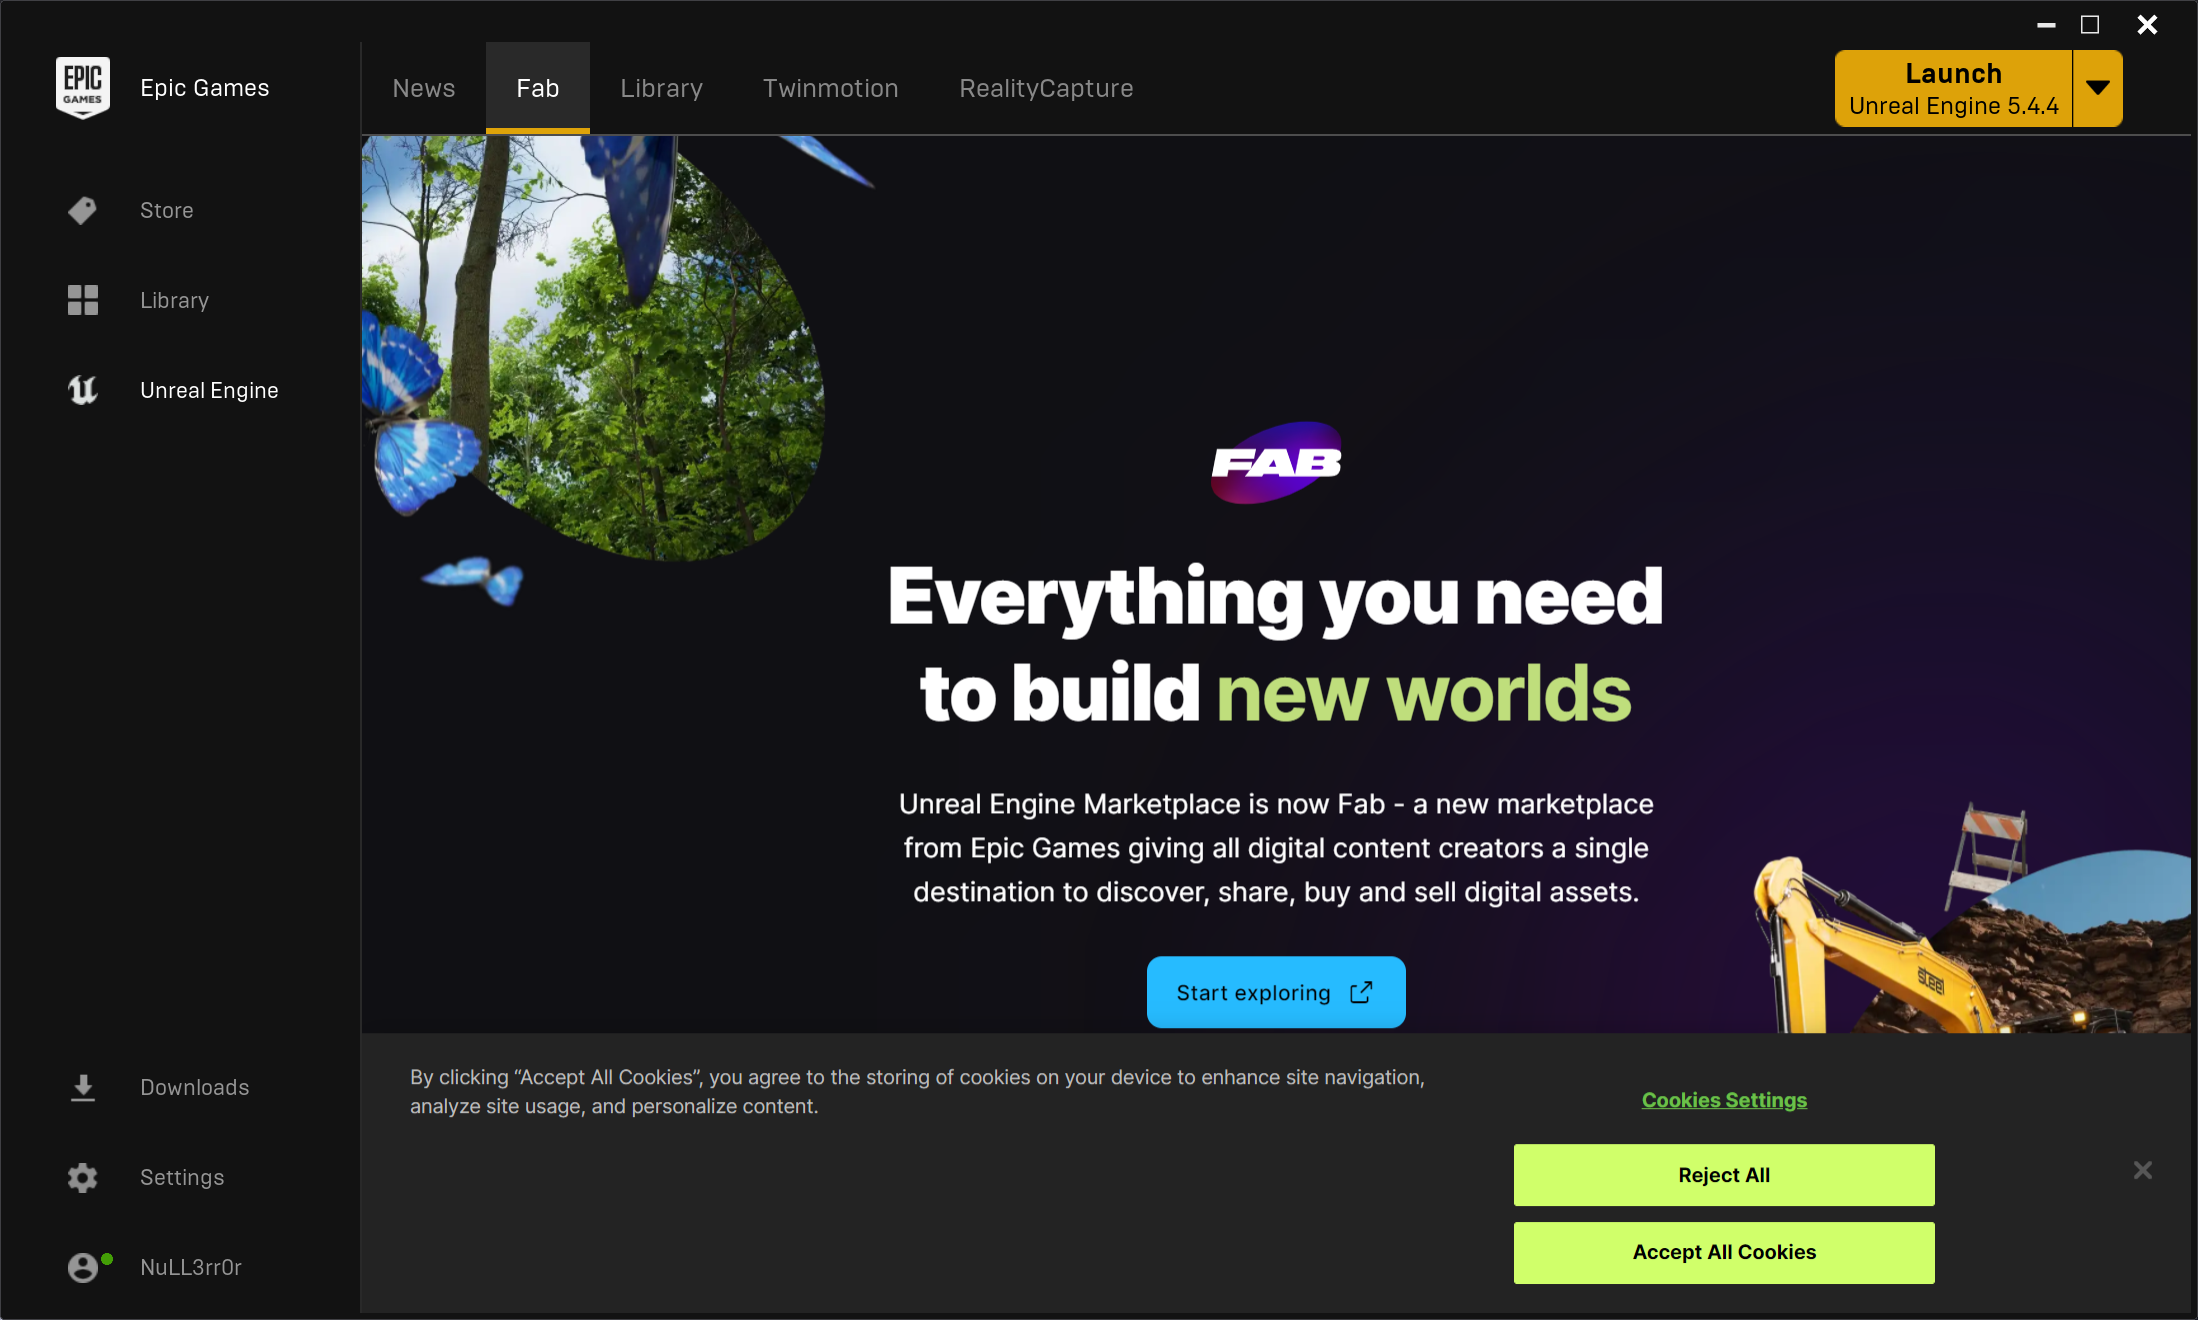
- Navigate to the
Fabtab and clickStart exploringbutton which in turn opens your default web browser pointing to the Fab home page.
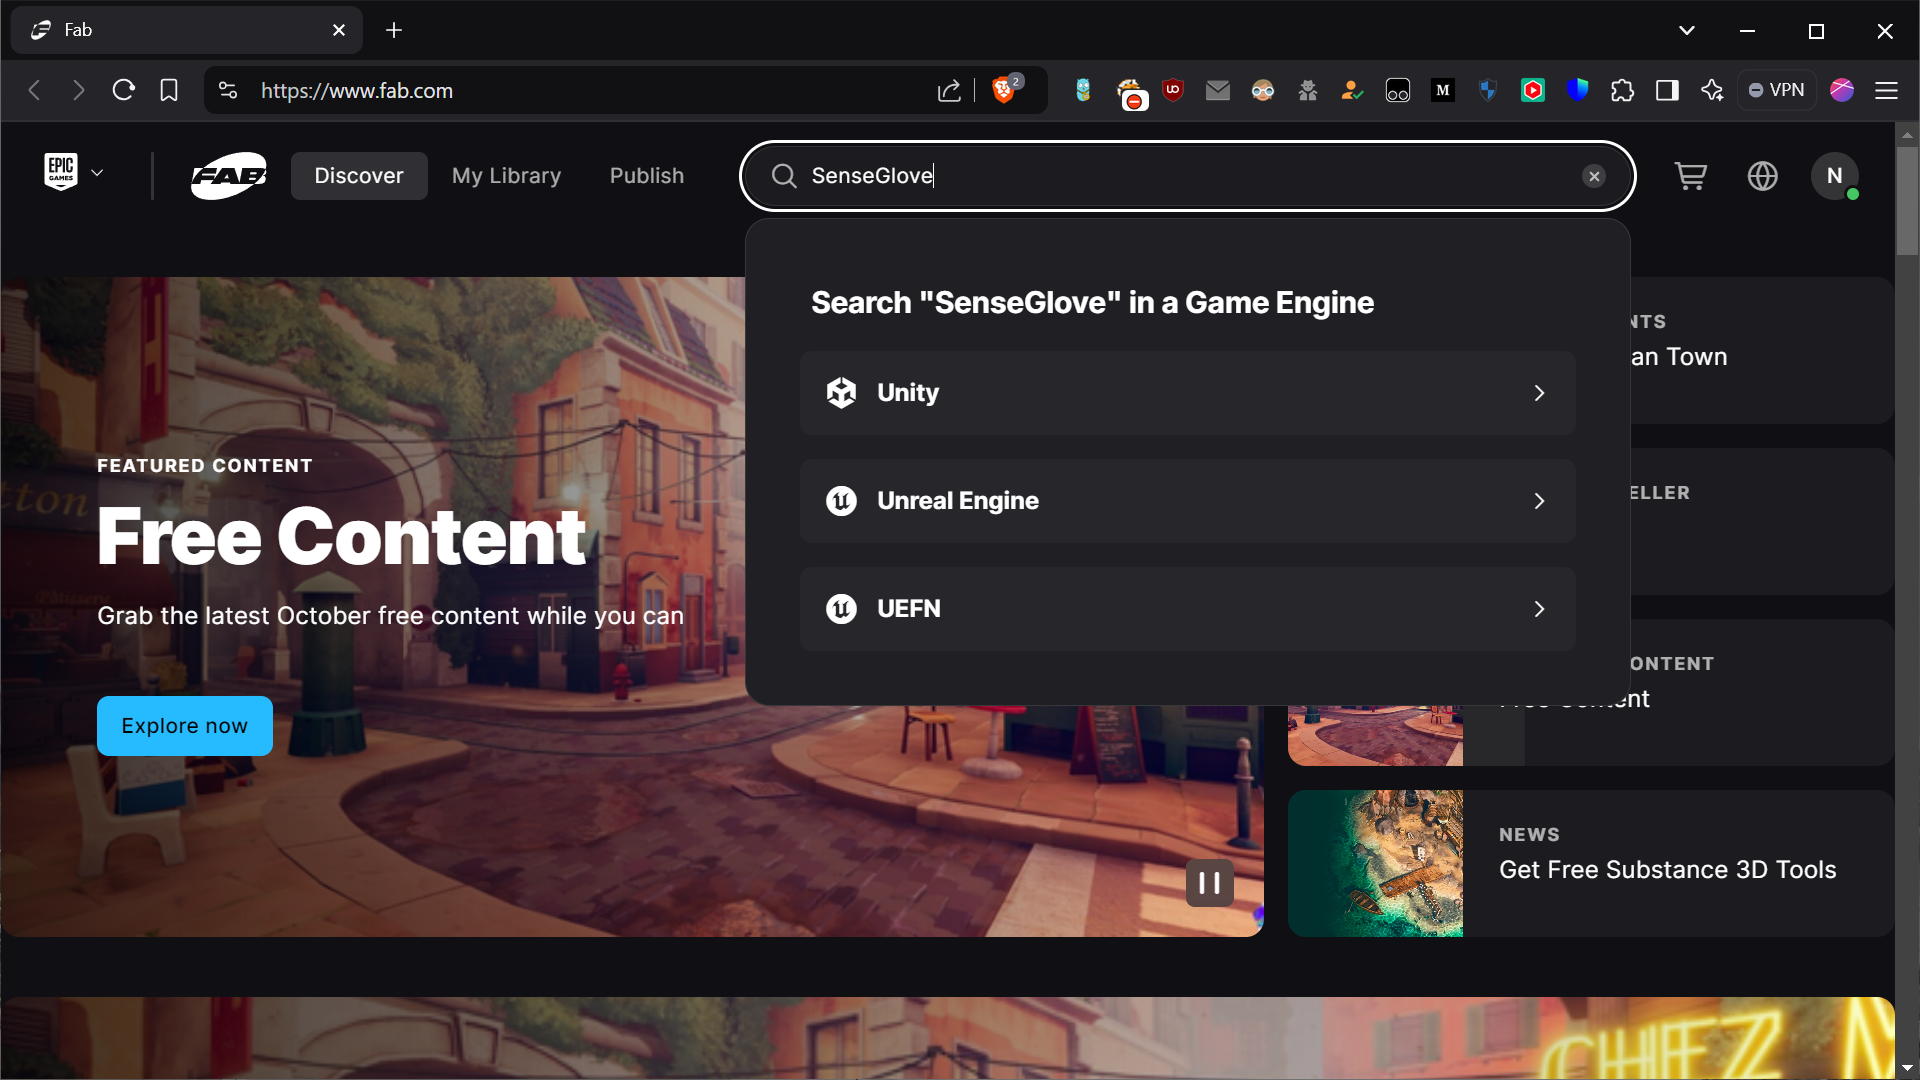
- On the Fab home page, enter the term
SenseGlovein the search box and press Enter. Alternatively, you can go directly to the SenseGlove Unreal Engine Plugin landing page on Fab directly instead of taking the above two steps.
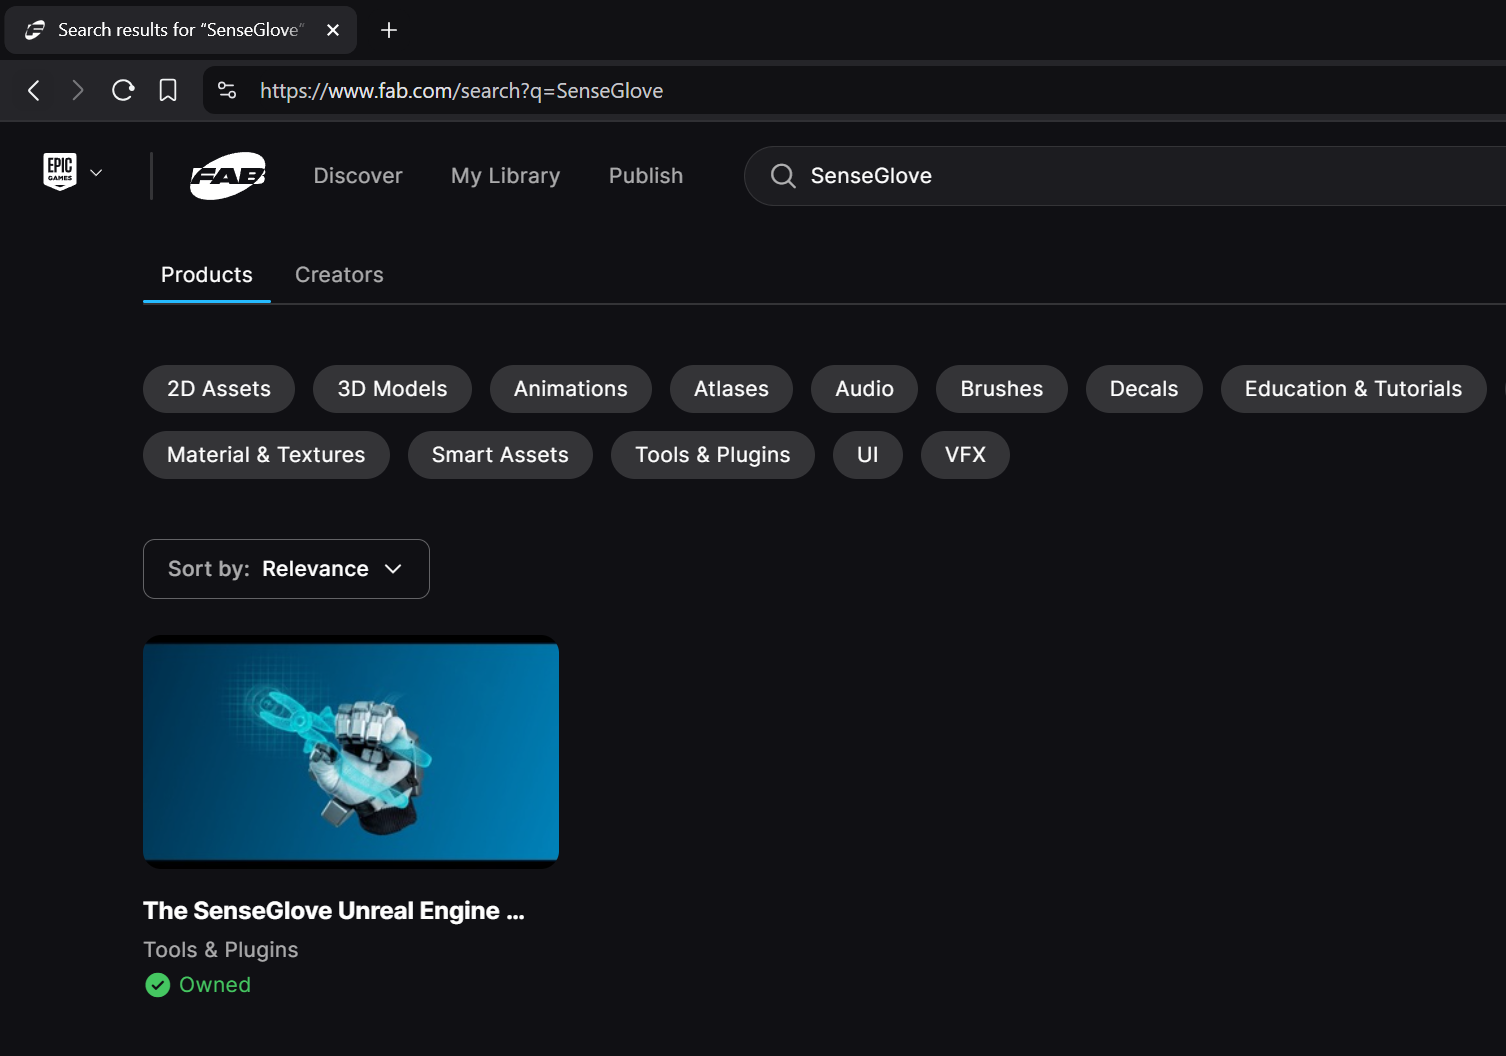
- Click on the
SenseGlove Unreal Engine Pluginin the search results to navigate to its dedicated page.
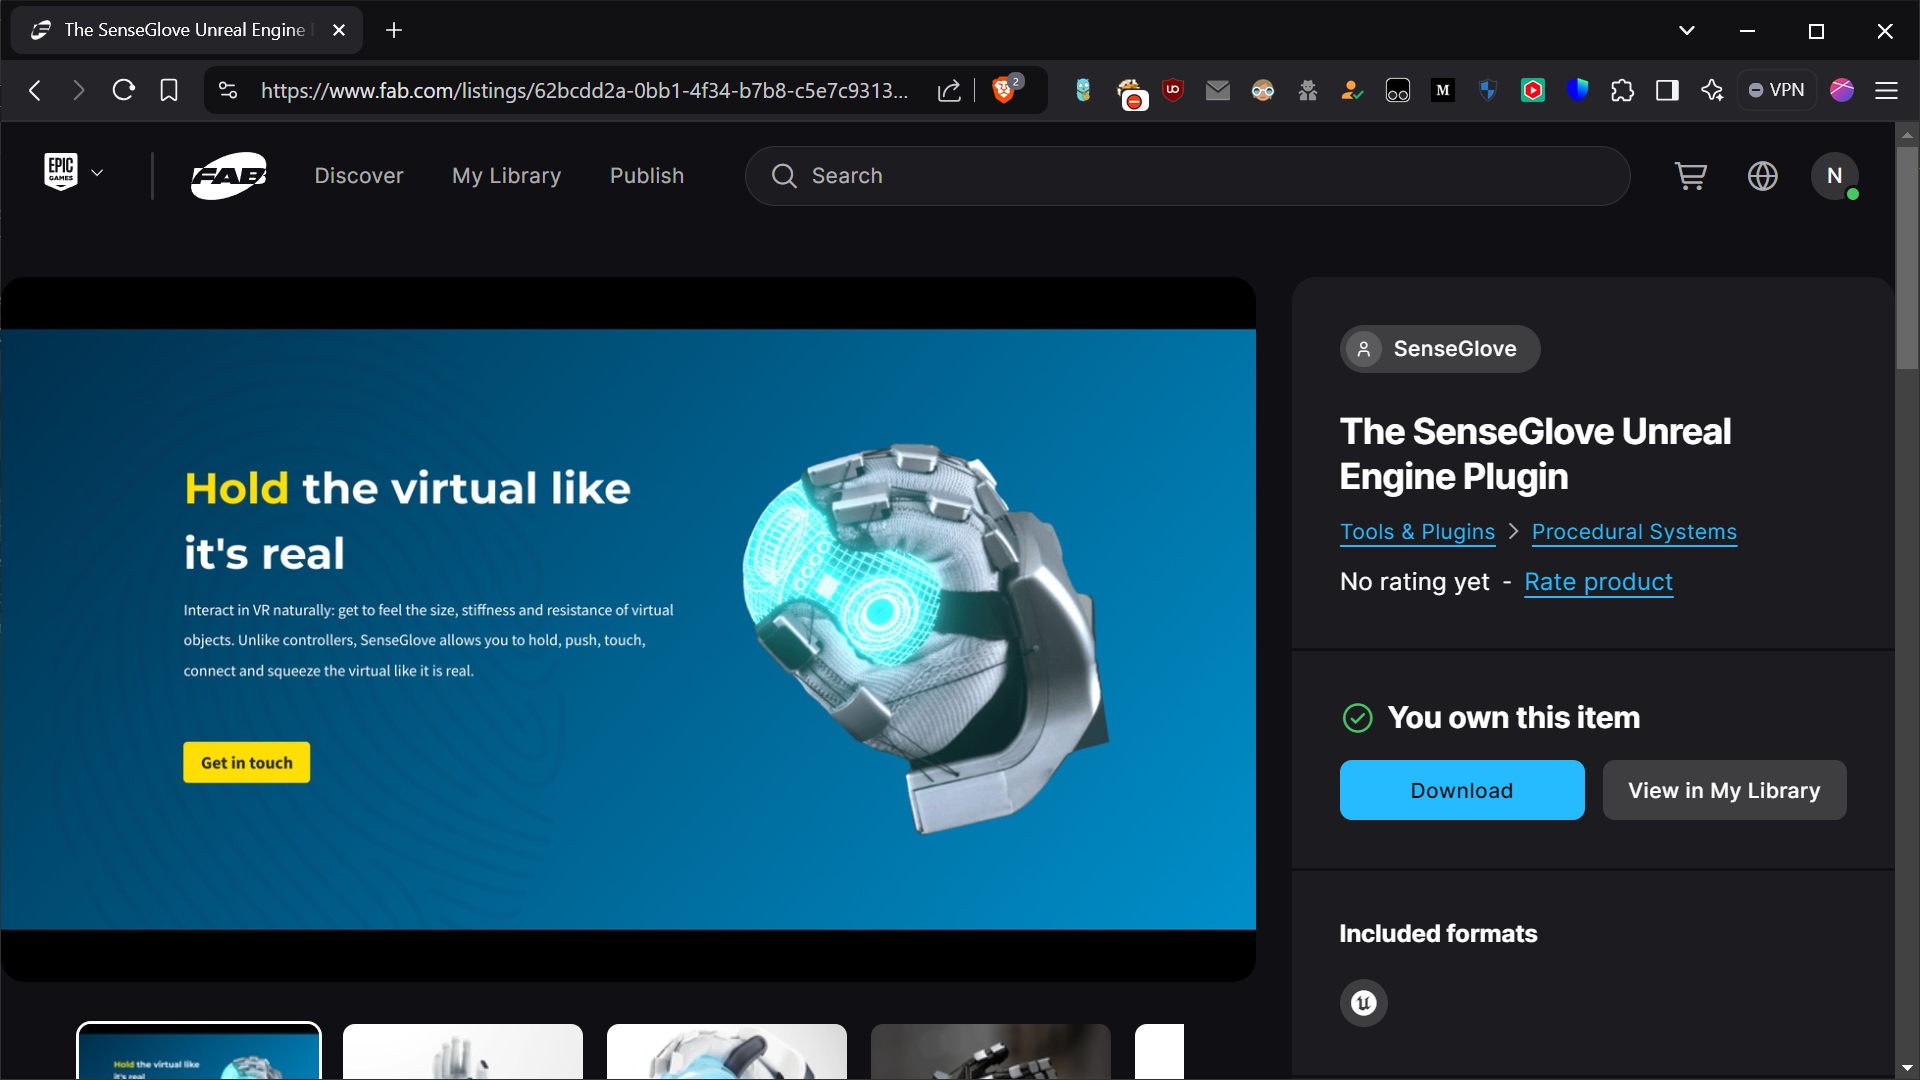
- On the SenseGlove Unreal Engine Plugin landing page on Fab click the
Downloadbutton.
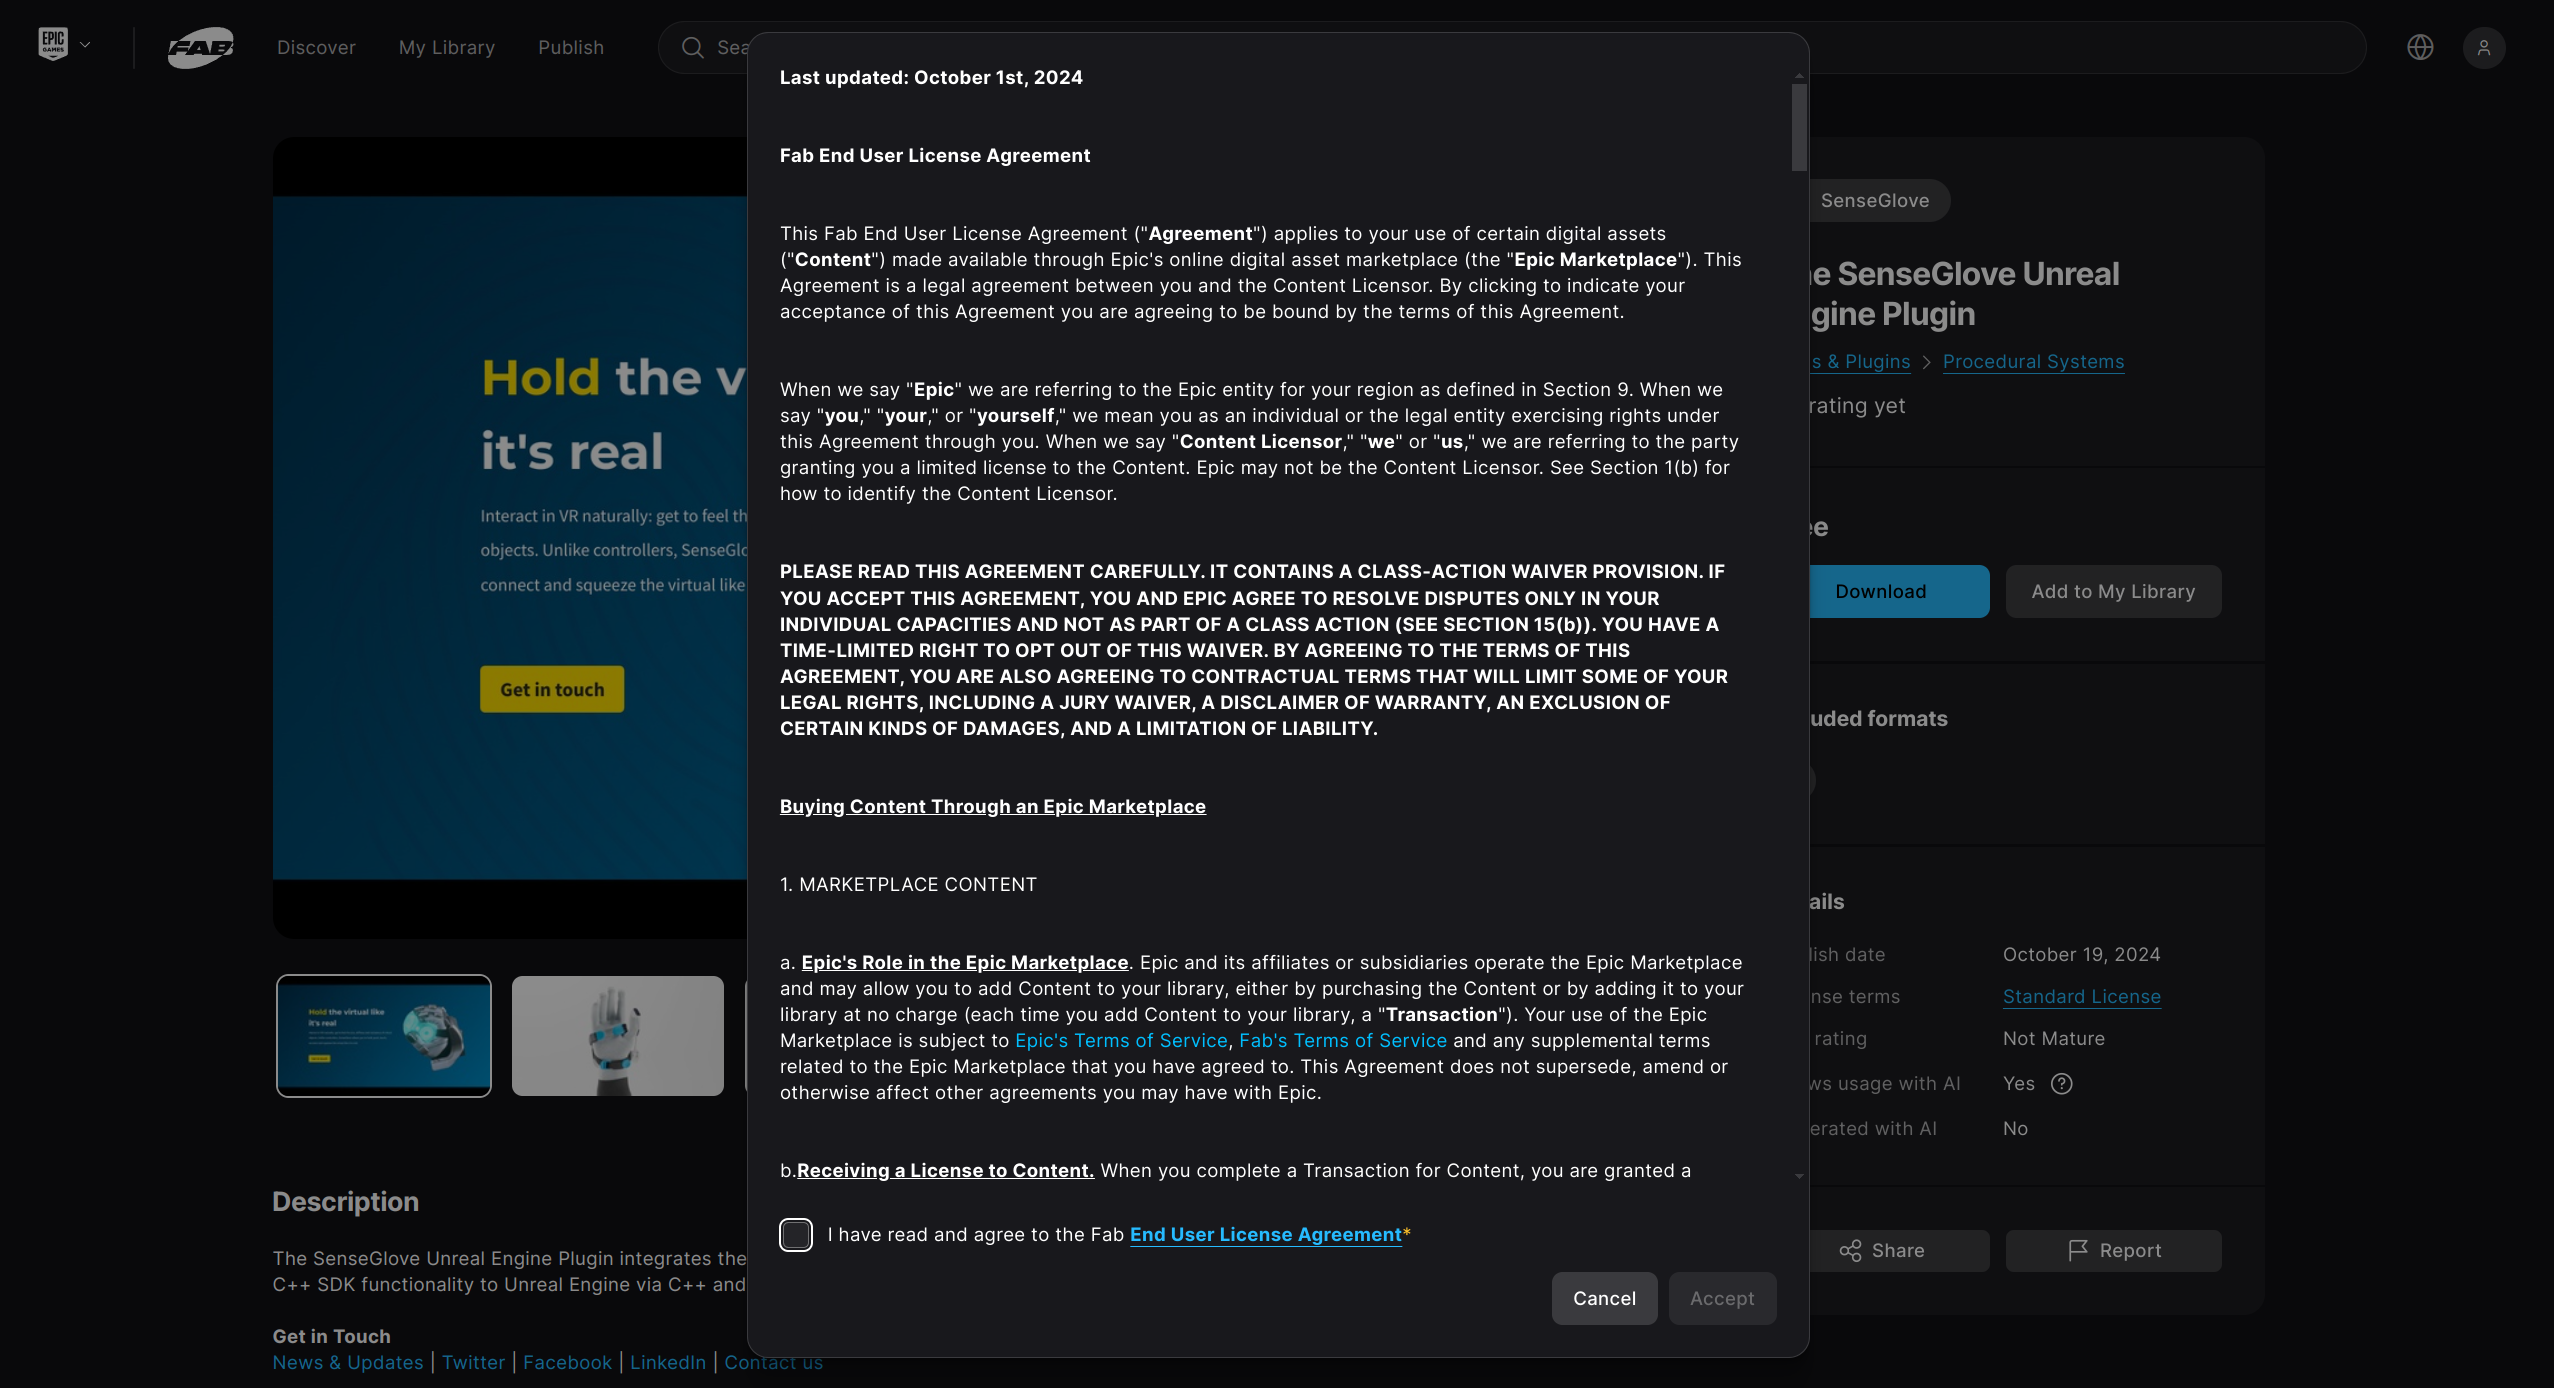
- If this is your first download from Fab, you will need to agree to the Fab End User License Agreement (EULA) before proceeding.
- After clicking
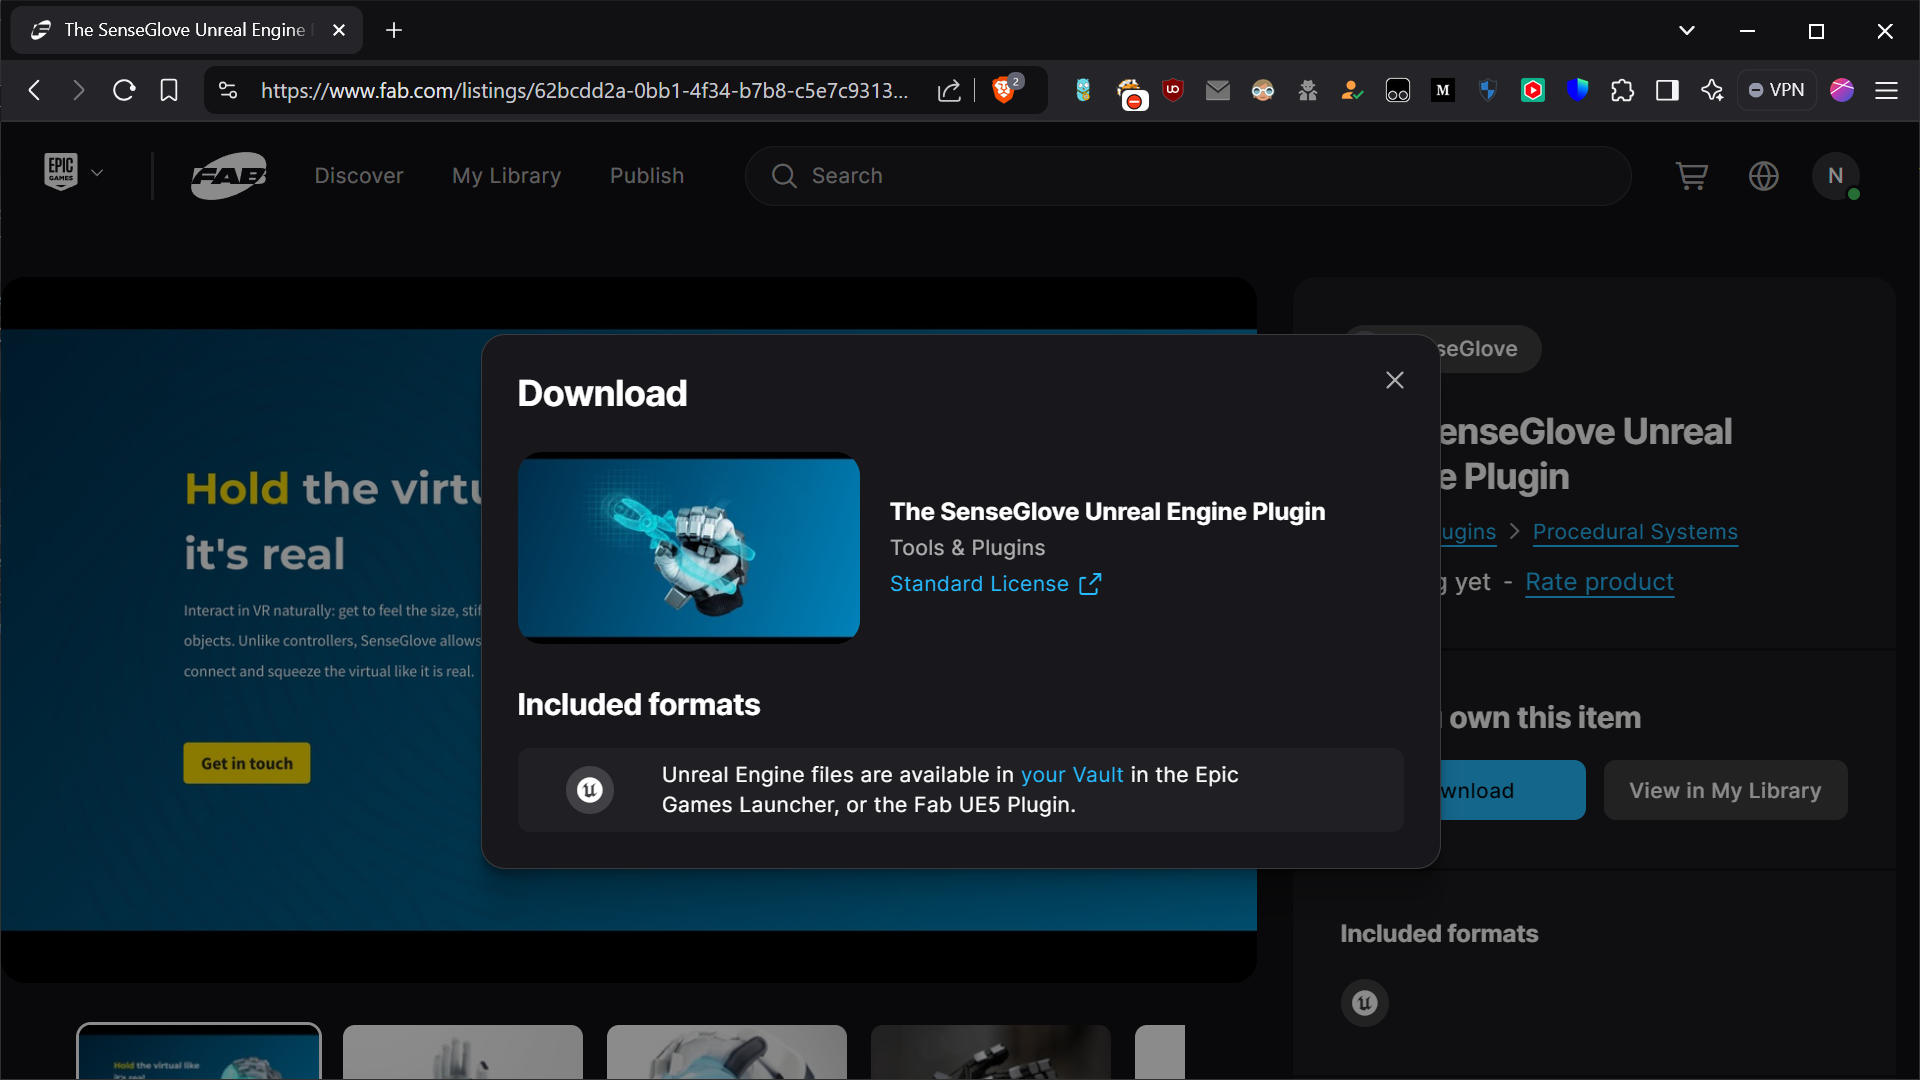
Download, a pop-up will notify you that the plugin is available in your Vault in the Epic Games Launcher, or the Fab UE5 Plugin.
Note
According to the Fab launch announcement:
The Fab integration in UEFN is undergoing maintenance and will be back online shortly, and the Fab integration in the Unreal Engine 5 Editor is coming soon.
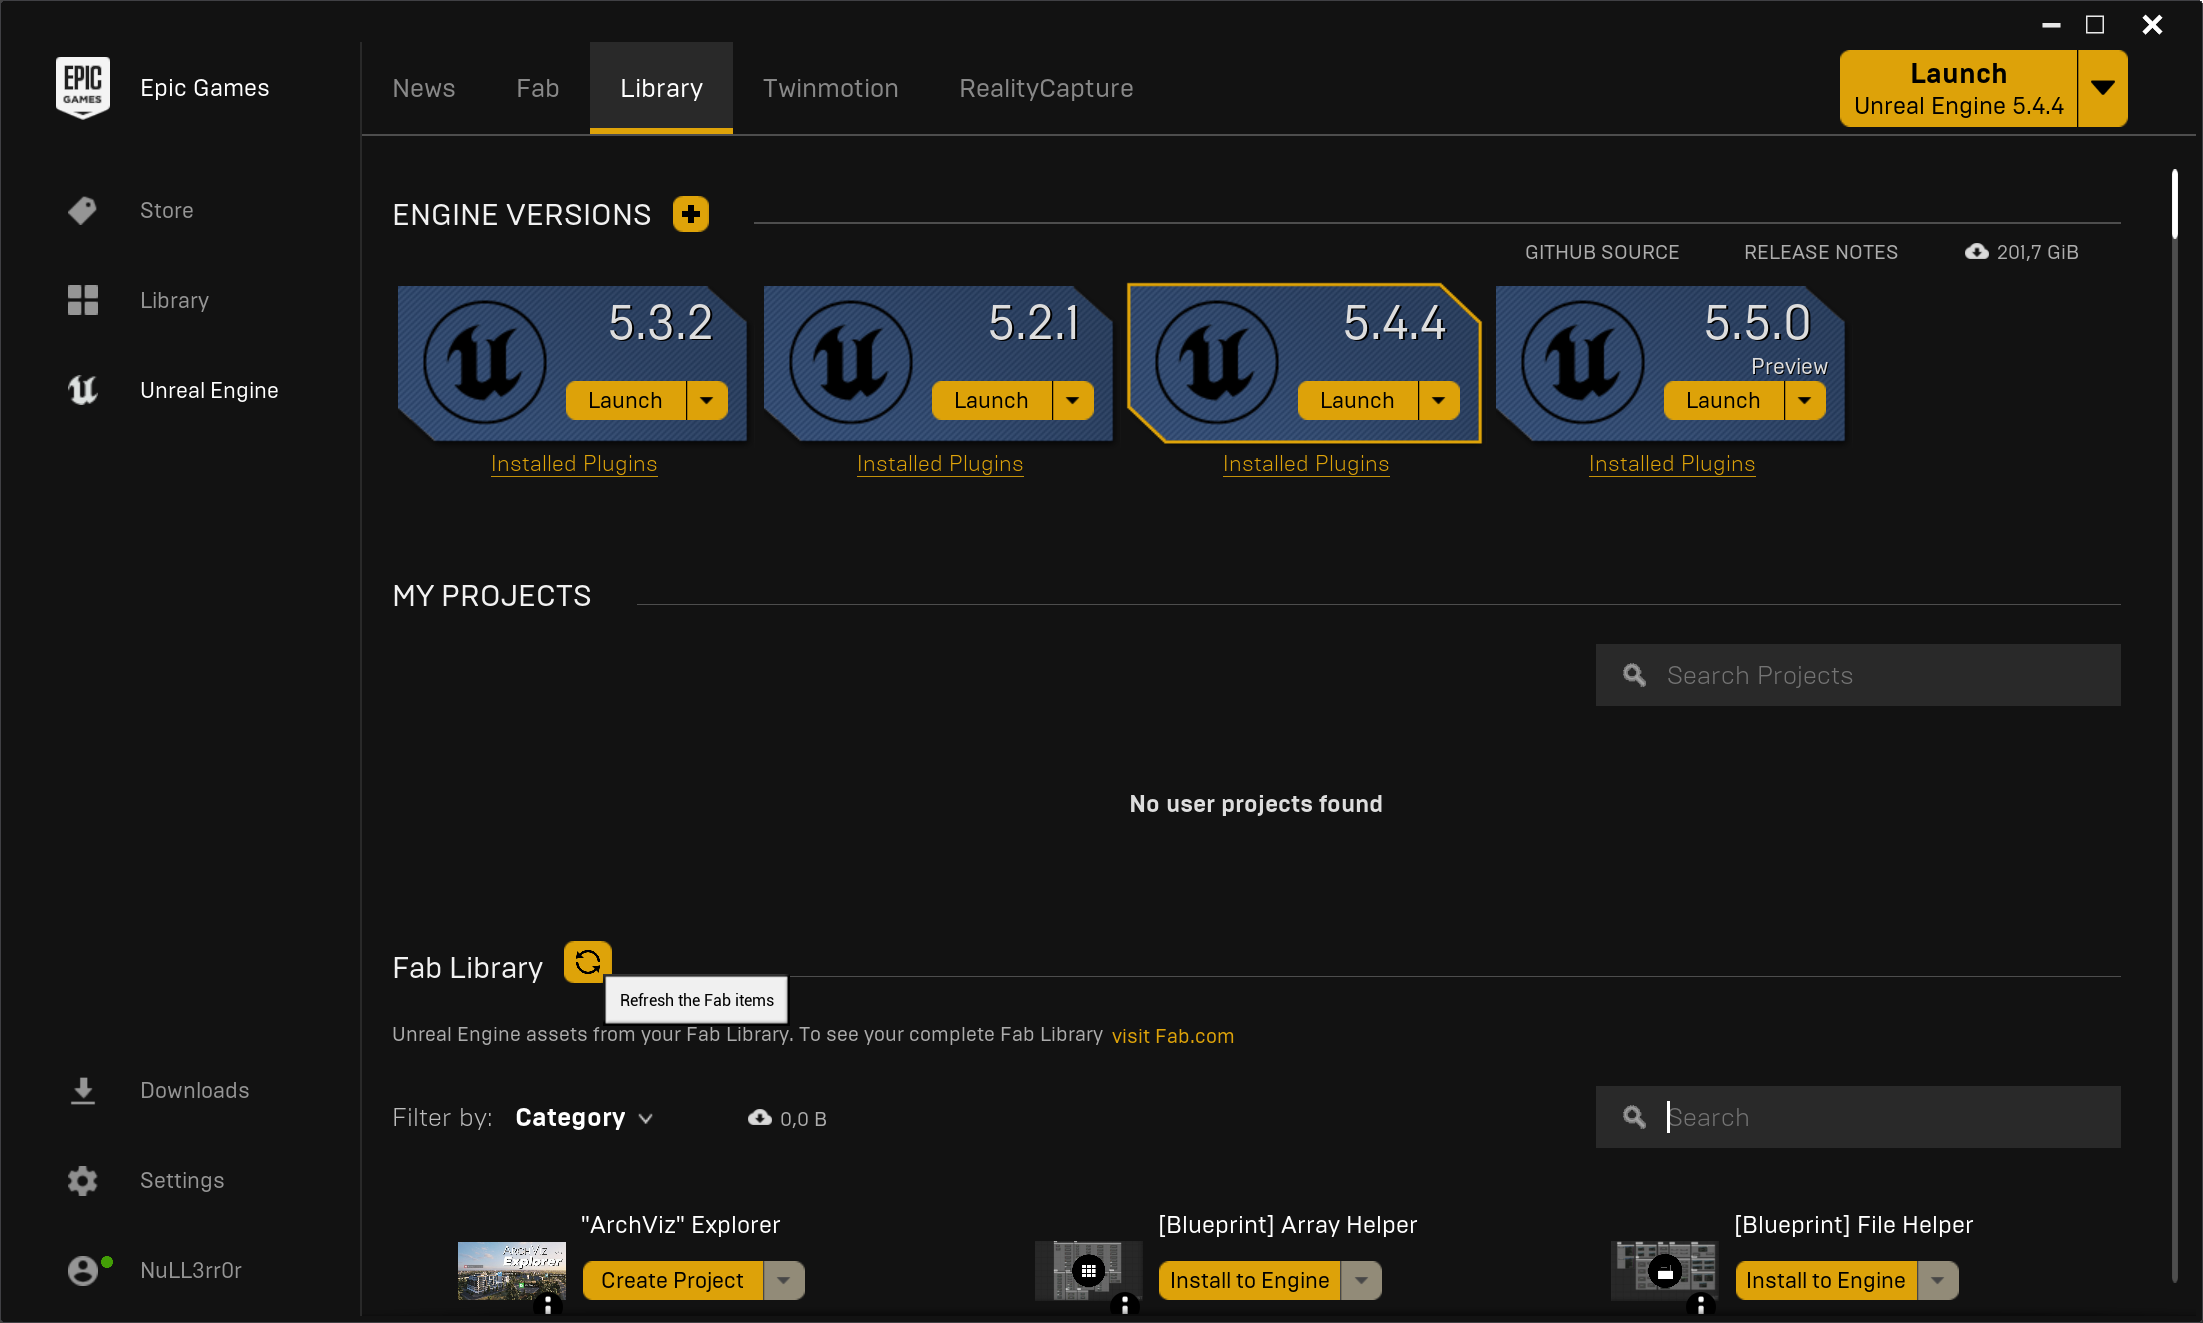
- Go back to the Epic Games Launcher, navigate to the
Librarytab, and in theFab Librarysection, click theRefresh Fab itemsbutton.
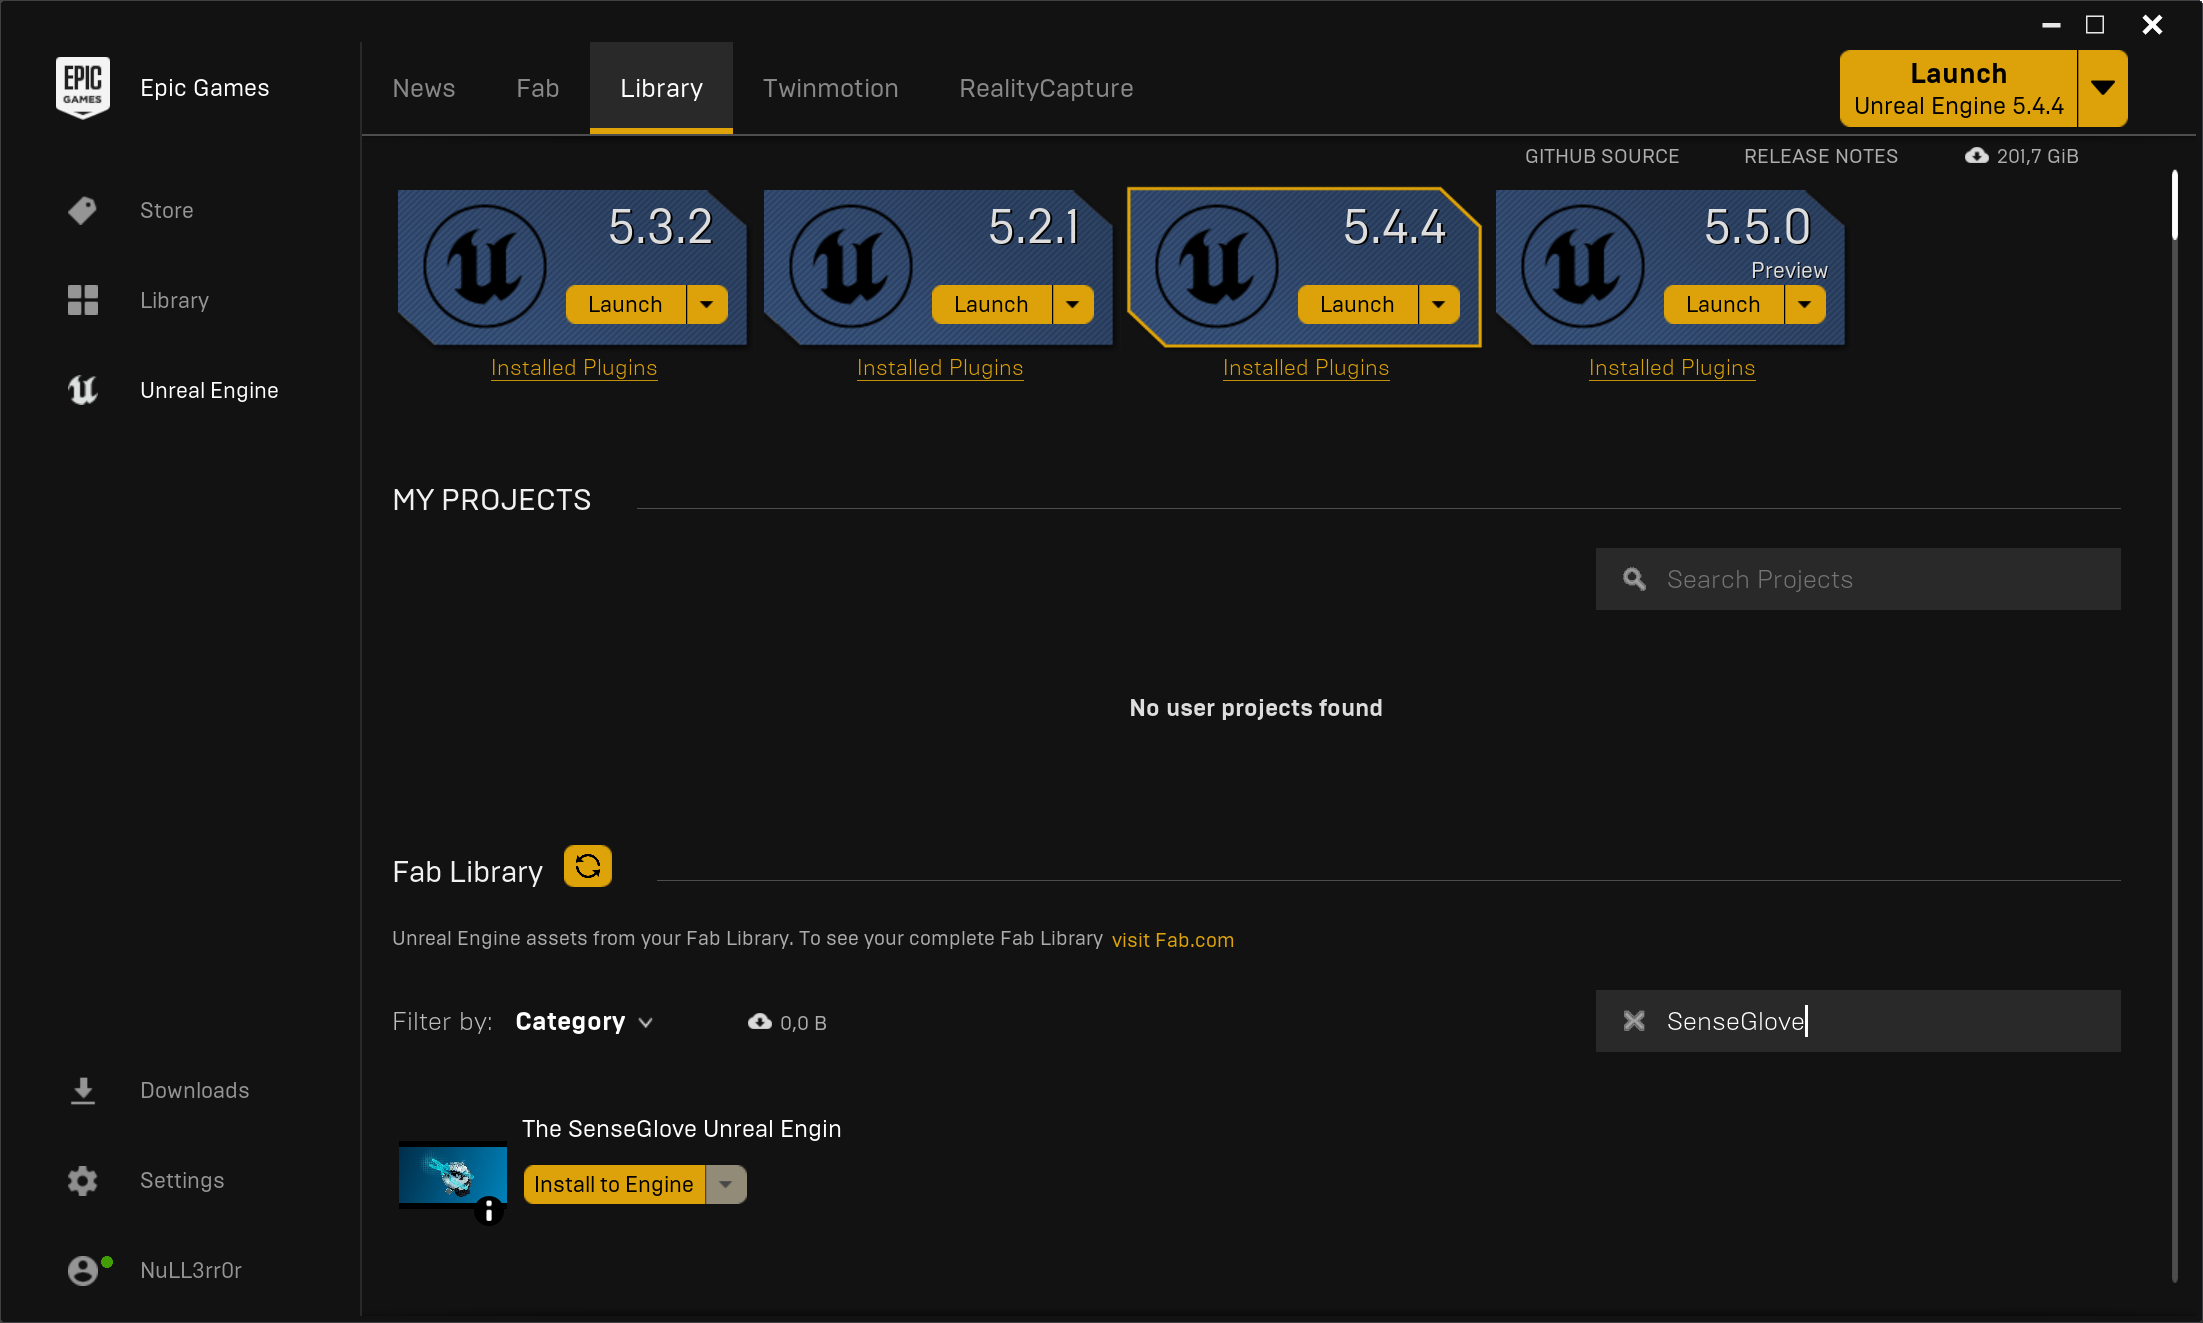
- Once the Fab library is refreshed and synchronized, use the Vault search box to find the
SenseGlove Unreal Engine Plugin. Click theInstall to Enginebutton.
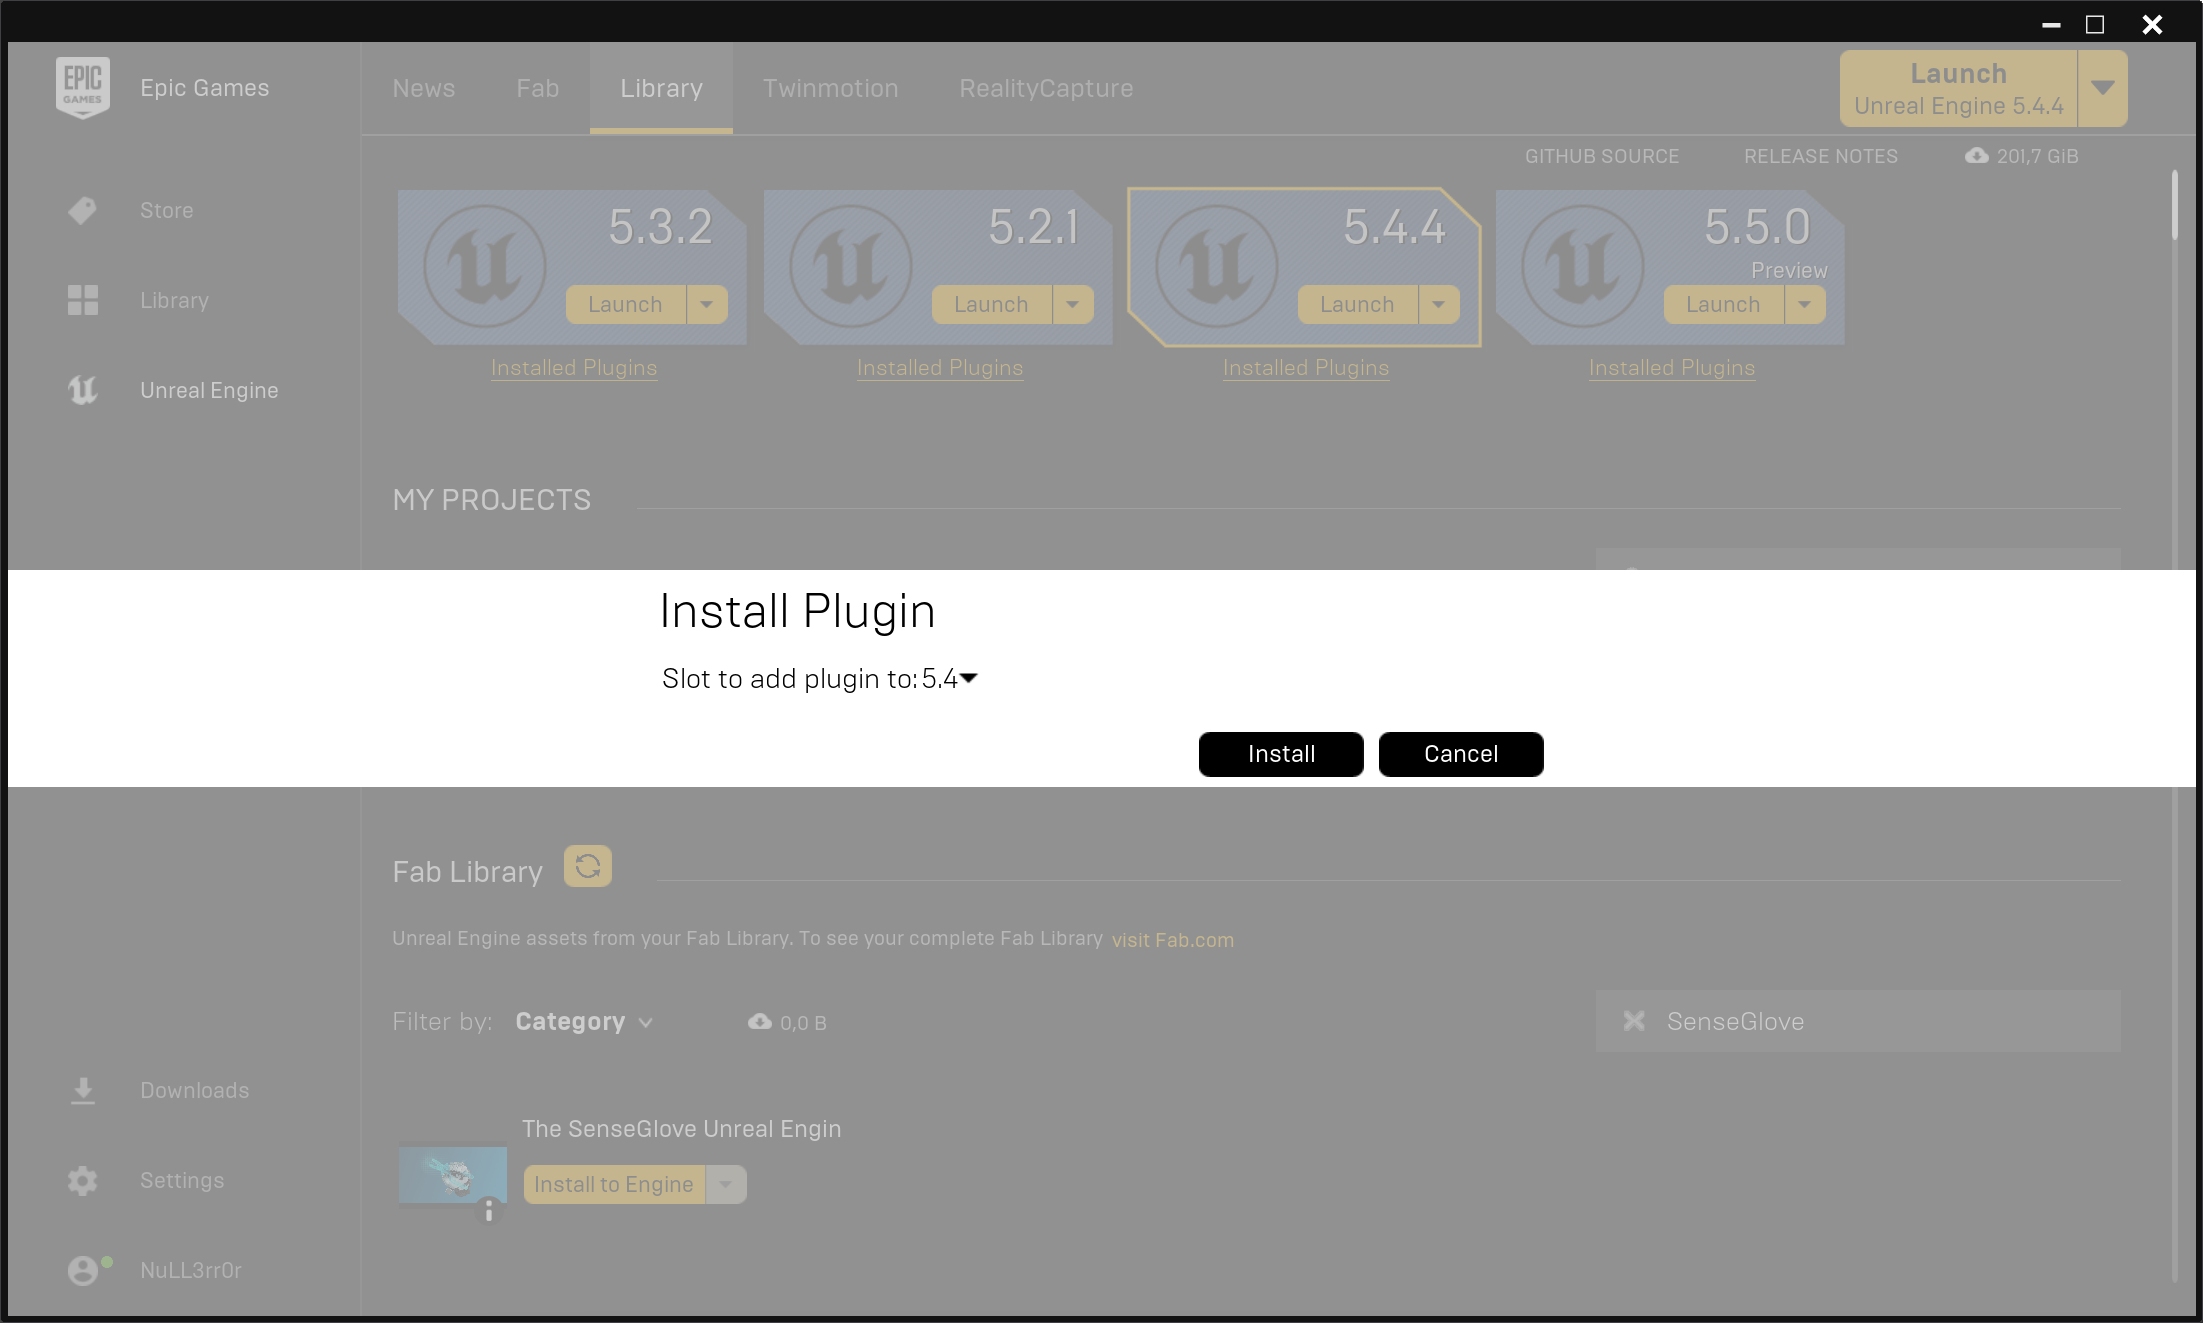
- You'll be prompted to choose a compatible engine version. Select your desired engine version from the list, then click
Install.
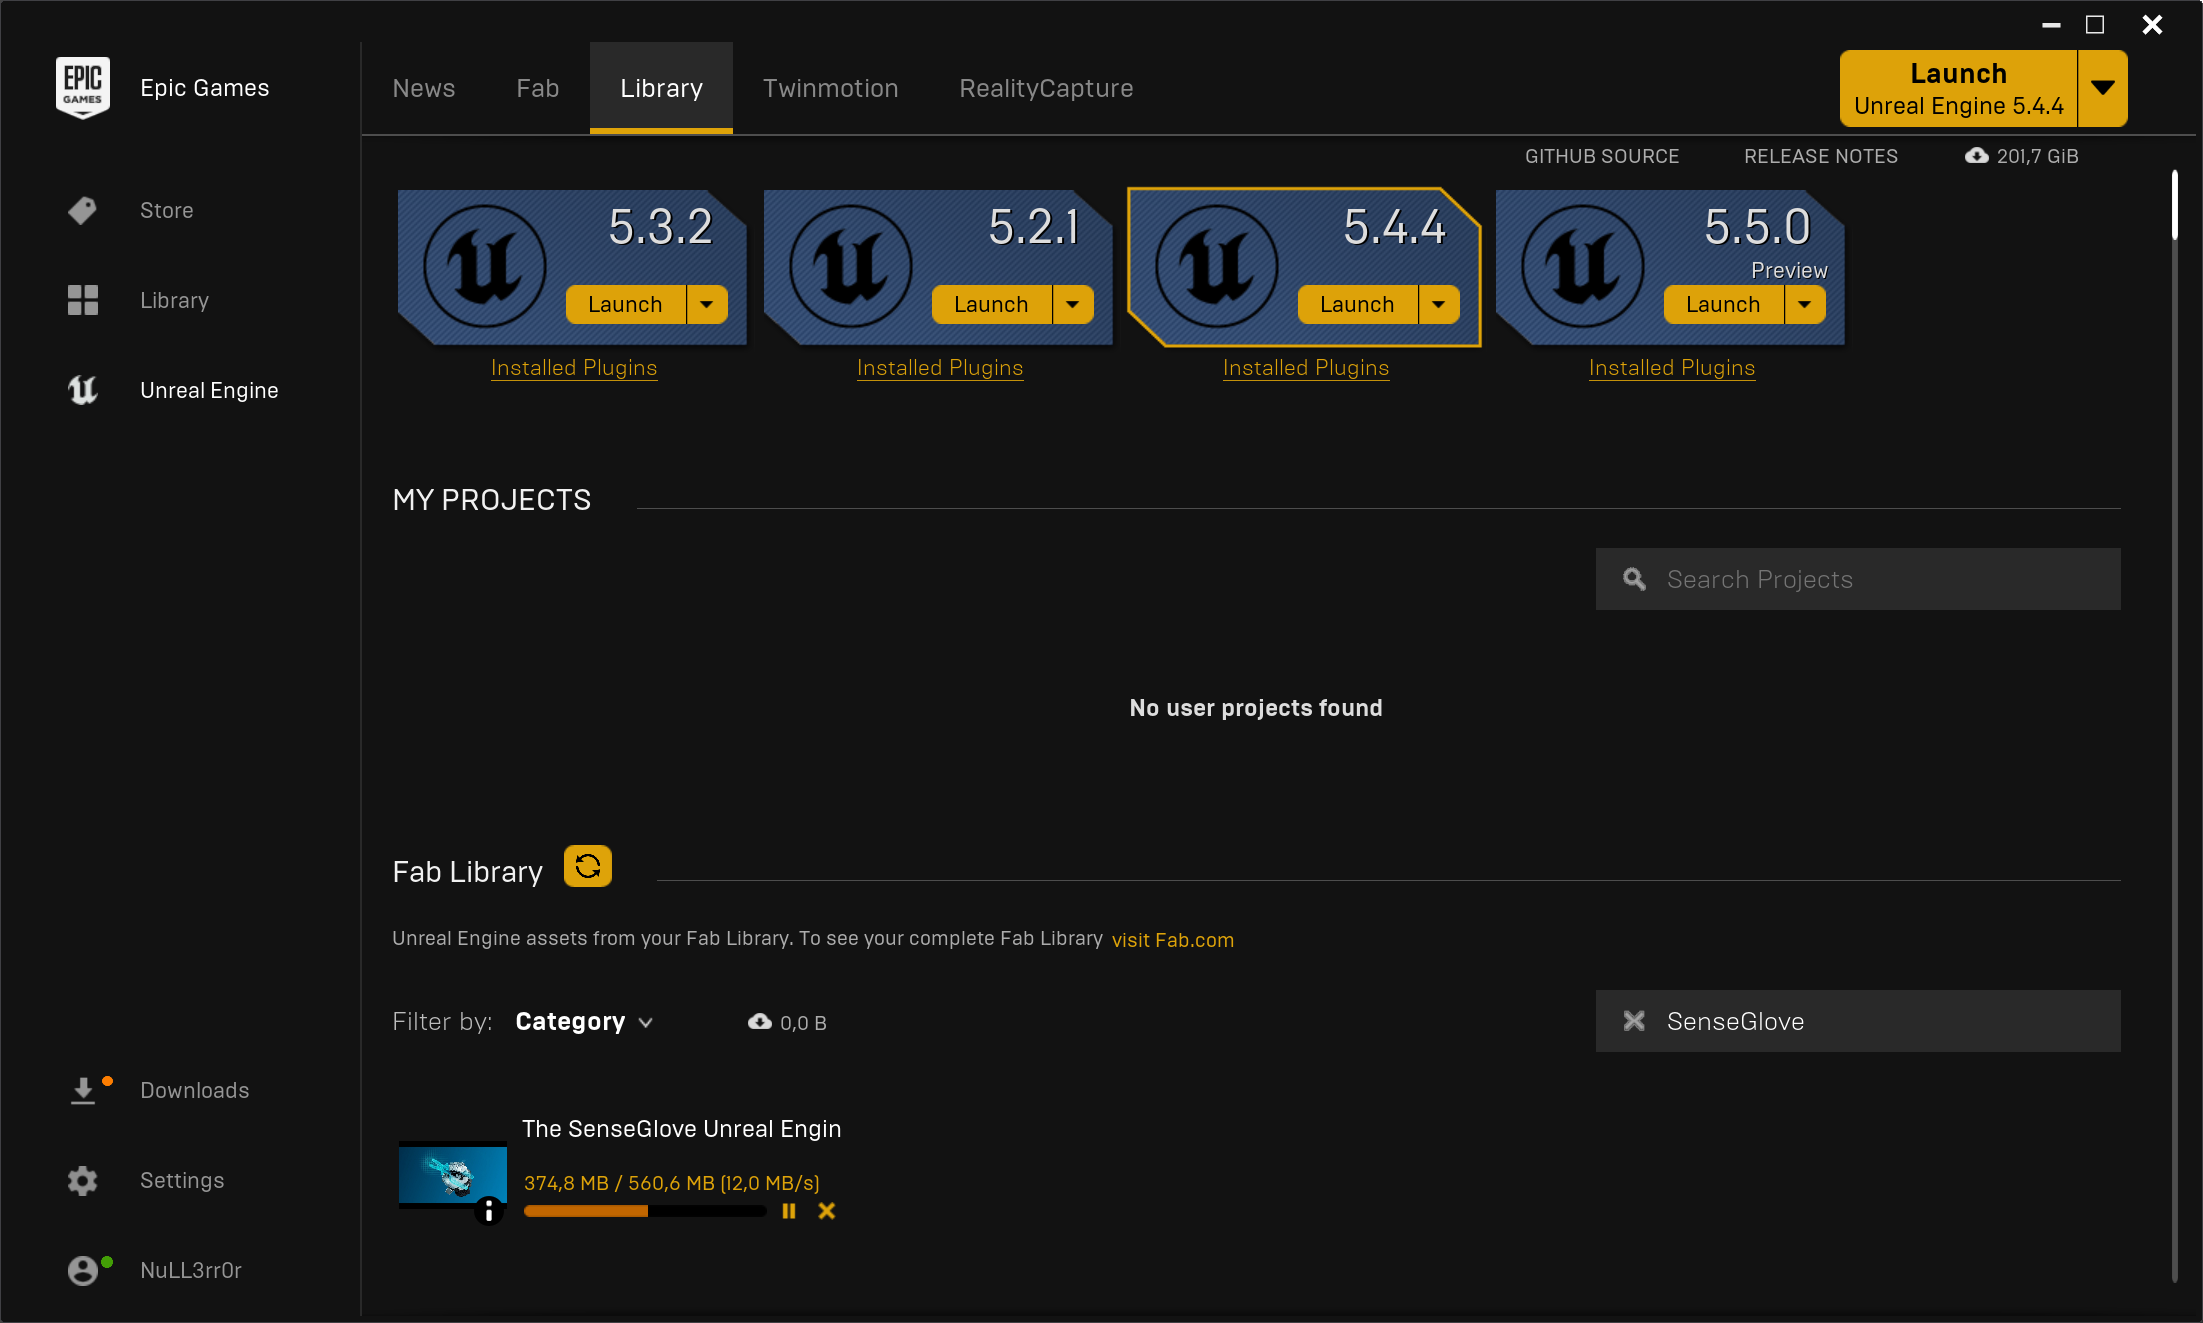
- The Epic Games Launcher will show the plugin's download and installation progress. Please wait for it to complete.
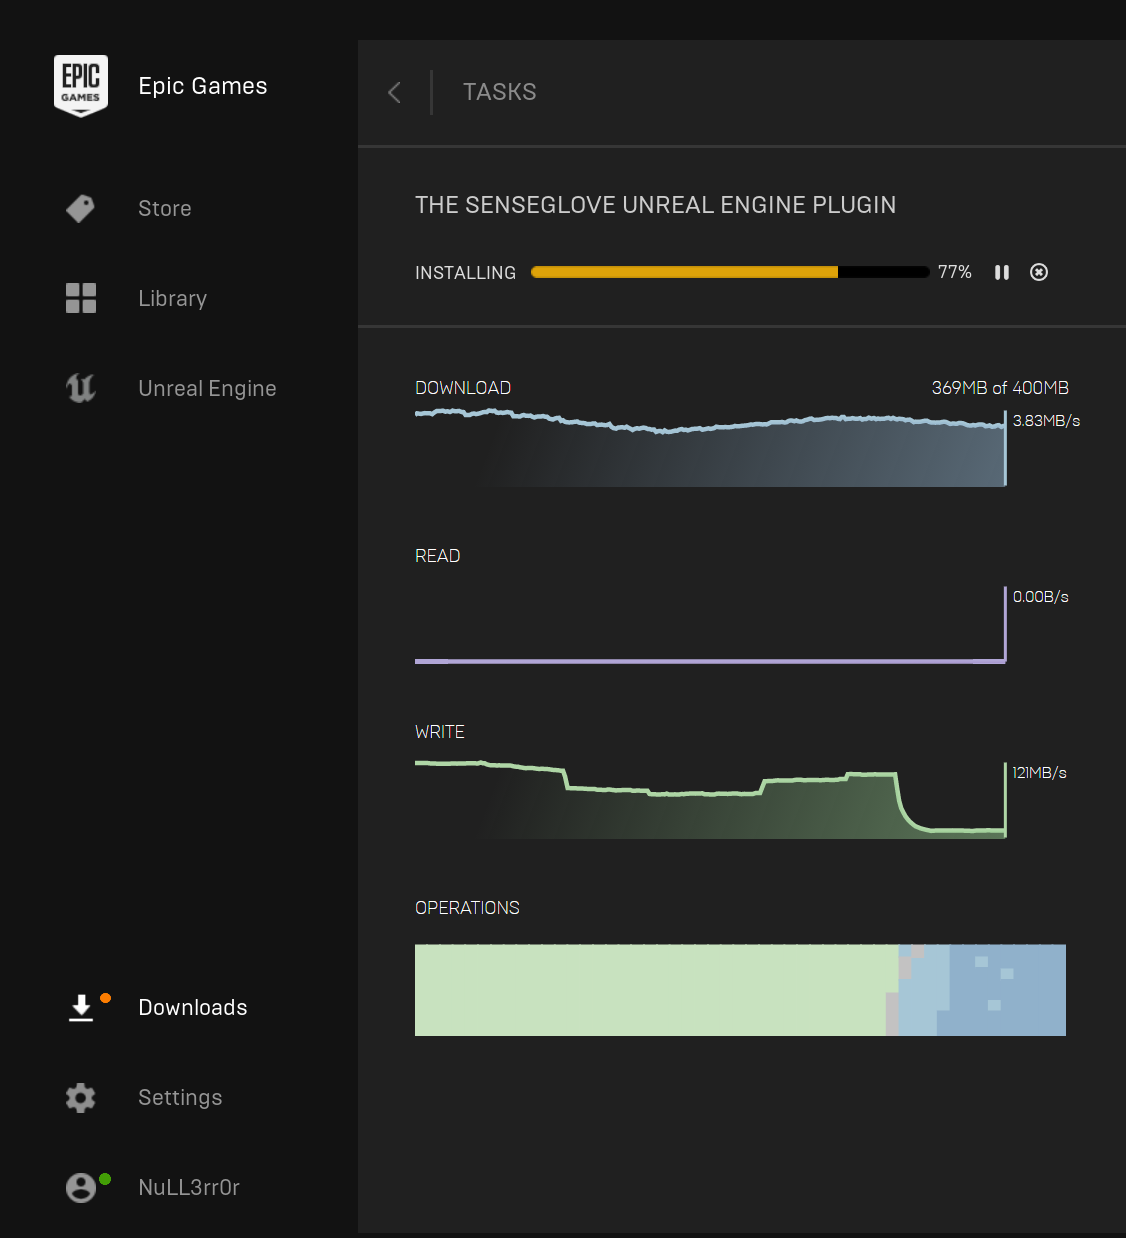
- While the download and installation are in progress, you can see the progress in more details by clicking on the
Downloadssection on the sidebar.
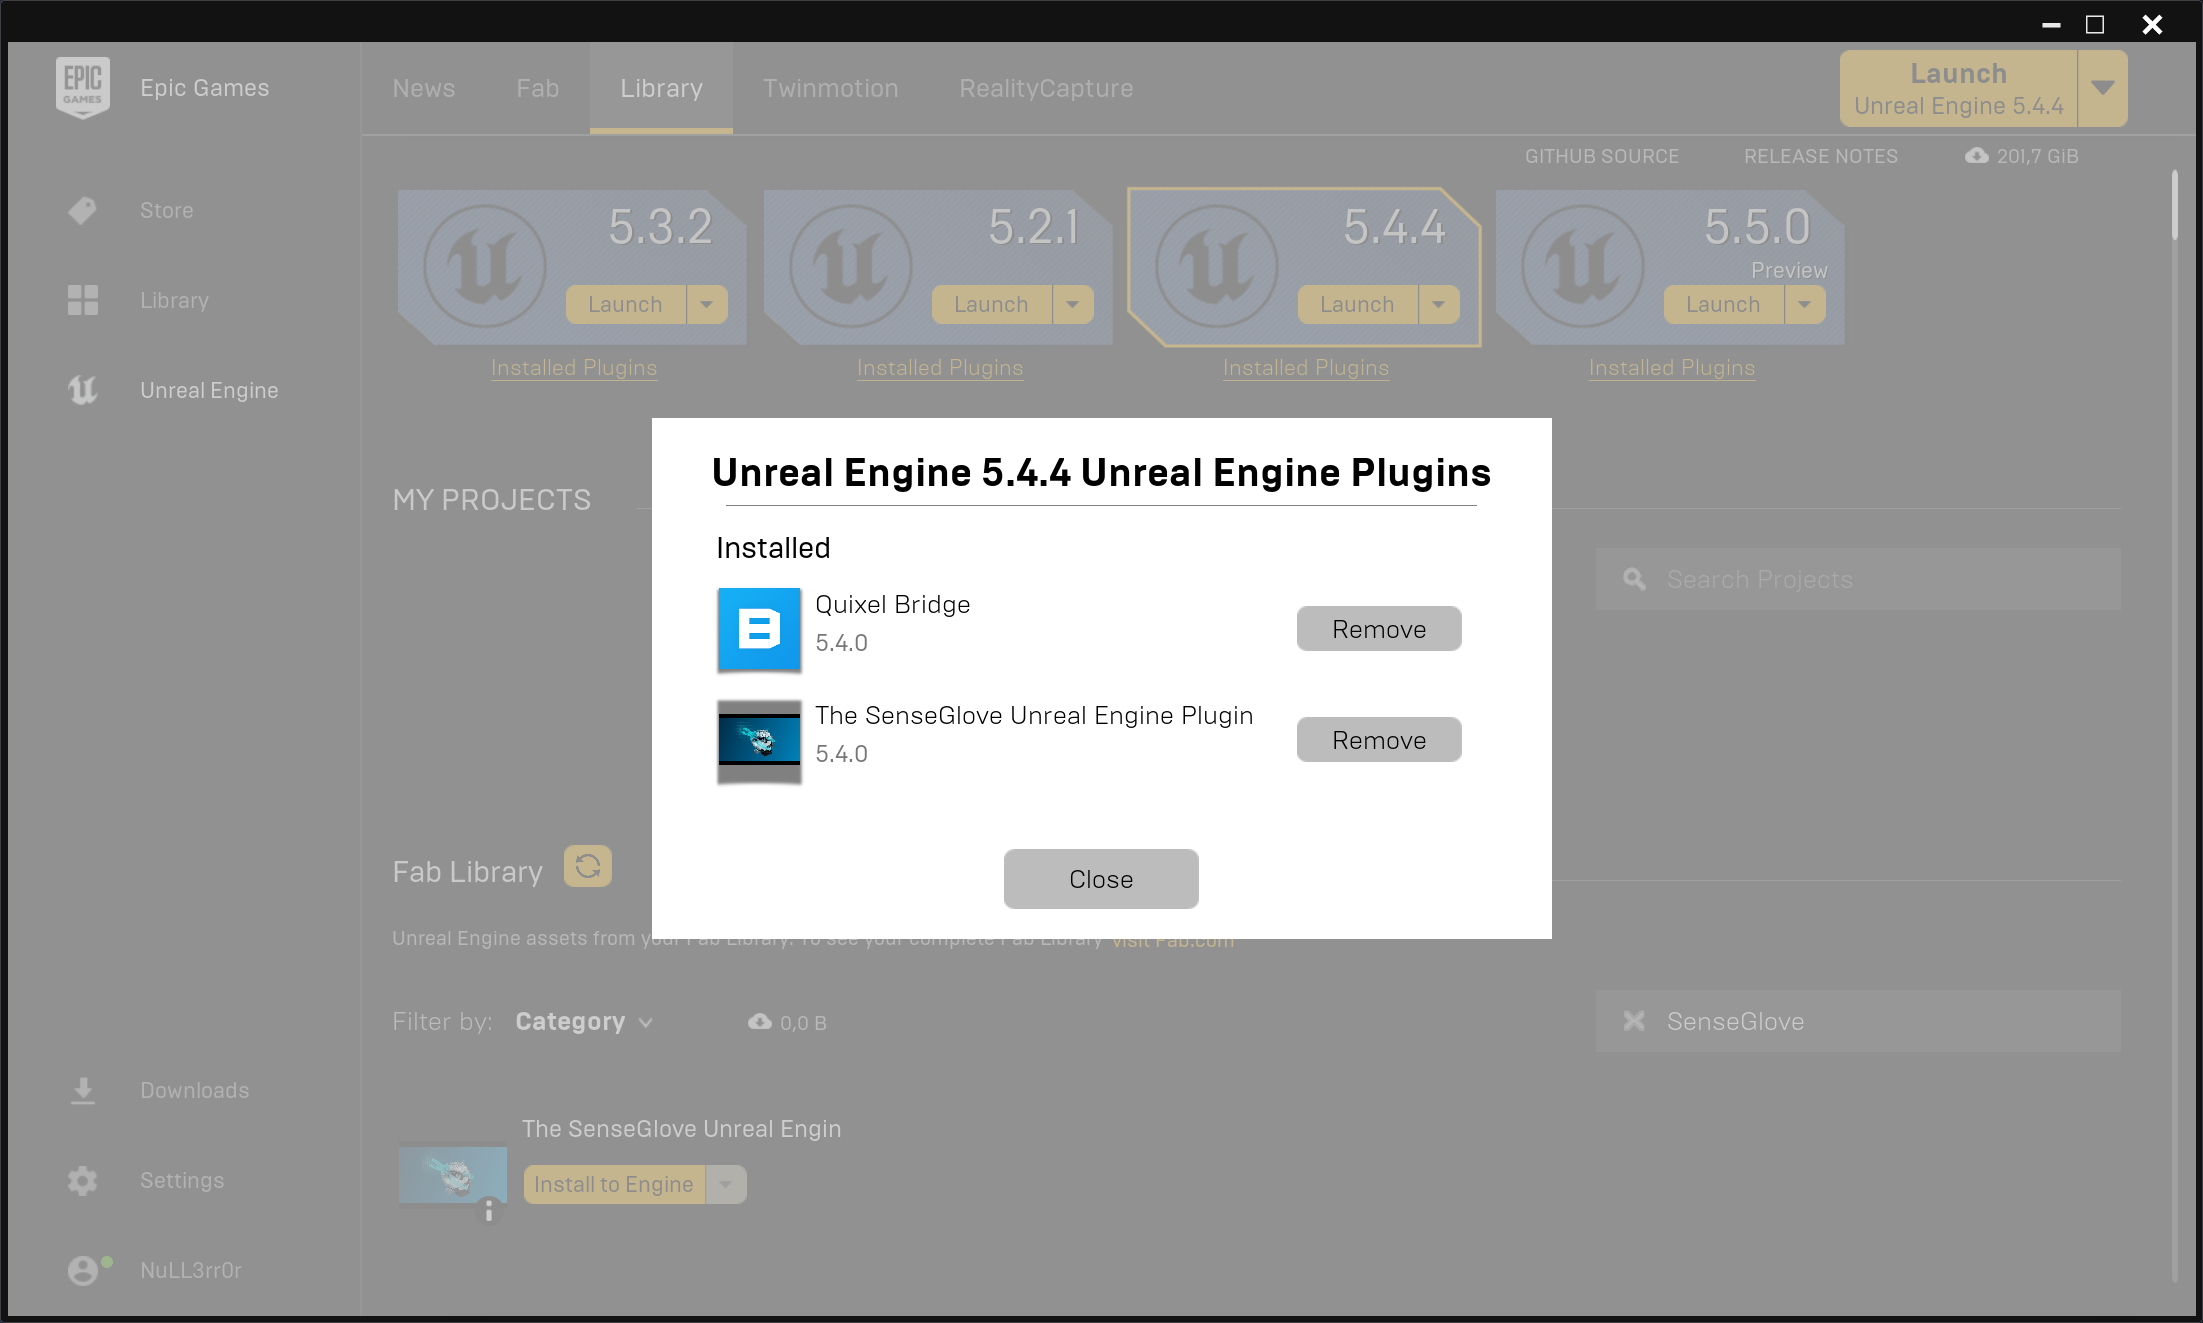
- Once the download and installation are complete, verify its installation by clicking
Installed Pluginsunder the engine you've just installed it to. The SenseGlove plugin should appear as installed among other currently installed plugins.
- One last confirmation could be navigating to
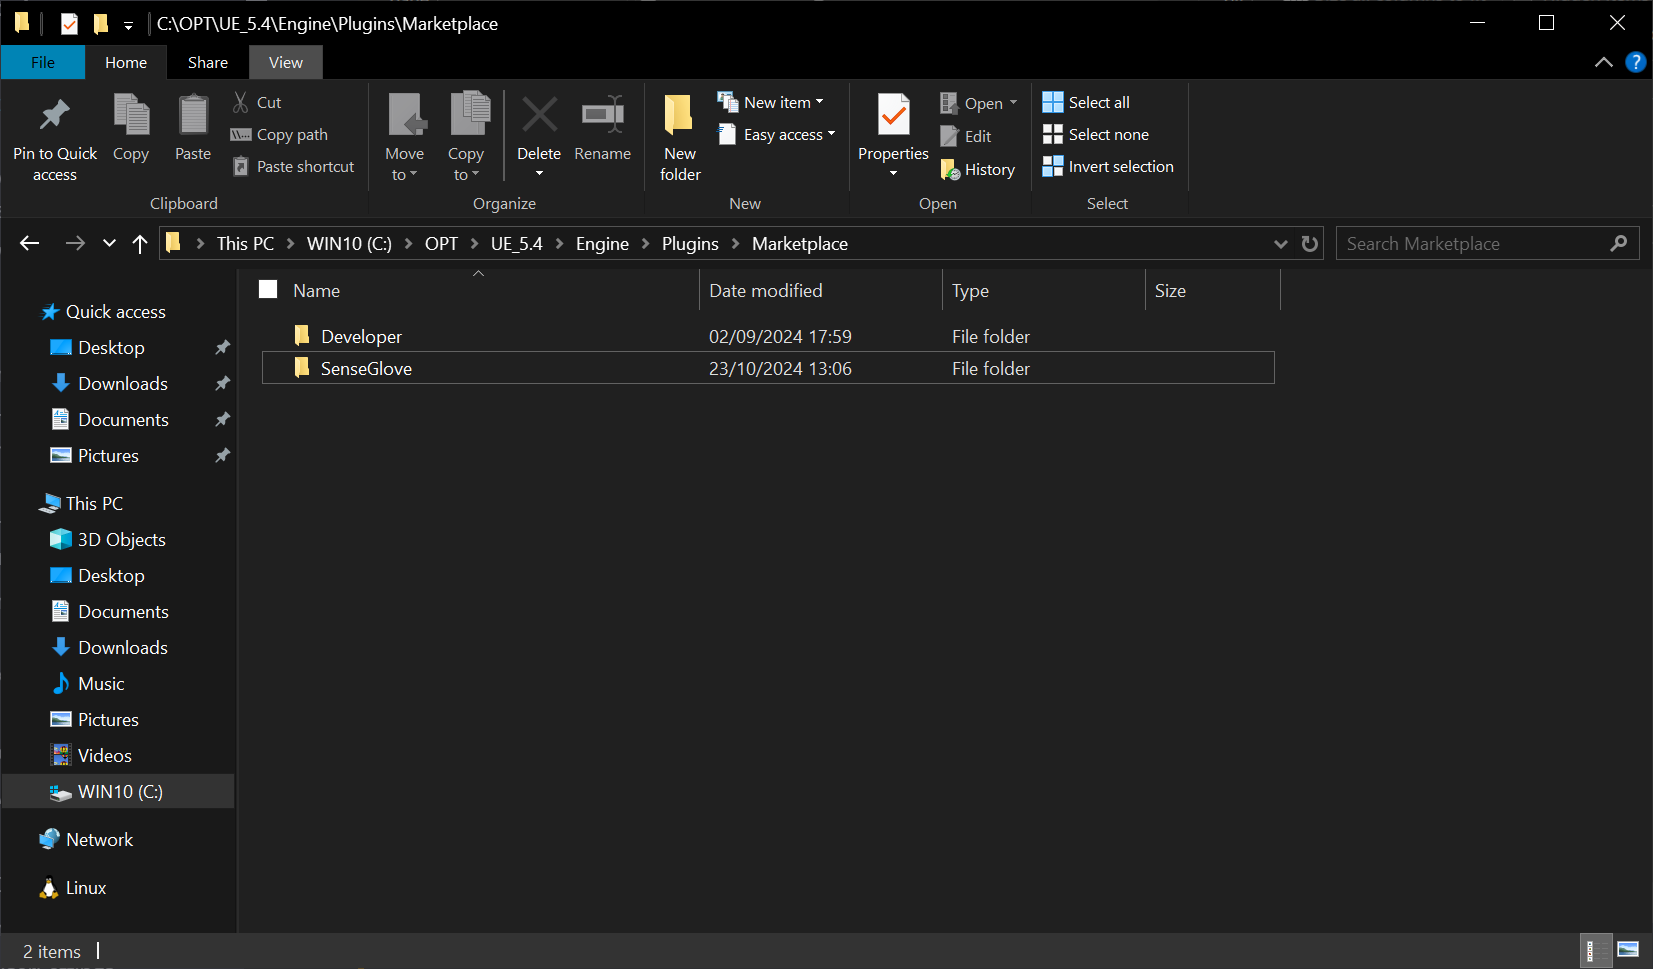
YourEngineInstallationPath/Engine/Plugins/Marketplacedirectory. The SenseGlove Unreal Engine Plugin source and binaries can be found inside this directory. This is especially useful in case one desires to copy the plugin for example to their own project's source code to run it at the project level instead of running it at the engine level.
Warning
Please note that it is best practice to install the plugin either at the project level or the engine level, but not both. Having the plugin installed in both locations, at the same time, can lead to various issues, especially if the version of the plugin installed at the engine level differs from the one installed at the plugin level. A guide on verifying the plugin version is also available as well.
Plugin Installation via Microsoft Azure DevOps Repositories
While plugin installation via the Epic Games Launcher is the most convenient method for most users to obtain and install the latest version of the SenseGlove Unreal Engine Plugin via Fab, there might be valid reasons to instead download and install the plugin directly from the SenseGlove Unreal Engine Plugin Microsoft Azure DevOps Repository. These reasons may include:
- Downloading an older version that is no longer available on Fab.
- Downloading a recent version that has been submitted to Fab, but is still awaiting approval and publication by the Fab Team.
- Downloading an under-development, unstable release of the plugin for testing purposes.
- Or, any other specific needs that require direct access to the repository.
Nonetheless, here is a step-by-step guide to downloading and installing the plugin from the Microsoft Azure DevOps Repositories.
Download a Specific Version
To download a specific version of the plugin, follow these steps:
-
Navigate to the the SenseGlove Unreal Engine Plugin Microsoft Azure DevOps Repository.
-
Locate the branch dropdown menu at the top of the page, just below the navigation bar, and next to the
Copy to clipboardicon. There you'll find a dropdown menu. By default, it usually selects the master branch.
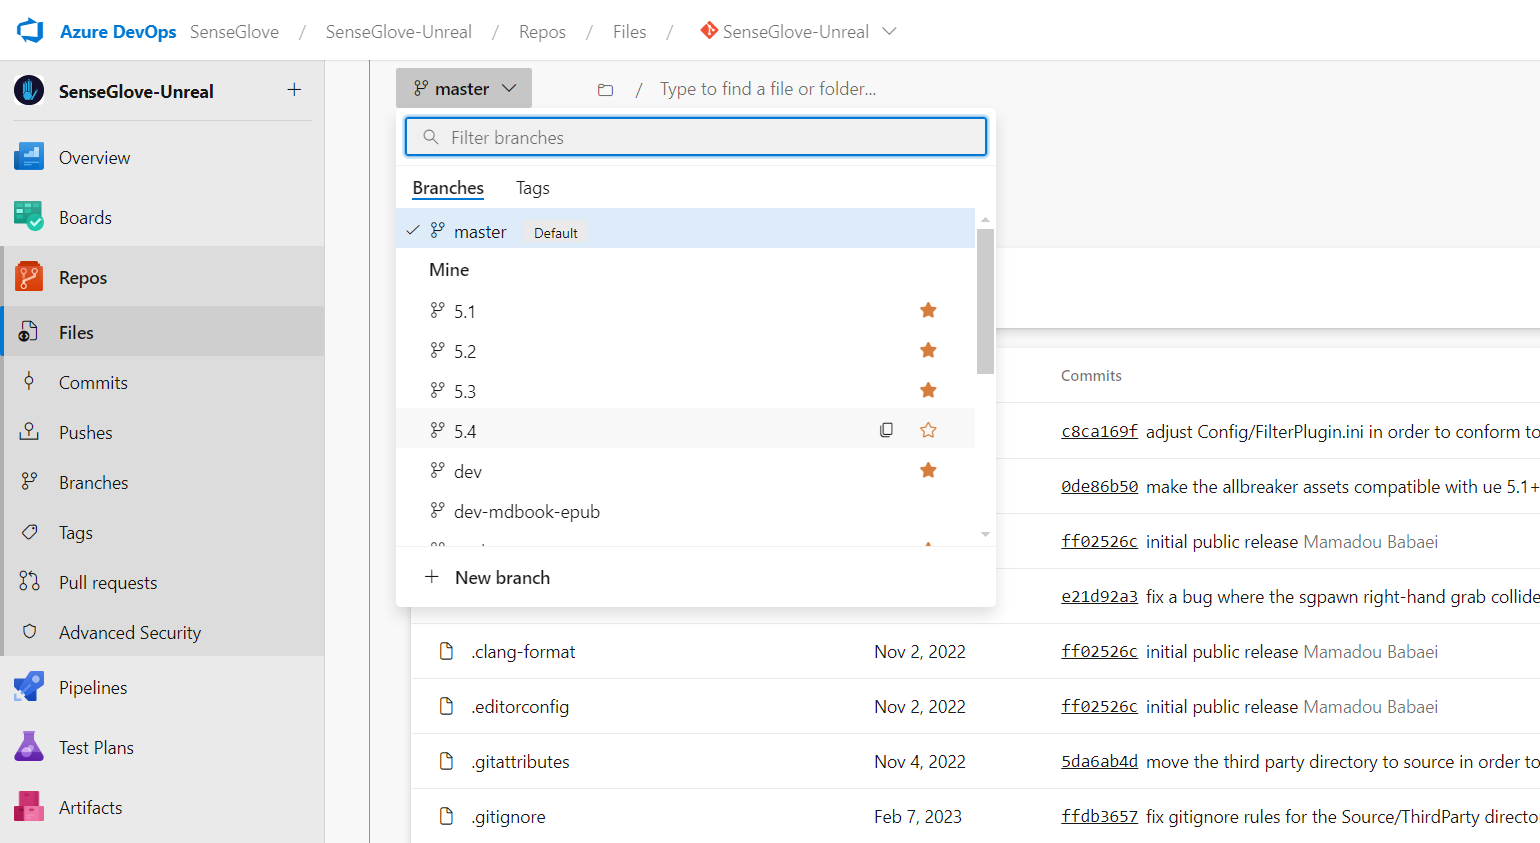
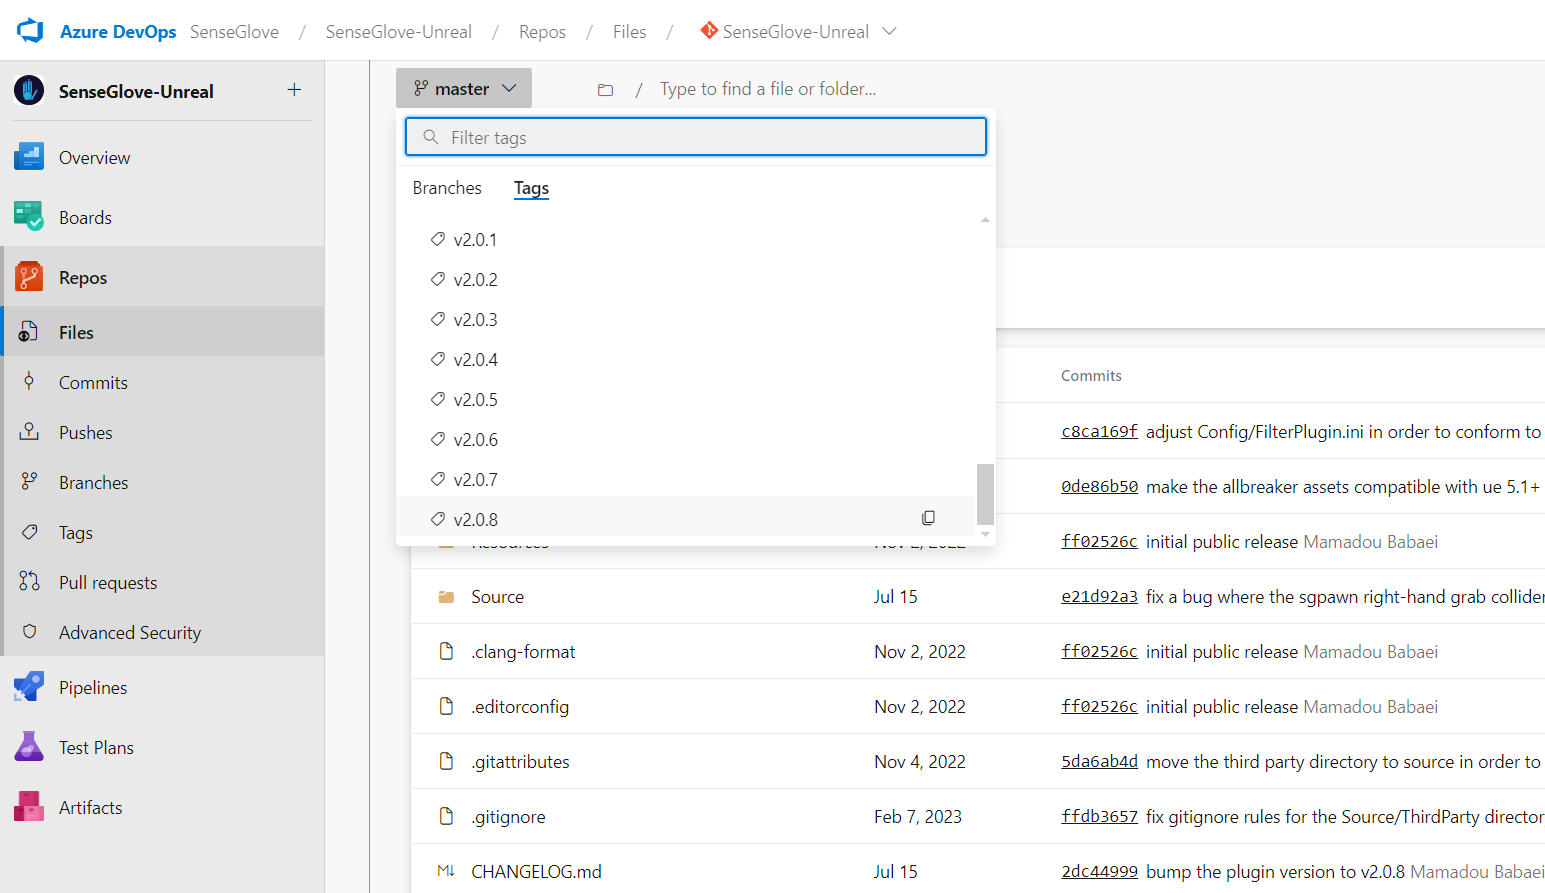
- Use the dropdown menu to choose a desired branch containing the source code for a specific version of Unreal Engine or a specific release of the plugin marked with a release tag.
Note
A branch named with engine version numbers, such as
5.4,5.3, etc., ususally contains the source code for the latest stable version of the plugin compatible with that specific Unreal Engine version, provided that version is still supported. For a comprehensive list of supported engine versions please refer to the Platform Support Matrix.As a general rule of thumb, the
masterbranch should work with any supported Unreal Engine version. This is because it does not specify anyEngineVersioninside the main.upluginfile. However, there may be rare exceptions where it does not work due to breaking changes between engine versions that the plugin cannot accommodate. One such a instance occurred with version2.0.xof the plugin, where some breaking changes prevented UE5.1from sharing similar code with versions5.2+. For this reason, it is generally recommended to select a branch specific to the version of the Unreal Engine you intend to use with the plugin.The same principles that apply to the
masterbranch also apply to thedevbranch, which will discuss later.We will also cover how to obtain a working version from a tag for scenarios like the one mentioned above.
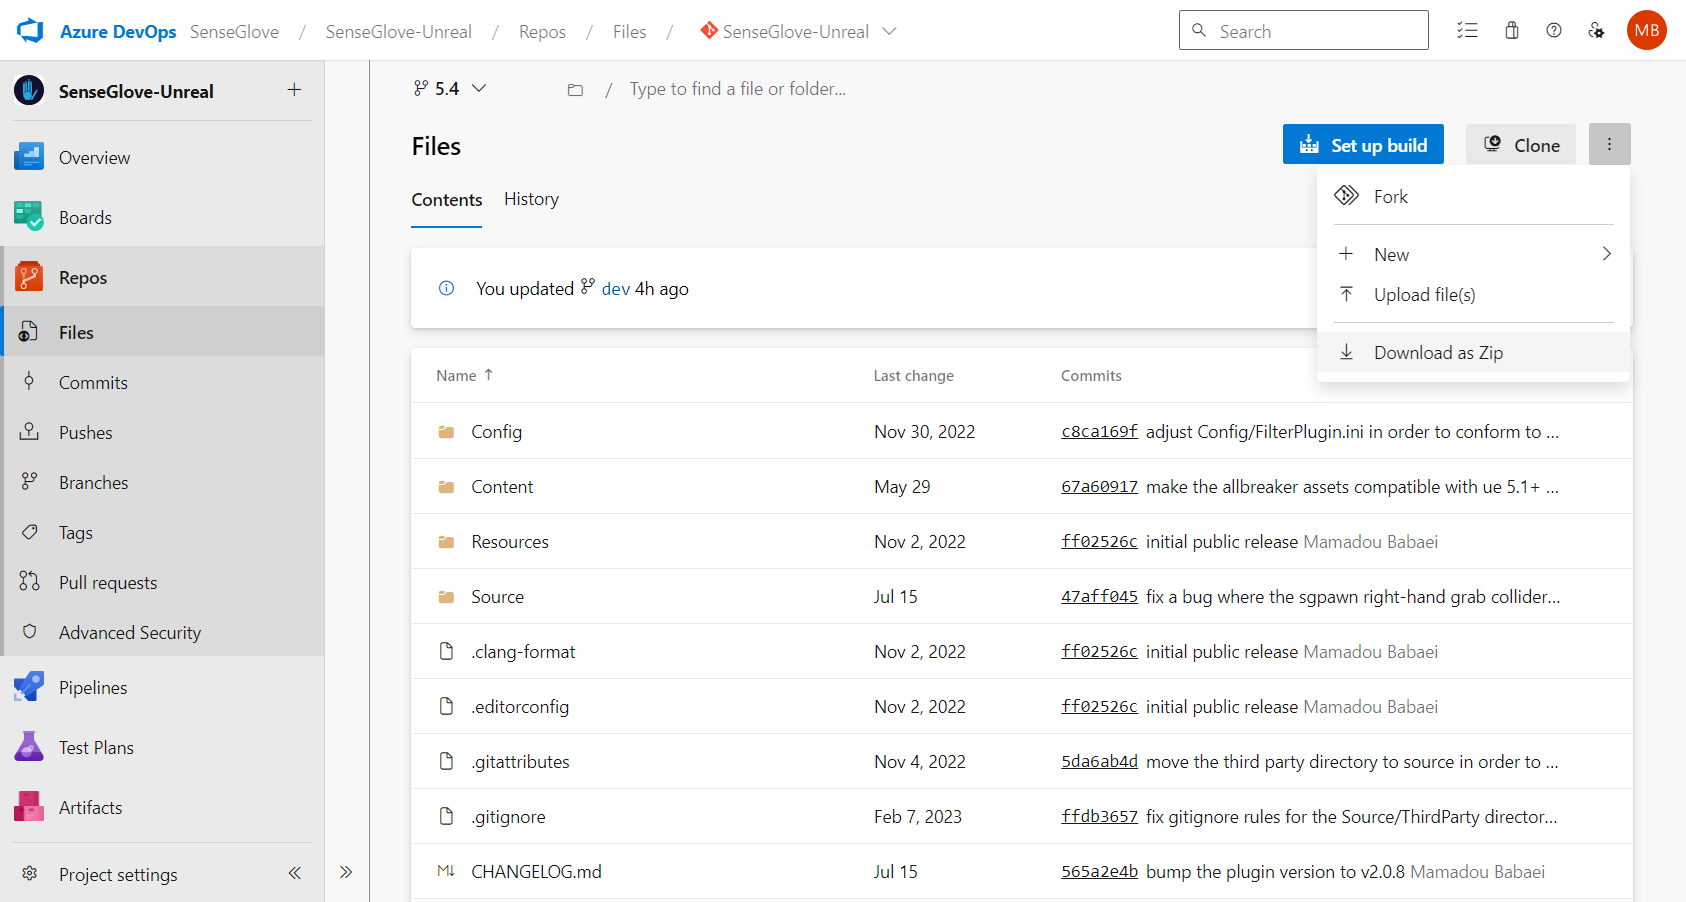
- After selecting your desired branch or tag, click on the kebab menu (three vertical dots) located at the top right of the screen and choose
Download as Zipto obtain the source code for that branch or tag.
Download a Specific Version for a Specifc Unreal Engine Version
As mentioned earlier, due to breaking changes between Unreal Engine versions, it might not be feasible to share the same source code across different Unreal Engine versions. Since release tags are created from the master branch, they contain code compatible only with the latest version of Unreal Engine. Therefore, the instructions for downloading a specific version from a release tag might not work with some Unreal Engine versions. In such cases, you can use an alternative approach:
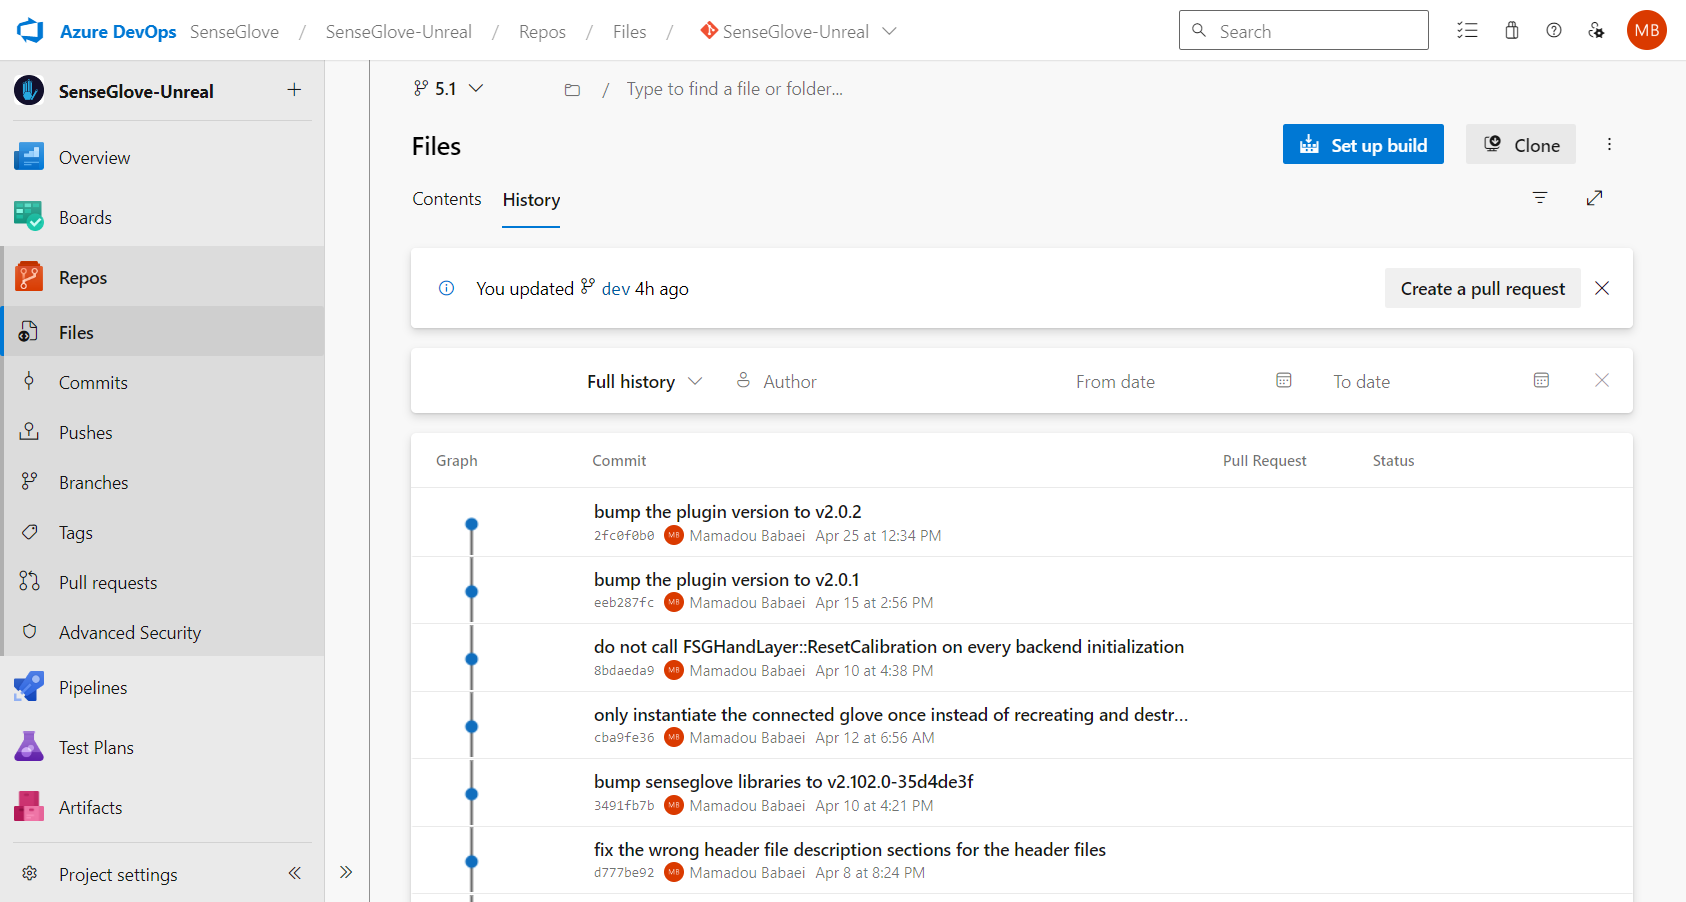
- First, choose the appropriate branch for your desired Unreal Engine version from the branch dropdown menu, as discussed earlier. Then navigate to the
Historytab.
-
Look via the commit history for a commit message that says
bump the plugin version to vX.X.Xas all releases are finalized with this exact commit message and the plugin version. Next, click on the commit message for the version you are looking for. -
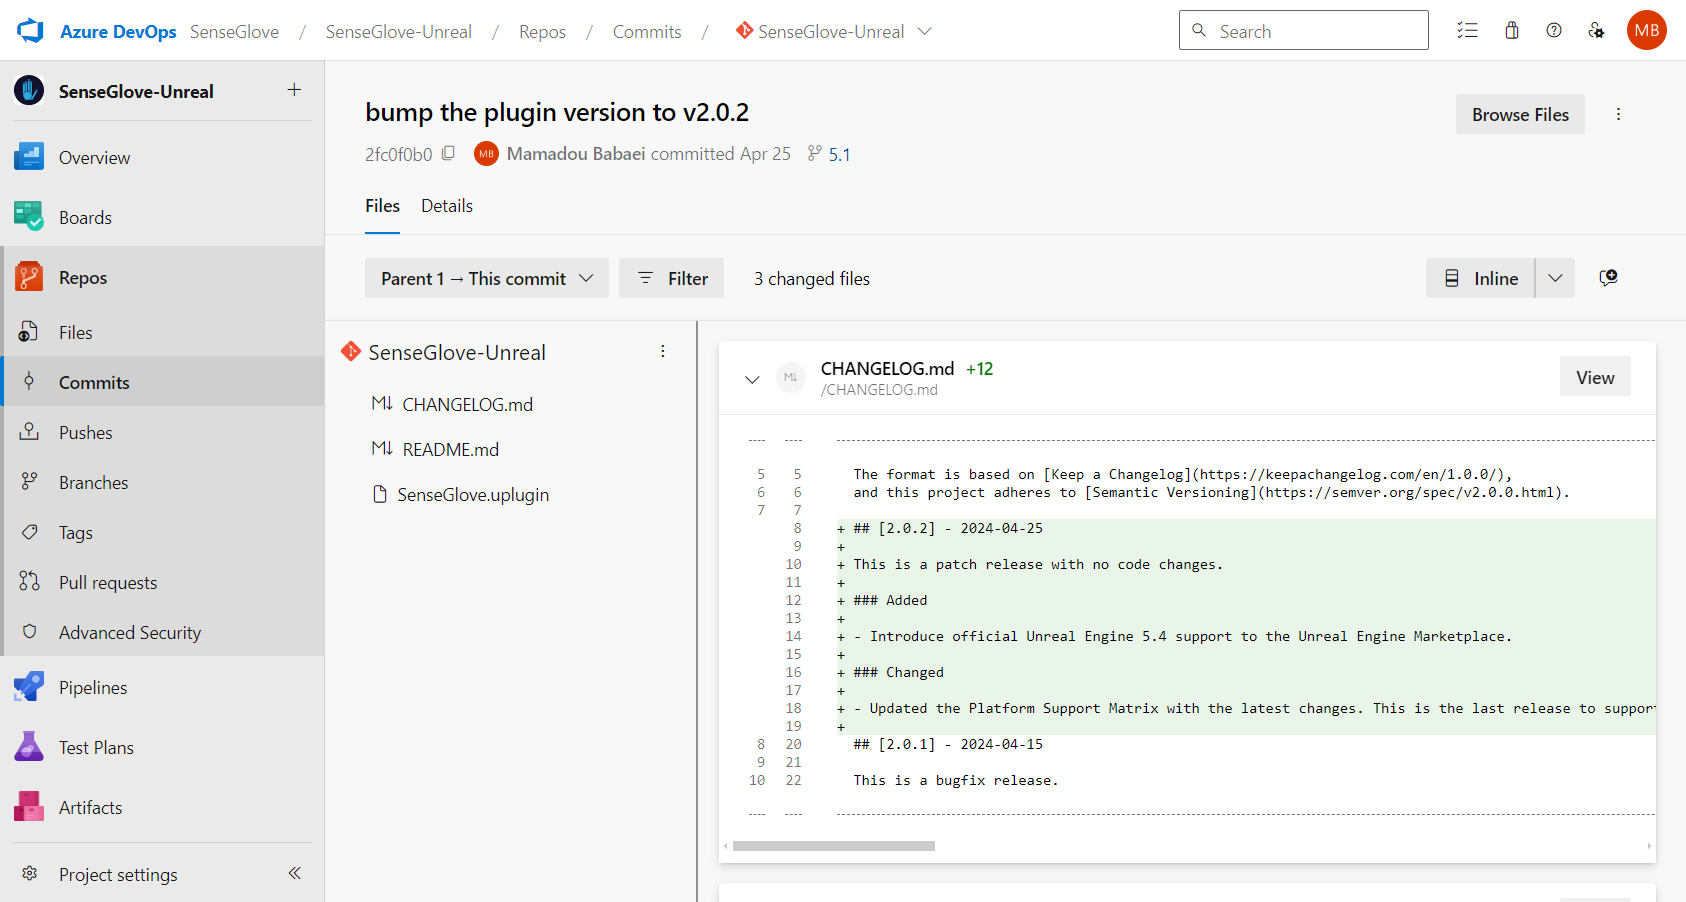
Once you've selected the correct commit, click on the
Browse Filesbutton next to the kebab menu (three vertical dots) at the top right of the screen.
- You should now be in the
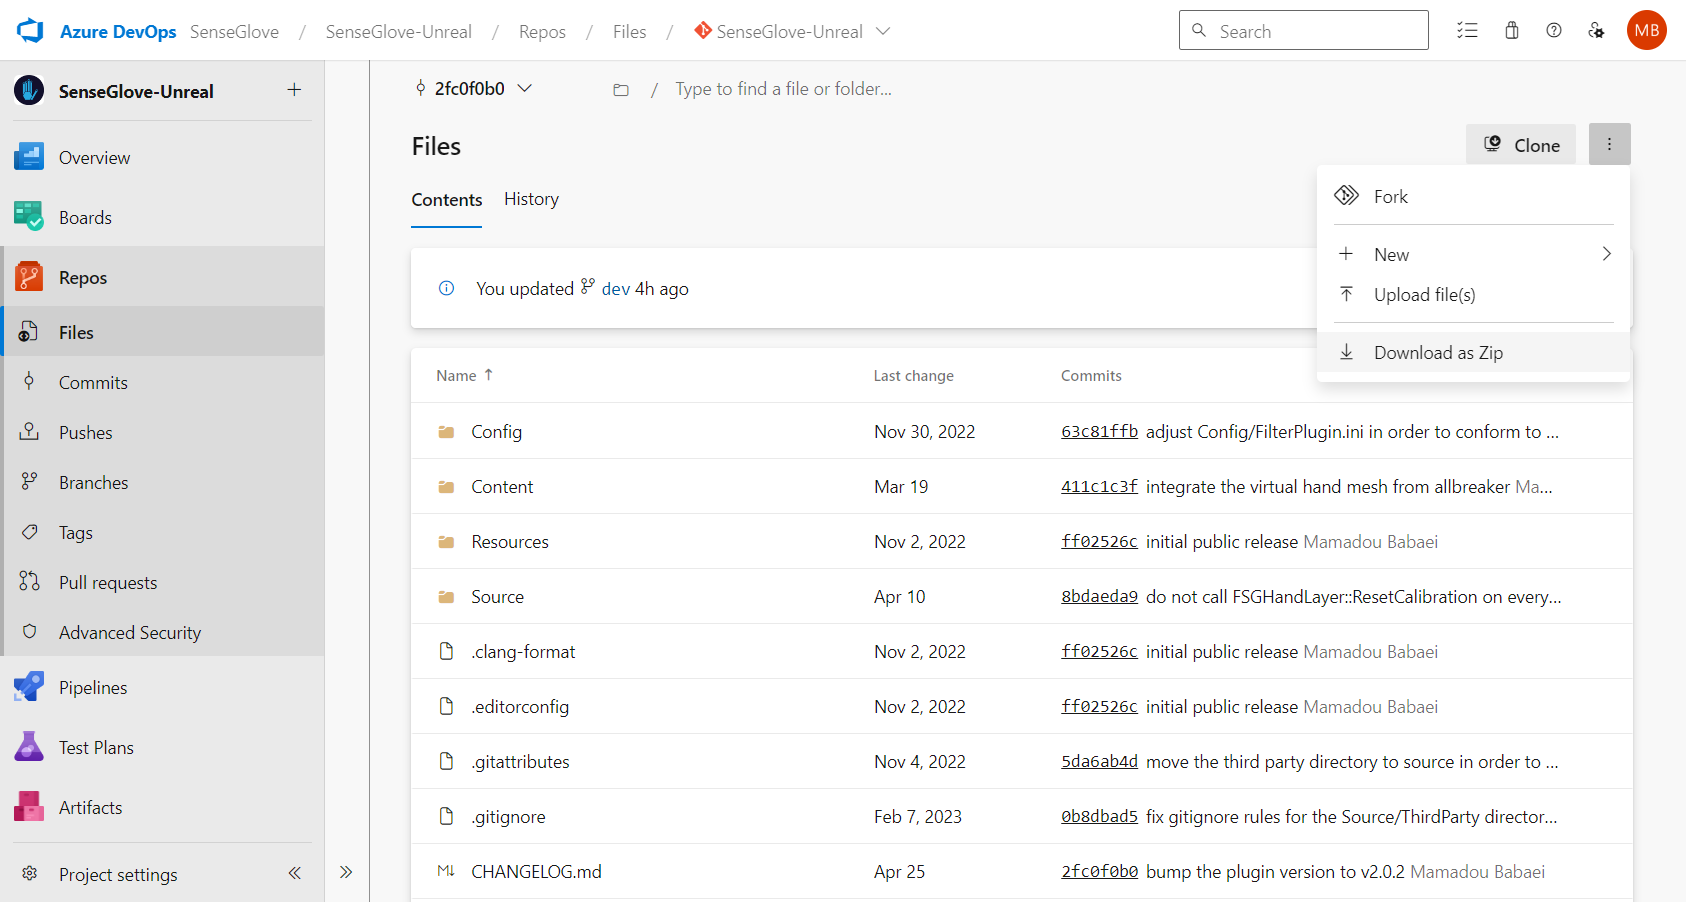
Contenttab, with the branch dropdown menu displaying the commit hash instead of a branch name or tag. Click on the kebab menu (three vertical dots) again, and selectDownload as Zip. This will give you a zip file containing the exact release you need, compatible with your chosen Unreal Engine version.
Download the Bleeding-edge Development Branch
Caution
The
devbranch is an active development branch that is constant and ongoing changes. As a result, the code on this branch is primarily untested and therefore not production-ready. It may not even compile successfully or may lack comprehensive documentation. For any serious development, it is generally recommended to use a stable release of the plugin. Thedevbranch is publicly accessible to give you a preview of upcoming features and for trial purposes only.The most up-to-date documentation for the dev branch can usually be found at: at: https://unreal.dev.senseglove.com/next.
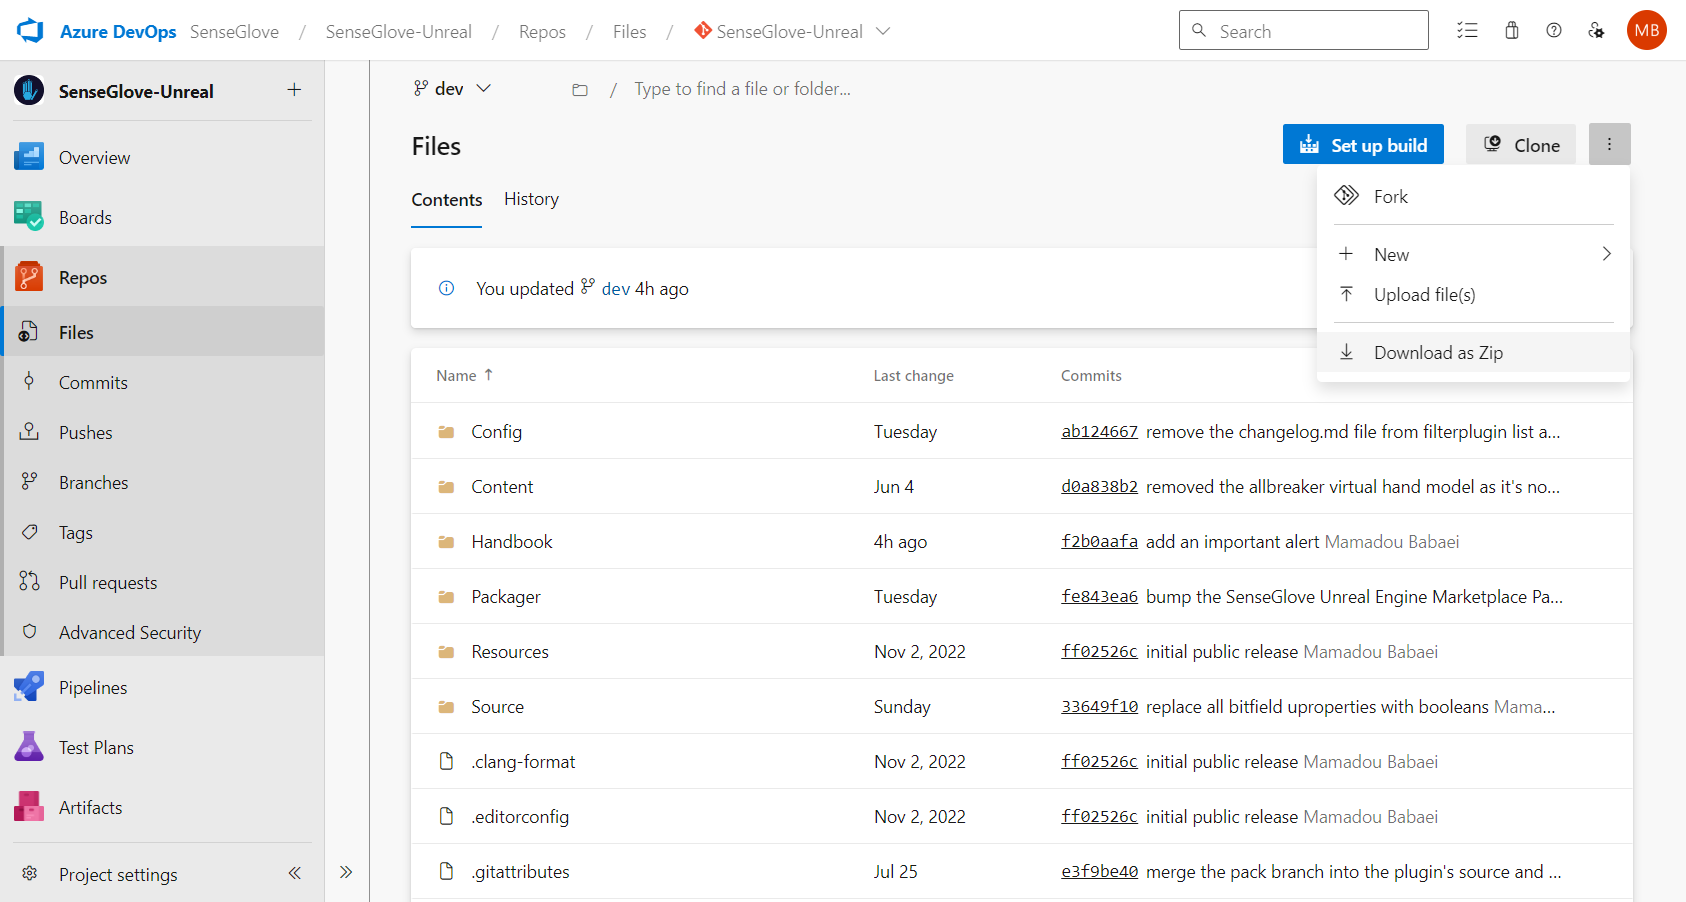
Downloading the dev branch is as easy as choosing the dev branch from the branch dropdown menu (as discussed earlier) and then choosing Download as Zip from the kebab menu (three vertical dots).
Installation
Once you have obtained the desired plugin version compatible with the Unreal Engine version you have in mind using any of the methods mentioned above, it's time to build and install the plugin. There are two ways to install the SenseGlove Unreal Engine Plugin, one is at the engine level, and the other is per project.
-
Engine-level installation: this method makes the plugin accessible to any project within that Unreal Engine version.
-
Per-project installation: this method makes the plugin accessible only to a specific project.
Warning
Please note that it is best practice to install the plugin either at the project level or the engine level, but not both. Having the plugin installed in both locations, at the same time, can lead to various issues, especially if the version of the plugin installed at the engine level differs from the one installed at the plugin level. A guide on verifying the plugin version is also available as well.
Engine-level installation
Per-project installation
- Locate your existing C++ or Blueprint project, or create a new project from scratch.
Important
Before proceeding, make sure your project's Unreal Editor is closed, and you do not have your project open in your C++ IDE to avoid any issues.
-
Inside your project's root directory create a new
Pluginsdirectory if you don't have one already. -
Inside the
Pluginsdirectory create a new directory namedSenseGlove. -
Extract the content of your downloaded zip file into the
SenseGlovedirectory. -
Remove any directories or files that are only meant for use by the SenseGlove Unreal Engine Plugin maintainers. These are not part of the distributed plugin package and are not required by either Unreal Engine or the SenseGlove Unreal Engine Plugin to function correctly.
The mandatory files and folders to stay are as follows:
Config
Content
Resources
Source
SenseGlove.uplugin
Anything else can be safely removed. For example, these files and folders can be safely deleted:
Handbook
Packager
.clang-format
.editorconfig
.gitattributes
.gitignore
README.md
- Ensure your project has the correct structure.
For a Blueprint-only project, it should look something like this:
MyBlueprintProject
  │
  ├── Config
  │
  ├── Content
  │
  ├── Plugins
  │     │
  │     └── SenseGlove
  │           │
  │           ├── Config
  │           │
  │           ├── Content
  │           │
  │           ├── Resources
  │           │
  │           ├── SenseGlove.uplugin
  │           │
  │           └── Source
  │
  └── MyBlueprintProject.uproject
For a C++ project, the structure should look like this:
MyCppProject
  │
  ├── Config
  │
  ├── Content
  │
  ├── Plugins
  │     │
  │     └── SenseGlove
  │           │
  │           ├── Config
  │           │
  │           ├── Content
  │           │
  │           ├── Resources
  │           │
  │           ├── SenseGlove.uplugin
  │           │
  │           └── Source
  │
  ├── Source
  │
  └── MyCppProject.uproject
Tip
If you are keeping your project under Git and Git LFS, consider keeping the
.gitignoreand.gitattributesas they help keep irrelevant files out of the remote repository, or manage binary blobs efficiently.
- OK, now it's time to build the plugin.
Note
For Linux build instructions see the Linux Build Instructions section.
For a Blueprint-only project, on Microsoft Windows simply double-clicking the project's .uproject file should present you with a pop-up informing you that some binary modules are missing.
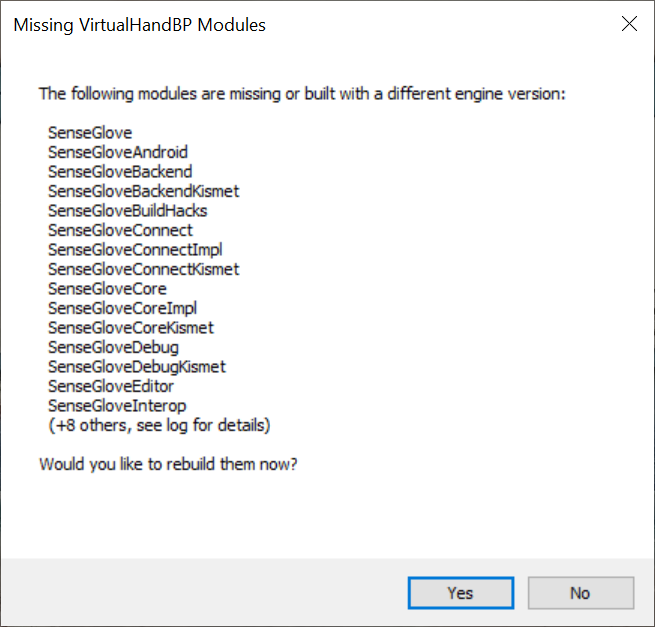
After confirming, the build process will start automatically, and a dialog indicating the build progress will be shown:
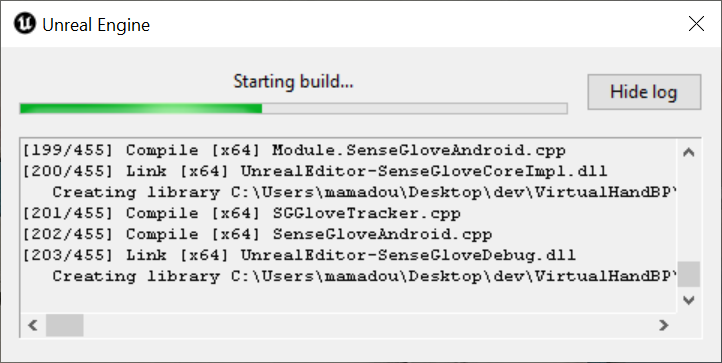
Once finished successfully, the project will be loaded.
Note
Sometimes, due to an esoteric bug in some versions of Unreal Engine, the build process for Blueprint-only projects may immediately fail after choosing
Yesin theMissing Modulesdialog. If this happens, one workaround would be to try to build the plugin inside a temporary C++ project, then copy thePlugins/SenseGlovefolder containing the binaries, from the C++ project to your Blueprint project and then try to reopen the project again.
For C++ projects, on Microsoft Windows, right-click on your C++ .uproject file and choose Generate Visual Studio project files:
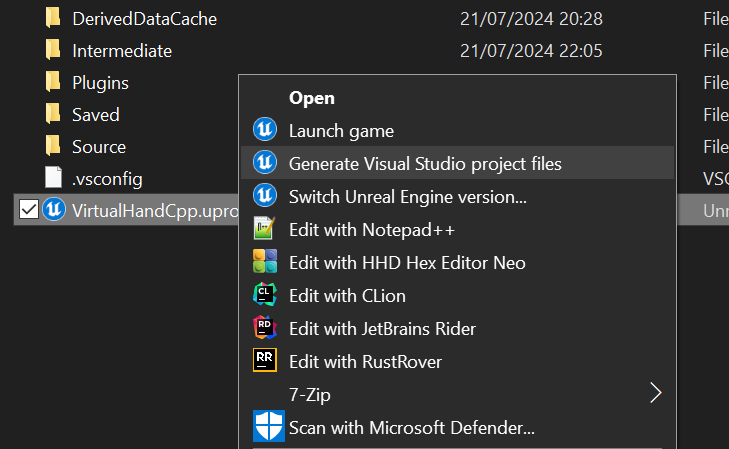
A dialog will pop up shows you the progress of generating the Visual Studio project files:
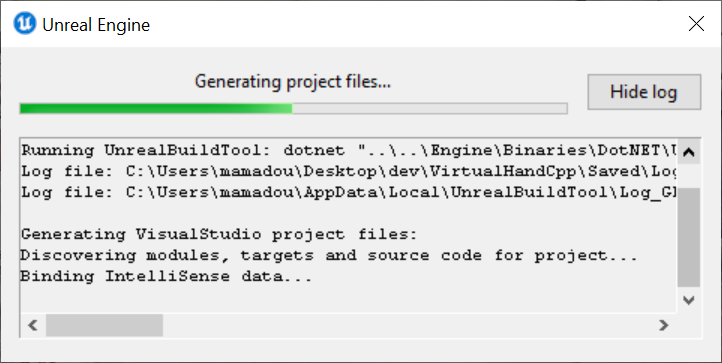
Once the project files are generated, open up the C++ project in your preferred C++ IDE and build the project. After this, the project can be loaded in the Unreal Editor.
- Once the plugin has been built successfully, ensure the SenseGlove Unreal Engine is enabled and verify the plugin version matches the expected version.
Linux Build Instructions
When building the SenseGlove Unreal Engine Plugin on Linux, you won't encounter the Missing Modules dialog that appears on Microsoft Windows. Instead, examining the Unreal Editor logs reveals that the Unreal Editor automatically chooses No in response to the Would you like to rebuild them now? question as the No is implied states.
$ /path/to/UnrealEngine/Engine/Binaries/Linux/UnrealEditor \
    /path/to/MyBlueprintProject/MyBlueprintProject.uproject

LogLinux: Warning: MessageBox: The following modules are missing or built with a different engine version:

  SenseGlove
  SenseGloveAndroid
  SenseGloveBackend
  SenseGloveBackendKismet
  SenseGloveBuildHacks
  SenseGloveConnect
  SenseGloveConnectImpl
  SenseGloveConnectKismet
  SenseGloveCore
  SenseGloveCoreImpl
  SenseGloveCoreKismet
  SenseGloveDebug
  SenseGloveDebugKismet
  SenseGloveEditor
  SenseGloveInterop
  (+8 others, see log for details)

Would you like to rebuild them now?: Missing MyBlueprintProject Modules: No is implied.
LogCore: Engine exit requested (reason: EngineExit() was called)
LogExit: Preparing to exit.
LogPakFile: Destroying PakPlatformFile
LogExit: Exiting.
LogInit: Tearing down SDL.
Exiting abnormally (error code: 1)
If your Unreal Engine installation on Linux was obtained from the GitHub Sources y you can generate the project files using the following command:
$ /path/to/UnrealEngine/GenerateProjectFiles.sh \
    /path/to/MyProject/MyProject.uproject \
    -editor -game -makefile
However, if you are using a prebuilt Linux version of Unreal Engine, the main GenerateProjectFiles.sh script at the engine root does not exists. Instead, we have to invoke the underlying GenerateProjectFiles.sh script located elsewhere. This is a different script which shares the same name and is also present in the GitHub sources. The main GenerateProjectFiles.sh script at the engine root is actually a wrapper around this script.
$ /path/to/UnrealEngine/Engine/Build/BatchFiles/Linux/GenerateProjectFiles.sh \
    /path/to/MyProject/MyProject.uproject \
    -editor -game -makefile
Still, running the any of the above commands on a Blueprint project results in the following error:
$  /path/to/UnrealEngine/Engine/Build/BatchFiles/Linux/GenerateProjectFiles.sh \
    /path/to/MyBlueprintProject/MyBlueprintProject.uproject \
    -editor -game -makefile

Setting up Unreal Engine project files...

Setting up bundled DotNet SDK
Log file: /home/mamadou/.config/Epic/UnrealBuildTool/Log_GPF.txt
Project file formats specified via the command line will be ignored when generating
project files from the editor and other engine tools.

Consider setting your desired IDE from the editor preferences window, or modify your
BuildConfiguration.xml file with:

<?xml version="1.0" encoding="utf-8" ?>
<Configuration xmlns="https://www.unrealengine.com/BuildConfiguration">
  <ProjectFileGenerator>
    <Format>Make</Format>
  </ProjectFileGenerator>
</Configuration>


Generating Make project files:
Discovering modules, targets and source code for project...
Total execution time: 0.35 seconds
Directory '/path/to/MyBlueprintProject/MyBlueprintProject' is missing 'Source' folder.
For a C++ project, however, the project files will generate without any issues:
$ /path/to/UnrealEngine/Engine/Build/BatchFiles/Linux/GenerateProjectFiles.sh \
    /path/to/MyCppProject/MyCppProject.uproject \
    -editor -game -makefile

Setting up Unreal Engine project files...

Setting up bundled DotNet SDK
Log file: /home/mamadou/.config/Epic/UnrealBuildTool/Log_GPF.txt
Project file formats specified via the command line will be ignored when generating
project files from the editor and other engine tools.

Consider setting your desired IDE from the editor preferences window, or modify your
BuildConfiguration.xml file with:

<?xml version="1.0" encoding="utf-8" ?>
<Configuration xmlns="https://www.unrealengine.com/BuildConfiguration">
  <ProjectFileGenerator>
    <Format>Make</Format>
  </ProjectFileGenerator>
</Configuration>


Generating Make project files:
Discovering modules, targets and source code for project...
Generating data for project indexing... 100%

Generating QueryTargets data for editor...
Total execution time: 2.98 seconds
So, the workaround for Blueprint projects is to build the plugin inside a C++ project and then copy the Plugin/SenseGlove directory, which contains the built binary modules, to the corresponding directory in your Blueprint project.
$ /path/to/UnrealEngine/Engine/Build/BatchFiles/Linux/GenerateProjectFiles.sh \
    /path/to/MyCppProject/MyCppProject.uproject \
    -editor -game -makefile
$ make MyCppProjectEditor -C /path/to/MyCppProject/
$ cp -vr \
    /path/to/MyCppProject/Plugins/SenseGlove \
    /path/to/MyBlueprintProject/Plugins/
$ /path/to/UnrealEngine/Engine/Binaries/Linux/UnrealEditor \
    /path/to/MyBlueprintProject/MyBlueprintProject.uproject
Enabling The SenseGlove Unreal Engine Plugin and Veirfying the Plugin Version
Enabling the SenseGlove Unreal Engine Plugin is a very simple and straightforward procedure. Furthermore, checking which version of the plugin your project is using may sometimes come in handy, especially if you have multiple versions of the plugin installed on different engine versions or various projects.
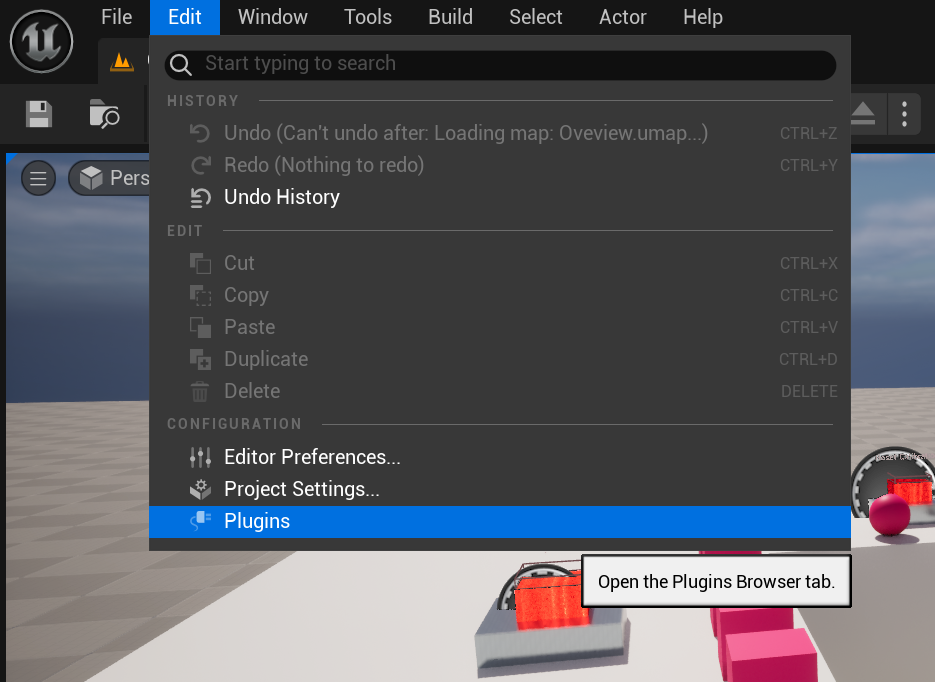
- Inside the Unreal Editor for your project, select the
Pluginsfrom theEditmenu.
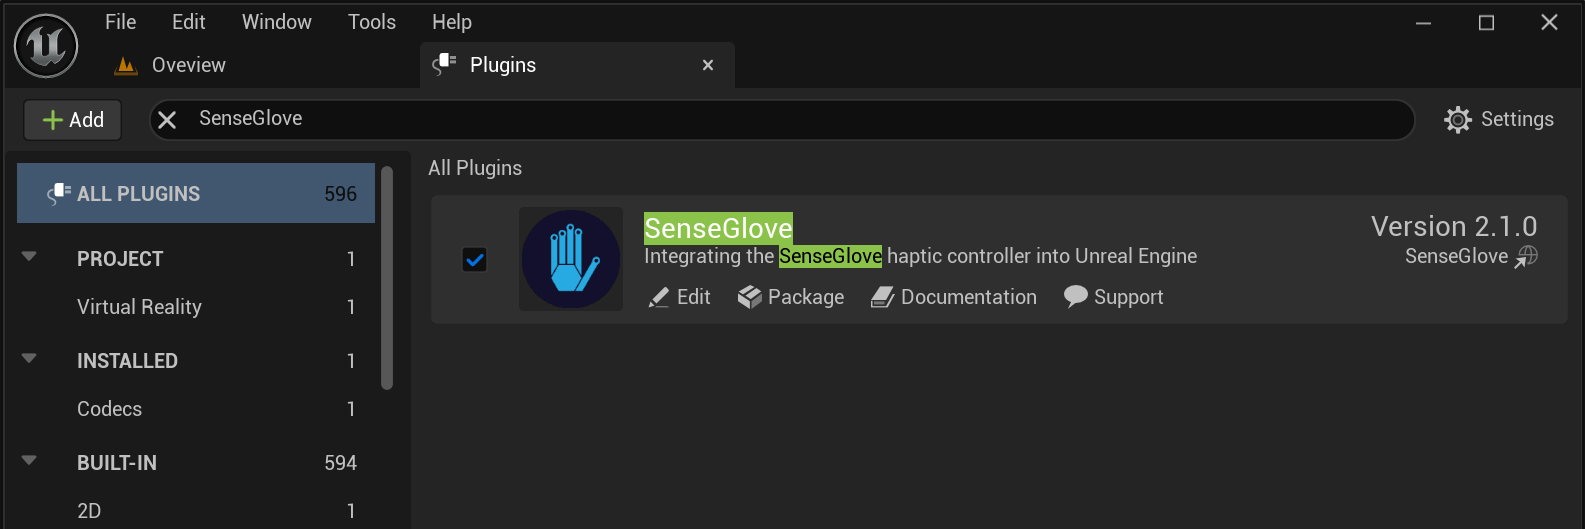
- Once the plugin window/tab is open, start typing
SenseGloveuntil you're able to spot the SenseGlove Unreal Engine Plugin. There you could find the plugin version, and other useful resources, such as the documentation website or support contact.
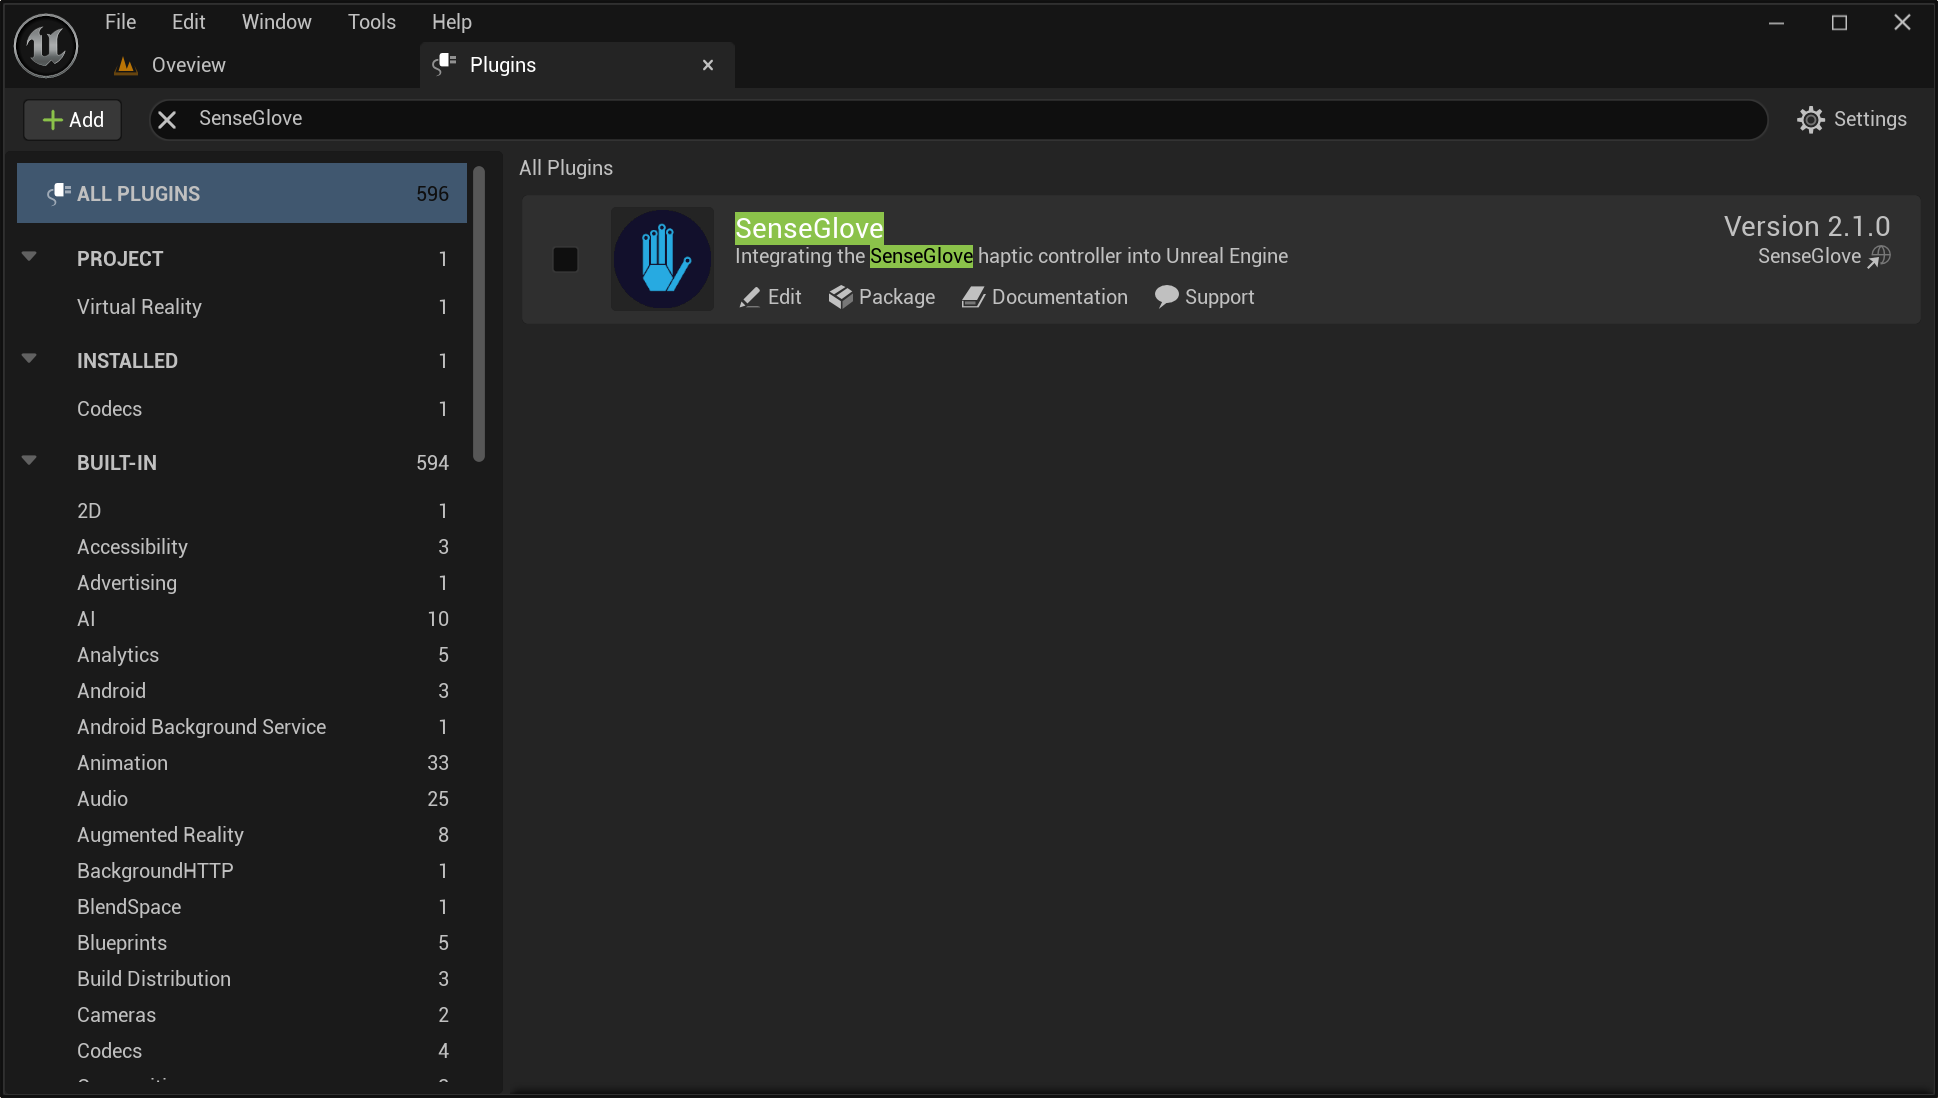
- If the plugin is not enabled, it does not have the checkmark next to it.
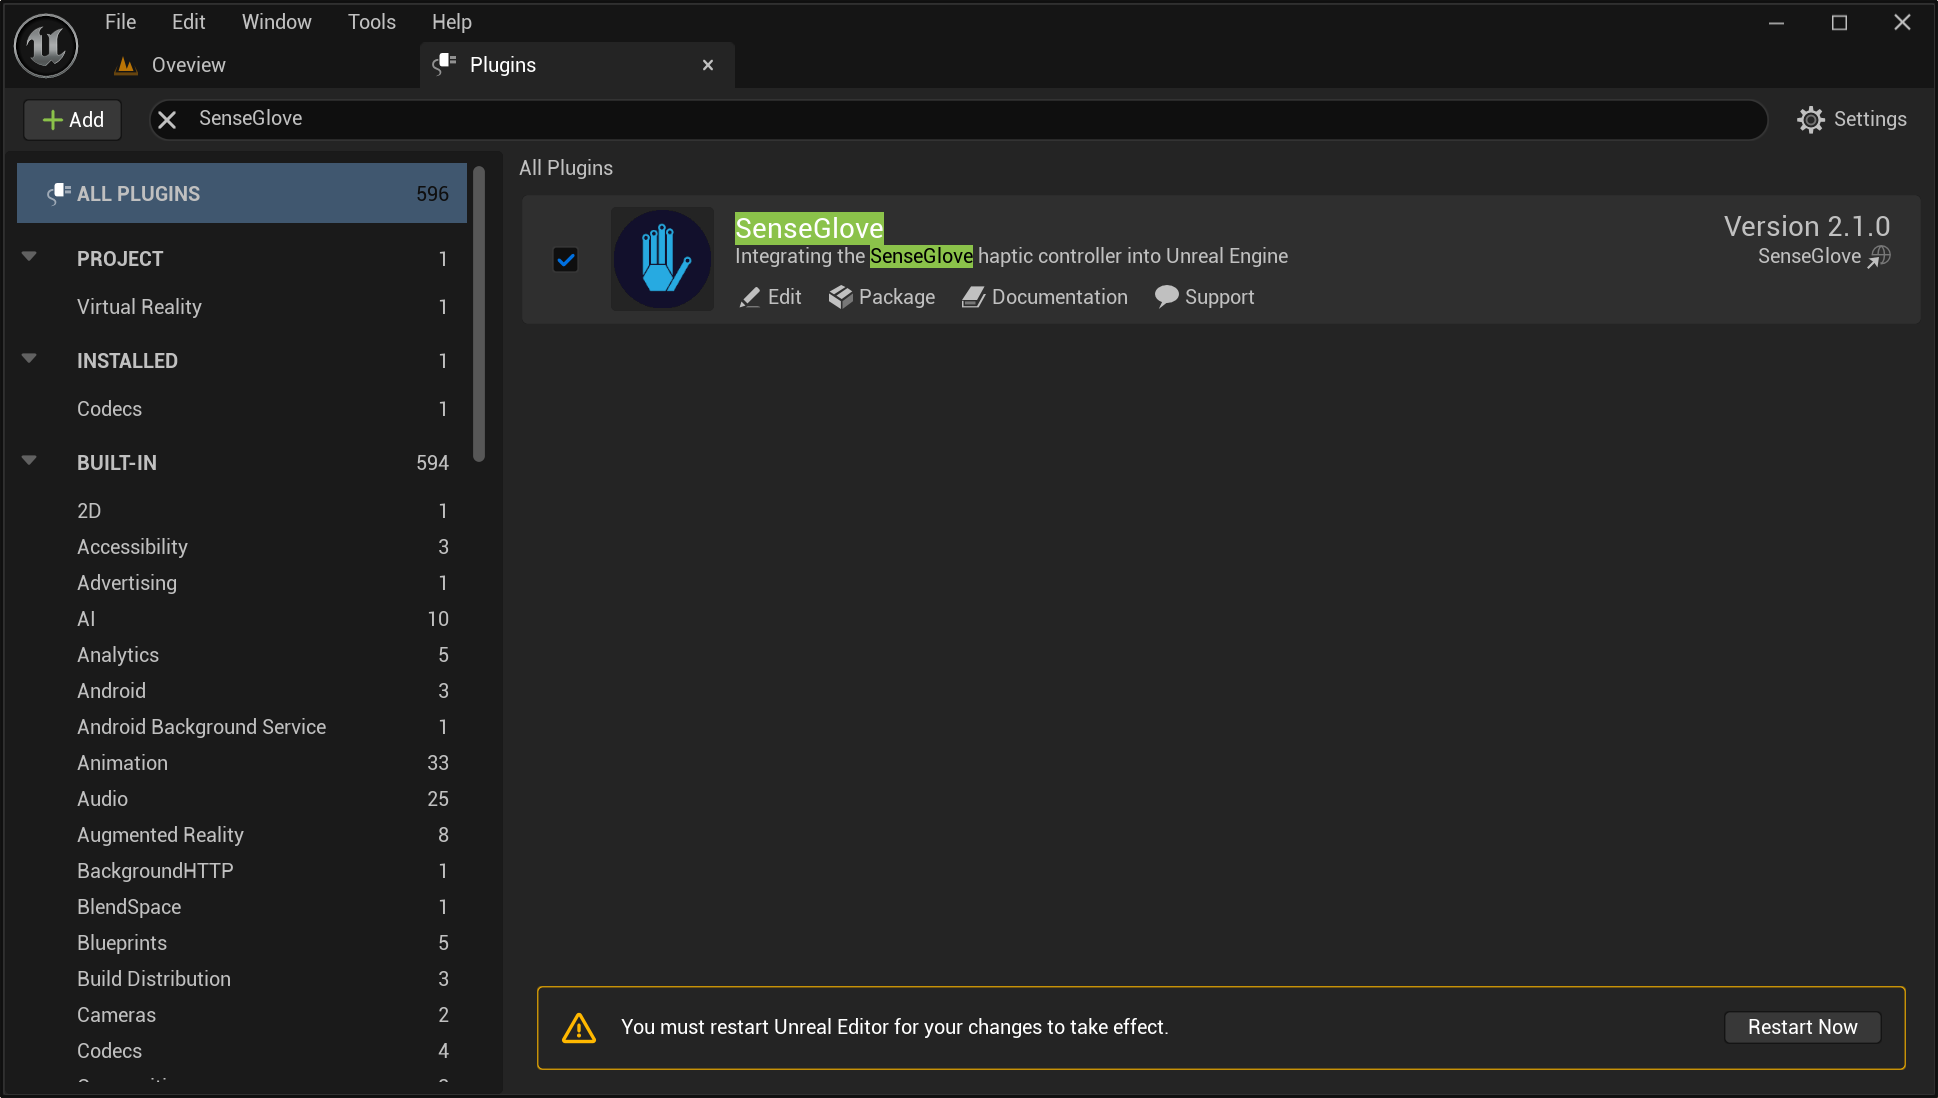
- It should be easy to click the checkmark and enable the plugin if that's not the case. Once the plugin is enabled, the Unreal Editor asks to be restarted. Click on the
Restart Nowbutton as this is mandatory to activate the plugin inside your project.
- The source code for the plugin might be required to be rebuilt depending on how you have obtained and installed the plugin, usually the Unreal Editor lets you know and does this automatically. If it's required to build the plugin source, and it fails to do so, it usually suggests an alternative approach such as opening your regenerating the project files and rebuilding the project inside a C++ IDE. Once this is done the Editor for your projects re-opens and you can follow steps
1and2in order to verify the plugin's version and availability inside your project.
Video Tutorial
A video demonstrating the same instructions in more detail is also available on the SenseGlove YouTube channel.
SenseCom
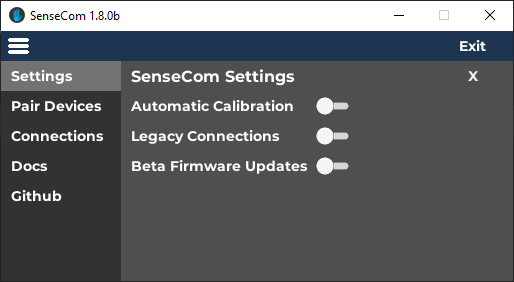
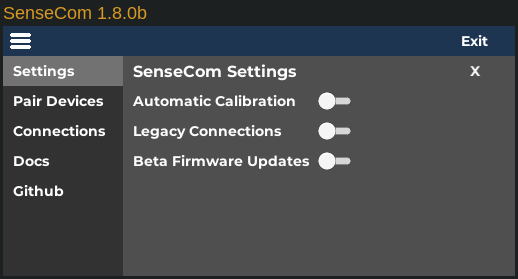
SenseCom (short for SenseGlove Communications) is a background program that runs alongside your Unreal Engine application. Its primary function is to discover, and connect to SenseGlove devices on your system, exchanging data with them, much like a "SteamVR for Haptic Gloves." The SenseGlove Unreal Engine Plugin relies on SenseCom to communicate with any SenseGlove hardware.
Communication between your application and the physical gloves are possible via either Bluetooth Low Energy (a.k.a. Bluetooth LE, colloquially BLE, formerly marketed as Bluetooth Smart), or Bluetooth Serial (a.k.a. BT Serial) depending on the type and model of your glove, or the firmware version.
Important
Some glove models support firmware upgrades from a Bluetooth Serial firmware to a BLE-compatible firmware version. For more information, refer to the relevant documentation here, as this topic is beyond the scope of this handbook.
Note
SenseCom is required only for communication on Windows or Linux. For standalone Android devices, the communication functionality is embedded directly into your application.
Note
For more detailed information and troubleshooting, consult the SenseCom documentation page on SGDocs, please.
SenseCom (Bluetooth Low Energy)
Up to SenseCom v1.7.x, the only supported Bluetooth protocol for communication was Bluetooth Serial. However, starting with the v1.8.x series, SenseCom introduced support for Bluetooth Low Energy, which is now the preferred method of communication.
Important
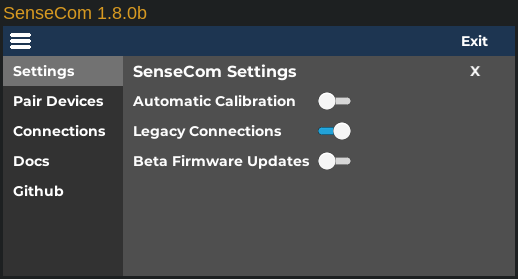
If SenseCom fails to recognize your gloves with Bluetooth Low Energy firmware, it may be because the
Legacy Connectionsoption is enabled. In that case SenseCom is only able to discover gloves with a Bluetooth Serial firmware. Enabling this option should allow SenseCom to discover and connect to your glove.
Important
Some glove models support firmware upgrades from a Bluetooth Serial firmware to a BLE-compatible firmware version. For more information, refer to the relevant documentation here, as this topic is beyond the scope of this handbook.
SenseCom on Android (Bluetooth Low Energy)
Unlike PCVR-mode on Windows or Linux, there's no separate SenseCom application available for Standalone-mode on Android; instead, the communication functionality is integrated into your application.
As a result, in Standalone-mode, unlike PCVR-mode where BLE gloves do not require pairing at the operating system level and connections are managed by SenseCom, you need to pair your desired gloves through your operating system's Bluetooth settings before launching any applications that rely on the SenseGlove Unreal Engine Plugin. These instructions vary depending on the vendor and model of your Head-Mounted Display device. Please refer to the official documentation for detailed instructions:
- Meta Quest: Connect a compatible Bluetooth device to Meta Quest headsets
- HTC VIVE: Pairing Bluetooth devices
If you are using a different kind of HMD, ensure you consult the vendor-specific instructions to properly pair your gloves with your HMD of choice in Standalone-mode.
SenseCom on GNU/Linux (Bluetooth Low Energy)
Follow these steps to quickly set up and run SenseCom on GNU/Linux:
- First, obtain the SenseCom binaries from its GitHub repository.
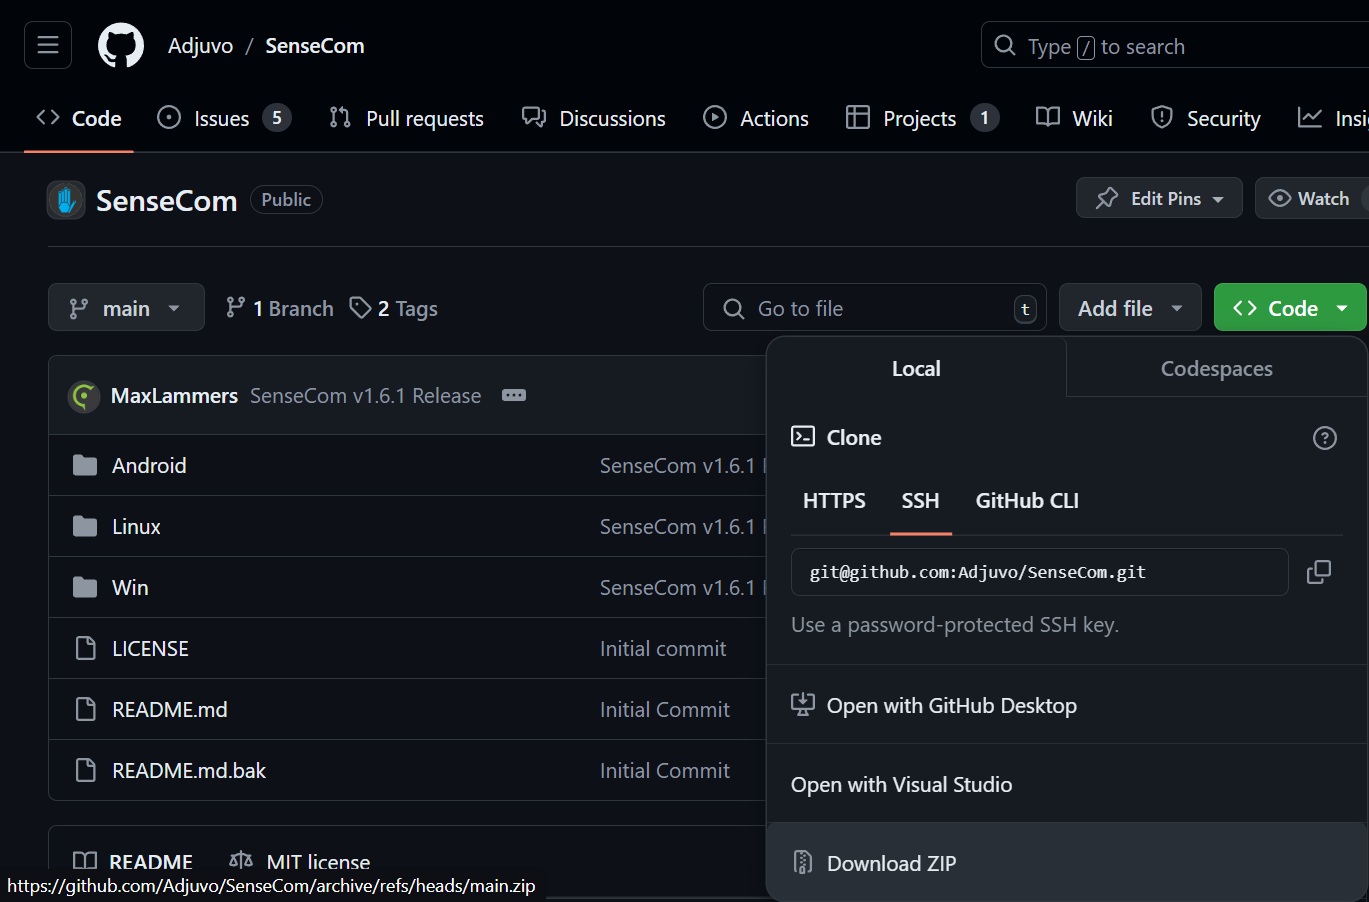
- Extract the SenseCom
.zipfile to a location on your computer.
$ unzip SenseCom-main.zip -d /some/path/
- Navigate to the
SenseCom_Linux_Latestfolder containing the SenseCom binaries for GNU/Linux:
$ cd /some/path/SenseCom-main/Linux/SenseCom_Linux_Latest/
- List the files and check the executable permissions for the main SenseCom binary,
SenseCom.x86_64:
$ ls -ahl

total 20M
drwxr-xr-x 3 mamadou mamadou   5 Apr 10 11:24 .
drwxr-xr-x 3 mamadou mamadou   5 Apr 10 11:24 ..
drwxr-xr-x 7 mamadou mamadou  34 Apr 10 11:24 SenseCom_Data
-rw-r--r-- 1 mamadou mamadou 15K Apr 10 11:24 SenseCom.x86_64
-rw-r--r-- 1 mamadou mamadou 33M Apr 10 11:24 UnityPlayer.so
- As seen above the
SenseCom.x86_64binary does not have the executable permission. Run the following command to set the executable permission for all users:
$ chmod a+x SenseCom.x86_64
- Veirfy the executable permission has been set on
SenseCom.x86_64:
$ ls -l SenseCom.x86_64

-rwxr-xr-x 1 mamadou mamadou 14720 Apr 10 11:24 SenseCom.x86_64
-
Make sure the glove is powered on.
-
Time to run the SenseCom executable:
$ ./SenseCom.x86_64

[UnityMemory] Configuration Parameters - Can be set up in boot.config
    "memorysetup-bucket-allocator-granularity=16"
    "memorysetup-bucket-allocator-bucket-count=8"
    "memorysetup-bucket-allocator-block-size=4194304"
    "memorysetup-bucket-allocator-block-count=1"
    "memorysetup-main-allocator-block-size=16777216"
    "memorysetup-thread-allocator-block-size=16777216"
    "memorysetup-gfx-main-allocator-block-size=16777216"
    "memorysetup-gfx-thread-allocator-block-size=16777216"
    "memorysetup-cache-allocator-block-size=4194304"
    "memorysetup-typetree-allocator-block-size=2097152"
    "memorysetup-profiler-bucket-allocator-granularity=16"
    "memorysetup-profiler-bucket-allocator-bucket-count=8"
    "memorysetup-profiler-bucket-allocator-block-size=4194304"
    "memorysetup-profiler-bucket-allocator-block-count=1"
    "memorysetup-profiler-allocator-block-size=16777216"
    "memorysetup-profiler-editor-allocator-block-size=1048576"
    "memorysetup-temp-allocator-size-main=4194304"
    "memorysetup-job-temp-allocator-block-size=2097152"
    "memorysetup-job-temp-allocator-block-size-background=1048576"
    "memorysetup-job-temp-allocator-reduction-small-platforms=262144"
    "memorysetup-temp-allocator-size-background-worker=32768"
    "memorysetup-temp-allocator-size-job-worker=262144"
    "memorysetup-temp-allocator-size-preload-manager=262144"
    "memorysetup-temp-allocator-size-nav-mesh-worker=65536"
    "memorysetup-temp-allocator-size-audio-worker=65536"
    "memorysetup-temp-allocator-size-cloud-worker=32768"
    "memorysetup-temp-allocator-size-gfx=262144"
Loading in SingleInstance mode
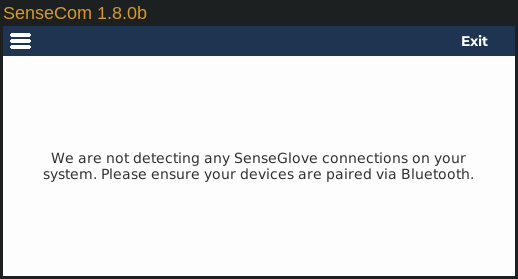
- After running SenseCom, it will not automatically connect to your gloves unless you have already paired them. To pair your devices, navigate to the hamburger menu and select
Pair Devices.
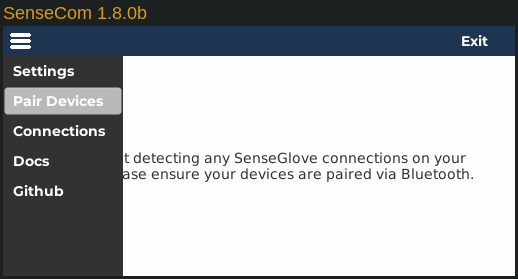
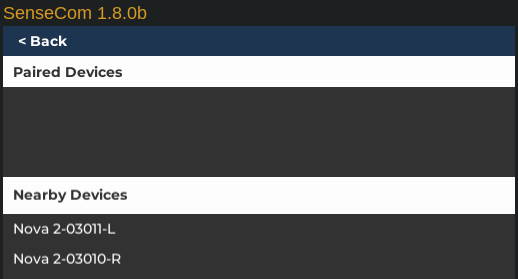
- Once inside the
Pair Devicessection, in case your gloves are already turned on, you should be able to spot them inside theNearby Deviceslist.
Important
If SenseCom fails to recognize your gloves with Bluetooth Low Energy firmware, it may be because the
Legacy Connectionsoption is enabled. In that case SenseCom is only able to discover gloves with a Bluetooth Serial firmware. Enabling this option should allow SenseCom to discover and connect to your glove.
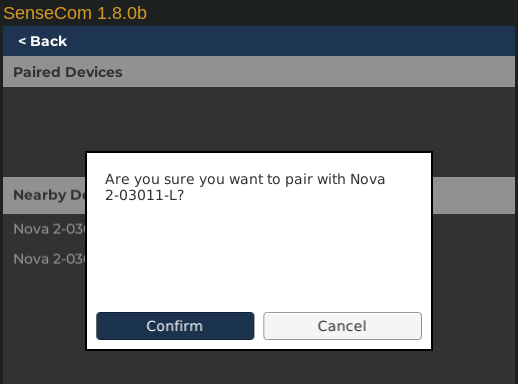
- Clicking on any glove within the
Nearby Deviceslist will prompt a pairing confirmation. If this is the desired glove you wish to pair, proceed by clicking theConfirmbutton.
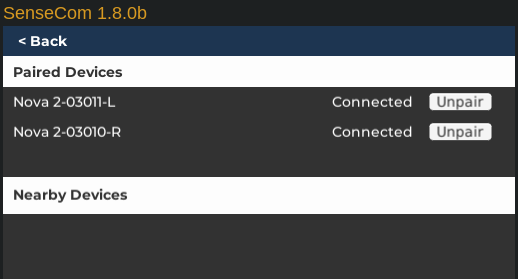
- After pairing all gloves, you can return to the main SenseCom window by pressing the
< Backbutton. If needed, you can always revisit thePaired Deviceslist to unpair any gloves.
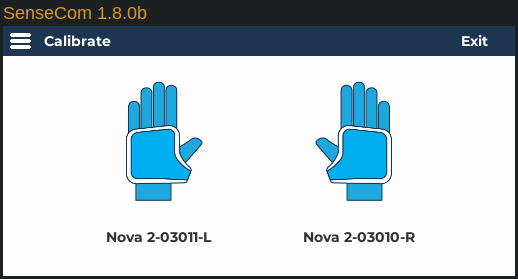
- If you have followed all the steps correctly, upon returning to the main SenseCom window, you should see that your gloves are connected
SenseCom on Microsoft Windows (Bluetooth Low Energy)
Follow these steps to quickly set up and run SenseCom on Microsoft Windows:
- First, obtain the SenseCom binaries from its GitHub repository.

-
Extract the SenseCom
.zipfile to a location on your computer after downloading it. -
Ensure any glove you would like to pair with and connect to your system is not paired, or connected to any other device, such as another PC or VR headset.
-
Make sure the glove is powered on.
-
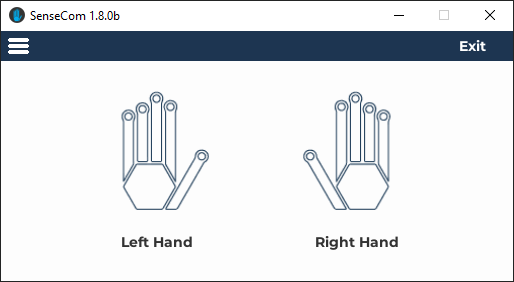
Now, it's time to run SenseCom. Navigate to the folder where you extracted SenseCom and go to
/path/to/extracted/SenseCom/directory/Win/SenseCom_Win_Latest, and then run the executableSenseCom.exe.
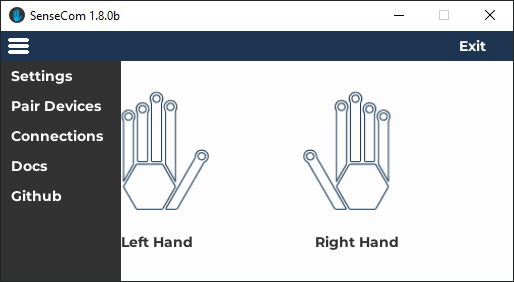
- After running SenseCom, it will not automatically connect to your gloves unless you have already paired them. To pair your devices, navigate to the hamburger menu and select
Pair Devices.
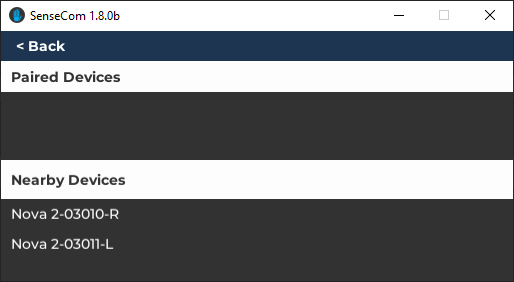
- Once inside the
Pair Devicessection, in case your gloves are already turned on, you should be able to spot them inside theNearby Deviceslist.
Important
If SenseCom fails to recognize your gloves with Bluetooth Low Energy firmware, it may be because the
Legacy Connectionsoption is enabled. In that case SenseCom is only able to discover gloves with a Bluetooth Serial firmware. Enabling this option should allow SenseCom to discover and connect to your glove.
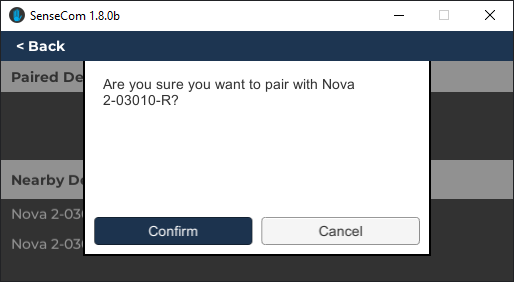
- Clicking on any glove within the
Nearby Deviceslist will prompt a pairing confirmation. If this is the desired glove you wish to pair, proceed by clicking theConfirmbutton.
- After pairing all gloves, you can return to the main SenseCom window by pressing the
< Backbutton. If needed, you can always revisit thePaired Deviceslist to unpair any gloves.
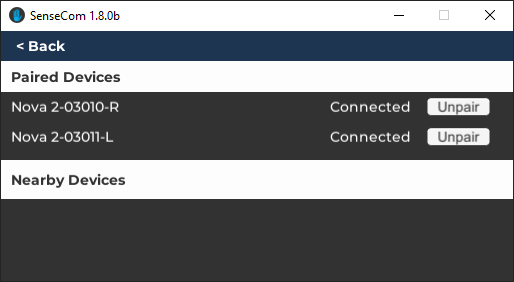
- If you have followed all the steps correctly, upon returning to the main SenseCom window, you should see that your gloves are connected
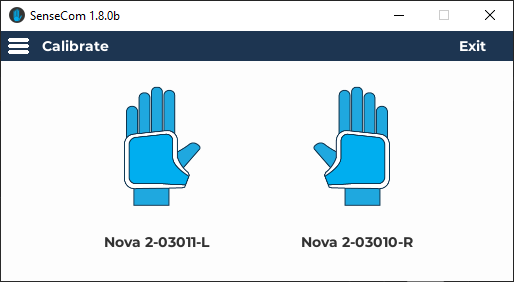
SenseCom (Bluetooth Serial)
Up to SenseCom v1.7.x, the only supported Bluetooth protocol for communication was Bluetooth Serial. However, starting with the v1.8.x series, SenseCom introduced support for Bluetooth Low Energy, which is now the preferred method of communication.
Important
If you are using SenseCom
v1.8.x+and it fails to recognize your gloves with a Bluetooth Serial firmware, it may be because theLegacy Connectionsoption is disabled, which is the default. Enabling this option should allow SenseCom to discover and connect to your glove.
Important
Some glove models support firmware upgrades from a Bluetooth Serial firmware to a BLE-compatible firmware version. For more information, refer to the relevant documentation here, as this topic is beyond the scope of this handbook.
SenseCom on Android (Bluetooth Serial)
Unlike PCVR-mode on Windows or Linux, there's no separate SenseCom application available for Standalone-mode on Android; instead, the communication functionality is integrated into your application.
As a result, you need to pair your desired gloves through your operating system's Bluetooth settings before launching any applications that rely on the SenseGlove Unreal Engine Plugin. These instructions vary depending on the vendor and model of your Head-Mounted Display device. Please refer to the official documentation for detailed instructions:
- Meta Quest: Connect a compatible Bluetooth device to Meta Quest headsets
- HTC VIVE: Pairing Bluetooth devices
If you are using a different kind of HMD, ensure you consult the vendor-specific instructions to properly pair your gloves with your HMD of choice in Standalone-mode.
SenseCom on GNU/Linux (Bluetooth Serial)
Follow these steps to quickly set up and run SenseCom on GNU/Linux:
- First, obtain the SenseCom binaries from its GitHub repository.

- Extract the SenseCom
.zipfile to a location on your computer.
$ unzip SenseCom-main.zip -d /some/path/
- Navigate to the
SenseCom_Linux_Latestfolder containing the SenseCom binaries for GNU/Linux:
$ cd /some/path/SenseCom-main/Linux/SenseCom_Linux_Latest/
- List the files and check the executable permissions for the main SenseCom binary,
SenseCom.x86_64:
$ ls -ahl

total 20M
drwxr-xr-x 3 mamadou mamadou   5 Apr 10 11:24 .
drwxr-xr-x 3 mamadou mamadou   5 Apr 10 11:24 ..
drwxr-xr-x 7 mamadou mamadou  34 Apr 10 11:24 SenseCom_Data
-rw-r--r-- 1 mamadou mamadou 15K Apr 10 11:24 SenseCom.x86_64
-rw-r--r-- 1 mamadou mamadou 33M Apr 10 11:24 UnityPlayer.so
- As seen above the
SenseCom.x86_64binary does not have the executable permission. Run the following command to set the executable permission for all users:
$ chmod a+x SenseCom.x86_64
- Veirfy the executable permission has been set on
SenseCom.x86_64:
$ ls -l SenseCom.x86_64

-rwxr-xr-x 1 mamadou mamadou 14720 Apr 10 11:24 SenseCom.x86_64
- Time to run the SenseCom executable:
$ ./SenseCom.x86_64

[UnityMemory] Configuration Parameters - Can be set up in boot.config
    "memorysetup-bucket-allocator-granularity=16"
    "memorysetup-bucket-allocator-bucket-count=8"
    "memorysetup-bucket-allocator-block-size=4194304"
    "memorysetup-bucket-allocator-block-count=1"
    "memorysetup-main-allocator-block-size=16777216"
    "memorysetup-thread-allocator-block-size=16777216"
    "memorysetup-gfx-main-allocator-block-size=16777216"
    "memorysetup-gfx-thread-allocator-block-size=16777216"
    "memorysetup-cache-allocator-block-size=4194304"
    "memorysetup-typetree-allocator-block-size=2097152"
    "memorysetup-profiler-bucket-allocator-granularity=16"
    "memorysetup-profiler-bucket-allocator-bucket-count=8"
    "memorysetup-profiler-bucket-allocator-block-size=4194304"
    "memorysetup-profiler-bucket-allocator-block-count=1"
    "memorysetup-profiler-allocator-block-size=16777216"
    "memorysetup-profiler-editor-allocator-block-size=1048576"
    "memorysetup-temp-allocator-size-main=4194304"
    "memorysetup-job-temp-allocator-block-size=2097152"
    "memorysetup-job-temp-allocator-block-size-background=1048576"
    "memorysetup-job-temp-allocator-reduction-small-platforms=262144"
    "memorysetup-temp-allocator-size-background-worker=32768"
    "memorysetup-temp-allocator-size-job-worker=262144"
    "memorysetup-temp-allocator-size-preload-manager=262144"
    "memorysetup-temp-allocator-size-nav-mesh-worker=65536"
    "memorysetup-temp-allocator-size-audio-worker=65536"
    "memorysetup-temp-allocator-size-cloud-worker=32768"
    "memorysetup-temp-allocator-size-gfx=262144"
Loading in SingleInstance mode
- If you have already paired any glove with your system, SenseCom should recognize and connect to your glove(s) shortly. If not, please follow the instructions on How to connect to Nova gloves using Blueman Bluetooth Manager or How to connect to Nova gloves using Command-line.
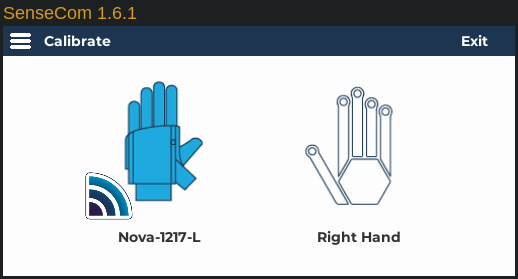
Important
If you are using SenseCom
v1.8.x+and it fails to recognize your gloves with a Bluetooth Serial firmware, it may be because theLegacy Connectionsoption is disabled, which is the default. Enabling this option should allow SenseCom to discover and connect to your glove.
Note
For more detailed information and troubleshooting, consult the SenseCom documentation page on SGDocs, please.
Connect to Nova gloves using Blueman Bluetooth Manager (Bluetooth Serial)
Follow these steps to pair a Nova glove with your PC on GNU/Linux usng the Blueman Bluetooth Manager:
- Install Blueman Bluetooth Manager on your Linux distribution using the appropriate package manager:
# Gentoo
$ emerge -atuv net-wireless/blueman

# Arch, Manjaro
$ sudo pacman -S blueman

# CentOS, Fedora, AlmaLinux, Rocky Linux
$ sudo dnf install blueman

# CentOS/RHEL
$ sudo yum install epel-release
$ sudo yum install blueman

# Debian, Ubuntu
$ sudo apt install blueman

# openSUSE
sudo zypper install blueman

# Solus
$ sudo eopkg install blueman

# Void Linux
$ sudo xbps-install -S blueman
Important
To properly set up the Bluetooth stack on your Linux distribution, additional steps may be required. For example, on Gentoo and Arch consult each distribution's official guide.
-
Ensure any glove you would like to pair with and connect to your system is not paired, or connected to any other device, such as another PC or VR headset.
-
Make sure the glove is turned on.
-
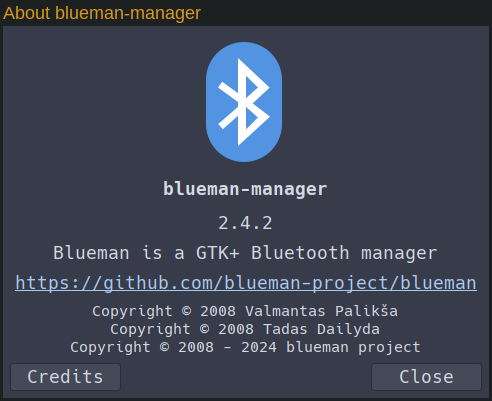
Start the Blueman Bluetooth Manager and verify you have a recent version installed by selecting
Help > Aboutfrom the application's menu.
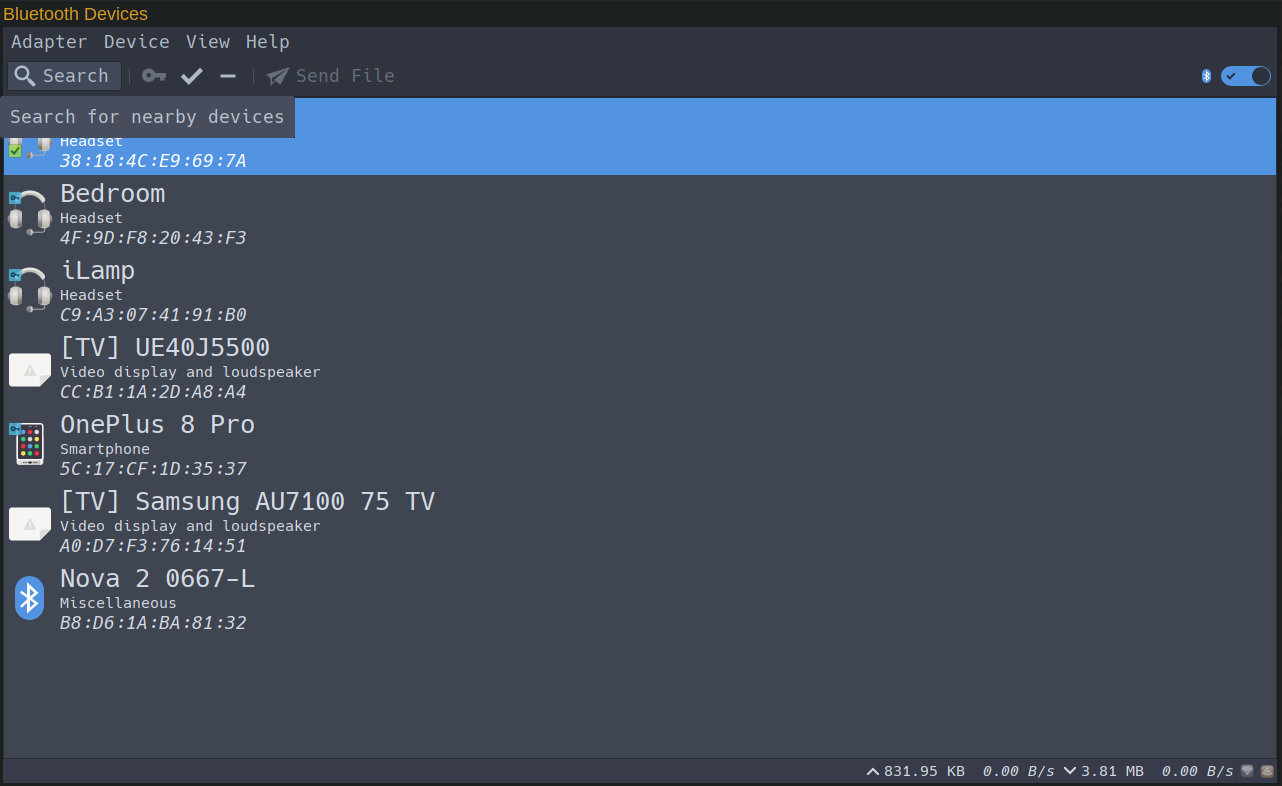
- If you don't see your glove, click the
Searchbutton on the toolbar or selectAdapter > Searchfrom the application's menu to look for new Bluetooth devices.
Important
Before starting the search operation, ensure that your PC's Bluetooth controller is turned on by verifying its status on the right side of the toolbar next to the Bluetooth logo. If disabled, the Search button will be grayed out.
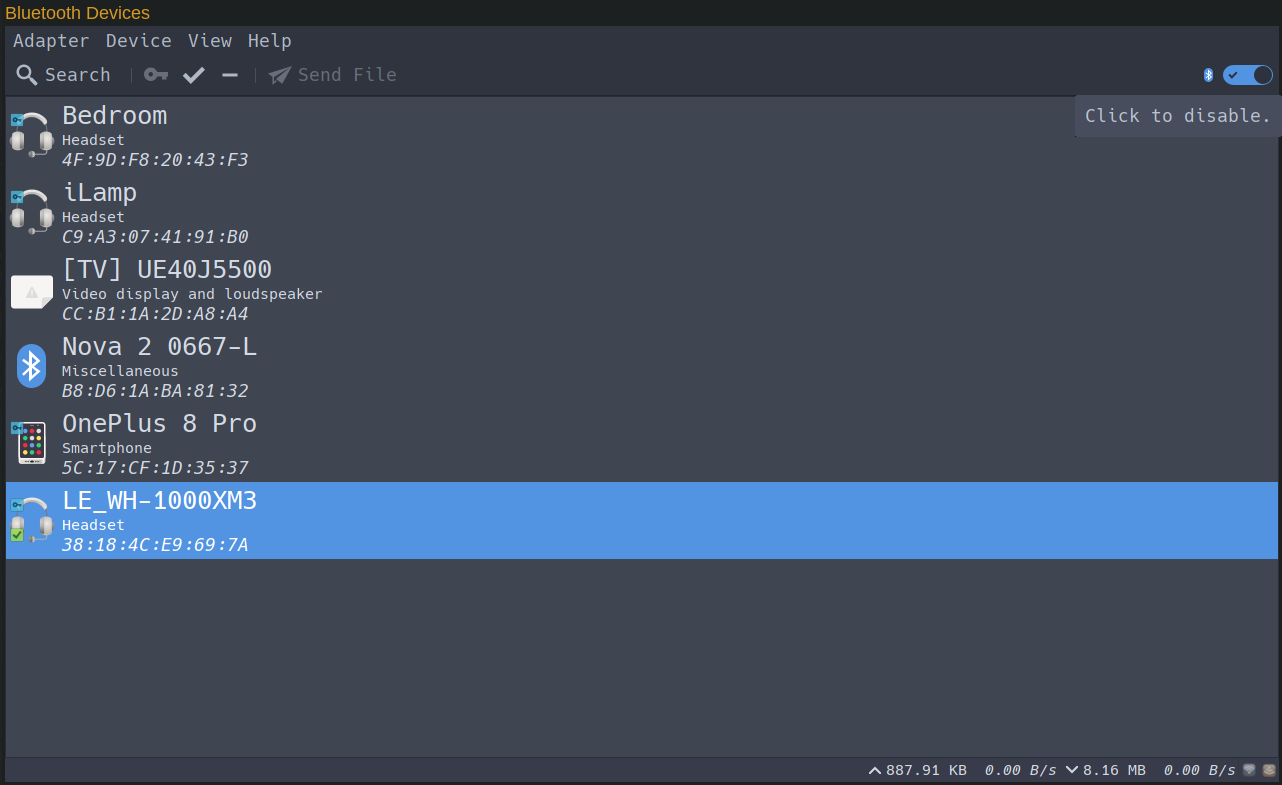
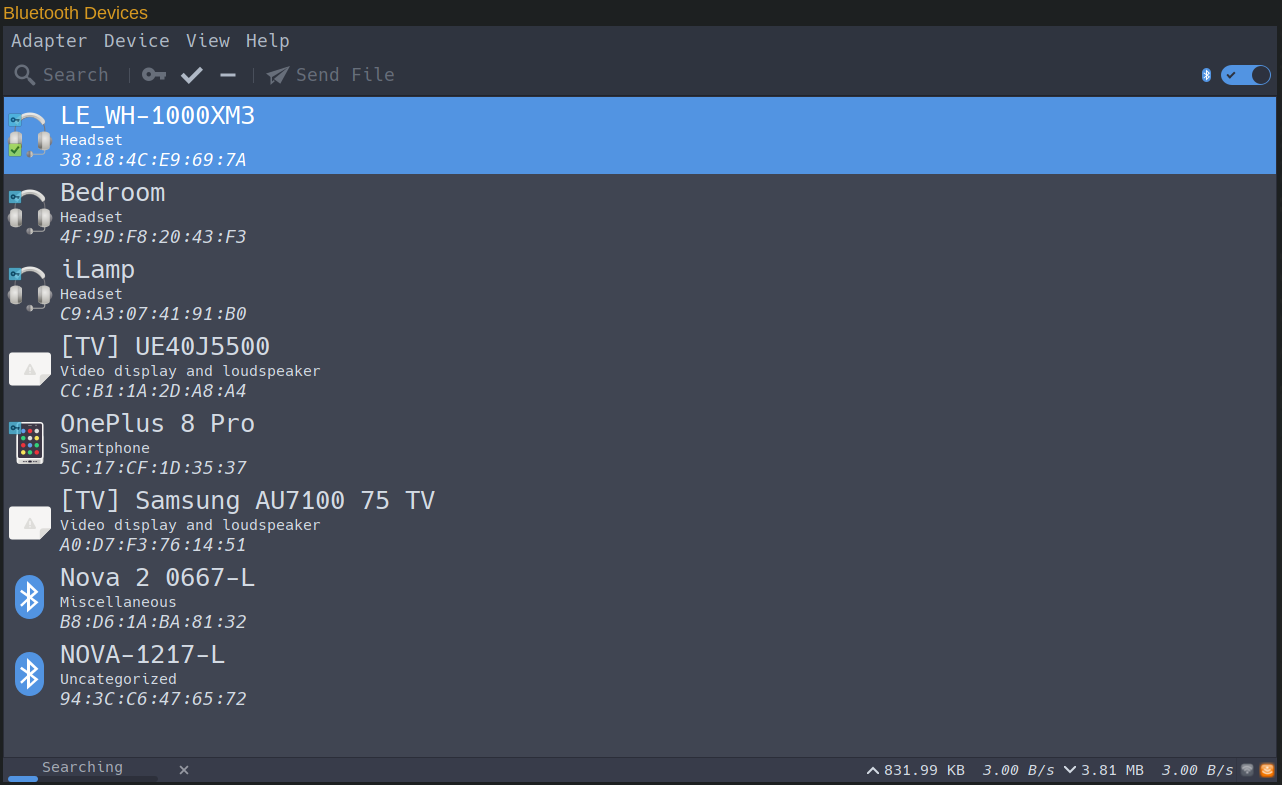
- A progress bar will appear on the application's status bar. If a new device is found, it will be listed in the main device list area.
-
Once the glove is found, click on it to select it.
-
Either right-click on the device, or go to the
Devicemenu, then choosePair. -
Blueman will prompt you to pair the glove with a notification. Click
Confirmto proceed.
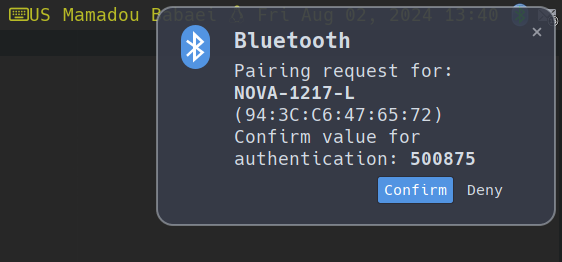
-
After pairing, either right-click on the device again, or go to the
Devicemenu, then chooseTrust. -
If everything has been successful, the key icon indicates successful pairing, and the checkmark confirms the device is trusted.
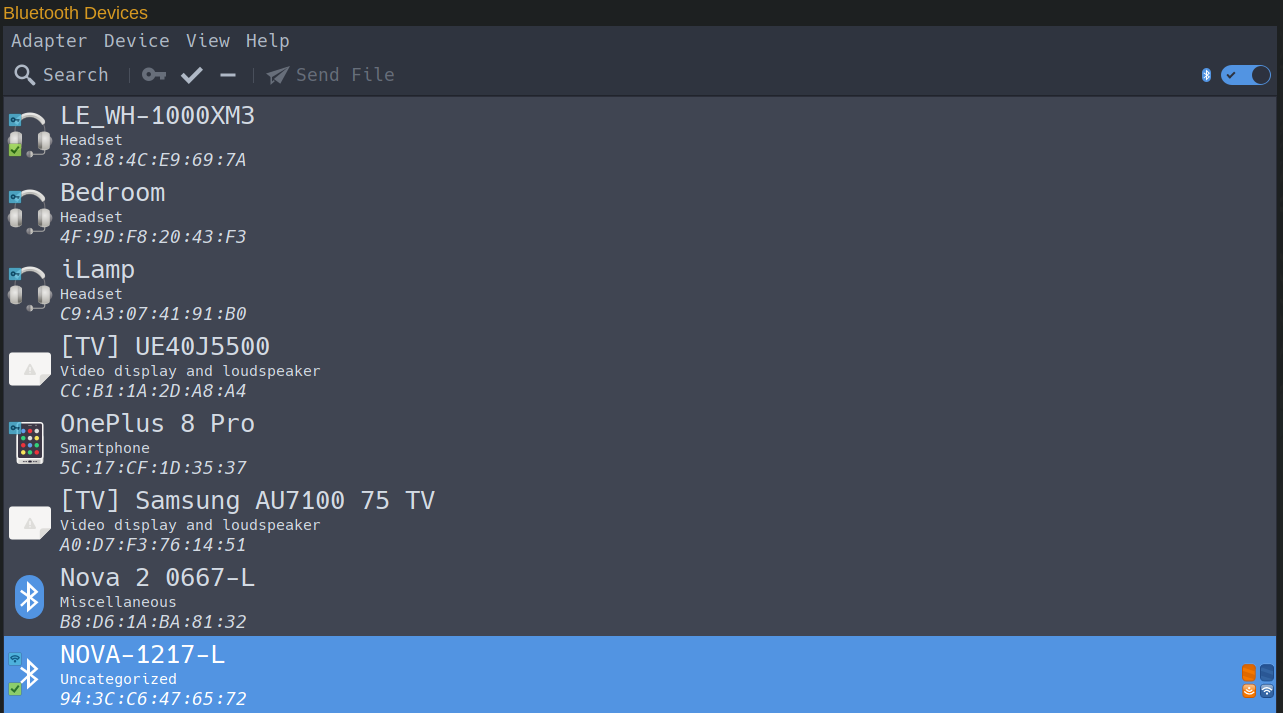
- Follow the SenseCom on GNU/Linux instructions and you should be able to successfully connect to the newly paired glove from SenseCom.
Video Tutorial
There is also a video tutorial demonstrating how to connect to Nova gloves on GNU/Linux using Blueman Bluetooth Manager.
Connect to Nova gloves using Command-line (Bluetooth Serial)
Follow these steps to pair a Nova glove to your PC on GNU/Linux usng command-line and Bluez:
- Some Linux distributions include BlueZ in their default installation. If yours doesn't, install it using the appropriate package manager:
# Gentoo
$ emerge -atuv net-wireless/bluez

# Arch, Manjaro
$ sudo pacman -S bluez

# CentOS, Fedora, AlmaLinux, Rocky Linux
$ sudo dnf install bluez

# CentOS/RHEL
$ sudo yum install bluez

# Debian, Ubuntu
$ sudo apt install bluez

# openSUSE
sudo zypper install bluez

# Solus
$ sudo eopkg install bluez

# Void Linux
$ sudo xbps-install -S bluez
Important
To properly set up the Bluetooth stack on your Linux distribution, additional steps may be required. For example, on Gentoo and Arch consult each distribution's official guide.
- Run the following command to ensure that BlueZ is installed and check your
bluetoothctlversion:
bluetoothctl version
Version 5.77
- Ensure that the
bluetoothservice is started and running. For example, on Gentoo Linux:
$ rc-service bluetooth start
You might see one of these outputs based on whether it's already running or not:
 * Starting bluetooth ...
# or
 * WARNING: bluetooth has already been started
-
Ensure any glove you would like to pair with and connect to your system is not paired, or connected to any other device, such as another PC or VR headset.
-
Make sure the glove is turned on.
-
Use
bluetoothctl listorbluetoothctl showcommand to extract your PC's Bluetooth Controller MAC Address which is useful for later on:
$ bluetoothctl list

Controller CC:15:31:90:69:87 BlueZ 5.77 [default]

$ bluetoothctl show
Controller CC:15:31:90:69:87 (public)
	Manufacturer: 0x0002 (2)
	Version: 0x0b (11)
	Name: BlueZ 5.77
	Alias: BlueZ 5.77
	Class: 0x007c010c (8126732)
	Powered: yes
	PowerState: on
	Discoverable: no
	DiscoverableTimeout: 0x0000003c (60)
	Pairable: no
	UUID: Message Notification Se.. (00001133-0000-1000-8000-00805f9b34fb)
	UUID: A/V Remote Control        (0000110e-0000-1000-8000-00805f9b34fb)
	UUID: OBEX Object Push          (00001105-0000-1000-8000-00805f9b34fb)
	UUID: Message Access Server     (00001132-0000-1000-8000-00805f9b34fb)
	UUID: PnP Information           (00001200-0000-1000-8000-00805f9b34fb)
	UUID: IrMC Sync                 (00001104-0000-1000-8000-00805f9b34fb)
	UUID: Headset                   (00001108-0000-1000-8000-00805f9b34fb)
	UUID: A/V Remote Control Target (0000110c-0000-1000-8000-00805f9b34fb)
	UUID: Generic Attribute Profile (00001801-0000-1000-8000-00805f9b34fb)
	UUID: Phonebook Access Server   (0000112f-0000-1000-8000-00805f9b34fb)
	UUID: Audio Sink                (0000110b-0000-1000-8000-00805f9b34fb)
	UUID: Device Information        (0000180a-0000-1000-8000-00805f9b34fb)
	UUID: Generic Access Profile    (00001800-0000-1000-8000-00805f9b34fb)
	UUID: Handsfree Audio Gateway   (0000111f-0000-1000-8000-00805f9b34fb)
	UUID: Audio Source              (0000110a-0000-1000-8000-00805f9b34fb)
	UUID: OBEX File Transfer        (00001106-0000-1000-8000-00805f9b34fb)
	Modalias: usb:v1D6Bp0246d054D
	Discovering: no
	Roles: central
	Roles: peripheral
Advertising Features:
	ActiveInstances: 0x00 (0)
	SupportedInstances: 0x0c (12)
	SupportedIncludes: tx-power
	SupportedIncludes: appearance
	SupportedIncludes: local-name
	SupportedSecondaryChannels: 1M
	SupportedSecondaryChannels: 2M
	SupportedCapabilities.MinTxPower: 0xffffffde (-34)
	SupportedCapabilities.MaxTxPower: 0x0007 (7)
	SupportedCapabilities.MaxAdvLen: 0xfb (251)
	SupportedCapabilities.MaxScnRspLen: 0xfb (251)
	SupportedFeatures: CanSetTxPower
	SupportedFeatures: HardwareOffload
- Ensure the controller is powered on:
$ bluetoothctl power on

Changing power on succeeded
- Enable the agent to listen for Bluetooth events that require user interaction, such as pairing requests and managing device authorizations:
$ bluetoothctl agent on
- Set the current agent as the default agent:
$ bluetoothctl default-agent

No agent is registered
- Set the controller to be discoverable for
180seconds:
$ bluetoothctl discoverable on

bluetoothctl discoverable on
hci0 new_settings: powered connectable ssp br/edr le secure-conn wide-band-speech
hci0 new_settings: powered connectable discoverable ssp br/edr le secure-conn wide-band-speech
Changing discoverable on succeeded
Note
To change the default discoverable timeout, you can set it manually using the
bluetoothctl discoverable-timeoutcommand.
$ bluetoothctl discoverable-timeout 300

Changing discoverable-timeout 300 succeeded
- Then, make the controller pairable as well:
$ bluetoothctl pairable on

hci0 new_settings: powered connectable discoverable bondable ssp br/edr le secure-conn wide-band-speech
Changing pairable on succeeded
- Begin scanning for devices:
$ bluetoothctl scan on

SetDiscoveryFilter success
- After a few seconds, list the discovered devices:
bluetoothctl devices
Device 78:D2:52:42:33:2F 78-D2-52-42-33-2F
Device 94:3C:C6:47:65:72 NOVA-1217-L
Device AC:F1:08:37:9F:93 LG DSN7CY(93)
Device 70:D6:10:9D:73:8F 70-D6-10-9D-73-8F
Device 7F:2C:8C:8D:09:9F 7F-2C-8C-8D-09-9F
Device F9:56:4B:86:1E:13 F9-56-4B-86-1E-13
Device C9:A3:07:41:91:B0 iLamp
Device 4F:9D:F8:20:43:F3 Bedroom
Device CC:B1:1A:2D:A8:A4 [TV] UE40J5500
Device A0:D7:F3:76:14:51 [TV] Samsung AU7100 75 TV
Device 5C:17:CF:1D:35:37 OnePlus 8 Pro
Device E2:F8:03:F6:D8:CB E2-F8-03-F6-D8-CB
Device 38:18:4C:E9:69:7A LE_WH-1000XM3
Device B8:D6:1A:BA:81:32 Nova 2 0667-L
Note
If your device is not listed yet, you can run this command multiple times as
bluetoothctlcontinues the device discovery in the background.
- Use the following command to pair with the discoved glove:
$ bluetoothctl pair GLOVE_MAC_ADDRESS
For example:
$ bluetoothctl pair 94:3C:C6:47:65:72

Attempting to pair with 94:3C:C6:47:65:72
[CHG] Device 94:3C:C6:47:65:72 Connected: yes
[CHG] Device 94:3C:C6:47:65:72 Bonded: yes
[CHG] Device 94:3C:C6:47:65:72 UUIDs: 00001101-0000-1000-8000-00805f9b34fb
[CHG] Device 94:3C:C6:47:65:72 ServicesResolved: yes
[CHG] Device 94:3C:C6:47:65:72 Paired: yes
Pairing successful
Note
If you encounter the
Failed to pair: org.bluez.Error.AuthenticationFailederror message, it might be misleading. Check if there is a line with the glove's MAC address followed byConnected: yes, which indicates that the connection was actually successful.
Attempting to pair with 94:3C:C6:47:65:72
[CHG] Device 94:3C:C6:47:65:72 Connected: yes
Failed to pair: org.bluez.Error.AuthenticationFailed
- Mark the device as trusted by issuing the following command:
$ bluetoothctl trust GLOVE_MAC_ADDRESS
For example:
$ bluetoothctl trust 94:3C:C6:47:65:72

[CHG] Device 94:3C:C6:47:65:72 Trusted: yes
Changing 94:3C:C6:47:65:72 trust succeeded
- Attempt to connect to the glove again:
$ bluetoothctl connect GLOVE_MAC_ADDRESS
For example:
$ bluetoothctl connect 94:3C:C6:47:65:72

Attempting to connect to 94:3C:C6:47:65:72
[CHG] Device 38:18:4C:E9:69:7A RSSI: 0xffffffd0 (-48)
[CHG] Device 94:3C:C6:47:65:72 Connected: yes
[CHG] Device 94:3C:C6:47:65:72 UUIDs: 00001101-0000-1000-8000-00805f9b34fb
[CHG] Device 94:3C:C6:47:65:72 ServicesResolved: yes
Failed to connect: org.bluez.Error.NotAvailable br-connection-profile-unavailable
Note
Again, the error message may be misleading. The connection is often successful despite the error.
- If desired, you can extract some information from the glove using:
$ bluetoothctl info GLOVE_MAC_ADDRESS
For example:
bluetoothctl info 94:3C:C6:47:65:72
Device 94:3C:C6:47:65:72 (public)
	Name: NOVA-1217-L
	Alias: NOVA-1217-L
	Class: 0x00001f00 (7936)
	Paired: yes
	Bonded: yes
	Trusted: yes
	Blocked: no
	Connected: yes
	LegacyPairing: no
	UUID: Serial Port               (00001101-0000-1000-8000-00805f9b34fb)
- Create an RFCOMM device:
$ sudo rfcomm connect /dev/rfcommX GLOVE_MAC_ADDRESS CHANNEL_NUMBER
For example:
$ sudo rfcomm connect /dev/rfcomm0 94:3C:C6:47:65:72 1

Connected /dev/rfcomm0 to 94:3C:C6:47:65:72 on channel 1
Press CTRL-C for hangup
Note
The
rfcommcommand requires root permision, so it must be run withsudo.
Tip
To determine the channel number, run the following command:
$ sdptool browse GLOVE_MAC_ADDRESS
$ sdptool browse 94:3C:C6:47:65:72
Browsing 94:3C:C6:47:65:72 ...
Service Name: SPP_SERVER
Service RecHandle: 0x10000
Service Class ID List:
  "Serial Port" (0x1101)
Protocol Descriptor List:
  "L2CAP" (0x0100)
  "RFCOMM" (0x0003)
    Channel: 1
Profile Descriptor List:
  "Serial Port" (0x1101)
    Version: 0x010
Note
If you have more than one glove or in general multiple serial Bluetooth devices connected to your device connected to your PC, then
/dev/rfcomm0may already be allocated to another device. In that case, increment the number until finding a free rfcomm device. You can query the existing rfcomm devices using the command:ls /dev/rfcomm*.
-
Follow the SenseCom on GNU/Linux instructions and you should be able to successfully connect to the newly paired glove from SenseCom.
-
Once the SenseCom is closed and we are done with the gloves, we can disconnect the gloves using:
$ bluetoothctl disconnect ${SG_DEVICE}
$ sudo rfcomm release ${SG_RFCOMM}
For example:
$ bluetoothctl disconnect 94:3C:C6:47:65:72
$ sudo rfcomm release /dev/rfcomm0
Note
Again, the
rfcommcommand requires elevated permissions, so it must be run with thesudocommand.
Scripts to Easily Connect and Disconnect from a Glove
You can automate the above tedious process using scripts for connecting and disconnecting gloves.
sg-connect.sh:
#!/usr/bin/env sh

CTRL_DEVICE="YOUR_BLUETOOTH_CONTROLLER_MAC_ADDRESS"
SG_DEVICE="YOUR_SENSEGLOVE_MAC_ADDRESS"
SG_RFCOMM="/dev/rfcomm0"

bluetoothctl pairable on
bluetoothctl discoverable on
bluetoothctl pair ${SG_DEVICE}
bluetoothctl trust ${SG_DEVICE}
bluetoothctl connect ${SG_DEVICE}
rfcomm connect ${SG_RFCOMM} ${SG_DEVICE} 1 &
sg-disconnect.sh:
#!/usr/bin/env sh

SG_DEVICE="YOUR_SENSEGLOVE_MAC_ADDRESS"
SG_RFCOMM="/dev/rfcomm0"

bluetoothctl disconnect ${SG_DEVICE}
rfcomm release ${SG_RFCOMM}
Example Scripts for a Left-Handed Glove
$ cat sg-connect-left.sh

#!/usr/bin/env sh

CTRL_DEVICE="CC:15:31:90:69:87"
SG_DEVICE="94:3C:C6:47:65:72"
SG_RFCOMM="/dev/rfcomm0"

bluetoothctl pairable on
bluetoothctl discoverable on
bluetoothctl pair ${SG_DEVICE}
bluetoothctl trust ${SG_DEVICE}
bluetoothctl connect ${SG_DEVICE}
rfcomm connect ${SG_RFCOMM} ${SG_DEVICE} 1 &

$ cat sg-disconnect-left.sh

#!/usr/bin/env sh

SG_DEVICE="94:3C:C6:47:65:72"
SG_RFCOMM="/dev/rfcomm0"

bluetoothctl disconnect ${SG_DEVICE}
rfcomm release ${SG_RFCOMM}

# Set the executable permissions for all users:
$ chmod a+x sg-connect-left.sh
$ chmod a+x sg-disconnect-left.sh

# Before running SenseCom:

$ sudo ./sg-connect-left.sh

Password:

Changing pairable on succeeded
hci0 new_settings: powered connectable bondable ssp br/edr le secure-conn wide-band-speech
hci0 new_settings: powered connectable discoverable bondable ssp br/edr le secure-conn wide-band-speech
Changing discoverable on succeeded
Attempting to pair with 94:3C:C6:47:65:72
Failed to pair: org.bluez.Error.AlreadyExists
Changing 94:3C:C6:47:65:72 trust succeeded
Attempting to connect to 94:3C:C6:47:65:72
hci0 94:3C:C6:47:65:72 type BR/EDR connected eir_len 18
[CHG] Device 94:3C:C6:47:65:72 Connected: yes
[CHG] Device 94:3C:C6:47:65:72 ServicesResolved: yes
Failed to connect: org.bluez.Error.NotAvailable br-connection-profile-unavailable

# Run SenseCom in between!

# Once SenseCom is closed:

$ sudo ./sg-disconnect-left.sh

sudo ./sg-disconnect-left.sh

Password:

Attempting to disconnect from 94:3C:C6:47:65:72
hci0 94:3C:C6:47:65:72 type BR/EDR disconnected with reason 2
[CHG] Device 94:3C:C6:47:65:72 ServicesResolved: no
Successful disconnected
Can't release device: No such device
Video Tutorial
There is also a video tutorial demonstrating how to connect to Nova gloves on GNU/Linux using the command line.
SenseCom on Microsoft Windows (Bluetooth Serial)
Follow these steps to quickly set up and run SenseCom on Microsoft Windows:
- First, obtain the SenseCom binaries from its GitHub repository.

-
Extract the SenseCom
.zipfile to a location on your computer after downloading it. -
Ensure any glove you would like to pair with and connect to your system is not paired, or connected to any other device, such as another PC or VR headset.
-
Make sure the glove is powered on.
-
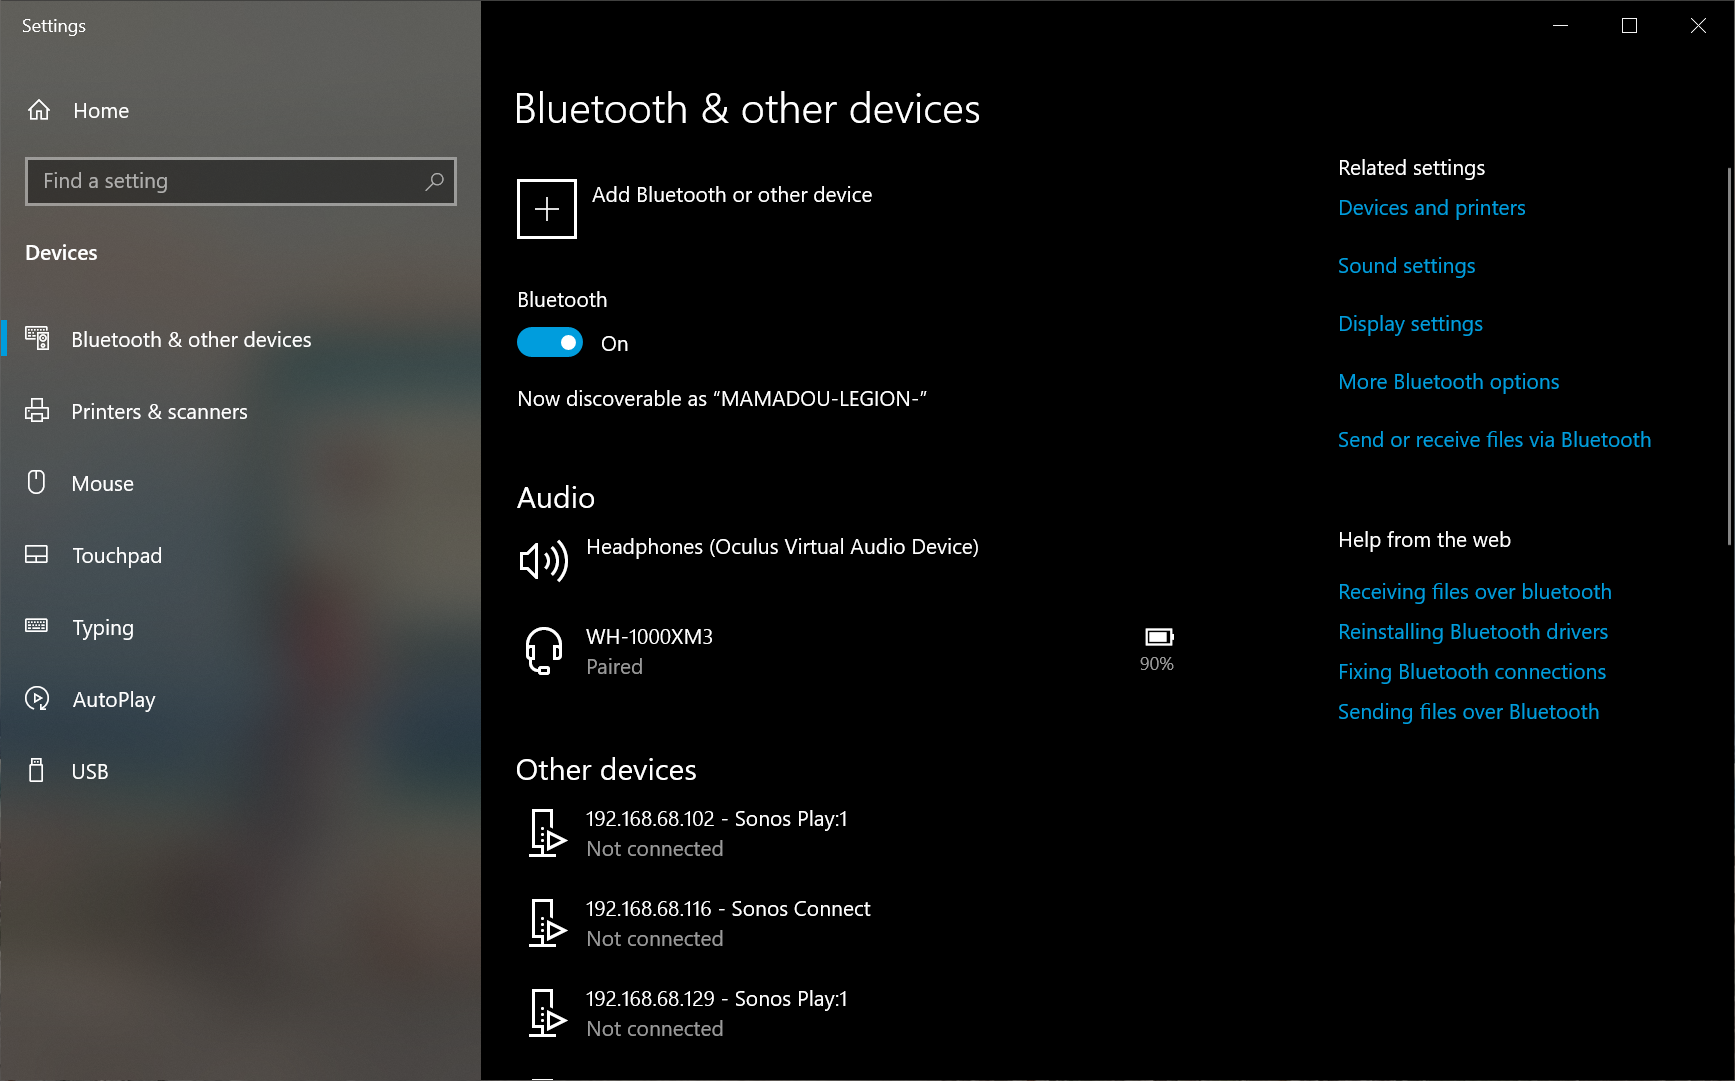
Access Windows Bluetooth Settings by navigating to
Settings > Devices > Bluetooth & other devices.
-
Click on
Add Bluetooth or other devices. -
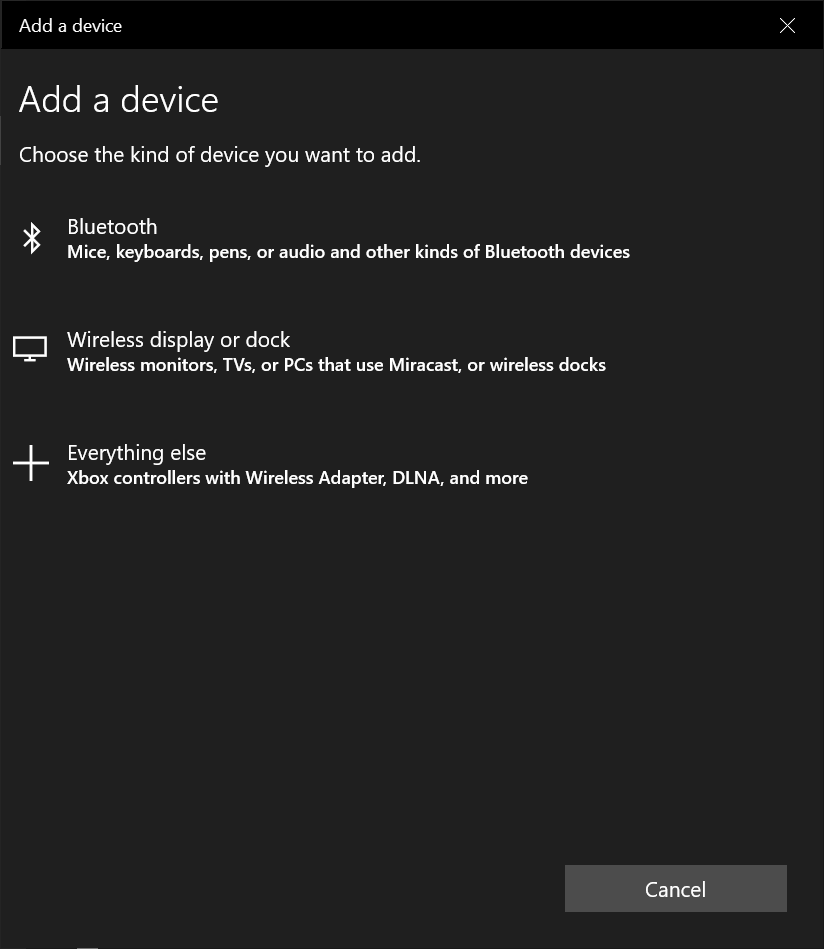
In the new window click on
Bluetooth.
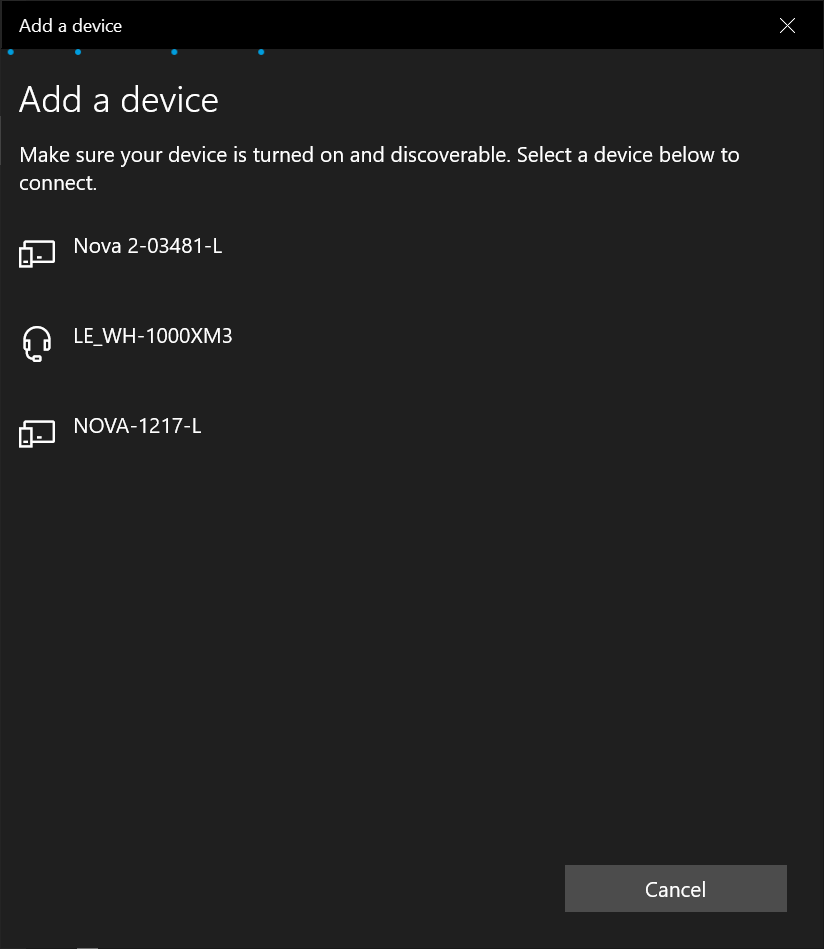
- Wait for the glove to be discovered, then click on it.
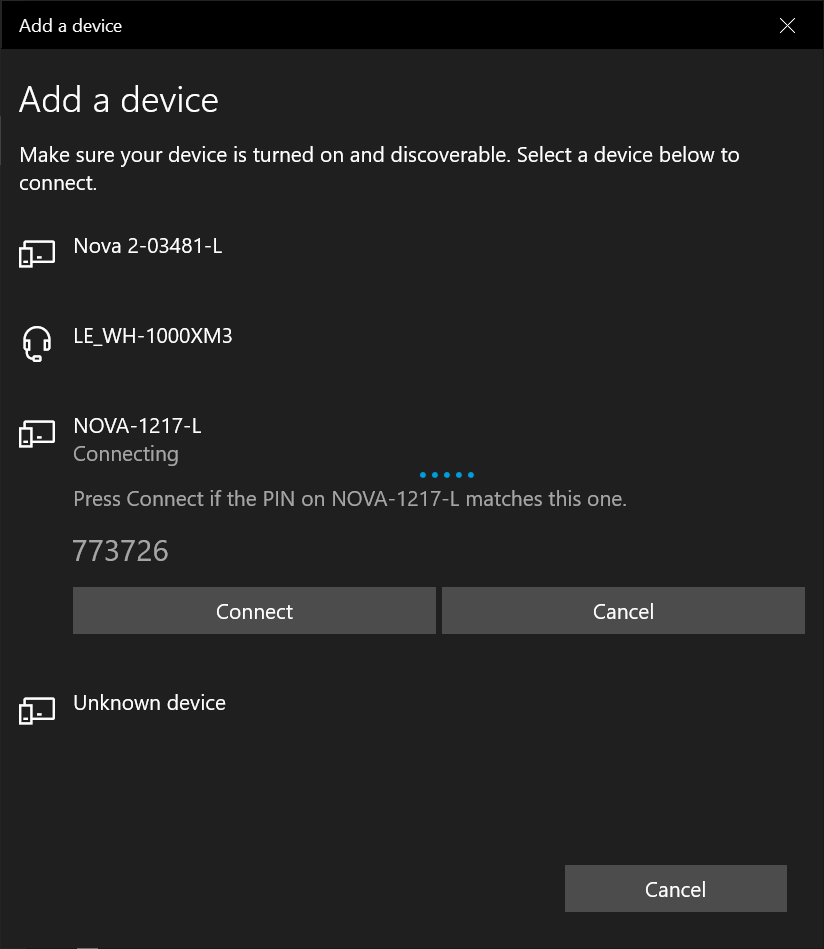
- Click
Connectto connect and pair the glove.
- Once the glove is paired, you're good to go. Click on
Done.
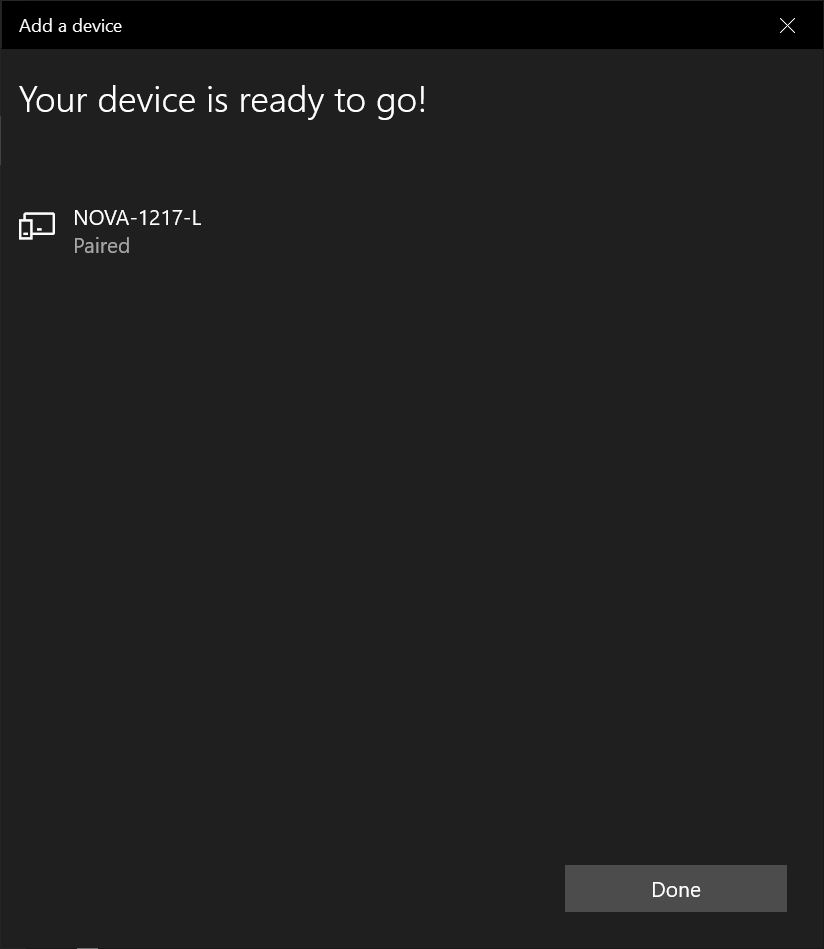
- Once you are back to Windows Bluetooth settings, verify that the glove is listed as a paired device.
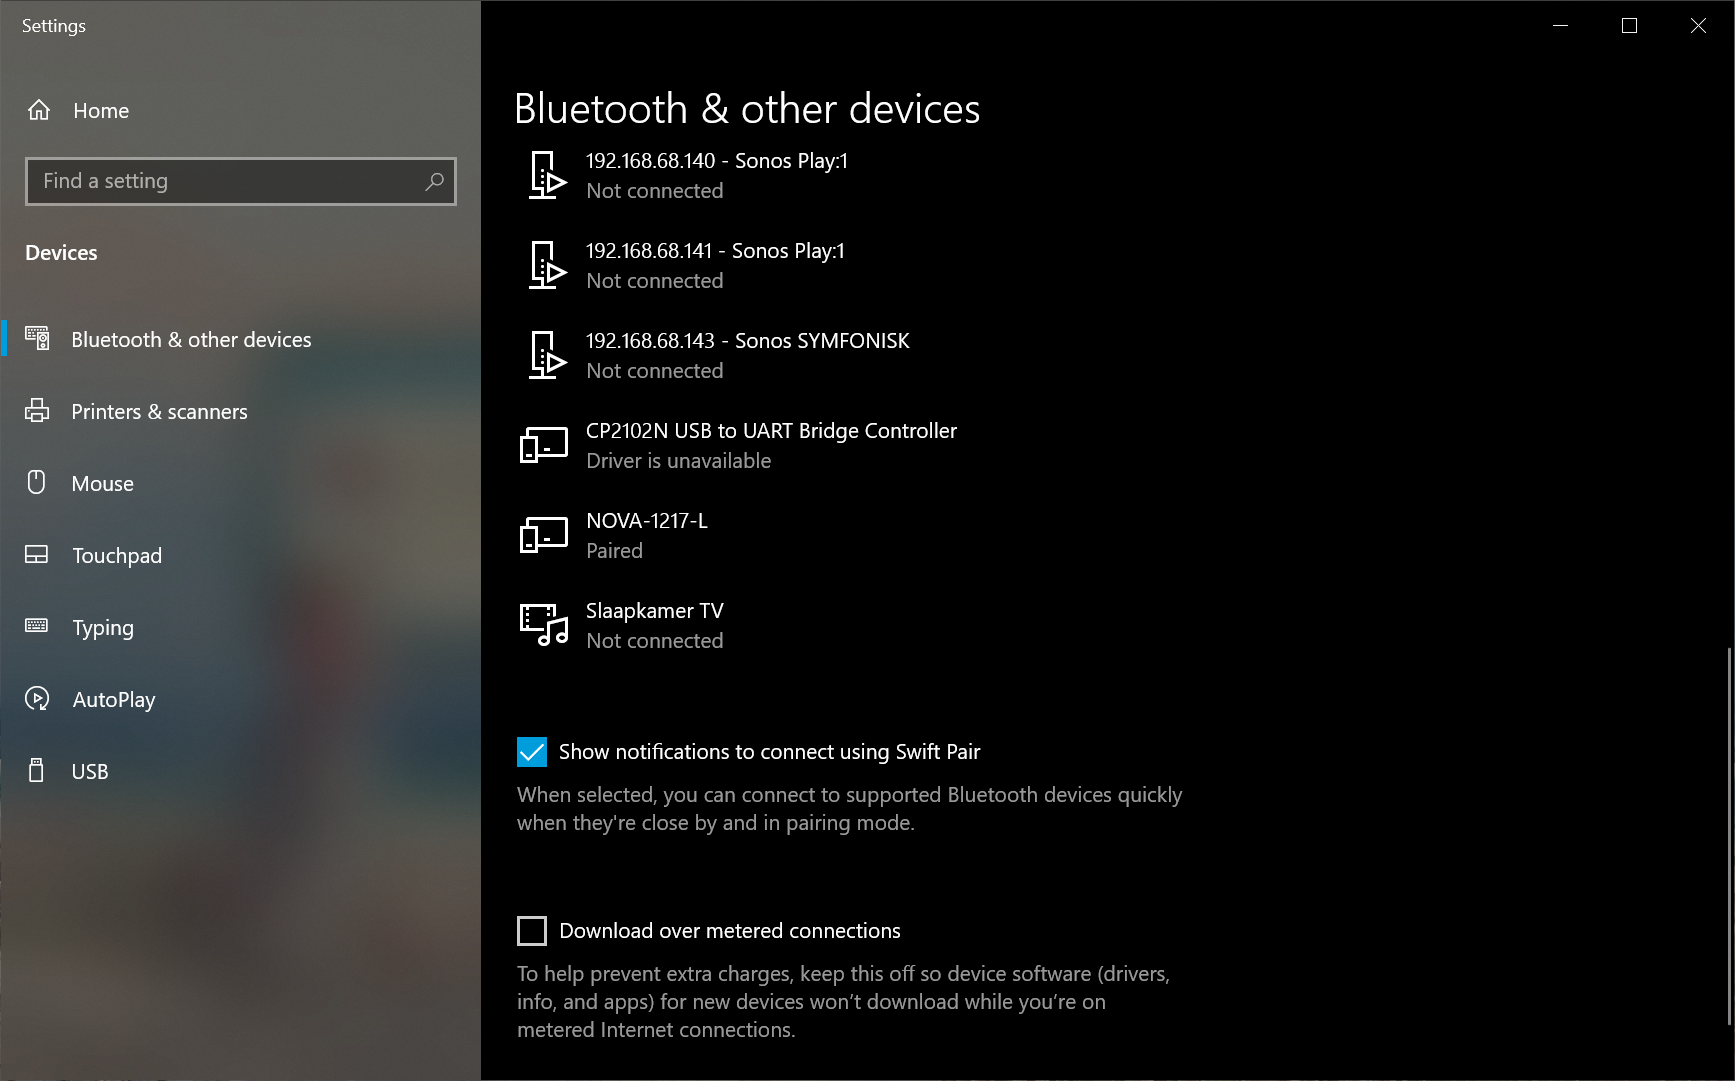
- After successfully paring your glove, it's time to run SenseCom. Navigate to the folder where you extracted SenseCom and go to
/path/to/extracted/SenseCom/directory/Win/SenseCom_Win_Latest, and then run the executableSenseCom.exe.

Note
Inside the
/path/to/extracted/SenseCom/directory/Win/folder, a SenseCom installer is available if you wish to permanently install it on your operating system.
- In a moment, SenseCom should recognize and connect to your glove(s):
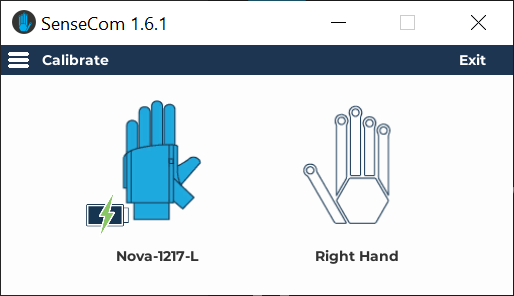
Important
If you are using SenseCom
v1.8.x+and it fails to recognize your gloves with a Bluetooth Serial firmware, it may be because theLegacy Connectionsoption is disabled, which is the default. Enabling this option should allow SenseCom to discover and connect to your glove.
Note
For more detailed information and troubleshooting, consult the SenseCom documentation page on SGDocs, please.
- At this stage, SenseCom is ready and you should be able to connect to and communicate with SenseGlove devices from inside your Unreal Engine applications.
Enabling XR_EXT_hand_tracking OpenXR Extension on VR Headsets
Important
Starting from version
v2.1.0, the SenseGlove Unreal Engine Plugin requires theXR_EXT_hand_trackingOpenXR extension to function. Without this OpenXR extension the plugin won't output any glove data.
Since version v2.1.0, the SenseGlove Unreal Engine Plugin requires the XR_EXT_hand_tracking OpenXR extension to function. Whether you are streaming your immersive 3D VR application from your PC to your VR headset, or deploying it to your VR headset in standalone mode, enabling XR_EXT_hand_tracking support, might require additional plugins or settings depending on the HMD's vendor or model.
PCVR Mode
For instructions on how to setup XR_EXT_hand_tracking support in PCVR mode please refer to the relevant section.
Standalone Mode
For instructions on how to setup XR_EXT_hand_tracking support in standalone mode on Android please refer to the relevant section.
Third-Party Tutorials
As a part of this OpenXR comprehensive tutorial series, you will learn how to enable the developer runtime features, set up the OpenXR runtime, and the XR_EXT_hand_tracking support in PCVR mode. Furthermore, it will show you how to enable hand-tracking on Android (standalone mode) using the Meta XR and VIVE OpenXR plugins.
Enabling XR_EXT_hand_tracking OpenXR Extension on VR Headsets in PCVR Mode
Starting from version v2.1.0, the SenseGlove Unreal Engine Plugin requires the XR_EXT_hand_tracking OpenXR extension to function. If you are streaming your immersive 3D VR application from your PC to your VR headset, enabling XR_EXT_hand_tracking support, requires additional plugins and settings depending on the HMD's vendor or model.
Enabling OpenXR Plugin and Disabling OpenXRHandTracking Plugin
Regardless of the type or vendor of the HMD you have in mind for development or deployment purposes, the OpenXR plugin is required as a prerequisite. Also, ensure the OpenXRHandTracking is disabled as it conflicts with the SenseGlove Unreal Engine Plugin since both implement the same XR_EXT_hand_tracking OpenXR extension.
Though enabling the SenseGlove Unreal Engine Plugin should enable the OpenXR plugin automatically, it is recommended to ensure this plugin is enabled, and most importantly OpenXRHandTracking is disabled, by navigating to Edit > Plugins in the Unreal Editor menus.
![]()
The OpenXRHandTracking plugin implements the XR_EXT_hand_tracking OpenXR extension.
Meta Quest
To set up XR_EXT_hand_tracking support on Meta Quest HMDs in PCVR mode, depending on your project requirements (e.g. whether you rely on the Meta XR plugin or not), additional setup steps are required.
Meta Quest Link App
For Meta Quest headsets, enable the Developer runtime features under the Settings > Beta section inside the Meta Quest Link app:
![]()
Important
Enabling
Developer runtime featuresin the Meta Quest Link requires a Meta Developer Account. If you are not signed in using a Meta Developer Account, this option won't be shown to you inside Meta Quest Link.
Caution
Streaming to Meta Quest headsets from SteamVR is no longer supported because the migration to OpenXR has caused controller offsets for Meta Quest HMDs to break on SteamVR. One possible reason is that SteamVR lists
XR_FB_hand_trackingas an unsupported feature. Further investigation is needed to identify the exact underlying cause.
Meta XR Plugin
Caution
Please note that enabling the
Meta XRplugin alongside the SenseGlove plugin will result in crashes or unexpected behavior.Meta XRplugin compatibility is being worked on and might be supported in the future.
HTC VIVE
To set up XR_EXT_hand_tracking support on HTC VIVE HMDs in PCVR mode, additional plugins or configuration steps are required.
OpenXRViveTracker Plugin
To enable VIVE Trackers support ensure the OpenXRViveTracker plugin is enabled by navigating to Edit > Plugins in the Unreal Editor menus. This plugin should be enabled, or wrist tracking won't function on VIVE devices at all.
![]()
The OpenXRViveTracker plugin implements the XR_HTCX_vive_tracker_interaction OpenXR extension which is necessary to use VIVE Trackers or to emulate the VIVE Wrist Trackers as VIVE Trackers on Windows.
VIVE Business Streaming App
For VIVE headsets relying on the VIVE Business Streaming application, ensure the Hand Tracking settings under Input are enabled and XR_HTCX_vive_tracker_interaction is enabled for VIVE Wrist Trackers by enabling Emulate VIVE Wrist Tracker as VIVE Tracker:
![]()
Note
Tracking and accessing
FXRHandTrackingStateoutput from SenseGlove devices do not require Hand and Body Tracking to be enabled on the HMD device. Enabling this feature is only necessary if you wish to use hand-tracking as a fallback option when no glove is connected to your PC.
SteamVR App
After enabling the OpenXRViveTracker plugin and enabling Emulate VIVE Wrist Tracker as VIVE Tracker for VIVE HMDs relying on the VIVE Business Streaming, you need to perform one final setup in the SteamVR app for the SenseGlove Unreal Engine Plugin to be able to retrieve the correct wrist-tracking offsets. Once you have paired your VIVE Trackers or VIVE Wrist Trackers, navigate to SteamVR Settings > Controllers > MANAGE TRACKERS and make sure your left tracker is set to LEFT FOOT and the right tracker is set to RIGHT FOOT:
![]()
SenseGlove Wrist Tracking Settings
Once you have set up everything, it's time to adjust the SenseGlove Wrist Tracking Settings inside the project-wide plugin's settings. For detailed information, please visit the Wrist Tracking Hardware and HMD auto-detection configuration section as well.
Enabling XR_EXT_hand_tracking OpenXR Extension on VR Headsets in Standalone Mode
Starting from version v2.1.0, the SenseGlove Unreal Engine Plugin requires the XR_EXT_hand_tracking OpenXR extension to function. If you are deploying your immersive 3D VR application to your VR headset in standalone mode, enabling XR_EXT_hand_tracking support, requires additional plugins and settings depending on the HMD's vendor or model.
Enabling OpenXR Plugin and Disabling OpenXRHandTracking Plugin
Regardless of the type or vendor of the HMD you have in mind for development or deployment purposes, the OpenXR plugin is required as a prerequisite. Also, ensure the OpenXRHandTracking is disabled as it conflicts with the SenseGlove Unreal Engine Plugin since both implement the same XR_EXT_hand_tracking OpenXR extension.
Though enabling the SenseGlove Unreal Engine Plugin should enable the OpenXR plugin automatically, it is recommended to ensure this plugin is enabled, and most importantly OpenXRHandTracking is disabled, by navigating to Edit > Plugins in the Unreal Editor menus.
![]()
The OpenXRHandTracking plugin implements the XR_EXT_hand_tracking OpenXR extension.
Meta Quest
To set up XR_EXT_hand_tracking support on Meta Quest HMDs in Standalone mode, depending on your project requirements (e.g. whether you rely on the Meta XR plugin or not), additional setup steps are required.
Important
Although, the SenseGlove plugin does not require the
Meta XRplugin to function, and relying solely on theOpenXRandOpenXRHandTrackingplugins would suffice for functional glove data retrieval using OpenXR, hand-tracking as a fallback mechanism won't work on Android without theMeta XRplugin availability.
Meta XR Plugin
Caution
Please note that enabling the
Meta XRplugin alongside the SenseGlove plugin will result in crashes or unexpected behavior.Meta XRplugin compatibility is being worked on and might be supported in the future.
HTC VIVE
To set up XR_EXT_hand_tracking support on HTC VIVE HMDs in Standalone mode, additional plugins or configuration steps are required.
Caution
The SenseGlove Unreal Engine Plugin
v2.7.xis the last release series to support Unreal Engine5.4, and its support will be removed in future minor or major releases. This is important to keep in mind if your target development and deployment platform is HTC VIVE in Standalone Mode. Unfortunately, HTC has not released any updates to their HTC ViveOpenXR plugin since December 6, 2024. Their latest release [1] [2], ViveOpenXR Pluginv2.5.0, supports only Unreal Engine5.3and5.4. HTC VIVE PCVR Mode is unaffected and will remain fully functional because, on Microsoft Windows, it is supported via the OpenXRViveTracker Plugin, which is bundled with Unreal Engine and officially maintained by Epic Games. If you still intend to target HTC in Standalone Mode, you are welcome to continue using the latest SenseGlove Unreal Engine Pluginv2.7.x, which will retain HTC Standalone Mode support. However, please keep in mind that once newer versions of the SenseGlove Unreal Engine Plugin are released and UE5.4is no longer supported, the latest release of the plugin supporting UE5.4will not receive new features, hardware support, or bug fixes. If at any point in the future HTC releases a new version of their ViveOpenXR plugin that supports any Unreal Engine version we actively support,+ in accordance with our support policy and Platform Support Matrix, we will make every reasonable effort to reintroduce HTC Standalone Mode support.
OpenXRViveTracker Plugin
Unlike the PCVR-mode on Windows, the OpenXRViveTracker plugin is not required on Android since it only provides an implementation of the XR_HTCX_vive_tracker_interaction OpenXR extension which is necessary when we use VIVE Trackers on Windows or we emulate the VIVE Wrist Trackers as VIVE Trackers on Windows. Instead, we require the XR_HTCX_vive_wrist_tracker_interaction OpenXR extension to be able to use VIVE Wrist Trackers on Android, which is provided by the ViveOpenXR plugin. So, you can safely ignore enabling this plugin for Android standalone deployments.
ViveOpenXR Plugin
To enable VIVE Wrist Trackers support ensure the ViveOpenXR plugin is enabled by navigating to Edit > Plugins in the Unreal Editor menus. This plugin should be enabled, or wrist tracking won't function on VIVE devices at all.
![]()
The ViveOpenXR plugin implements the XR_HTCX_vive_wrist_tracker_interaction OpenXR extension.
Important
Without the
ViveOpenXRplugin deploying an immersive 3D VR application to your HTC VIVE in Standalone mode won't be possible, whether you enablebStartInVR, or not. Without it your app will be deployed and recognized as a 2D app.
By default, the ViveOpenXR plugin settings located in Edit > Project Settings > Plugins > Vive OpenXR look something like these:
![]()
![]()
The following settings control the availability of hand-tracking when the ViveOpenXR plugin is enabled:
- Enable Hand Interaction: This enables the hand interactions with the OpenXR hand interaction extension
XR_HTC_hand_interaction. Changing this setting will prompt you to restart the engine to apply the new settings. This setting should be enabled.
![]()
- Use HTC Hand Interaction: This selects which OpenXR hand interaction extension to use. If enabled,
XR_HTC_hand_interactionwill be used, effectively breaking SenseGlove glove and hand-tracking data output. If disabled,XR_EXT_hand_interactionwill be used, which is compatible with the SenseGlove Unreal Engine Plugin. Changing this setting will prompt you to restart the engine to apply the new settings. This setting should be disabled.
The following settings control the availability of wrist-tracking when the ViveOpenXR plugin is enabled:
- Enable Wrist Tracker: This option controls the
XR_HTC_vive_wrist_tracker_interactionOpenXR extension. If enabled, in turn, it enables the use of HTC Wrist Tracker interaction profiles in OpenXR. Changing this setting will prompt you to restart the engine to apply the new settings.
![]()
-
Enable Ultimate Tracker (Beta): This option controls the
XR_HTC_path_enumerationandXR_HTC_vive_xr_tracker_interactionOpenXR extensions. If enabled, in turn, they enable the use of HTC Xr Tracker interaction profiles in OpenXR. Changing this setting will prompt you to restart the engine to apply the new settings. -
Enable Ultimate Tracker Pogo Pin Inputs (Beta): Enables or disables the input options for Unreal's Enhanced Input System. Changing this setting will prompt you to restart the engine to apply the new settings.
The following setup demonstrates a functional immersive 3D VR application with the minimum ViveOpenXR required features enabled to make it compatible with the SenseGlove Unreal Engine Plugin:
![]()
![]()
SenseGlove Wrist Tracking Settings
Once you have set up everything, it's time to adjust the SenseGlove Wrist Tracking Settings inside the project-wide plugin's settings. For detailed information, please visit the Wrist Tracking Hardware and HMD auto-detection configuration section as well.
Third-Party Tutorials: XR_EXT_hand_tracking Setup
Introduction to Virtual Reality, OpenXR Hand-Tracking, and Gesture Detection in Unreal Engine
A part of this comprehensive tutorial will guide you through setting up the OpenXR runtime and enabling developer runtime features:
Unreal Engine OpenXR Hand-Tracking on Android with Meta XR (Quest 3S/3/Pro/2) and HTC VIVE OpenXR (Focus Vision/XR Elite/Focus 3) Plugins
A part of this comprehensive tutorial will guide you through setting up the Meta XR and VIVE OpenXR plugins for Android standalone-mode deployment:
Setting Up the SenseGlove Default Classes
Setting up the default SenseGlove classes is recommended if you want to take full advantage of the quality-of-life features provided by the SenseGlove Unreal Engine Plugin. These features are designed to streamline the development process within the Unreal Engine environment. For instance, if you need a quick setup with a virtual hand mesh already integrated into a pawn, enabling you to get started with your project in just a few minutes, it is essential to configure the default classes and familiarize yourself with these classes.
If you wish to extend the functionality of these classes, you can do so by subclassing them. The default SenseGlove classes, which are prefixed with SG, include:
However, if you prefer a different approach or do not require the functionality provided by the default SenseGlove classes, you can opt to utilize individual components like SGVirtualHandComponent, SGWristTrackerComponent, etc., directly within your own actors. Alternatively, you can develop a completely custom system from scratch, leveraging the low-level SenseGlove C++ or Blueprint APIs.
Additionally, you can enforce setting the default SenseGlove classes during initialization via the plugin settings, if desired.
Setting Up SGGameModeBase
After installing and enabling the SenseGlove Unreal Engine Plugin, the easiest and most straightforward approach to get started is to just set the default GameMode to SGGameModeBase from Edit > Project Settings... > Maps & Modes > Default Mode > Default GameMode. By doing this, the Default Pawn Class is automatically set to SGPawn, and the Player Controller Class is set to SGPlayerController. This setup ensures that a SenseGlove pawn will automatically spawn when you hit the play button in the editor.
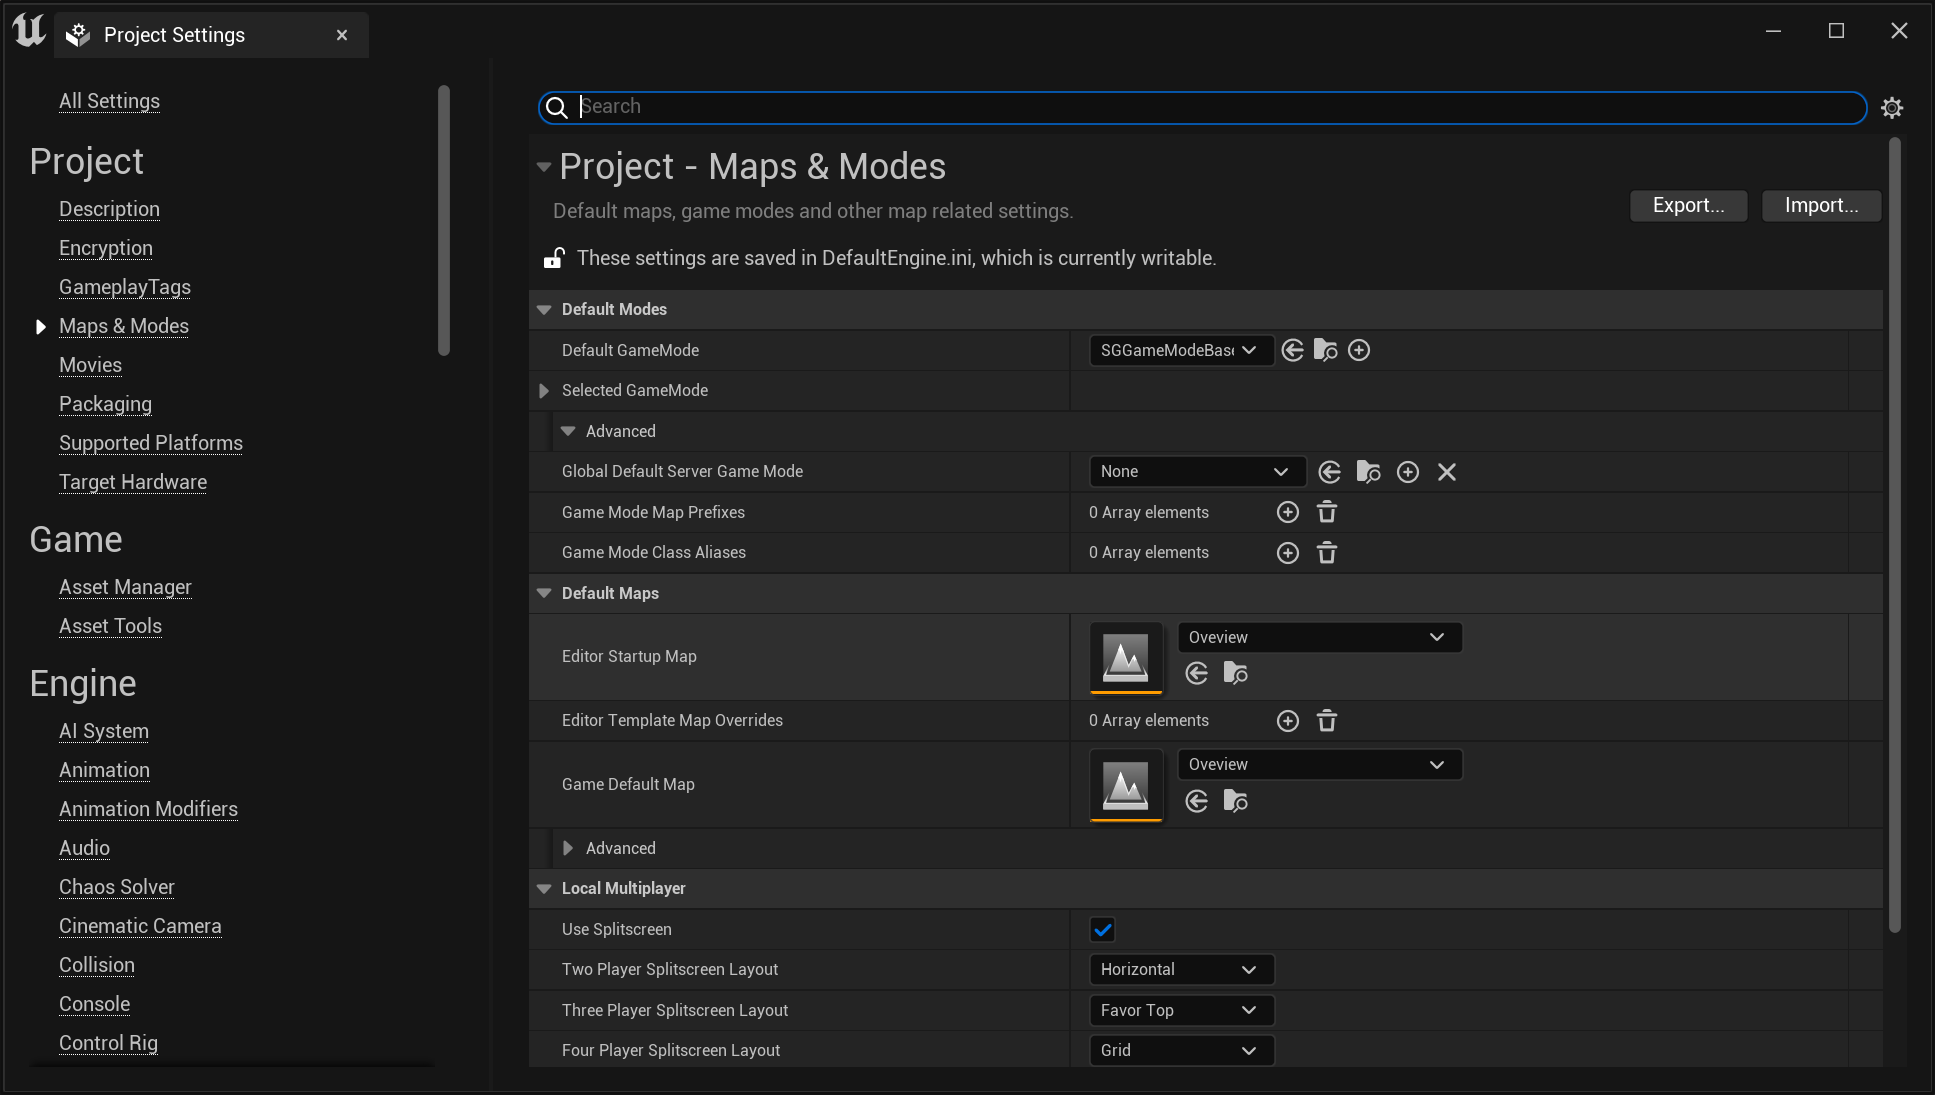
Tip
For greater control and customization, consider extending the SGGameModeBase.
Note
Currently, setting
SGGameModeBaseor a subclass of it as theDefault GameModeis not a strict requirement. Its primary function is to ensure that a defaultSGPawnandSGPlayerControllerare set. However, this might change in the future, and it could become a mandatory setting.
Important
While setting
SGGameModeBaseas theDefault GameModewill automatically spawn the default SGPawn at BeginPlay and initiate communication with the SenseGlove devices, it will not display any virtual hands in your simulation by default. You might still need to configure the Virtual Hand Meshes and the Wrist Tracking Hardware separately.
Important
Before starting the simulation in the editor, make sure that SenseCom is running and XR_EXT_hand_tracking is enabled. Without these, your simulation will not receive hand pose data from the SenseGlove devices.
Extending SGGameModeBase
Follow these steps to extend and set up your own version of SGGameModeBase:
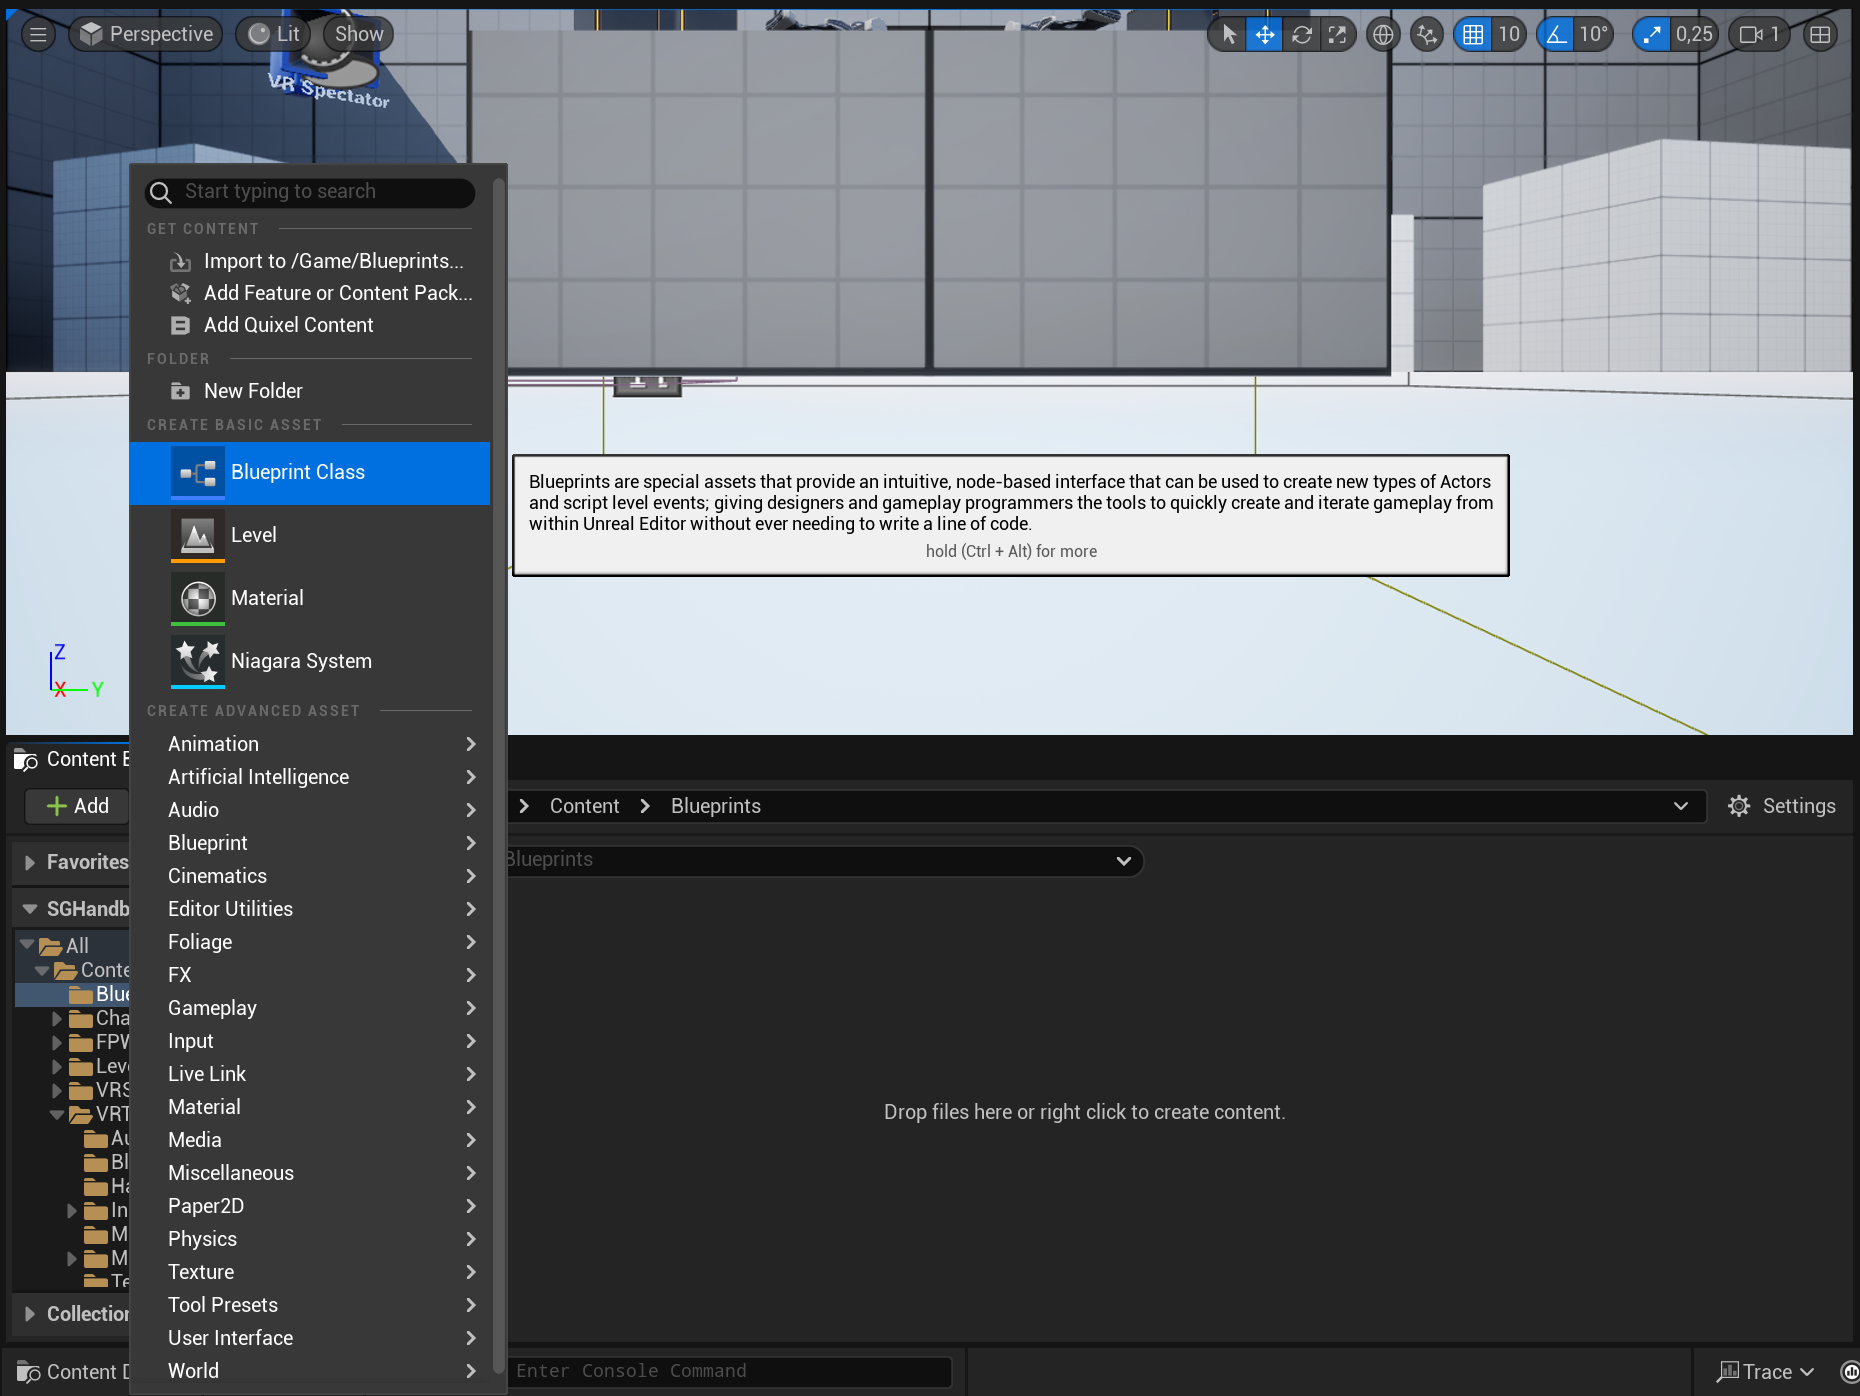
- In the Content Browser, click the
+ Addbutton, then selectBlueprint Class from the menu. Alternatively, right-click inside the Content Browser and chooseBlueprint Classfrom the context menu.
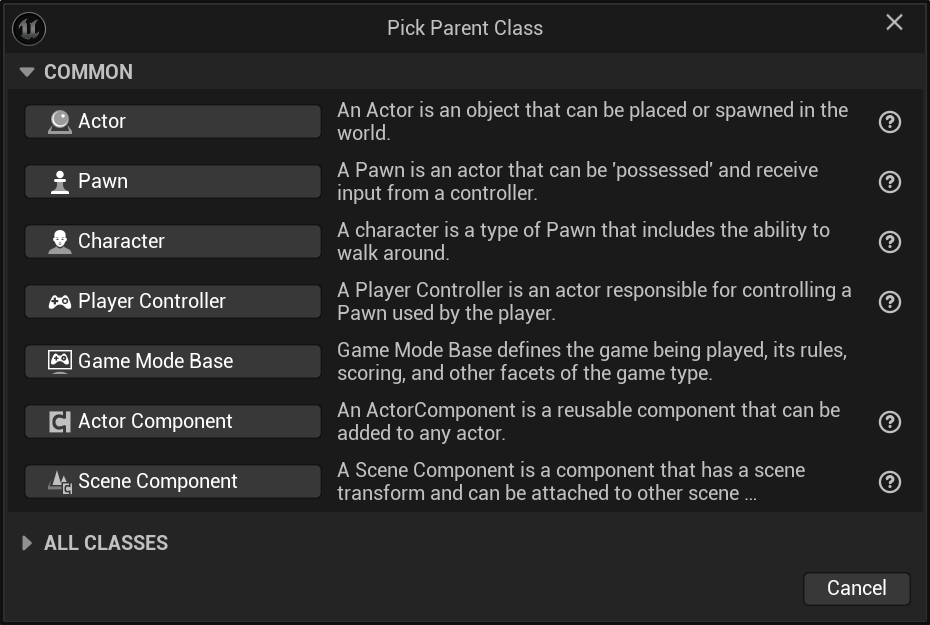
- A dialog will appear asking you to choose a parent class. Click on the
ALL CLASSESsection to expand the list of available classes.
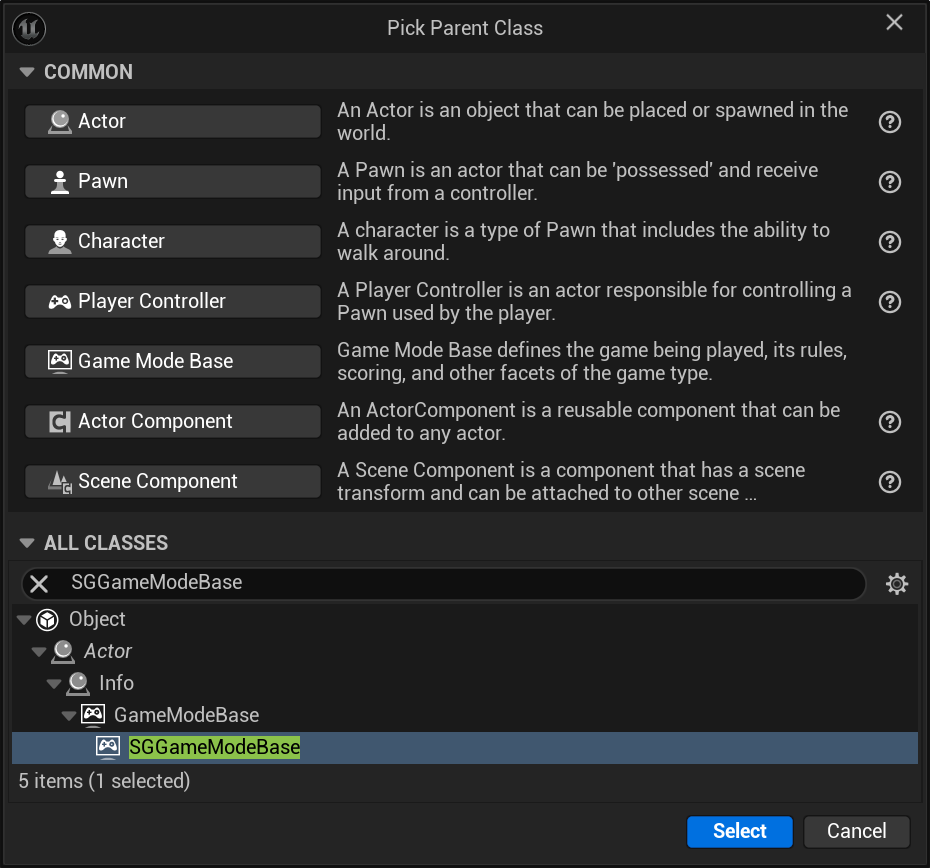
- In the expanded
ALL CLASSESsection, start typingSGGameModeBasein the Search box. WhenSGGameModeBaseappears, select it and click theSelectbutton to create your new Blueprint class based on it.
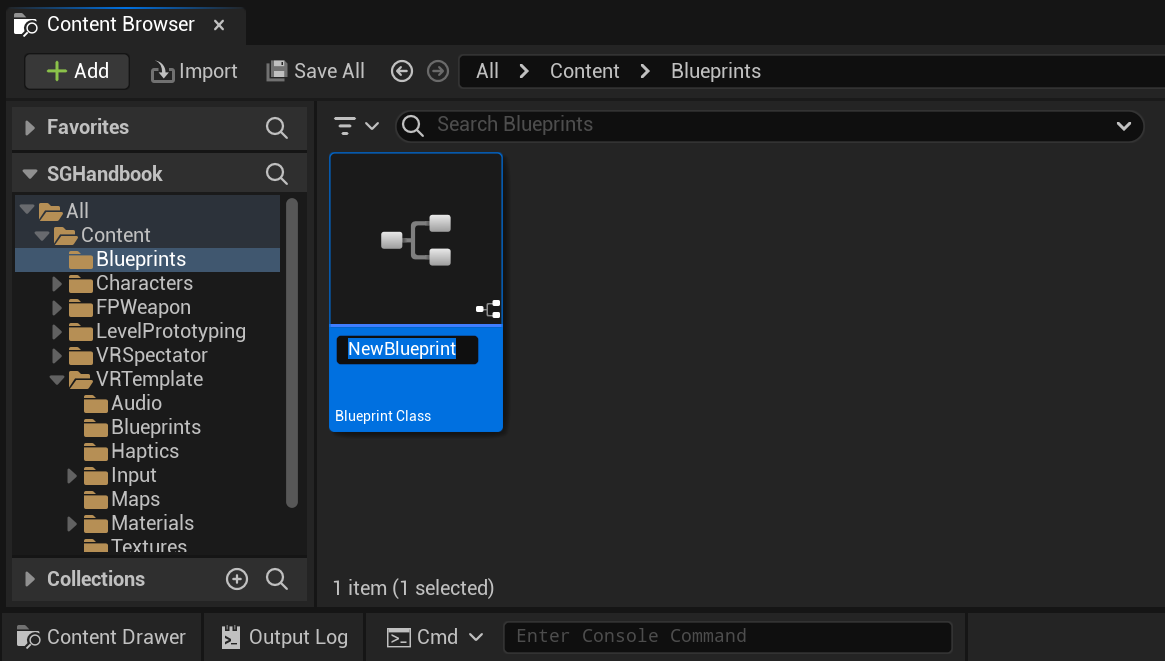
- After returning to the Content Browser, the Unreal Editor will prompt you to rename
NewBlueprintto your desired class name. You can rename the class at any time by pressingF2or by right-clicking on it and selectingRenamefrom the context menu.
- Once you have renamed the
NewBlueprintclass to your desired name, click onSave Allto save the new class to disk.
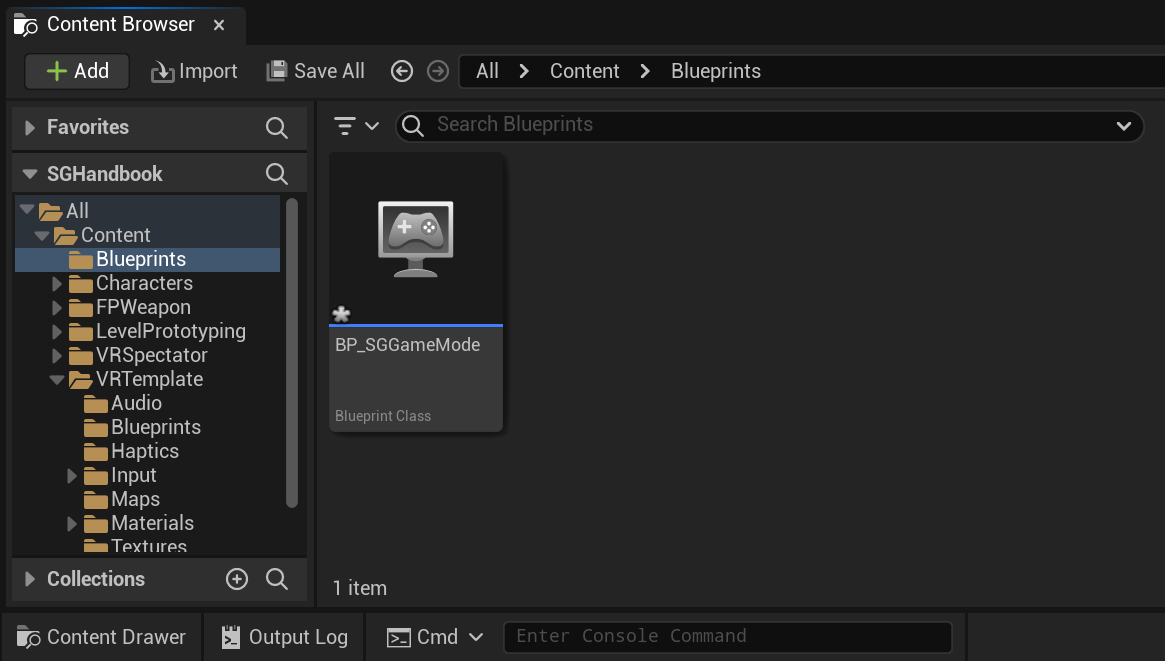
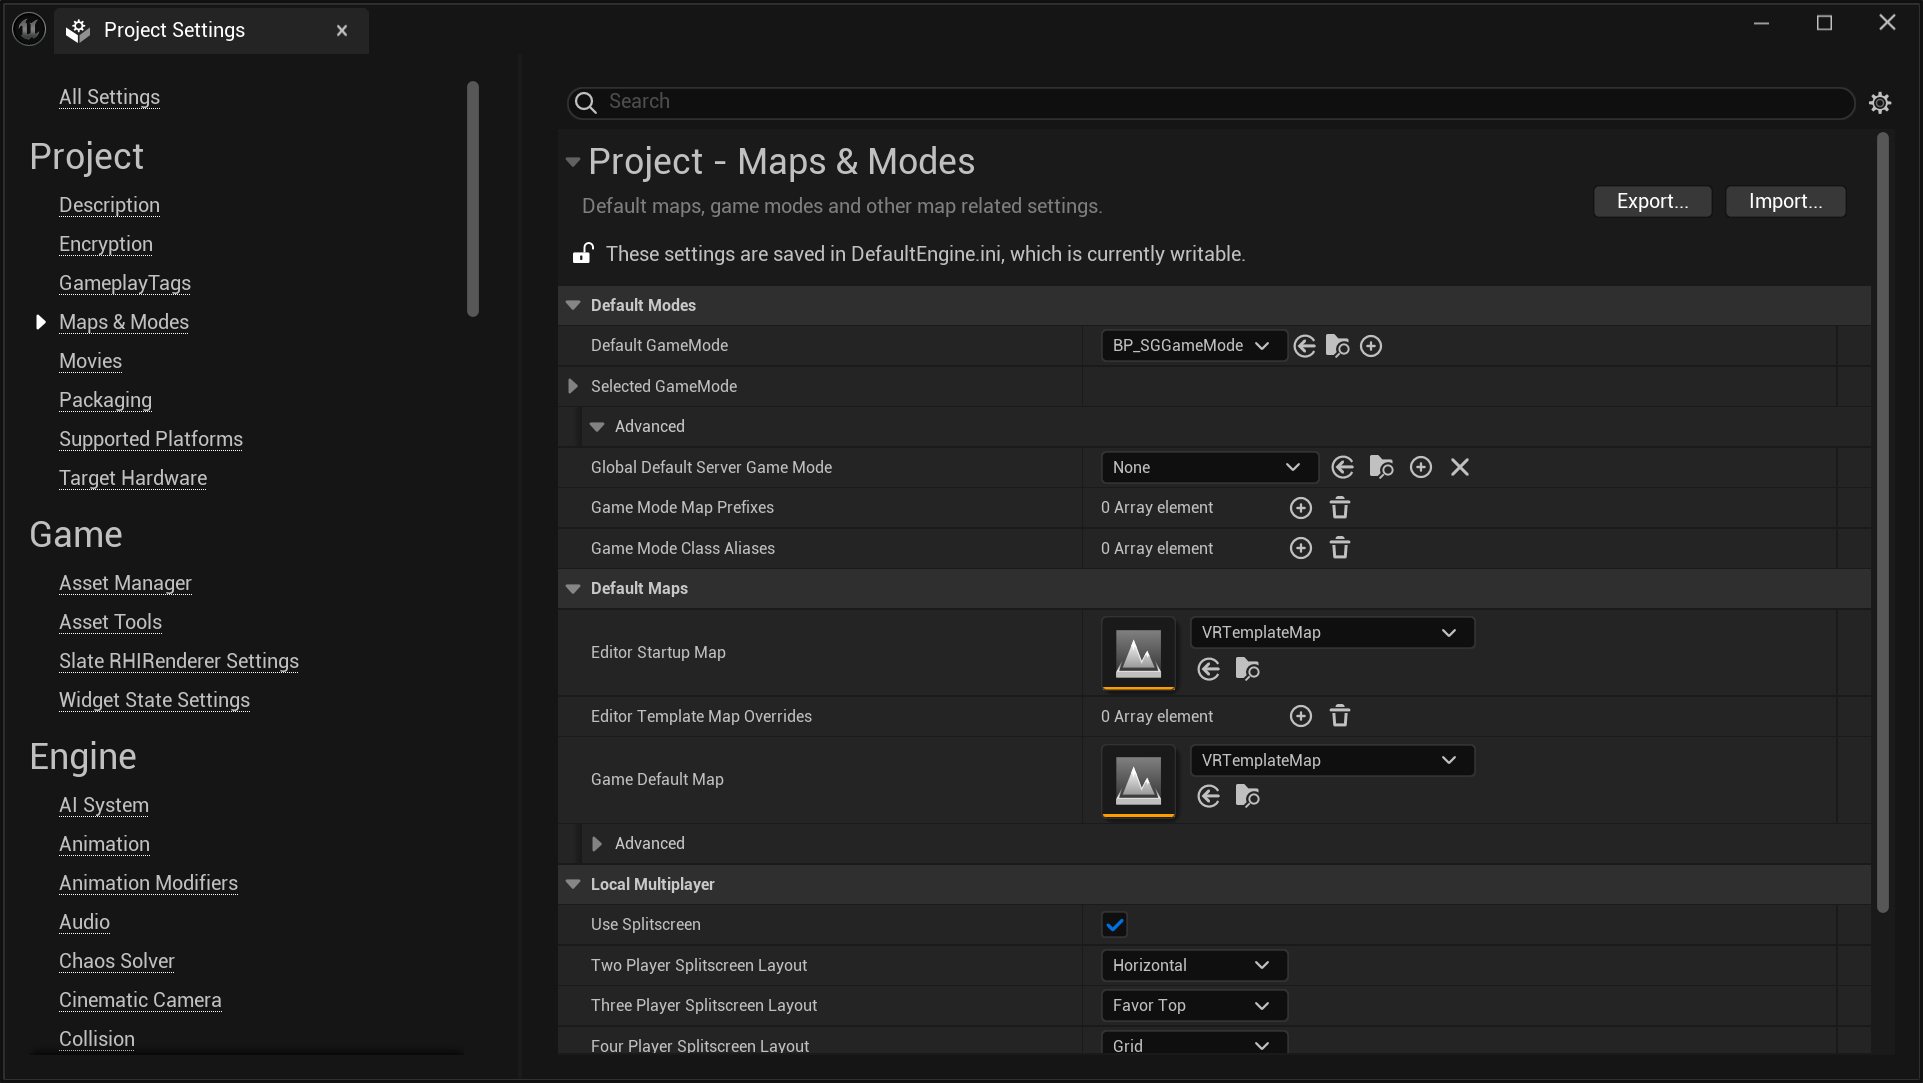
- Finally, set your newly created subclass of
SGGameModeBaseas theDefault GameMode. You can do this by navigating toProject Settings > Project > Maps & Modes > Default Modes > Default GameMode.
Setting Up SGPawn
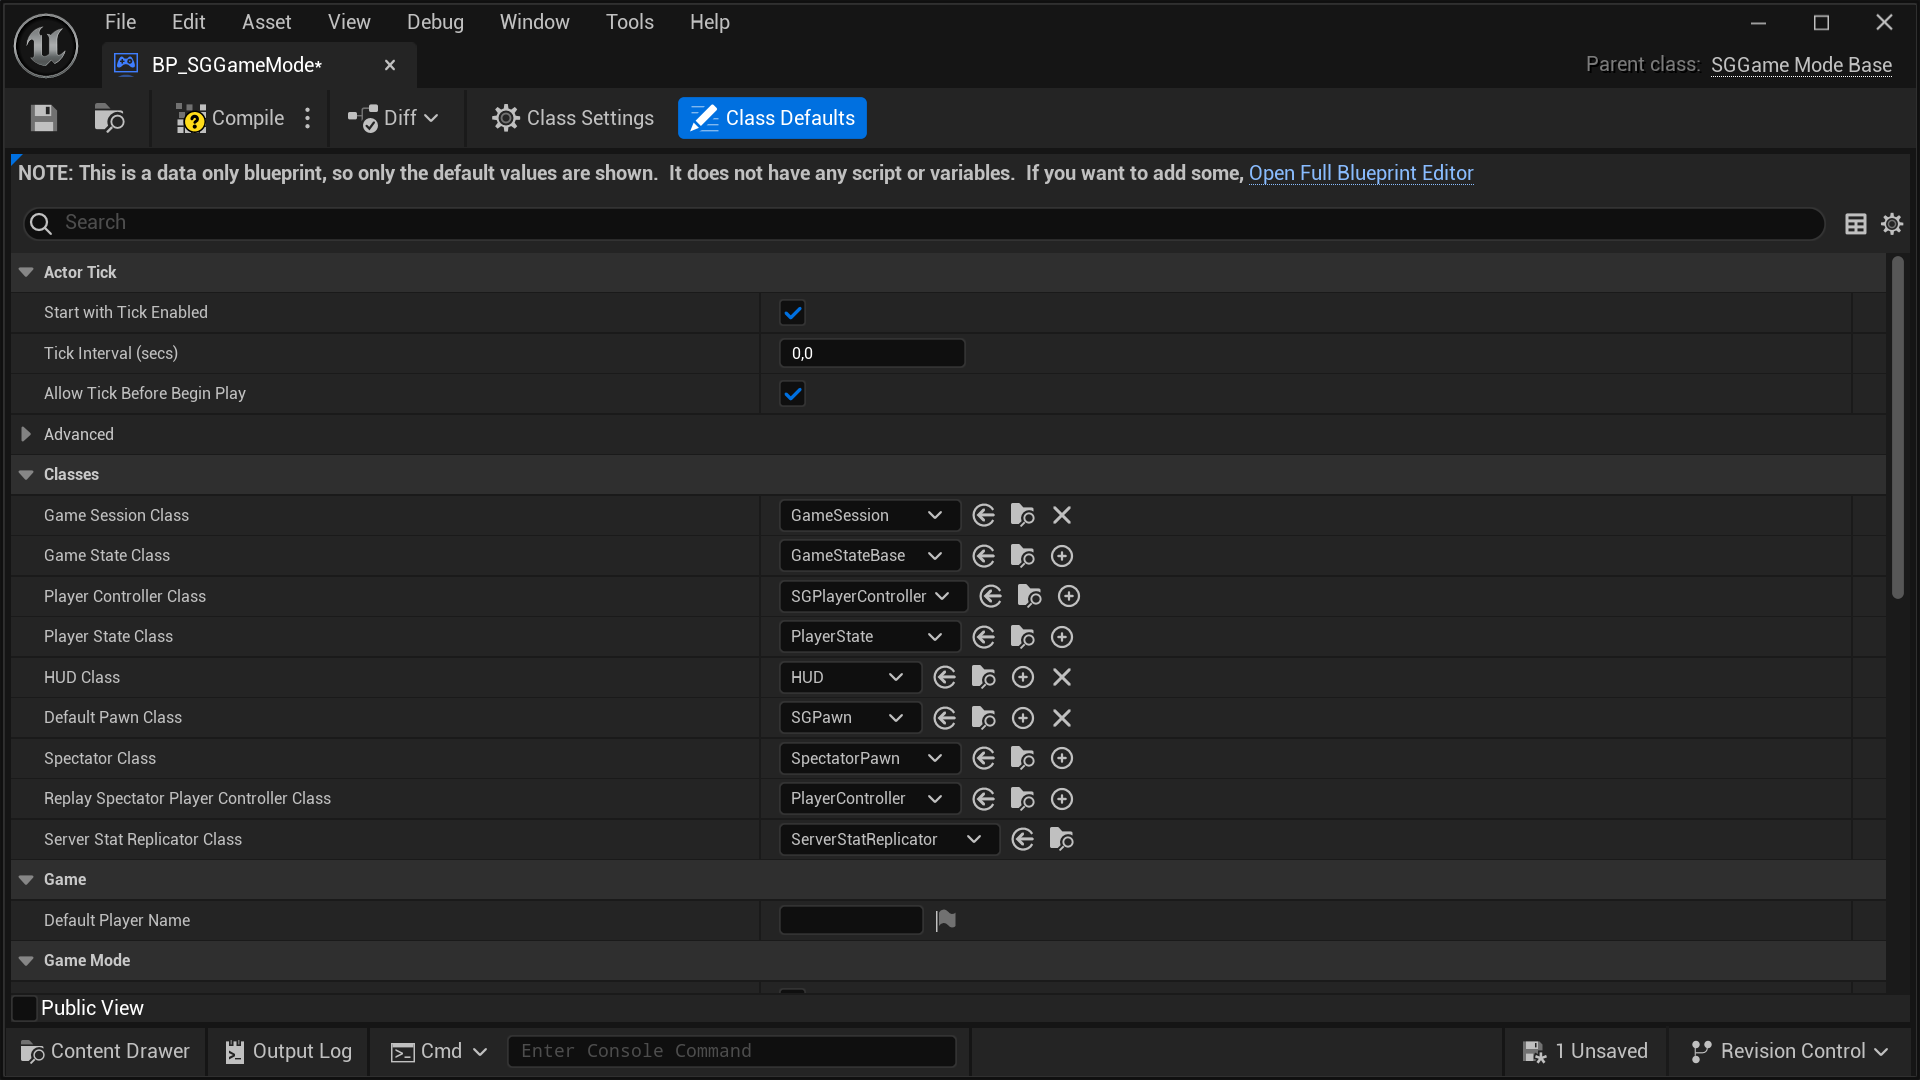
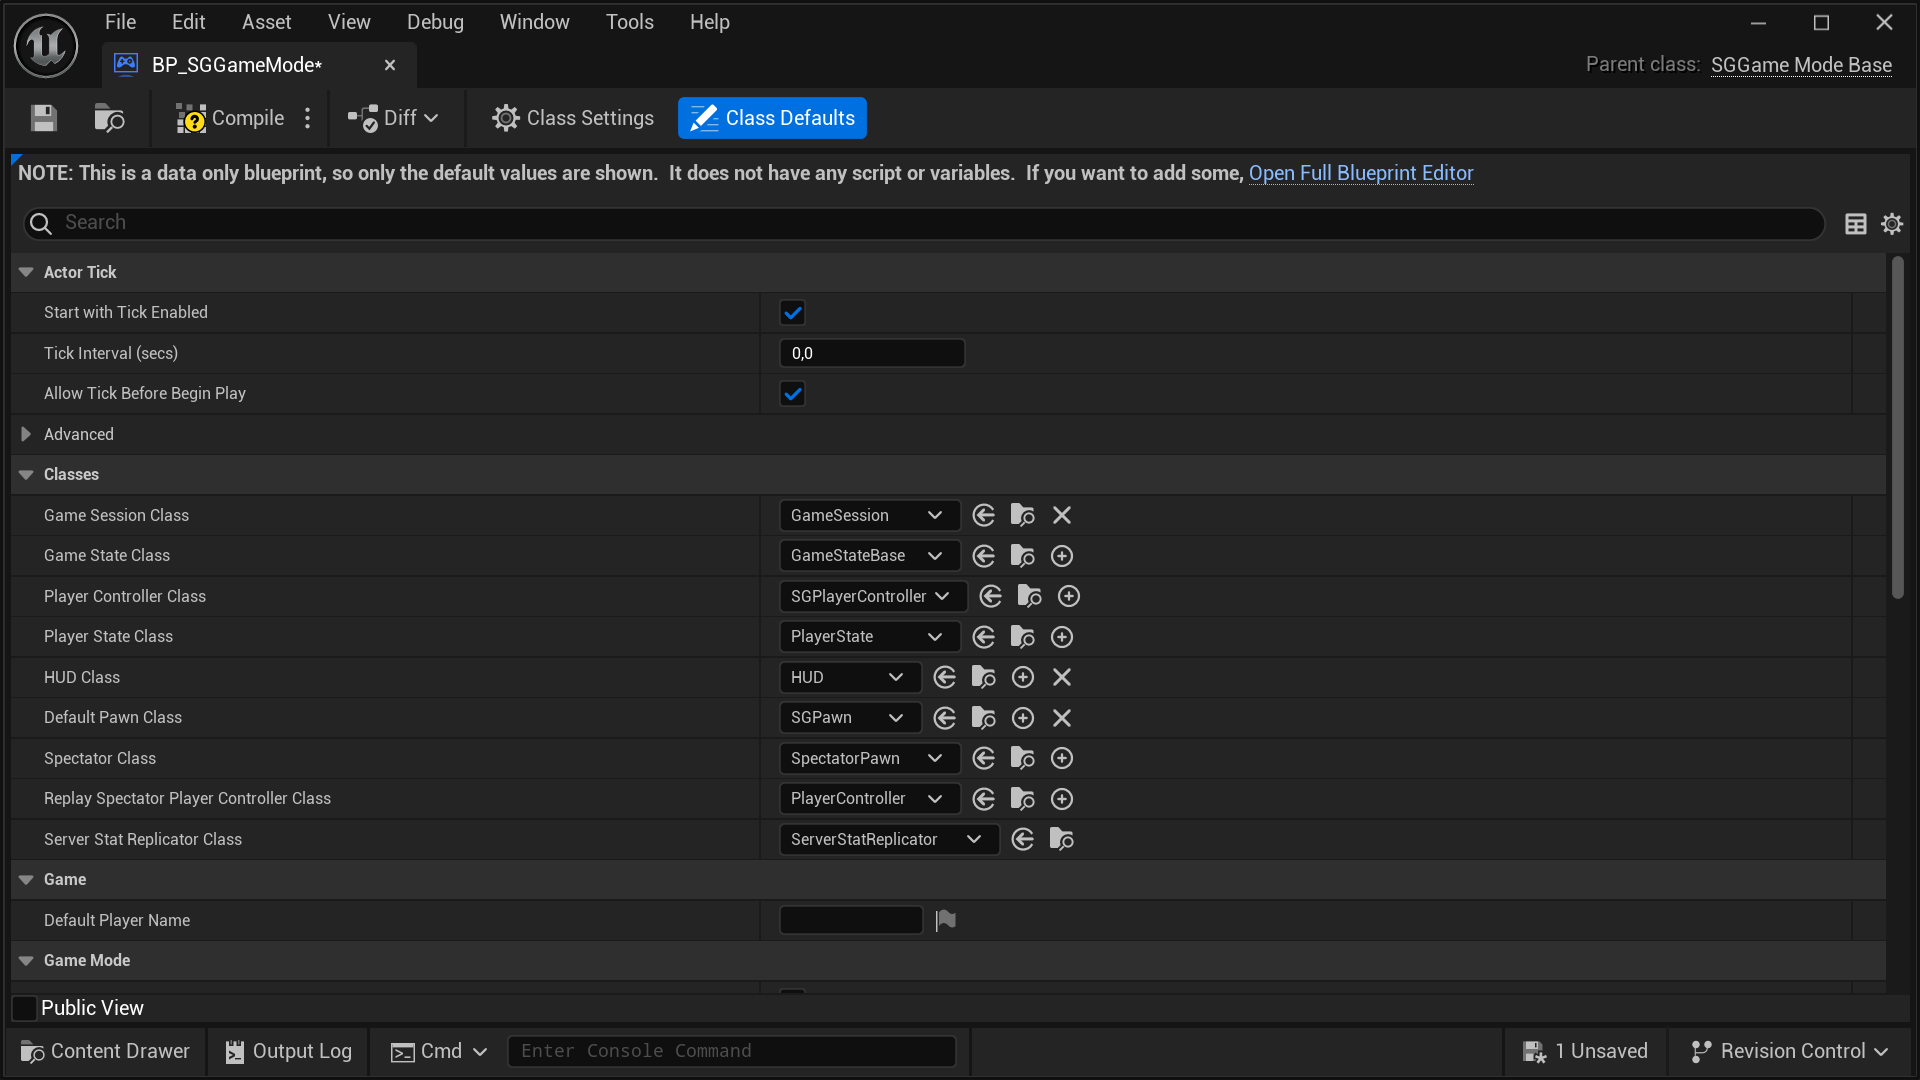
Depening on the Unreal Engine version and your project's type and configuration, you might be able to set SGPawn as the Default Pawn Class by navigating to Project Settings > Project > Maps & Modes > Default Modes > Selected GameMode > Default Pawn Class. However, regardless of the engine version or project type and configuration, you can always configure this by opening your Default GameMode and setting the Default Pawn Class directly from there. Once set, click on the Compile button and save your game mode Blueprint asset.
Tip
For greater control and customization, consider extending the SGPawn.
Caution
Setting
SGPawnor a subclass of it as theDefault Pawn Classwithout settingSGPlayerControlleror a subclass of it as the defaultPlayer Controller Classwill cause theSGPawnto not function properly. So, it's a strict requirement.
Important
To have a fully functional
SGPawn, simply setting it up is not enough. You still need to setup the Virtual Hand Meshes and setup the Wrist Tracking Hardware.
Extending SGPawn
Follow these steps to extend and set up your own version of SGPawn:
- In the Content Browser, click the
+ Addbutton, then selectBlueprint Class from the menu. Alternatively, right-click inside the Content Browser and chooseBlueprint Classfrom the context menu.

- A dialog will appear asking you to choose a parent class. Click on the
ALL CLASSESsection to expand the list of available classes.

- In the expanded
ALL CLASSESsection, start typingSGPawnin the Search box. WhenSGPawnappears, select it and click theSelectbutton to create your new Blueprint class based on it.
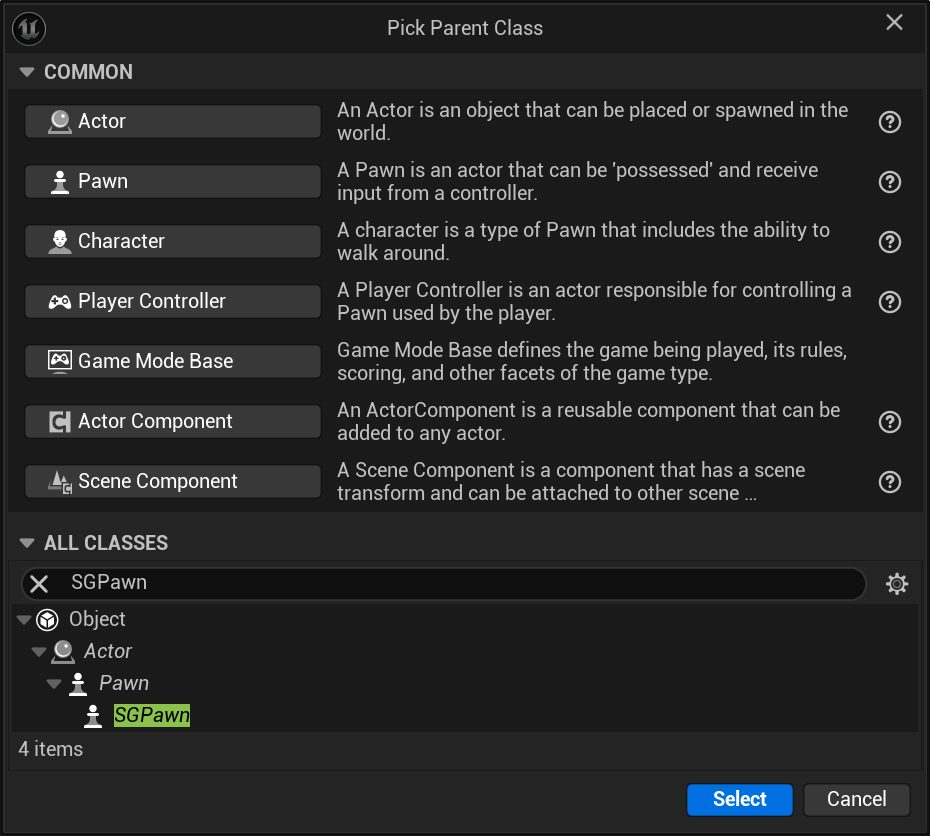
- After returning to the Content Browser, the Unreal Editor will prompt you to rename
NewBlueprintto your desired class name. You can rename the class at any time by pressingF2or by right-clicking on it and selectingRenamefrom the context menu.

- Once you have renamed the
NewBlueprintclass to your desired name, click onSave Allto save the new class to disk.
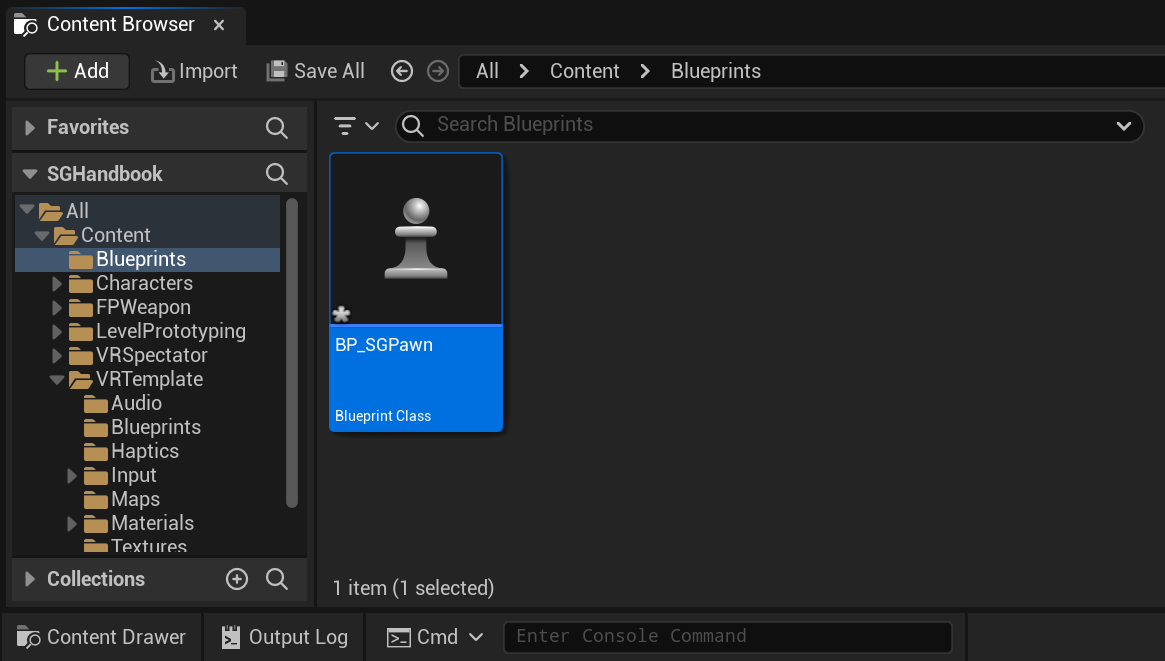
- Finally, set your newly created subclass of
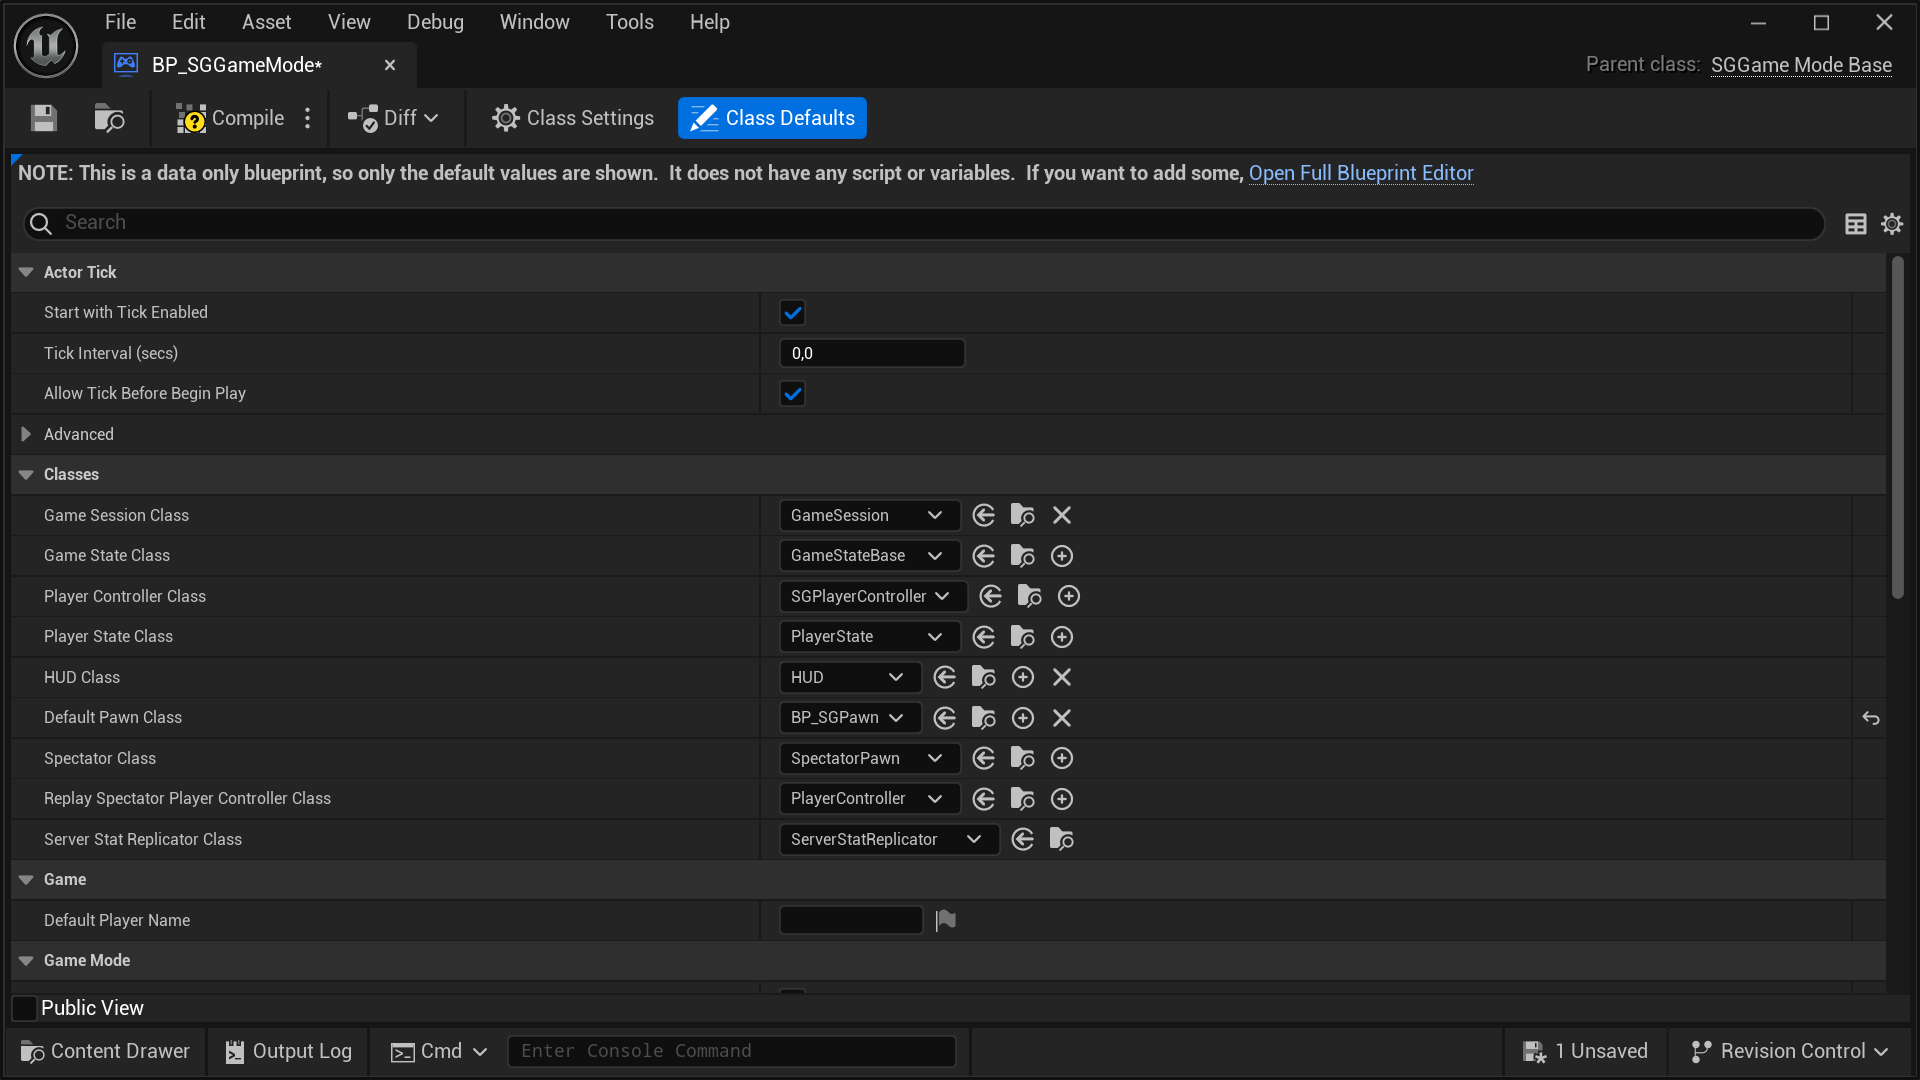
SGPawnas theDefault Pawn Class. Depening on the Unreal Engine version and your project's type and configuration, you might be able do this by navigating toProject Settings > Project > Maps & Modes > Default Modes > Selected GameMode > Default Pawn Class. However, regardless of the engine version or project type and configuration, you can always configure this by opening yourDefault GameModeand setting theDefault Pawn Classdirectly from there. Once set, click on theCompilebutton and save your game mode Blueprint asset.
Important
To have a fully functional
SGPawn, simply setting it up is not enough. You still need to setup the Virtual Hand Meshes and setup the Wrist Tracking Hardware.
Customizing SGPawn
Customizing the SGPawn after subclassing is straightforward and flexible.
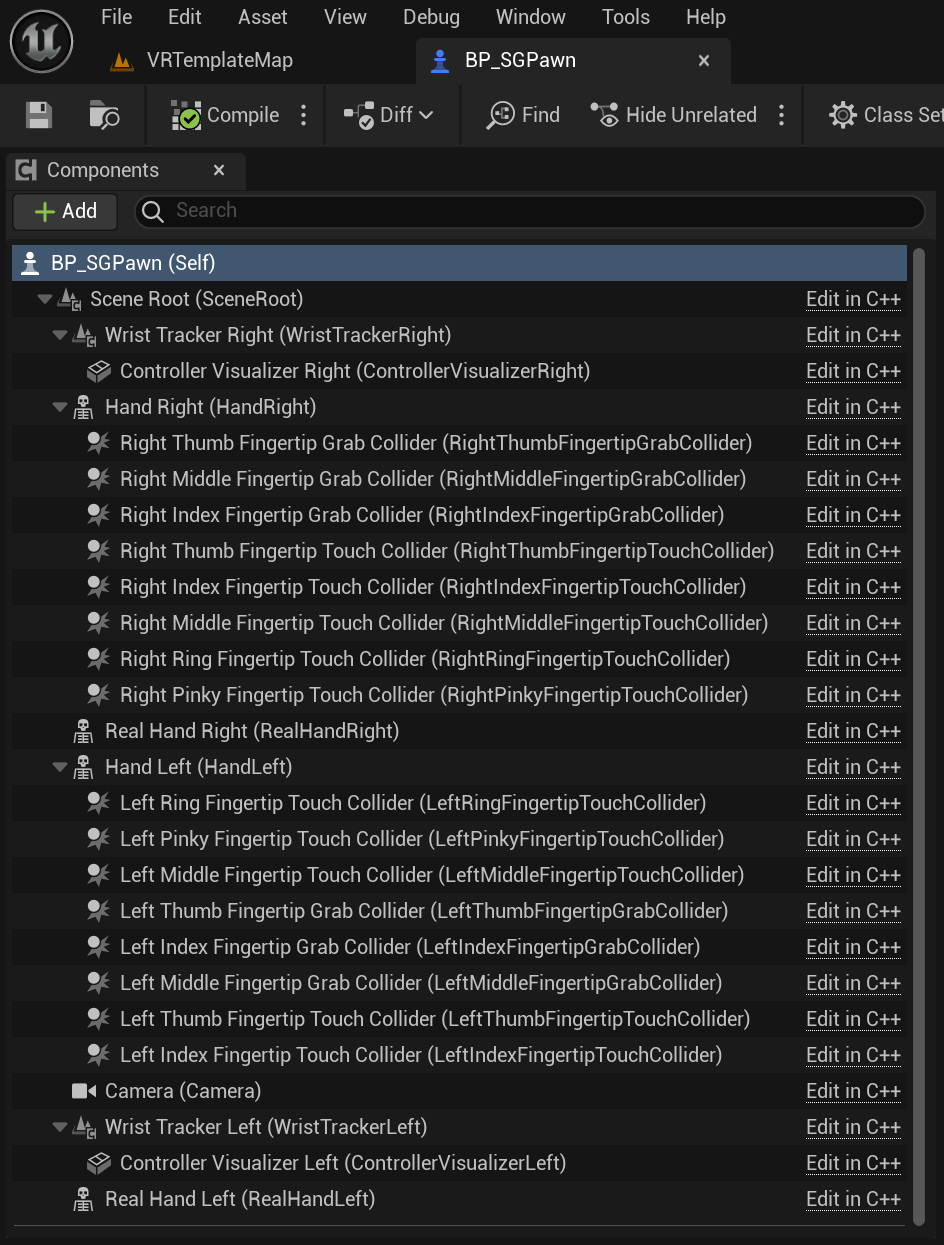
The SGPawn class includes several key subcomponents:
Wrist Tracker LeftandWrist Tracker Rightof typeSGWristTrackerComponent.HandLeftandHandRightof typeSGVirtualHandComponentand represent the virtual hand models visible to the user in the simulation.RealHandLeftandRealHandRightof typeSGVirtualHandComponent. By default, these are hidden and represent the real hands within the simulation. These components are useful if you need to separate the rendering of the virtual hands from the real hands. For instance, the virtual hands typically have collisions and cannot pass through objects, while the real hands are not constrained in this way.
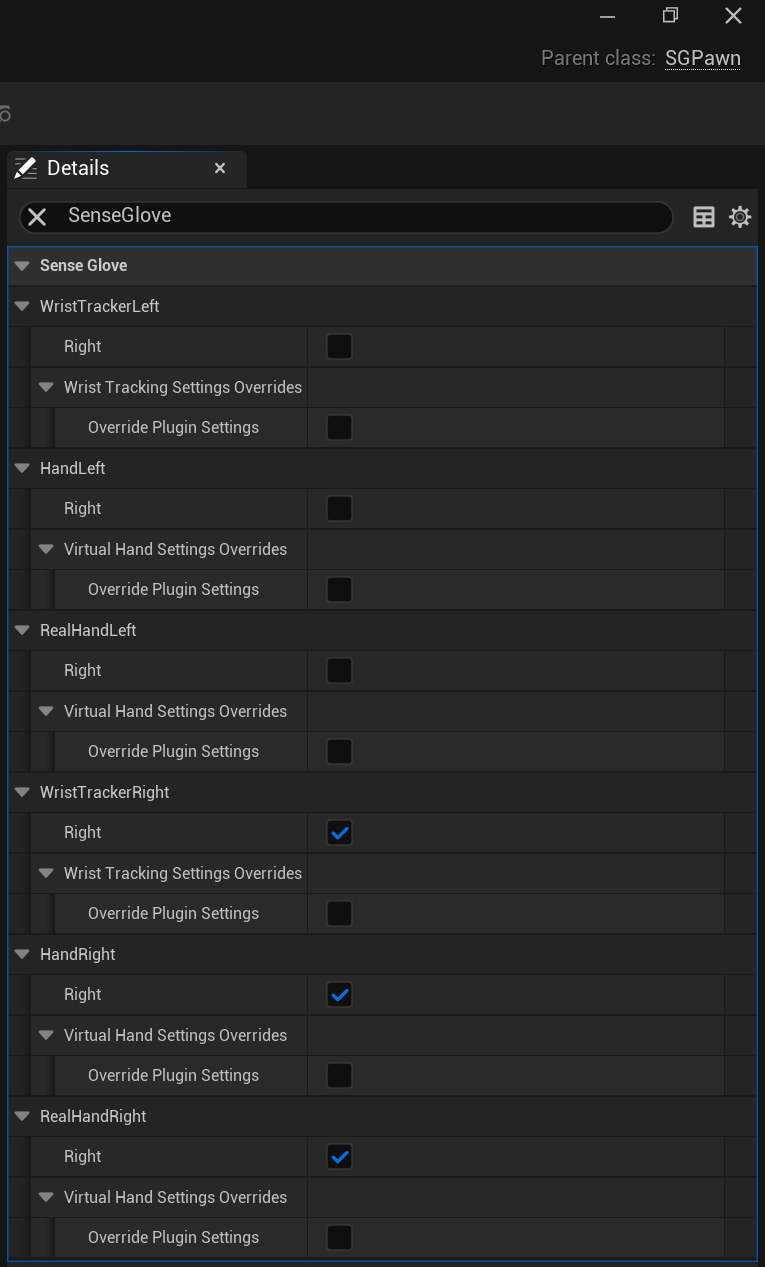
Also, it's possible to filter the properties for these SenseGlove components inside the Details panel inside the SGPawn Blueprint Editor by typing the word SenseGlove inside Search box of the Details panel.
Please visit how to setup the Virtual Hand Meshes, The Virtual Hand Mesh Settings, and how to setup the Wrist Tracking Hardware sections for more information.
Setting Up SGPlayerController
Depening on the Unreal Engine version and your project's type and configuration, you might be able to set SGPlayerController as the default Player Controller Class by navigating to Project Settings > Project > Maps & Modes > Default Modes > Selected GameMode > Player Controller Class. However, regardless of the engine version or project type and configuration, you can always configure this by opening your Default GameMode and setting the default Player Controller Class directly from there. Once set, click on the Compile button and save your game mode Blueprint asset.
Tip
For greater control and customization, consider extending the SGPlayerController.
Caution
Setting
SGPlayerControlleror a subclass of it as the defaultPlayer Controller Classwithout settingSGPawnor a subclass of it as theDefault Pawn Classwill cause your simulation or editor to crash. So, it's a strict requirement.
Extending SGPlayerController
Follow these steps to extend and set up your own version of SGPlayerController:
- In the Content Browser, click the
+ Addbutton, then selectBlueprint Class from the menu. Alternatively, right-click inside the Content Browser and chooseBlueprint Classfrom the context menu.

- A dialog will appear asking you to choose a parent class. Click on the
ALL CLASSESsection to expand the list of available classes.

- In the expanded
ALL CLASSESsection, start typingSGPlayerControllerin the Search box. WhenSGPlayerControllerappears, select it and click theSelectbutton to create your new Blueprint class based on it.
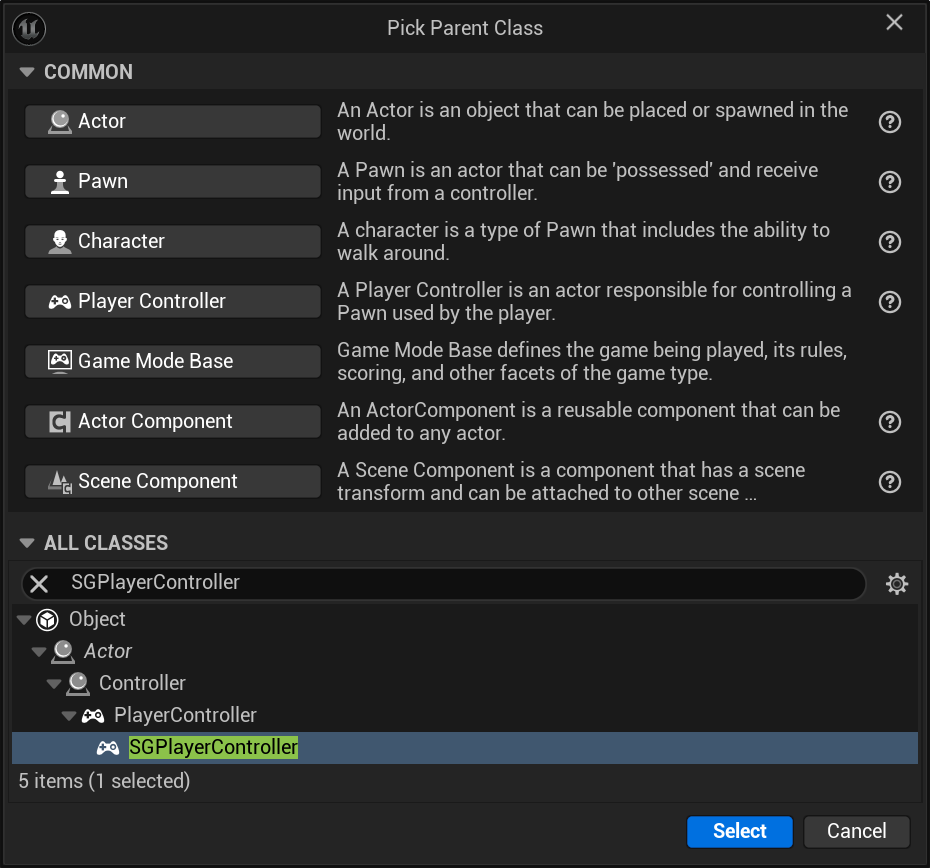
- After returning to the Content Browser, the Unreal Editor will prompt you to rename
NewBlueprintto your desired class name. You can rename the class at any time by pressingF2or by right-clicking on it and selectingRenamefrom the context menu.

- Once you have renamed the
NewBlueprintclass to your desired name, click onSave Allto save the new class to disk.
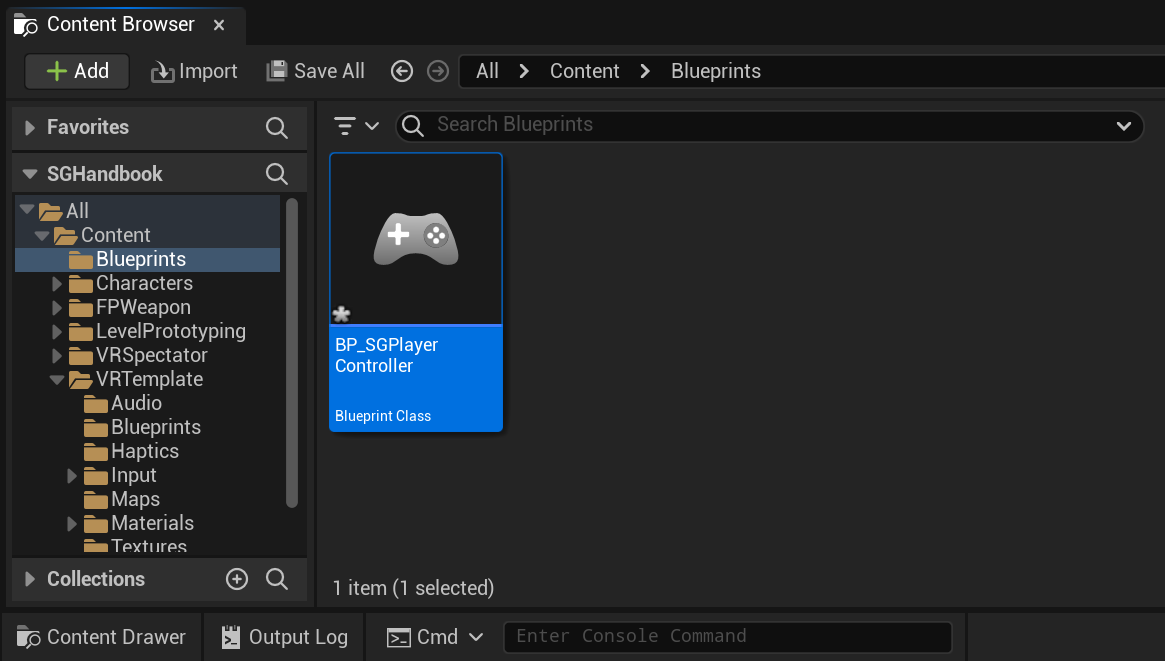
- Finally, set your newly created subclass of
SGPlayerControlleras the defaultPlayer Controller Class. Depening on the Unreal Engine version and your project's type and configuration, you might be able do this by navigating toProject Settings > Project > Maps & Modes > Default Modes > Selected GameMode > Player Controller Class. However, regardless of the engine version or project type and configuration, you can always configure this by opening yourDefault GameModeand setting the defaultPlayer Controller Classdirectly from there. Once set, click on theCompilebutton and save your game mode Blueprint asset.
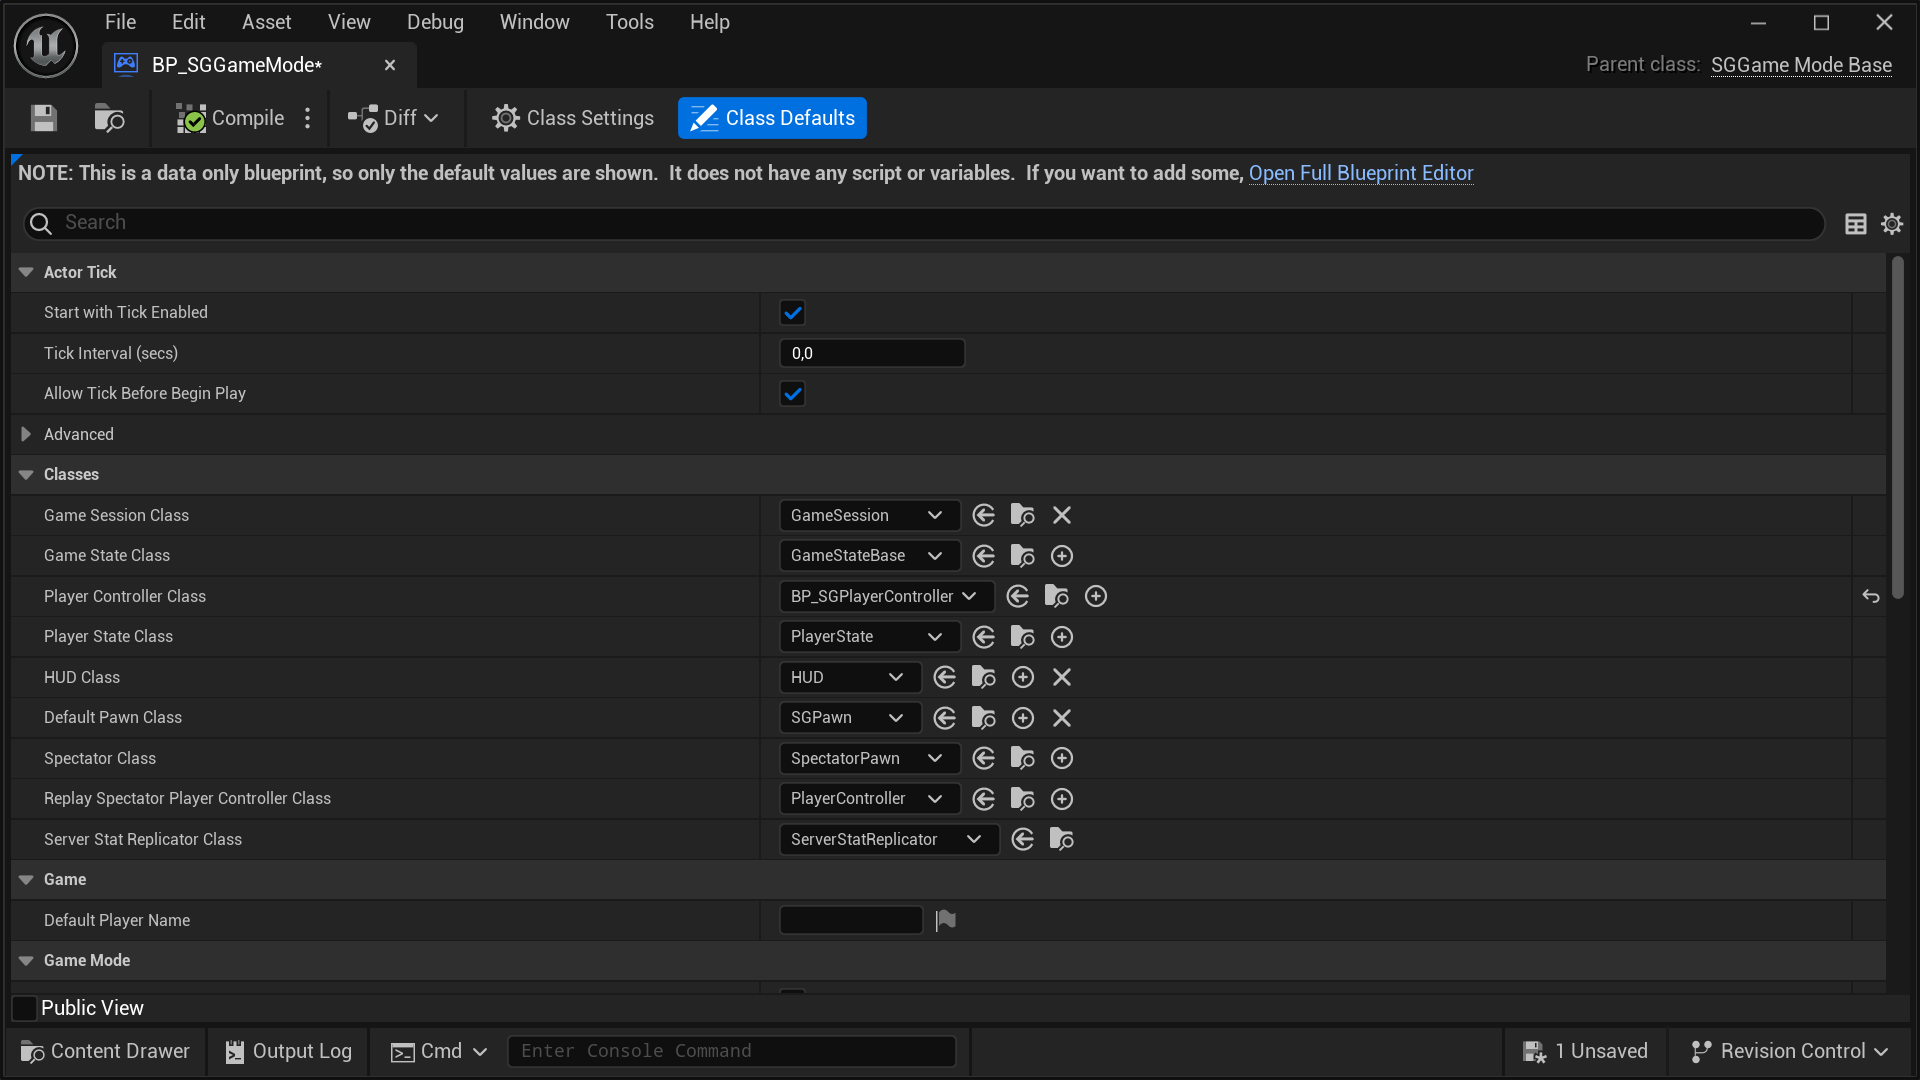
Setting Up SGGameInstance
Setting SGGameInstance as the default Game Instance Class is very straightforward. You can do this by navigating to Project Settings > Project > Maps & Modes > Game Instance > Game Instance Class.
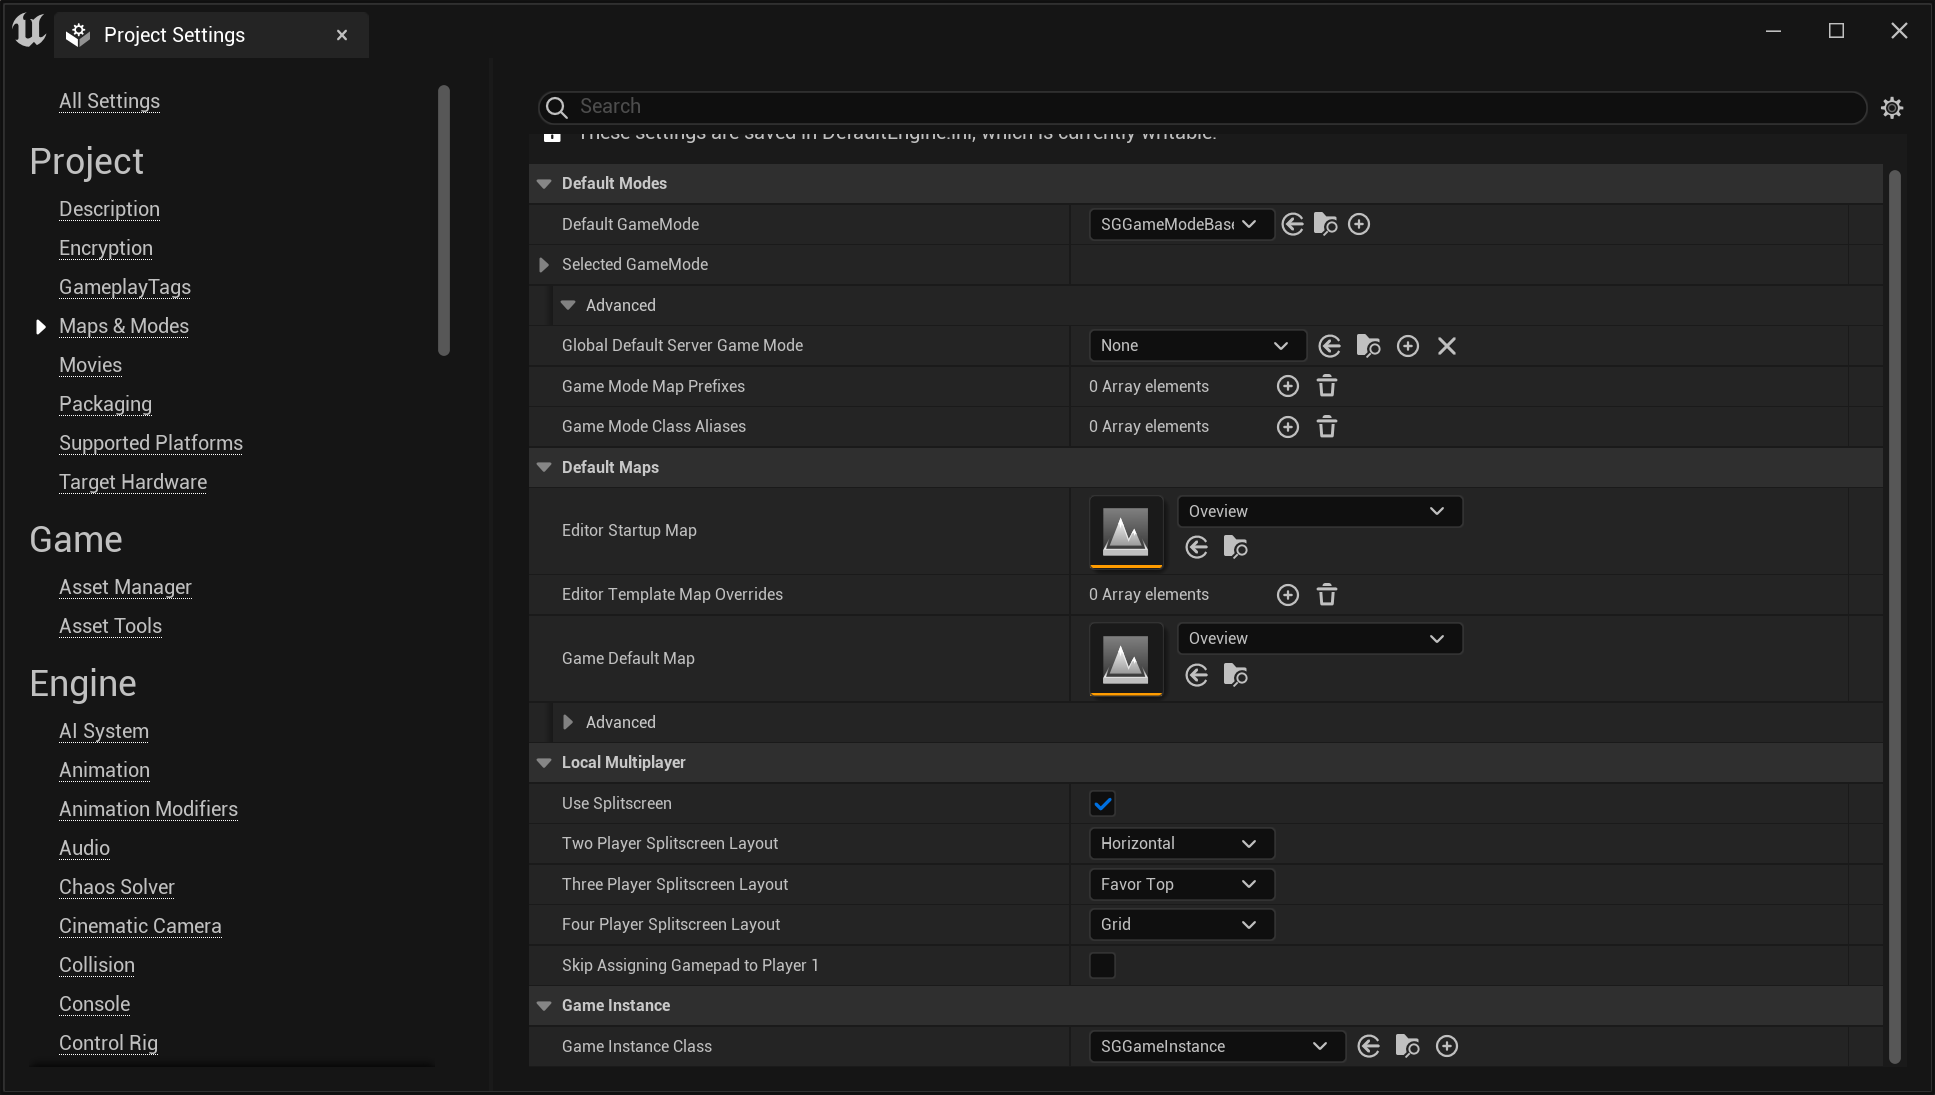
Tip
For greater control and customization, consider extending the SGGameInstance.
Important
Currently, setting
SGGameModeBaseor a subclass of it as the defaultGame Instance Classis not a strict requirement. However, if you intend to use any SenseGlove console command it becomes mandatory. If not set, SenseGlove console commands will not be recognized by Unreal Engine.
Extending SGGameInstance
Follow these steps to extend and set up your own version of SGGameInstance:
- In the Content Browser, click the
+ Addbutton, then selectBlueprint Class from the menu. Alternatively, right-click inside the Content Browser and chooseBlueprint Classfrom the context menu.

- A dialog will appear asking you to choose a parent class. Click on the
ALL CLASSESsection to expand the list of available classes.

- In the expanded
ALL CLASSESsection, start typingSGGameInstancein the Search box. WhenSGGameInstanceappears, select it and click theSelectbutton to create your new Blueprint class based on it.
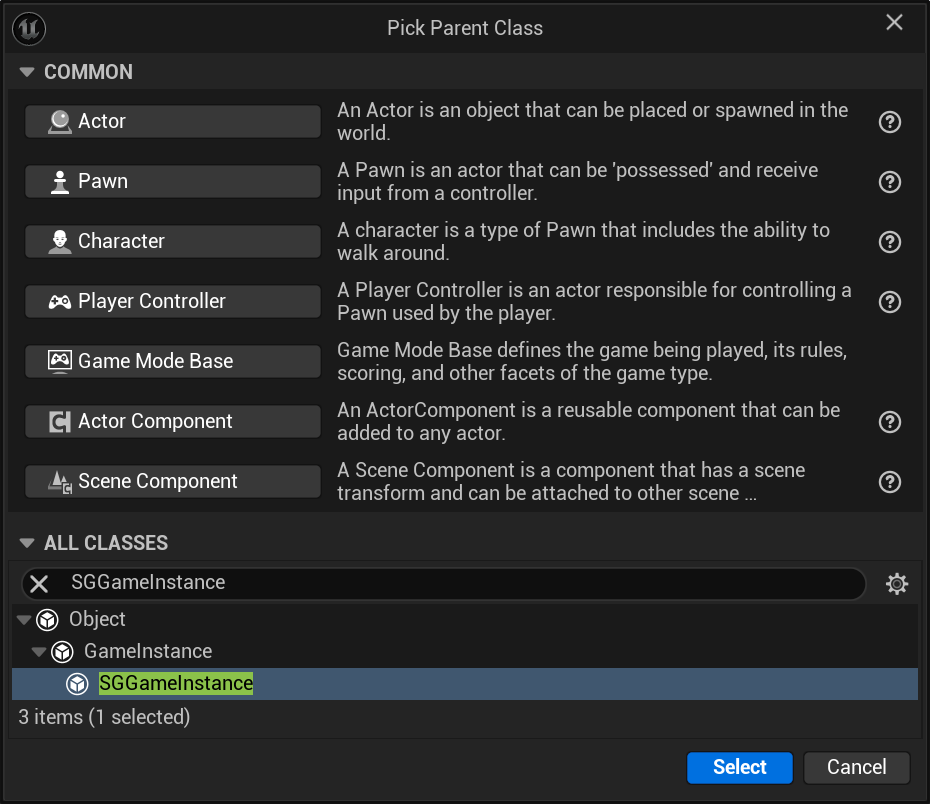
- After returning to the Content Browser, the Unreal Editor will prompt you to rename
NewBlueprintto your desired class name. You can rename the class at any time by pressingF2or by right-clicking on it and selectingRenamefrom the context menu.

- Once you have renamed the
NewBlueprintclass to your desired name, click onSave Allto save the new class to disk.
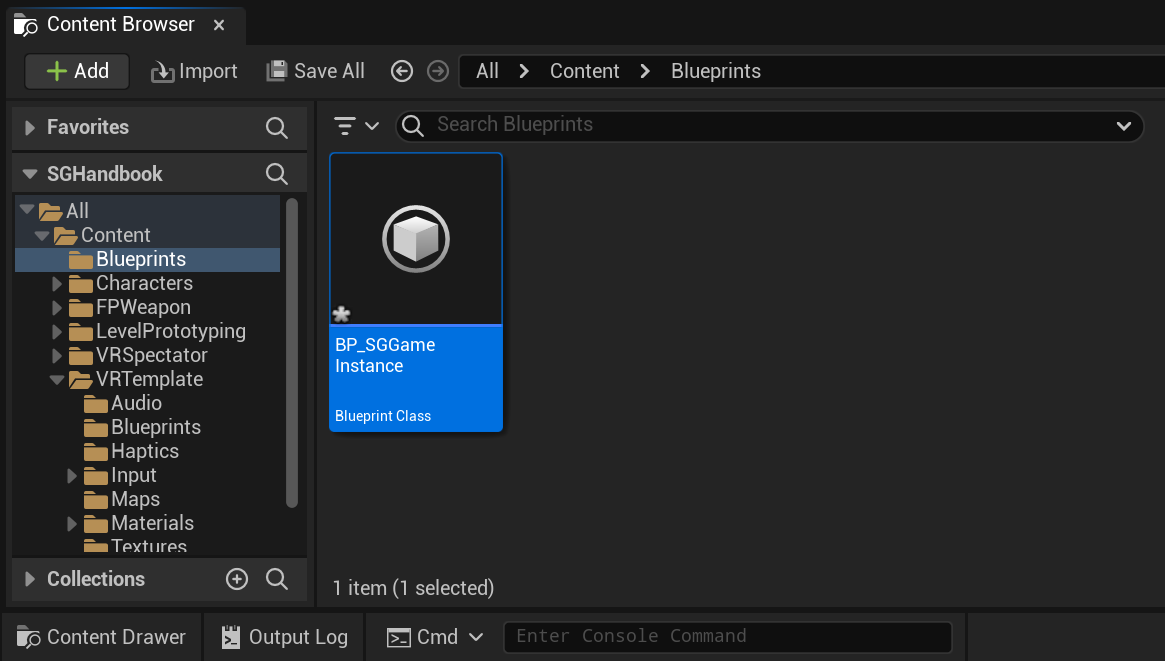
- Finally, set your newly created subclass of
SGGameInstanceas the defaultGame Instance Class. You can do this by navigating toProject Settings > Project > Maps & Modes > Game Instance > Game Instance Class.
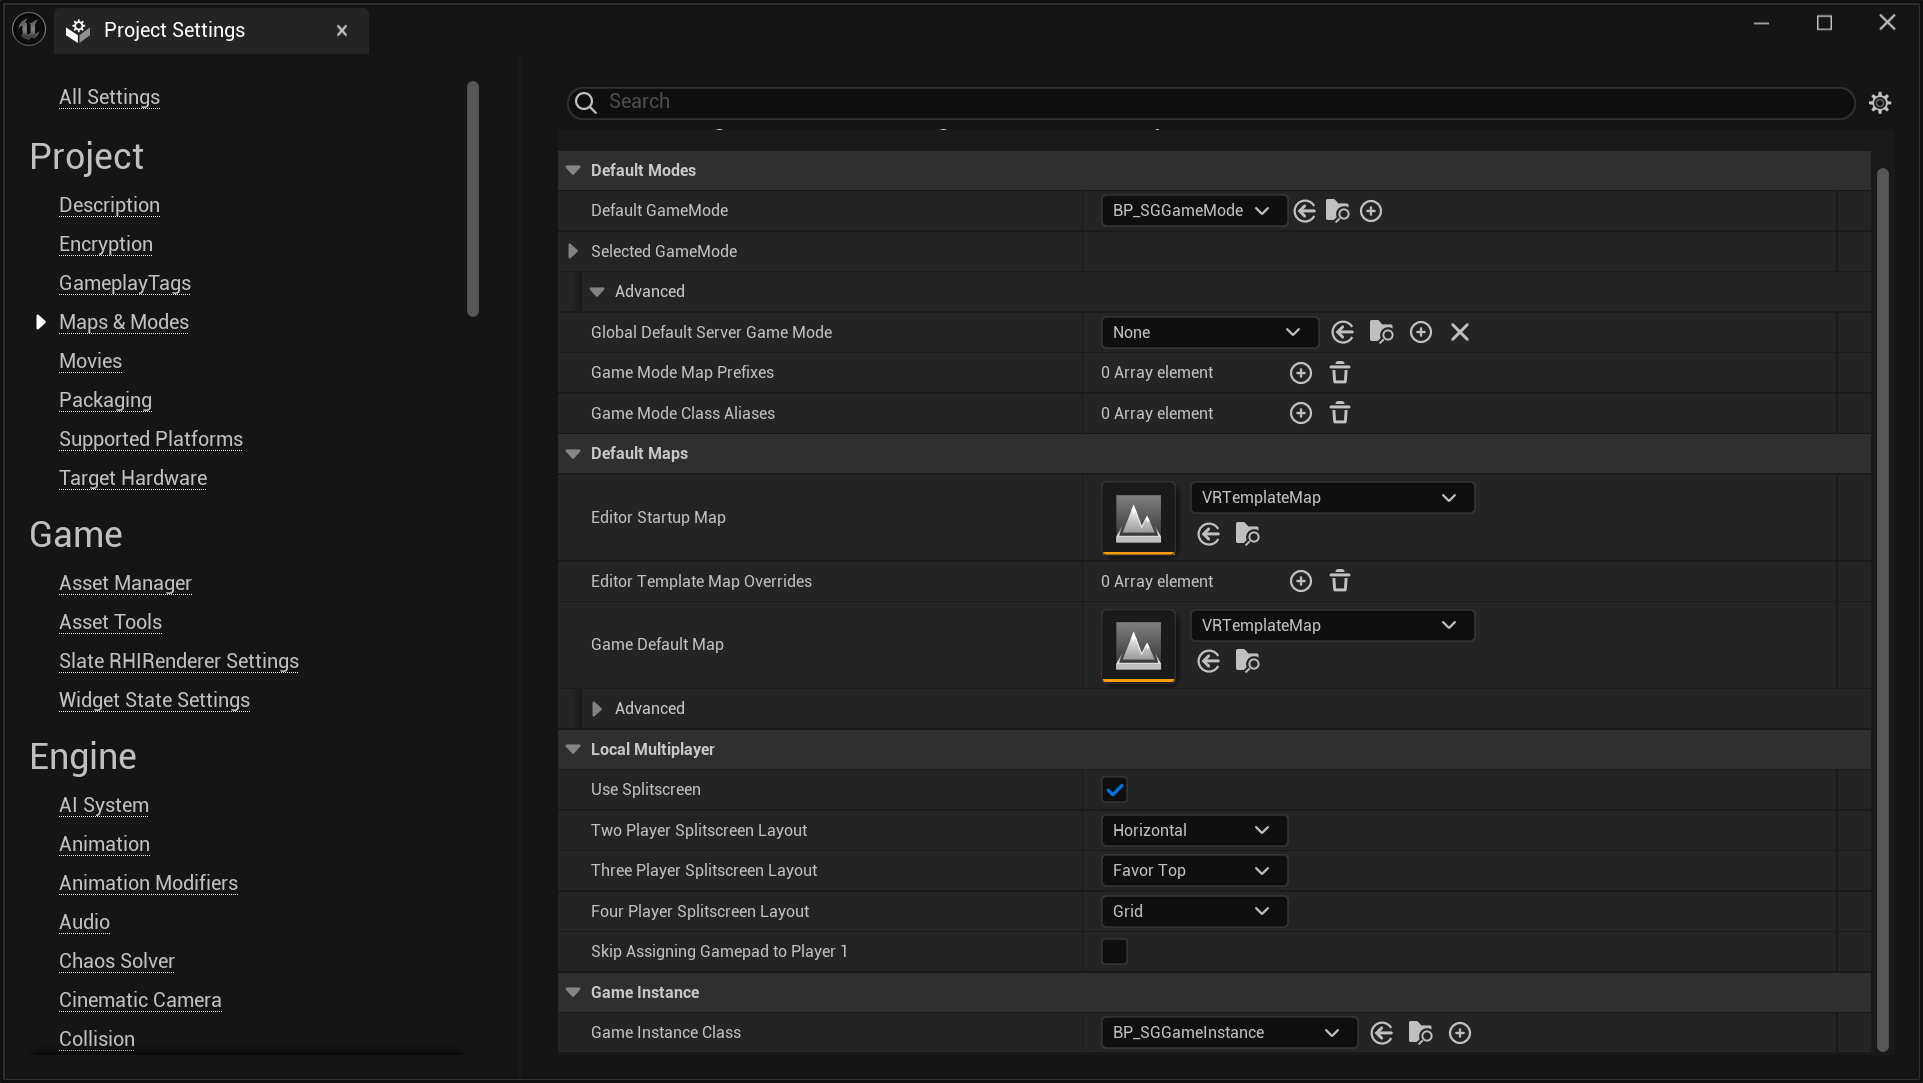
Setting Up SGGameUserSettings
Setting SGGameUserSettings as the default Game User Settings Class is very straightforward. You can do this by navigating to Project Settings > Engine > General Settings > Default Classes > Advanced > Game User Settings Class. Once you change the default Game User Settings Class the Unreal Editor will prompt you with Restart required to apply new settings. For the changes to take effect, click on the Restart Now button and wait for the editor to reopen.
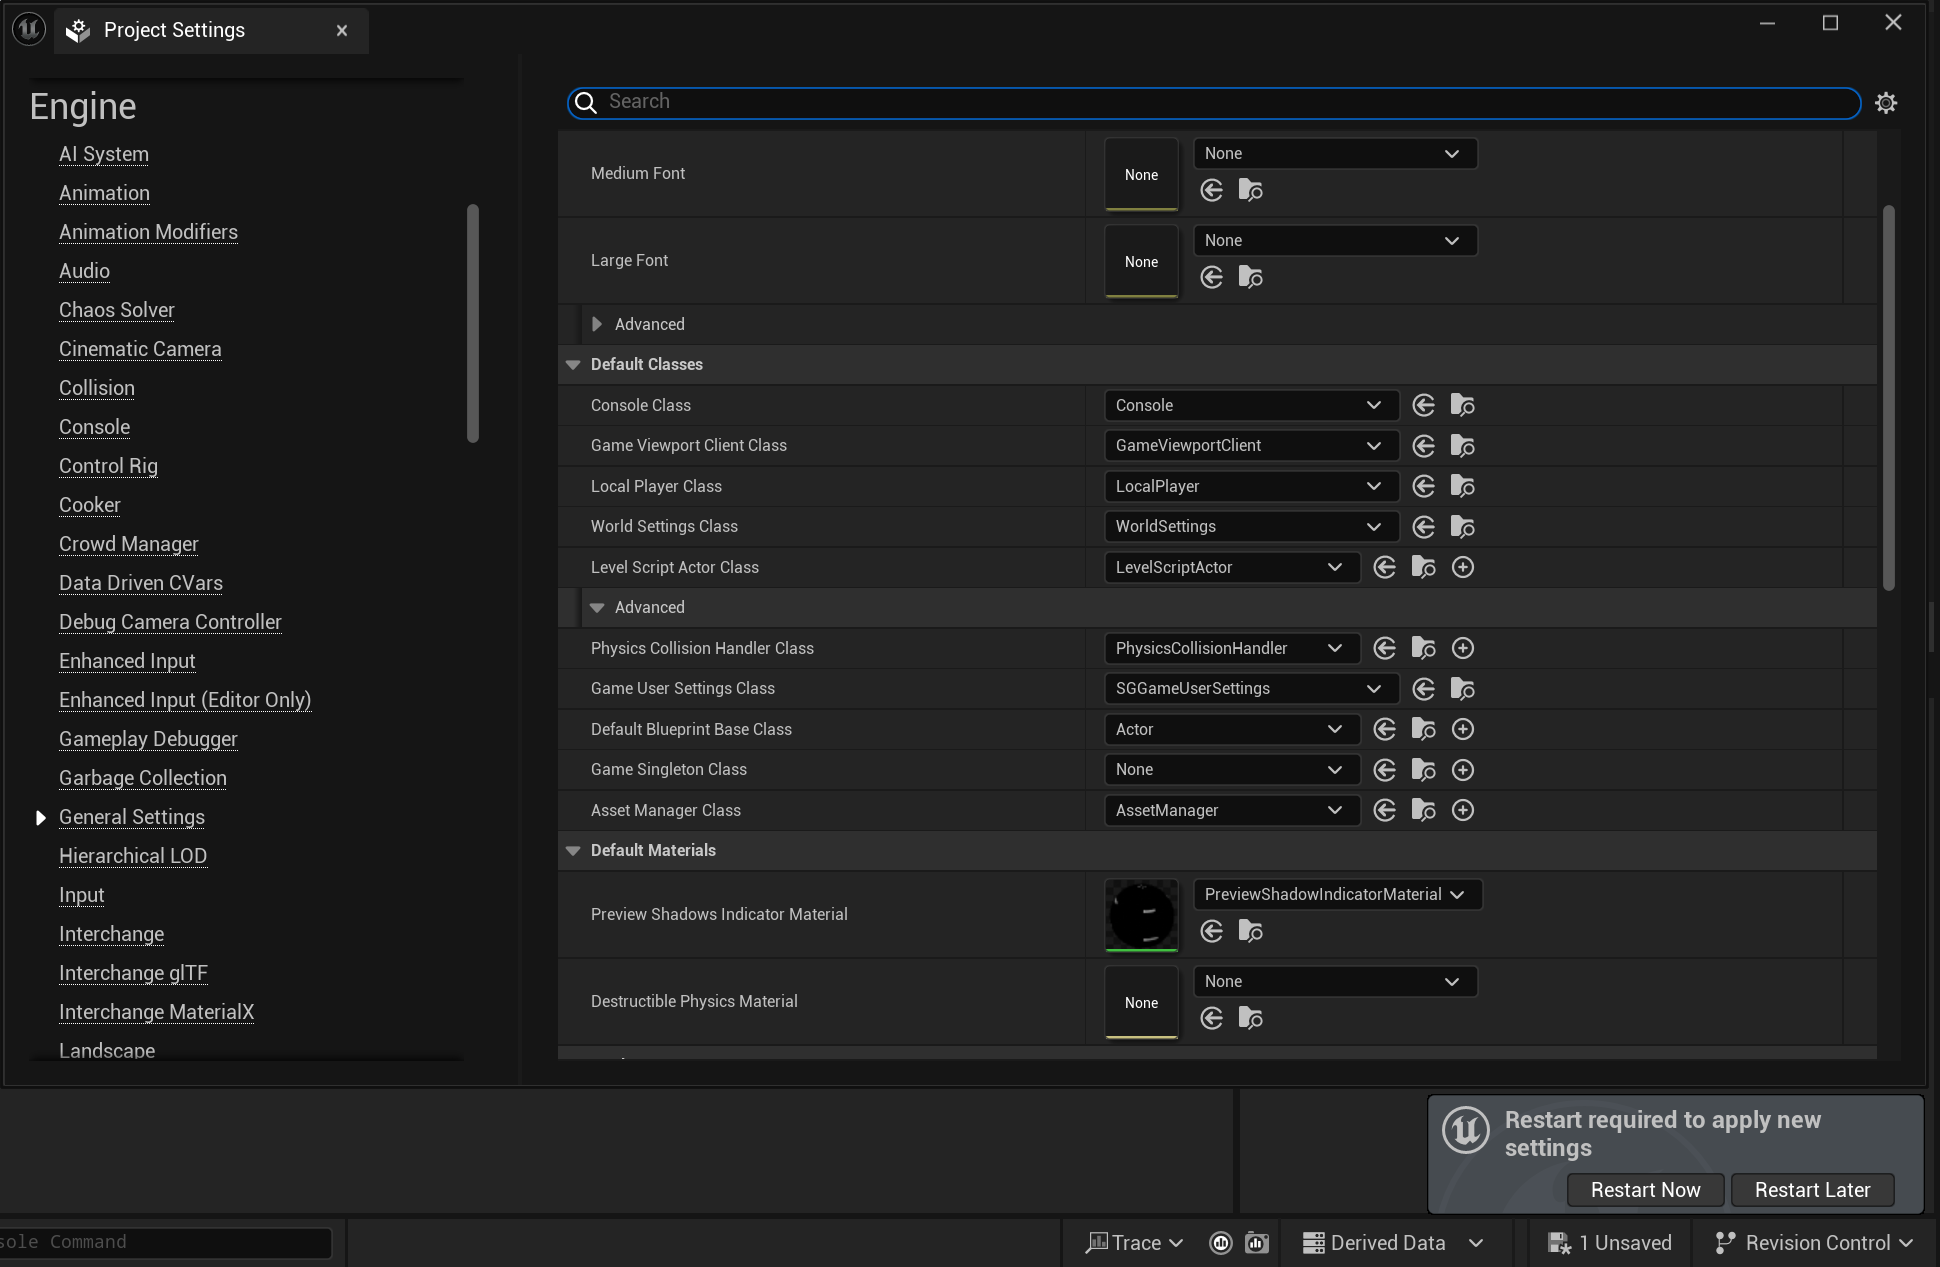
Tip
For greater control and customization, consider extending the SGGameUserSettings.
Important
Currently, setting
SGGameUserSettingsor a subclass of it as the defaultGame User Settings Classis not a strict requirement. However, if you intend to use any SGGameUserSettings-related SenseGlove console command it becomes mandatory. If not set, calling any SGGameUserSettings-related SenseGlove console command will cause your simulation or editor to crash.
Extending SGGameUserSettings
Follow these steps to extend and set up your own version of SGGameUserSettings:
- In the Content Browser, click the
+ Addbutton, then selectBlueprint Class from the menu. Alternatively, right-click inside the Content Browser and chooseBlueprint Classfrom the context menu.

- A dialog will appear asking you to choose a parent class. Click on the
ALL CLASSESsection to expand the list of available classes.

- In the expanded
ALL CLASSESsection, start typingSGGameUserSettingsin the Search box. WhenSGGameUserSettingsappears, select it and click theSelectbutton to create your new Blueprint class based on it.
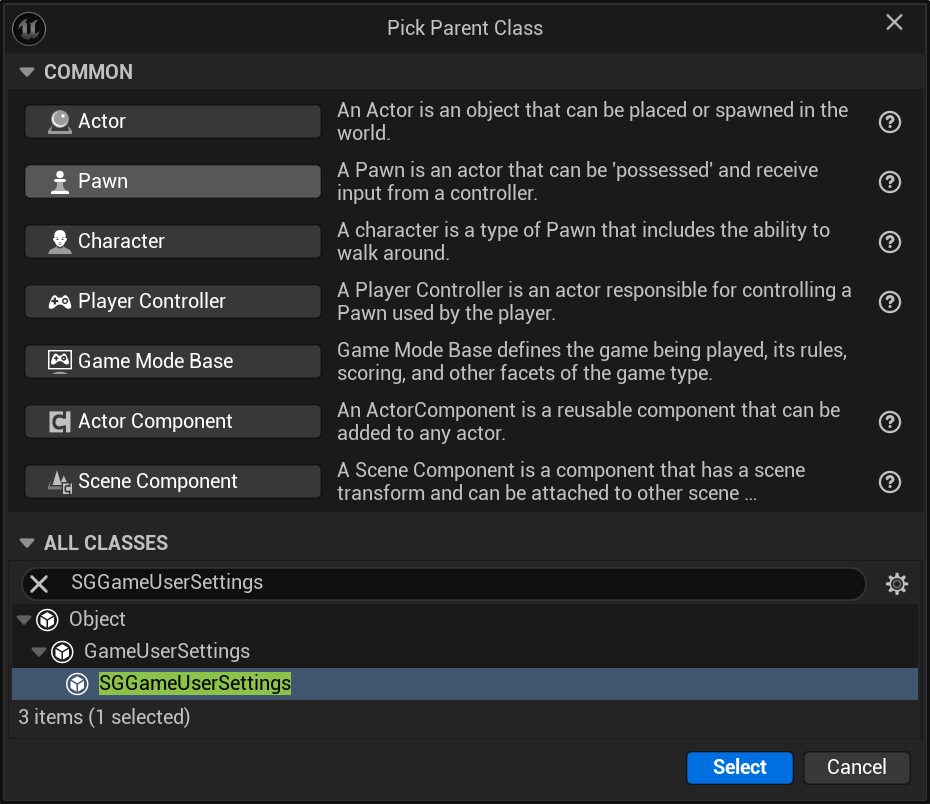
- After returning to the Content Browser, the Unreal Editor will prompt you to rename
NewBlueprintto your desired class name. You can rename the class at any time by pressingF2or by right-clicking on it and selectingRenamefrom the context menu.

- Once you have renamed the
NewBlueprintclass to your desired name, click onSave Allto save the new class to disk.
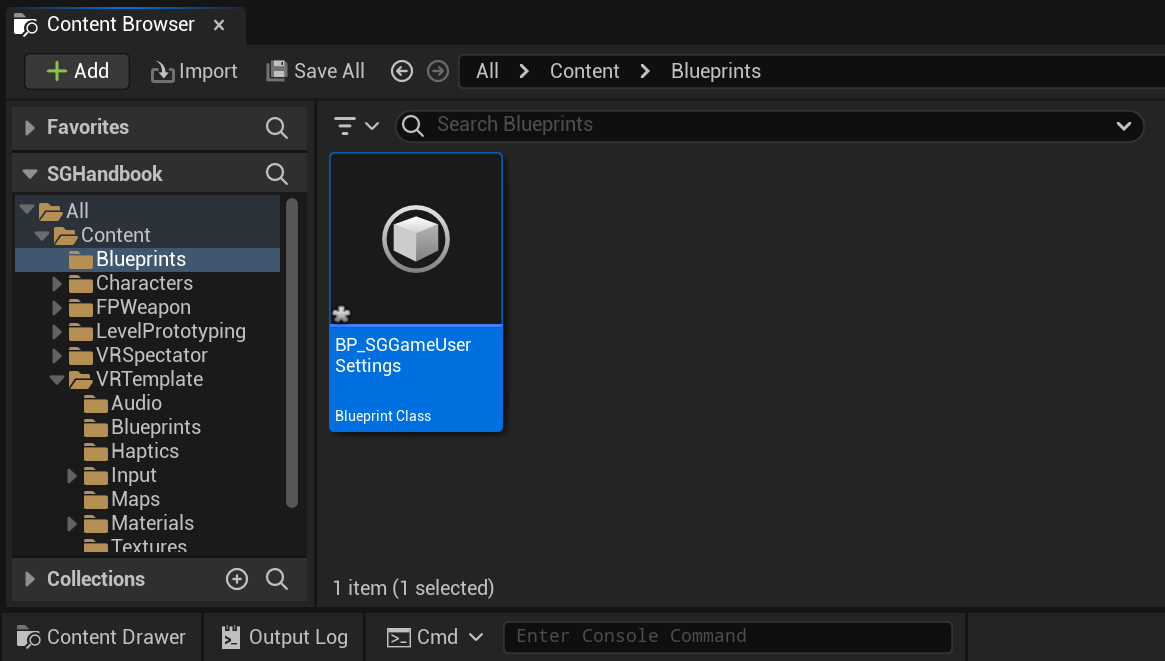
- Finally, set your newly created subclass of
SGGameUserSettingsas the defaultGame User Settings Class. You can do this by navigating toProject Settings > Engine > General Settings > Default Classes > Advanced > Game User Settings Class. Once you change the defaultGame User Settings Classthe Unreal Editor will prompt you withRestart required to apply new settings. For the changes to take effect, click on theRestart Nowbutton and wait for the editor to reopen.
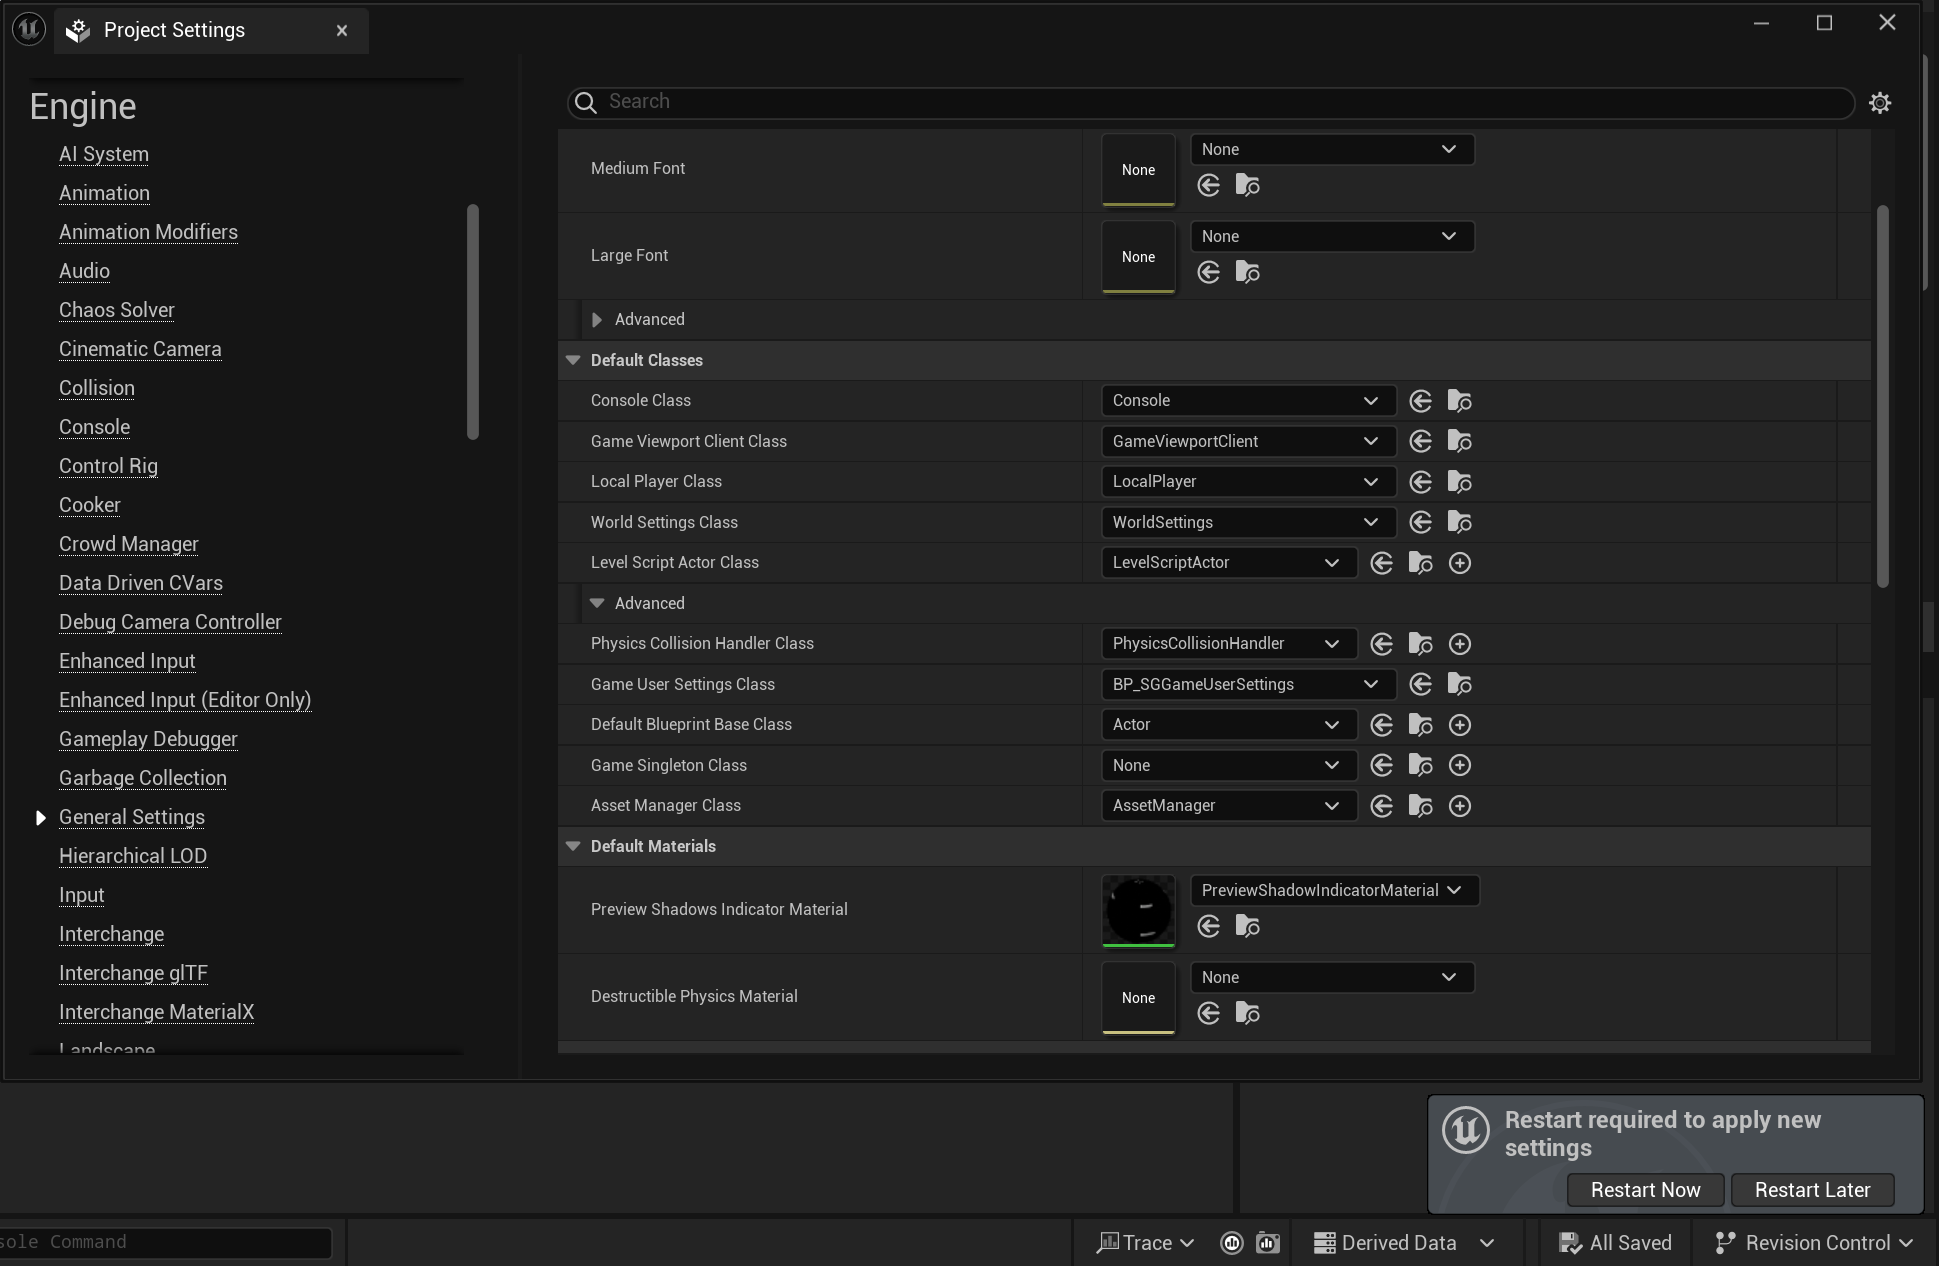
Setting Up the Virtual Hand Meshes
Setting up Virtual Hand Meshes involves two key steps:
- Importing the virtual hand meshes into your project.
- Configuring the virtual hand settings.
In this section we focus on the first part. For detailed information on step two, please visit the Virtual Hand configuration section.
Compatible Virtual Hand Meshes
The SenseGlove Unreal Engine Plugin is compatible with any virtual hand mesh that adheres to the Epic rig and bone structure. Additionally, the virtual hand meshes must be exported with specific settings to meet all requirements. If you're planning to model and rig your own virtual hand meshes, the Epic FBX Skeletal Mesh Pipeline is a useful starting point.
However, if you're looking to get up and running with the SenseGlove Unreal Engine Plugin quickly, the process is much simpler. Unreal Engine has included two sets of compatible virtual hand models with the Unreal Engine VR Template since version 5.1. This guide will walk you through how to export these virtual hand models from the VR Template and import them into your VR simulation.
Caution
While it is possible to migrate the virtual hand meshes directly from the Content Browser of the VR Template, this approach is not recommended. As part of the setup process, it is necessary to configure the SenseGlove Grab and Touch sockets. Although it's possible to set up these sockets manually, as demonstrated in one of our older tutorials, we no longer recommend doing so. Since version
v2.1.0of the SenseGlove Unreal Engine Plugin, we’ve included a tool that automates the socket setup with a single click, eliminating the need for the tedious manual process.Unfortunately, the SenseGlove Sockets Editor tool does not support skeletal meshes that share their skeleton. This is the case with the hand models included in the VR Template. Because of this limitation, we will be reimporting the virtual hand meshes with separate skeletons to ensure full compatibility with the SenseGlove Sockets Editor.
Exporting the Virtual Hand Meshes from the VRTemplate
- Start by creating a new Unreal Engine project using the VR Template. In the Unreal Project Browser, select
GAMES > Virtual Reality.
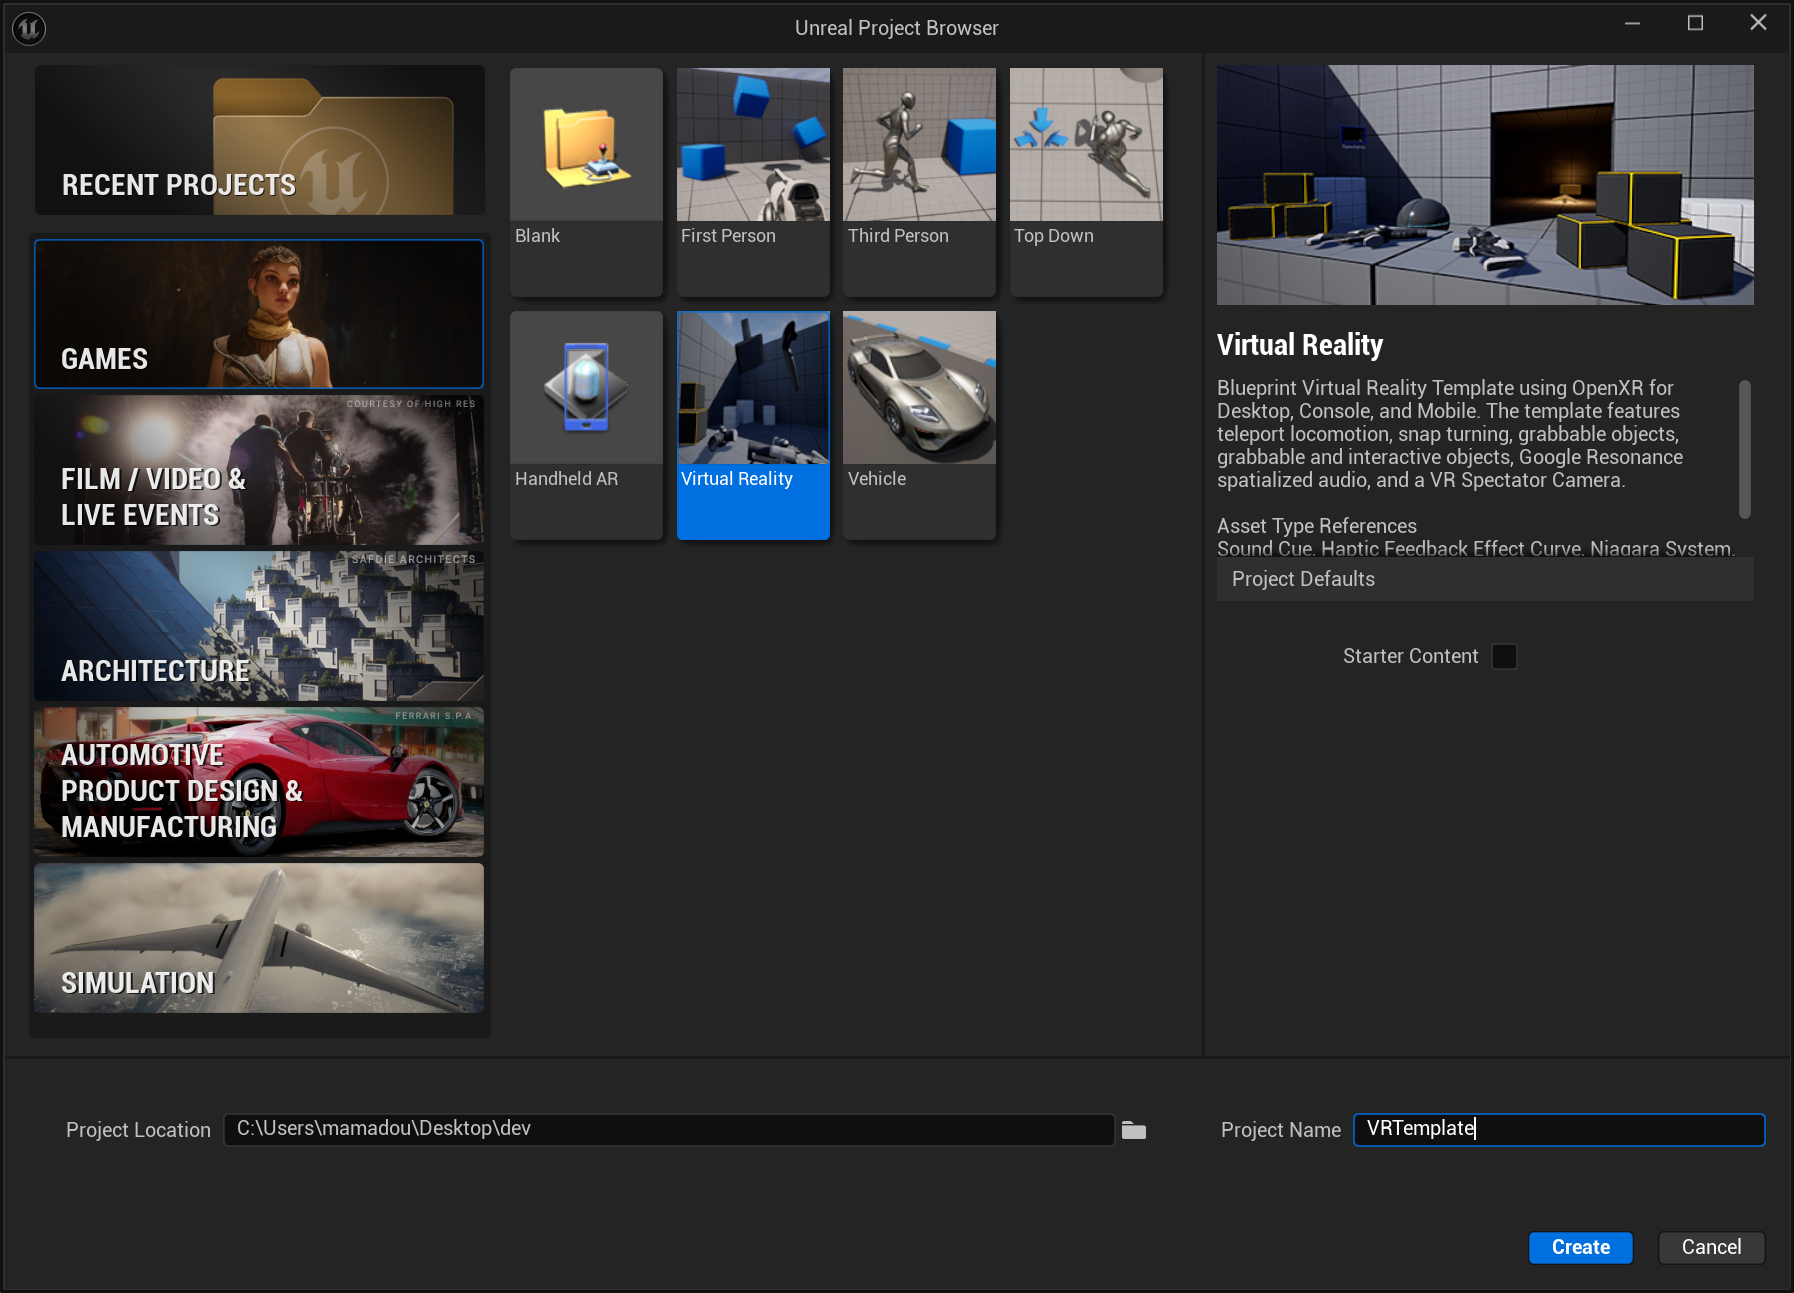
- Once the Unreal Editor opens with your new project, navigate to the Content Browser. Go to
All > Content > Characters > MannequinsXR > Meshes. Here, you'll find two sets of virtual hand meshes:SDKM_MannyXR_leftandSDKM_MannyXR_right(male hands), andSDKM_QuinnXR_leftandSDKM_QuinnXR_right(female hands).
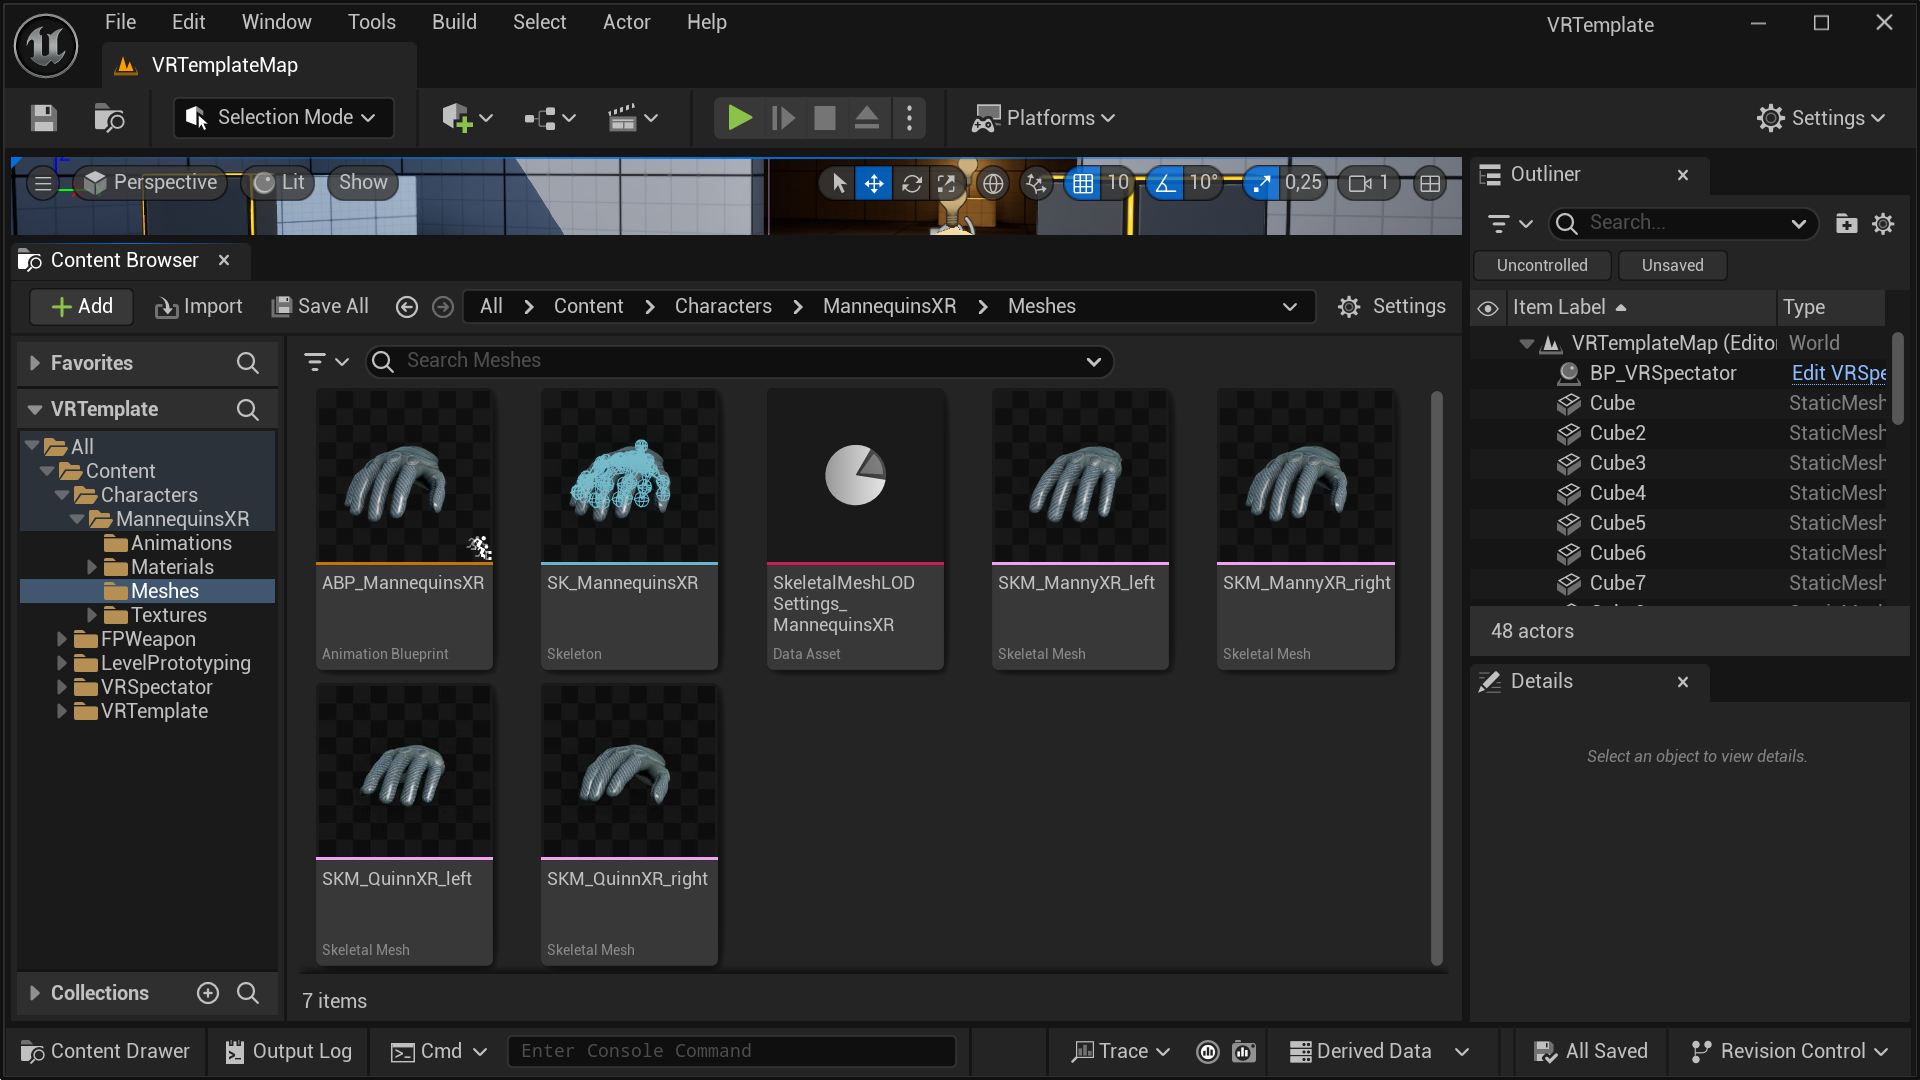
- Choose the pair of hand meshes you want to export. Right-click on them, then select
Asset Actionsfollowed byBulk Export...from the context menu.
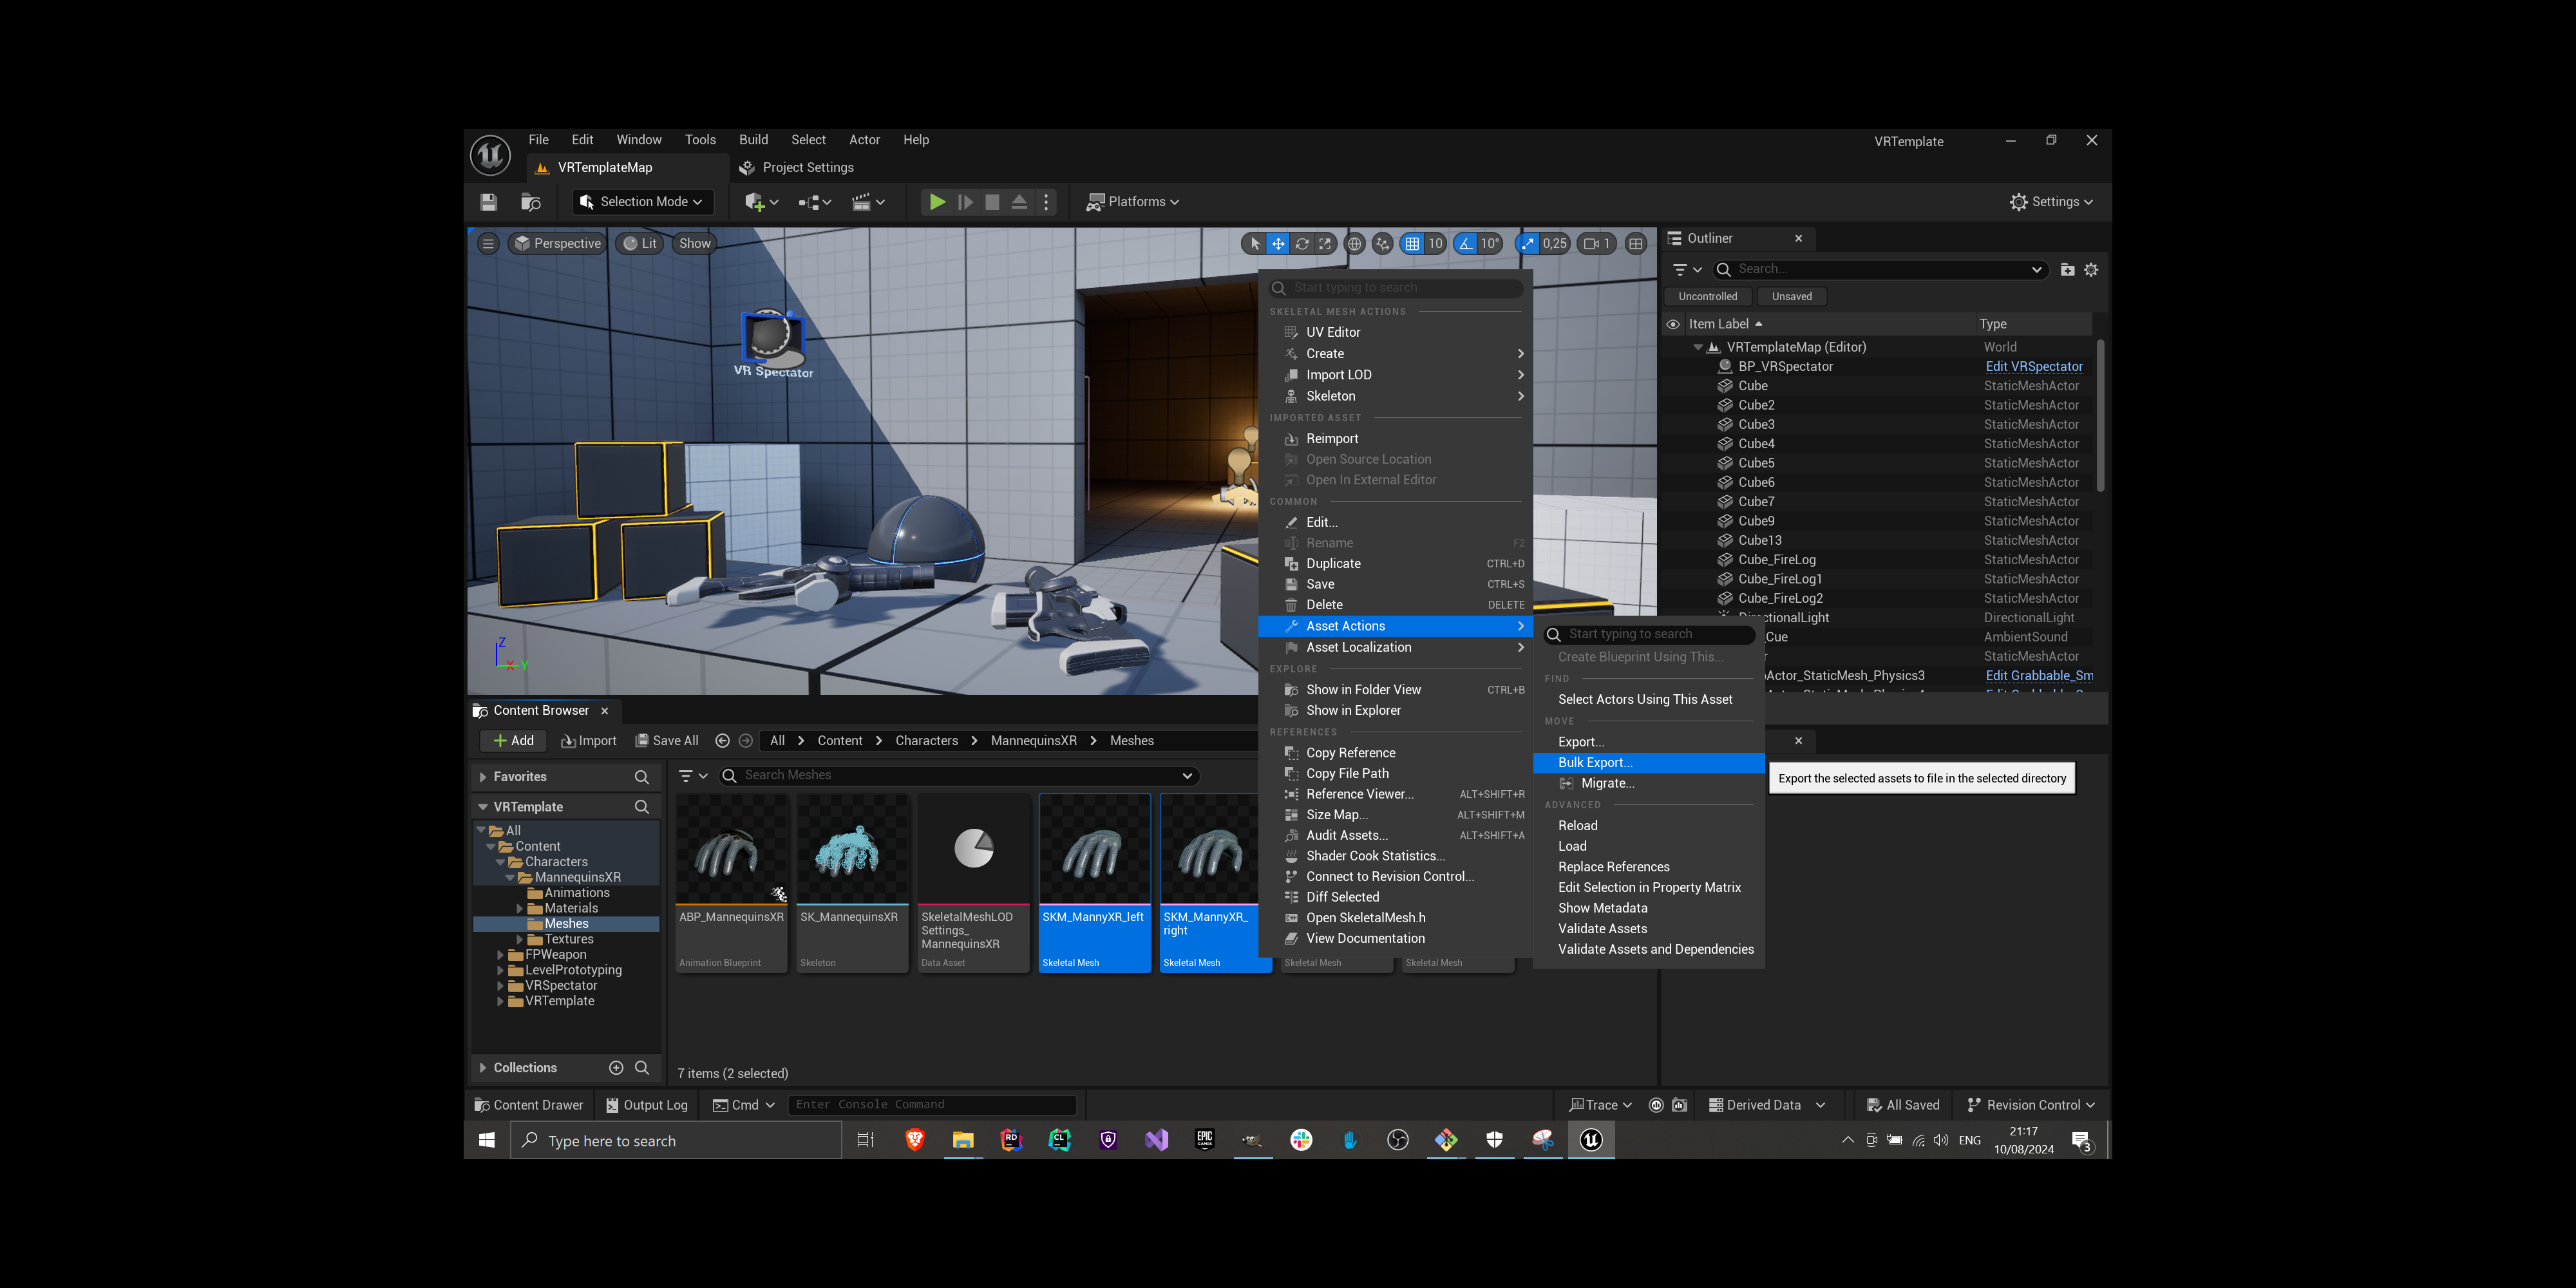
- In the file dialog that appears, choose a folder to save the exported hands, and click the
Select Folderbutton to export the meshes in FBX format.
- The Unreal Editor will then display the
FBX Export Optionsdialog. Leave the default settings unchanged and clickExport Allto proceed.
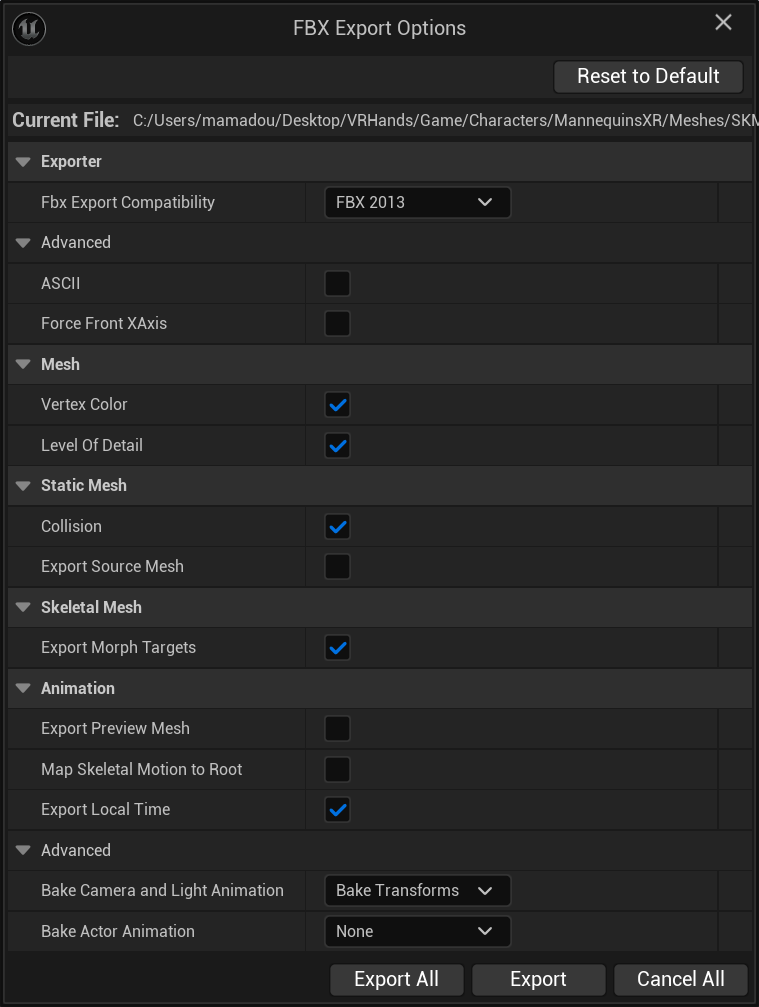
Tip
If you're unsure whether the options are set to their defaults, you can click the
Reset to Defaultbutton in the top-right corner of the dialog to restore the default settings.
- After exporting, you can find the FBX files for both hands in the directory you selected:
/path/you/chose/for/bulk/export/Game/Characters/MannequinsXR/Meshes/.
Importing the Virtual Hand Meshes into Your Own Project
- Start by creating a new folder inside your project's Content Browser. Navigate to that folder, then press the
Importbutton next to the+ Addbutton at the top of the Content Browser.
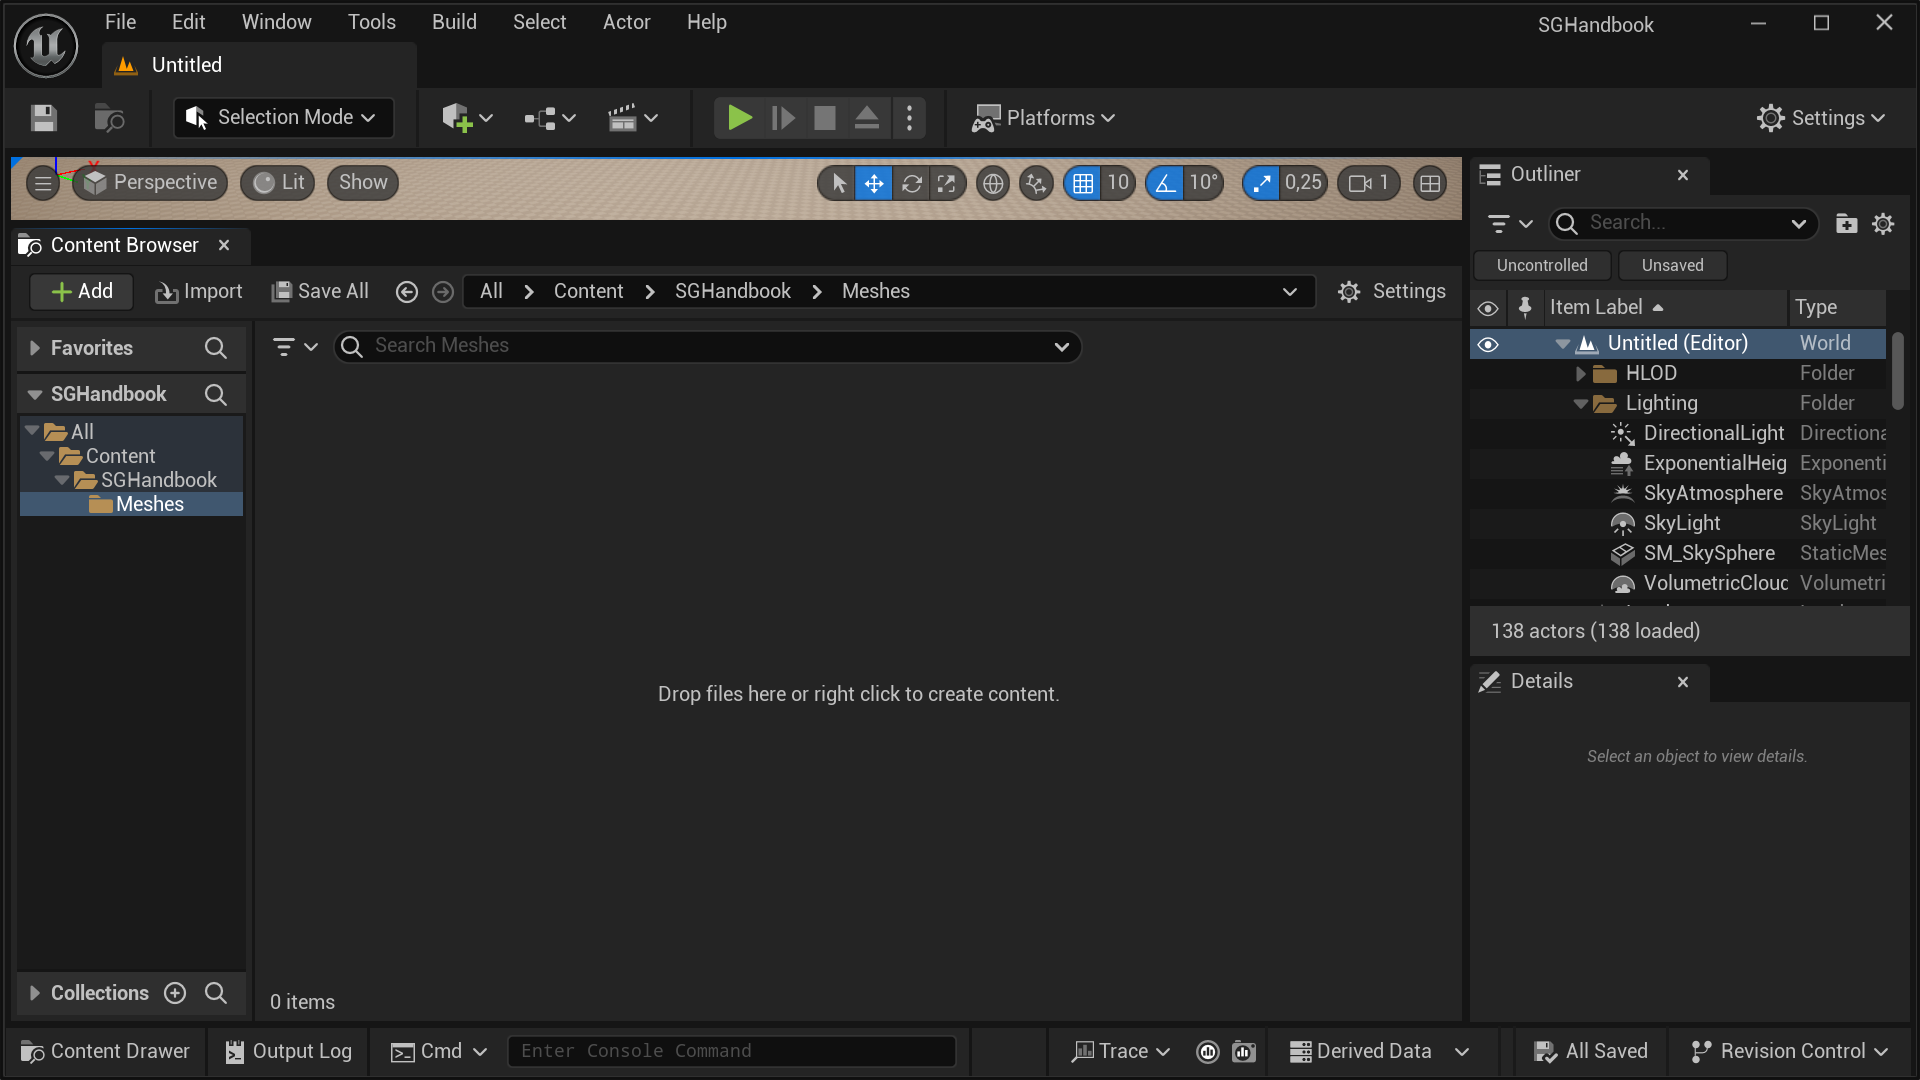
- In the
Importdialog that appears, navigate to the folder containing the virtual hand meshes. Select both FBX files and click theOpenbutton.
- The Unreal Editor will display the
FBX Import Optionsdialog. Leave the default settings unchanged and clickImport Allto proceed.
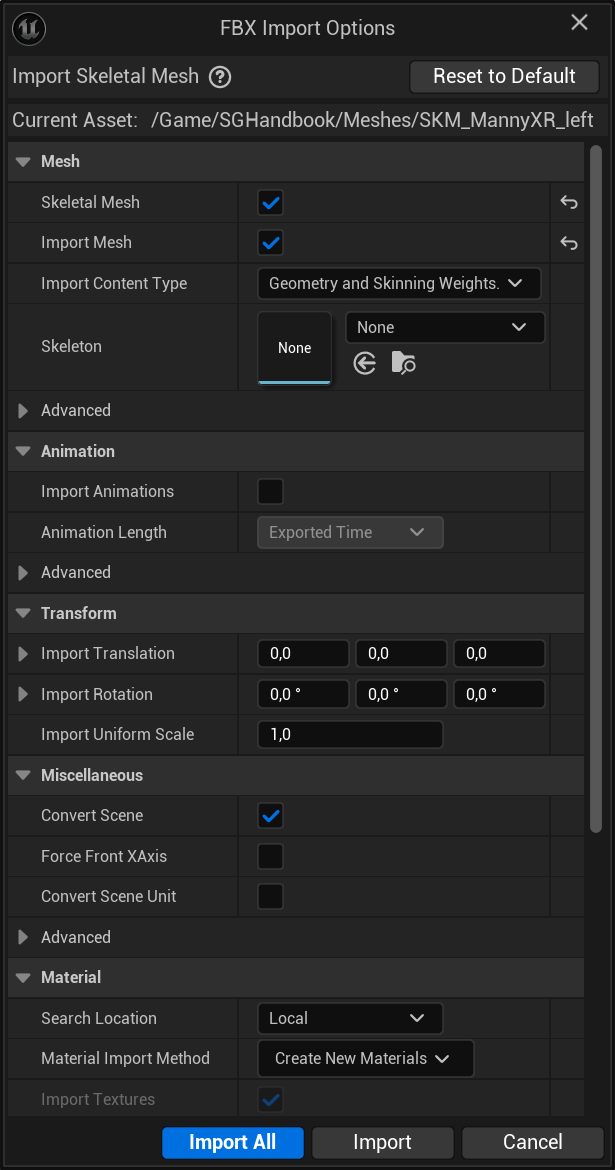
Tip
If you're unsure whether the options are set to their defaults, you can click the
Reset to Defaultbutton in the top-right corner of the dialog to restore the default settings.
- After the import process is done, a dialog will display the import logs. Any errors or warnings encountered during the import process will be shown here.
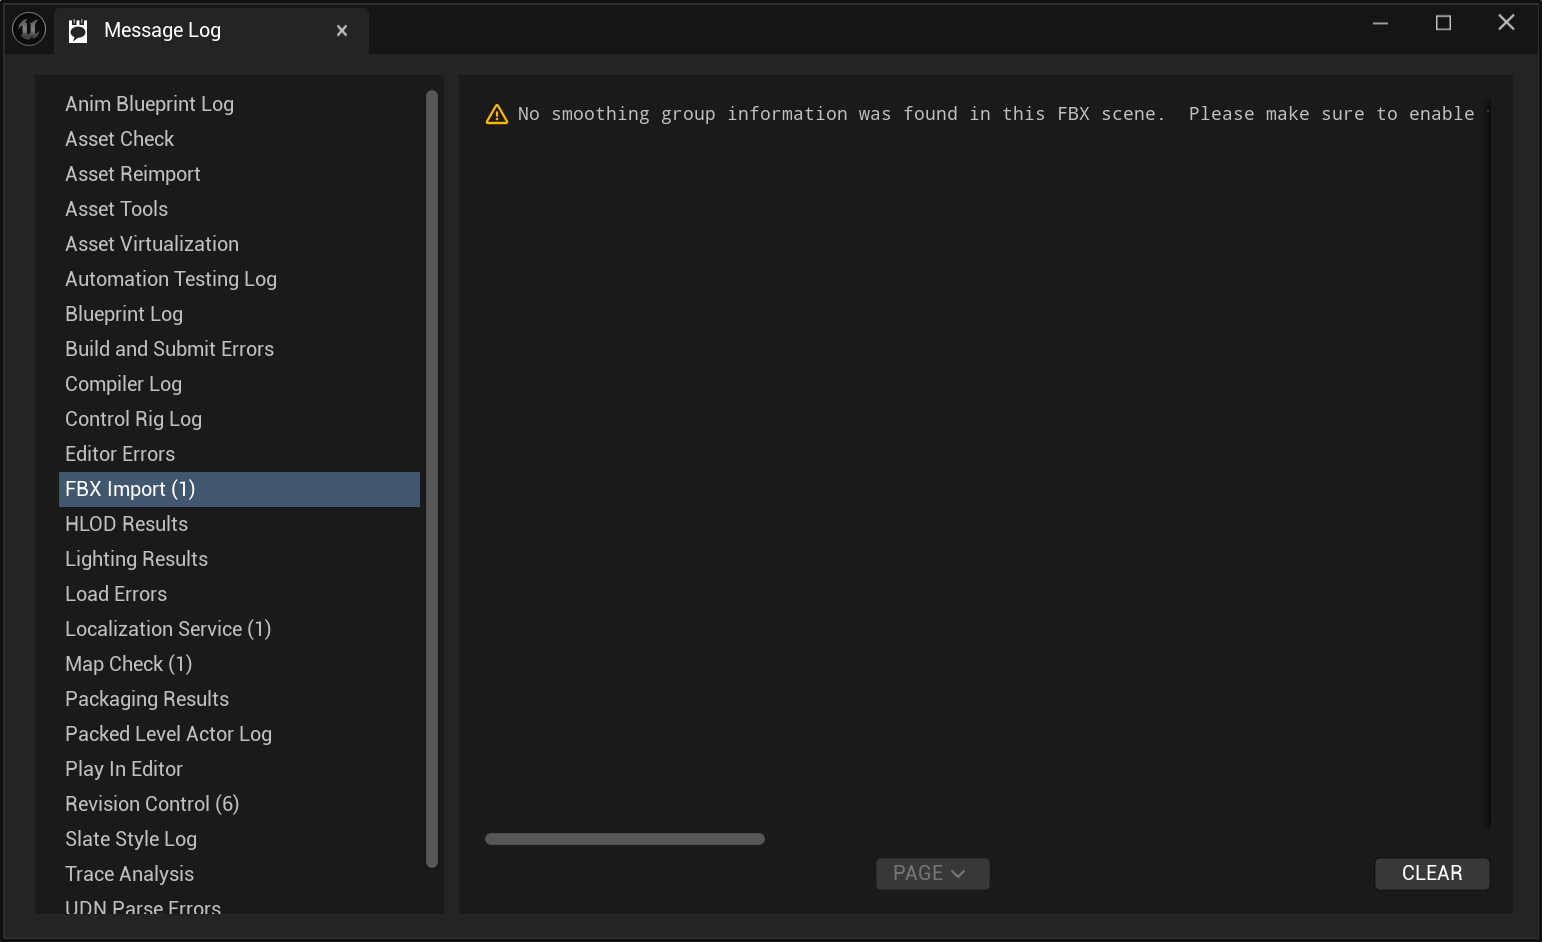
Note
The following warning can be safely ignored:
FBXImport: Warning: No smoothing group information was found in this FBX scene. Please make sure to enable the 'Export Smoothing Groups' option in the FBX Exporter plug-in before exporting the file. Even for tools that don't support smoothing groups, the FBX Exporter will generate appropriate smoothing data at export-time so that correct vertex normals can be inferred while importing.
- The imported virtual hand meshes should now appear in the folder you selected in the Content Browser. Unreal Engine will create a Skeletal Mesh, a Skeleton, and a Physics Asset for each imported mesh, along with a default Material asset shared between both virtual hand meshes.
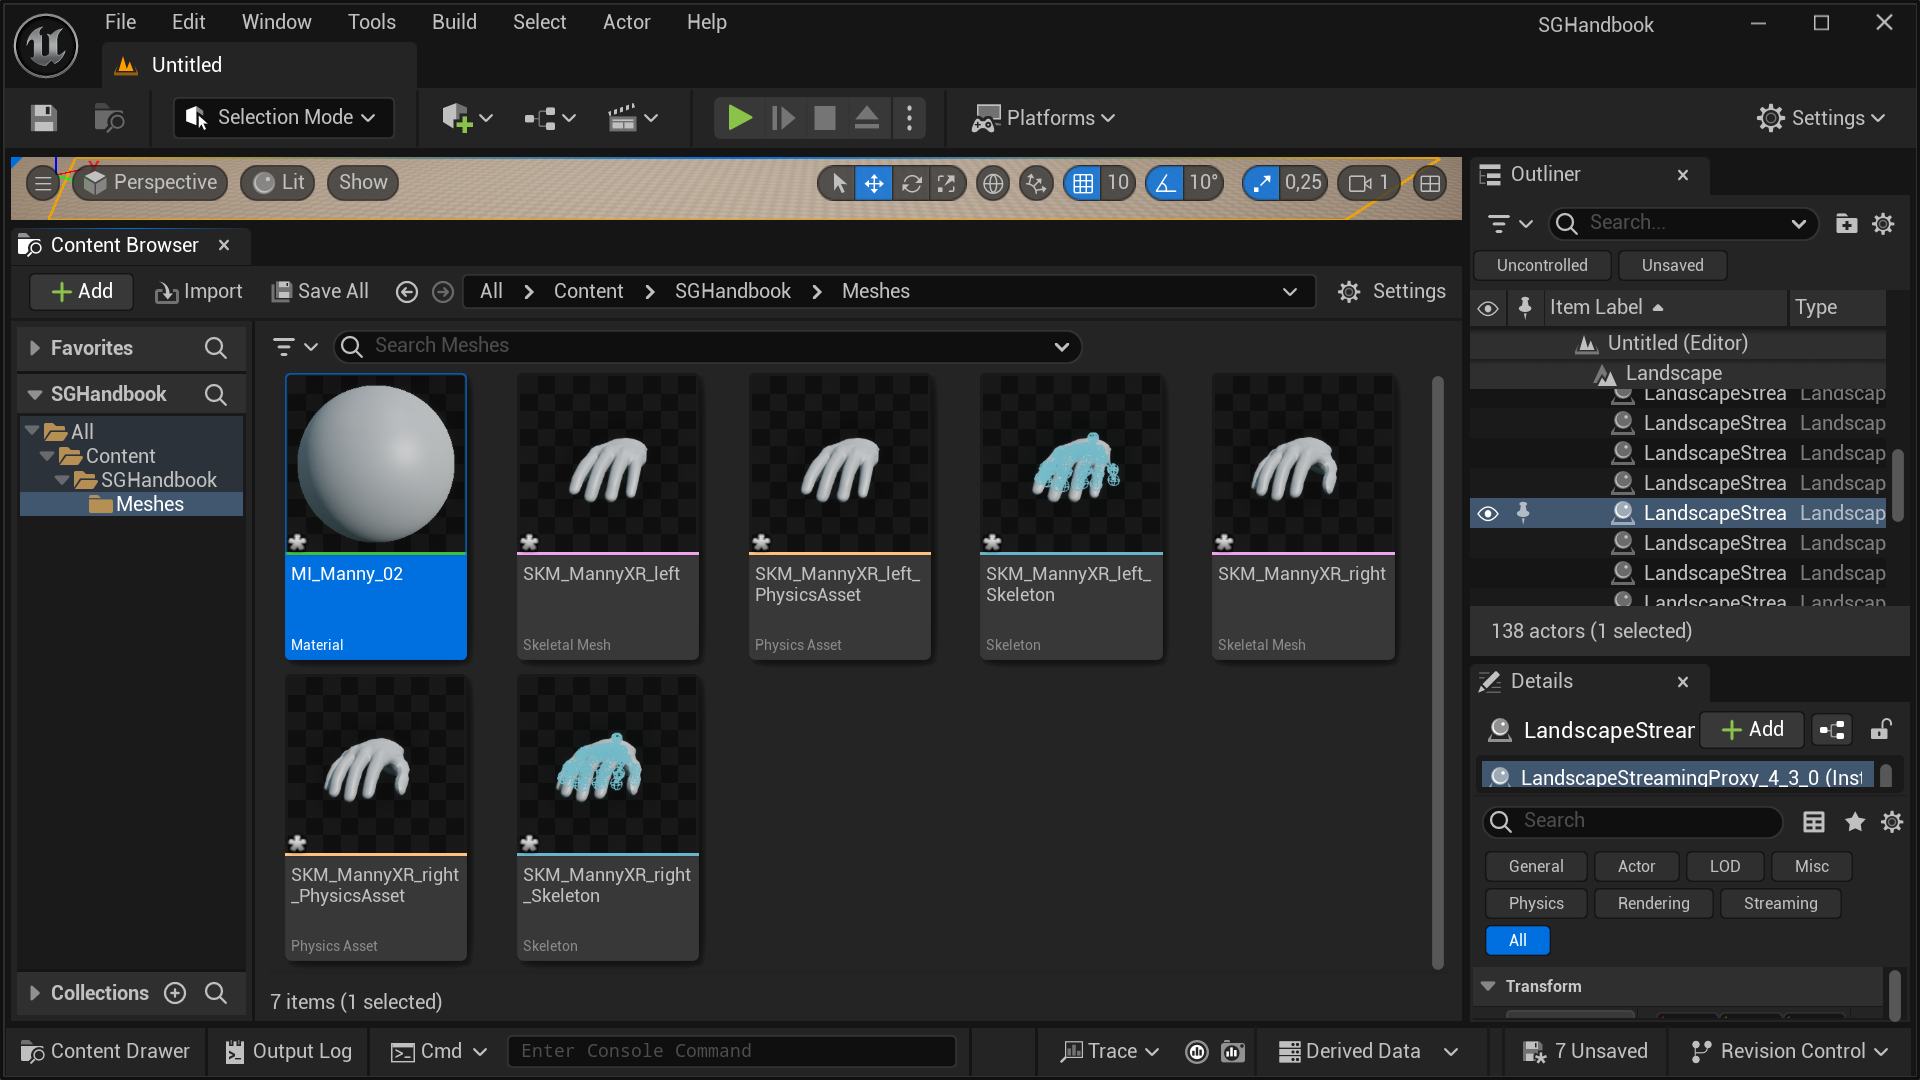
- You can choose to keep or modify the default material. However, since the SenseGlove Unreal Engine Plugin provides a default material, we choose to delete the default material created by Unreal Engine during the import process. We'll assign the SenseGlove default material to the imported virtual hand meshes in the next steps. Right-click on the default material and select
Delete.
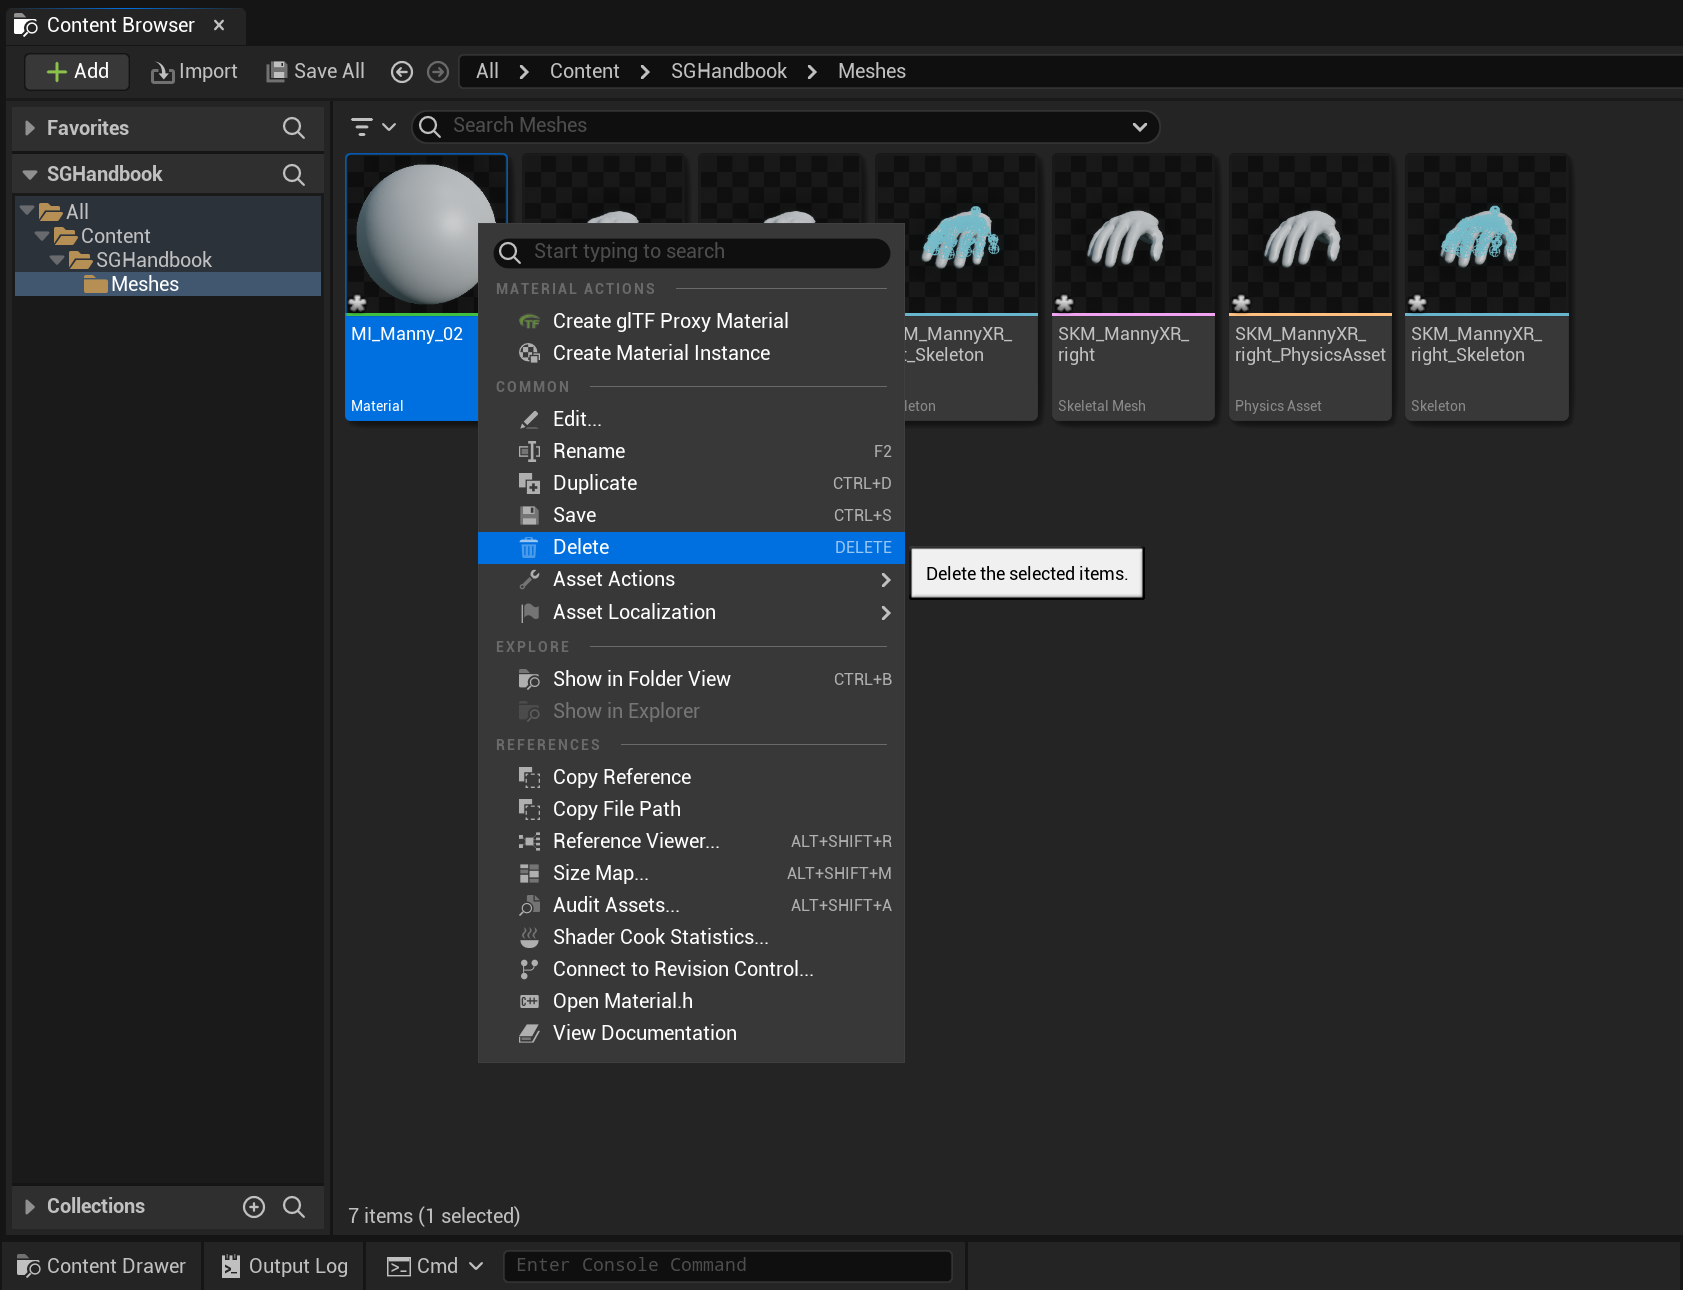
- In the
Delete Assetsdialog, clickForce Deleteto confirm the deletion of the default material.
- Open the Skeletal Mesh asset for the left hand and assign the
M_SenseGlove_VirtualHandmaterial from theAsset Detailspanel.
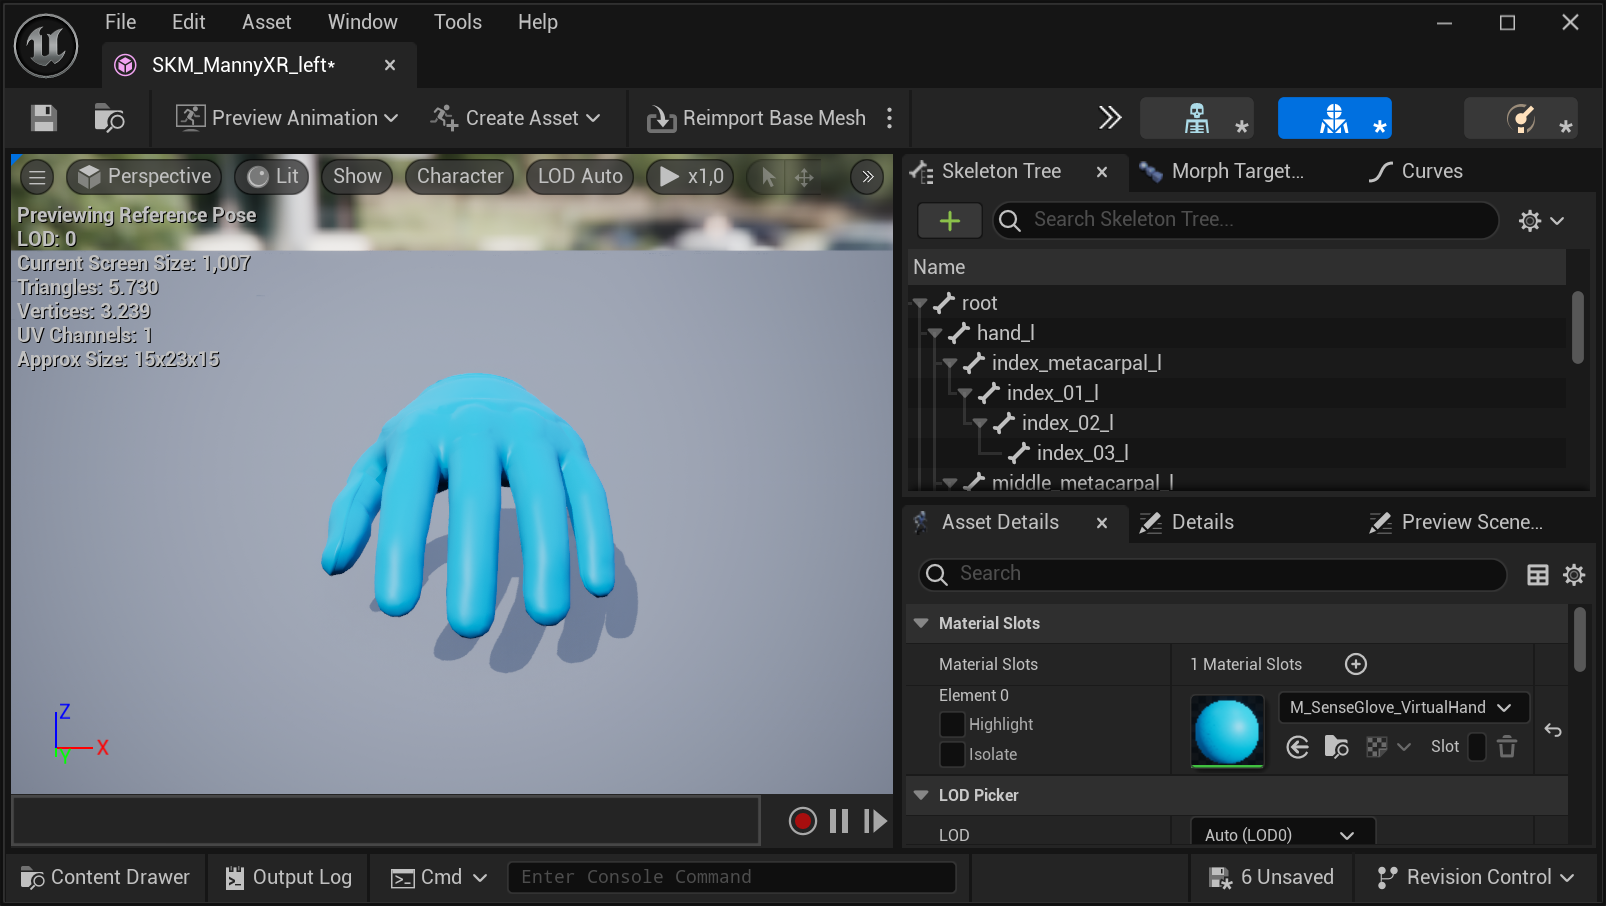
- Repeat the process for the Skeletal Mesh asset of the right hand, and assign the
M_SenseGlove_VirtualHandmaterial in theAsset Detailspanel.
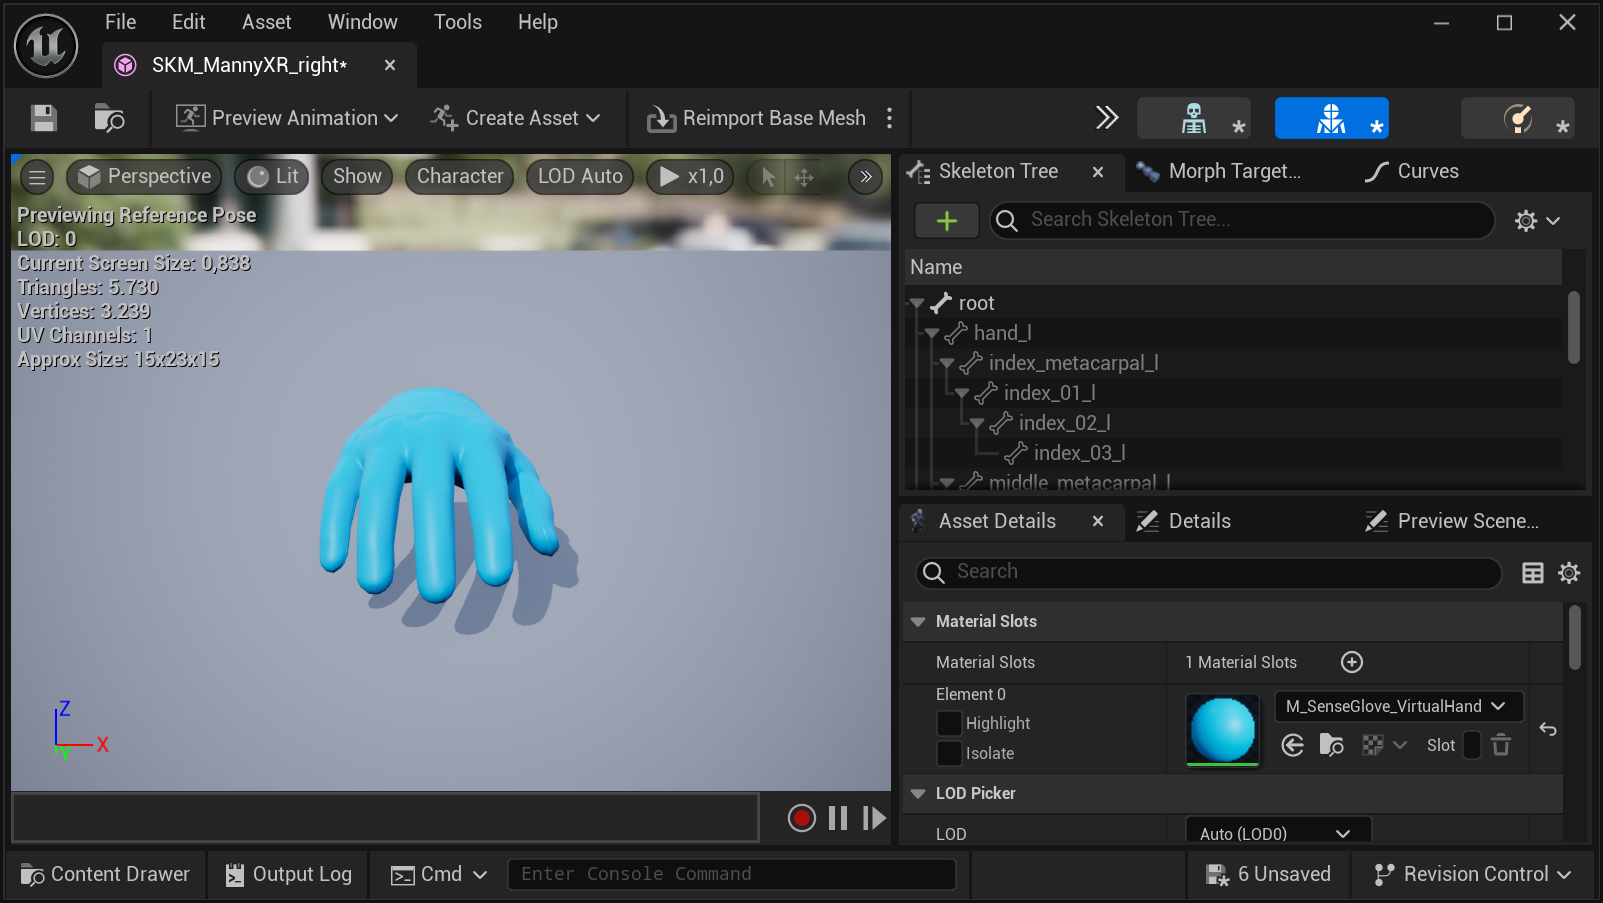
- Return to the Content Browser by closing all asset windows and click the
Save Allbutton to save all imported virtual hand mesh assets to disk.
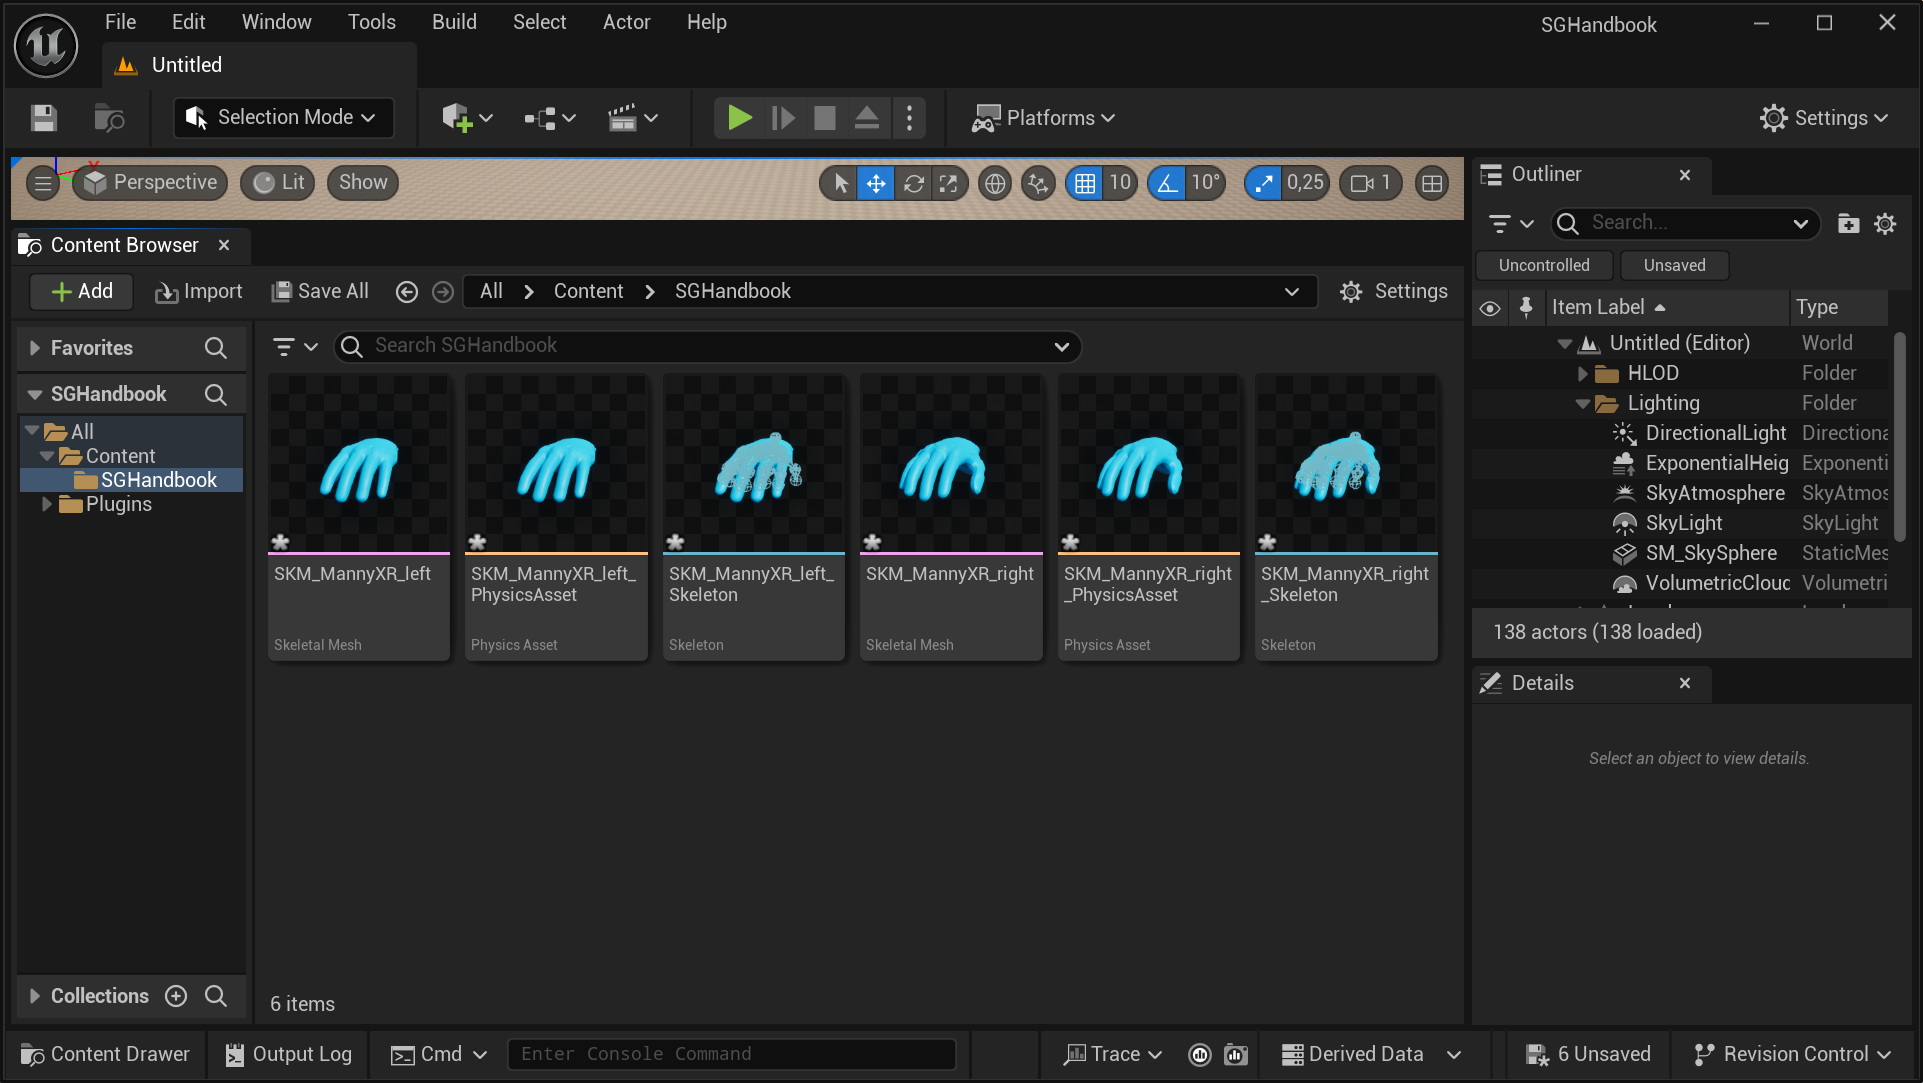
- In the
Save Contentdialog, chooseSave Selectedto confirm the saving all action.
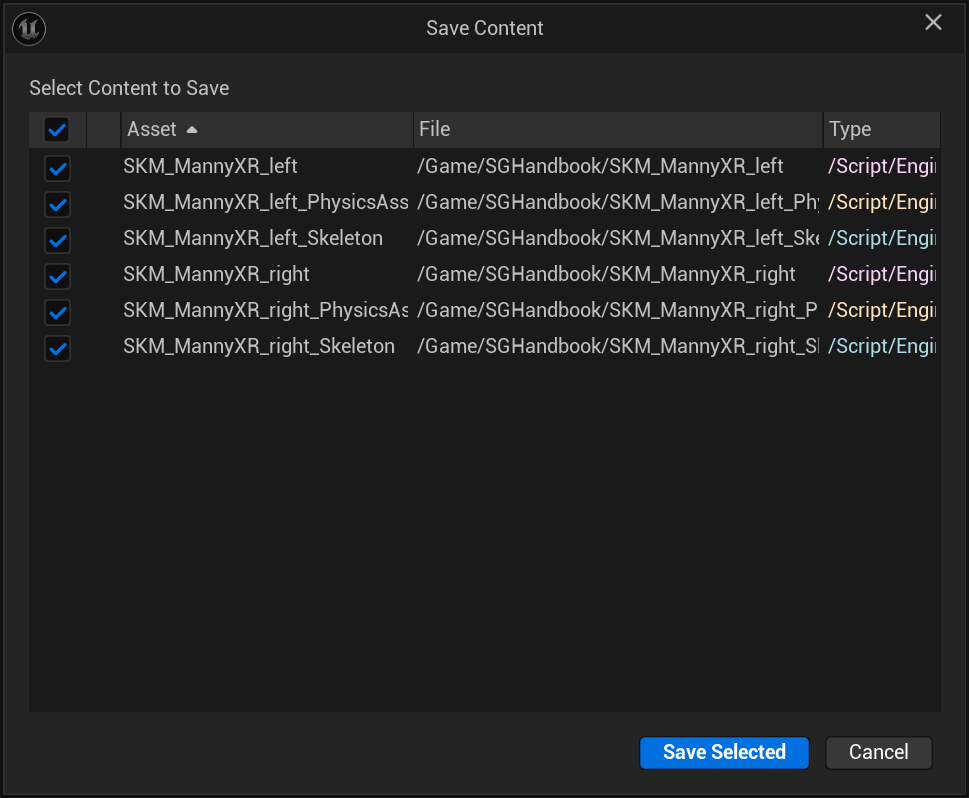
Setting up the Rigid Bodies
- Open the Physics Asset for the left virtual hand mesh by double-clicking it in the Content Browser. This will open the PhAT (Physics Asset Tool) editor, where the virtual hand mesh for the left hand will appear with a default physics body, usually shaped as a capsule.
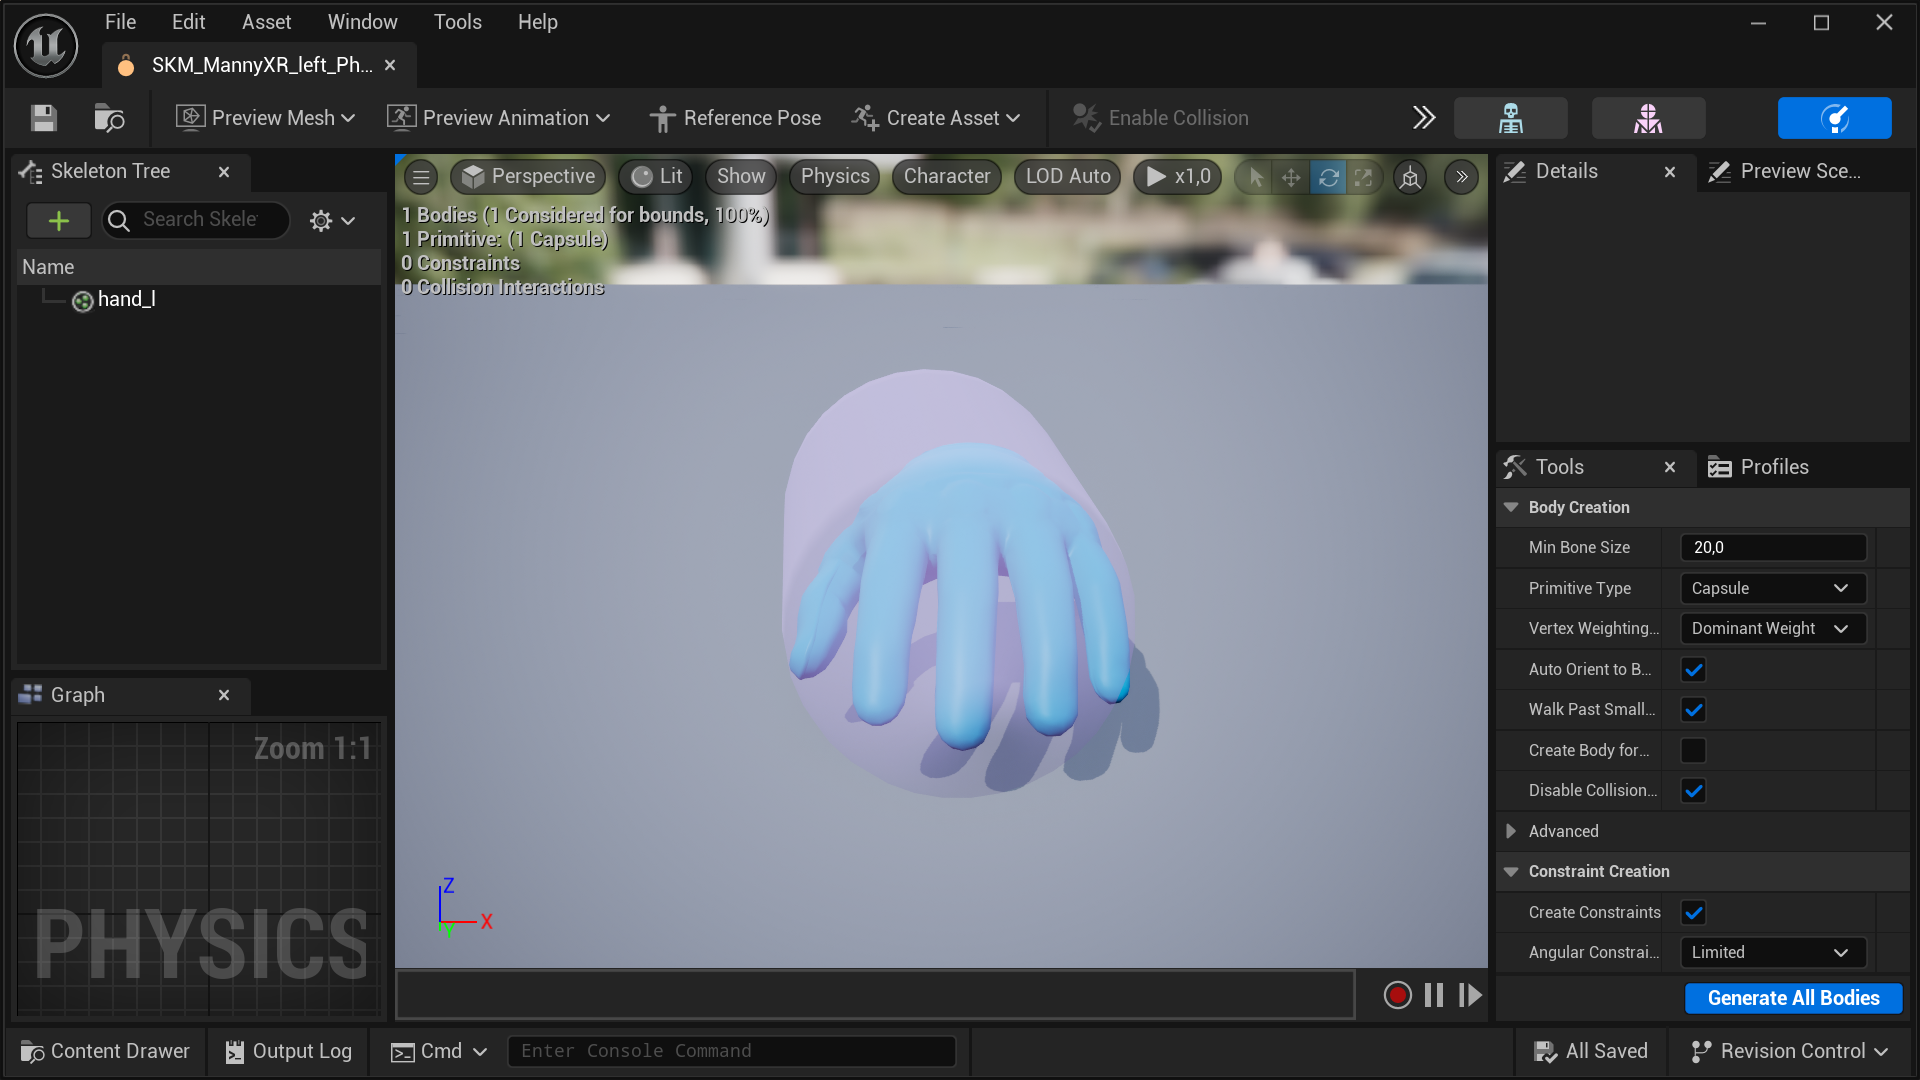
- In the
Toolspanel, under theBody Creationsection, locate thePrimitive Typedropdown and selectBoxinstead of the defaultCapsuleshape. Then, click theGenerate All Bodiesbutton at the bottom of theToolspanel to create a new physics body.
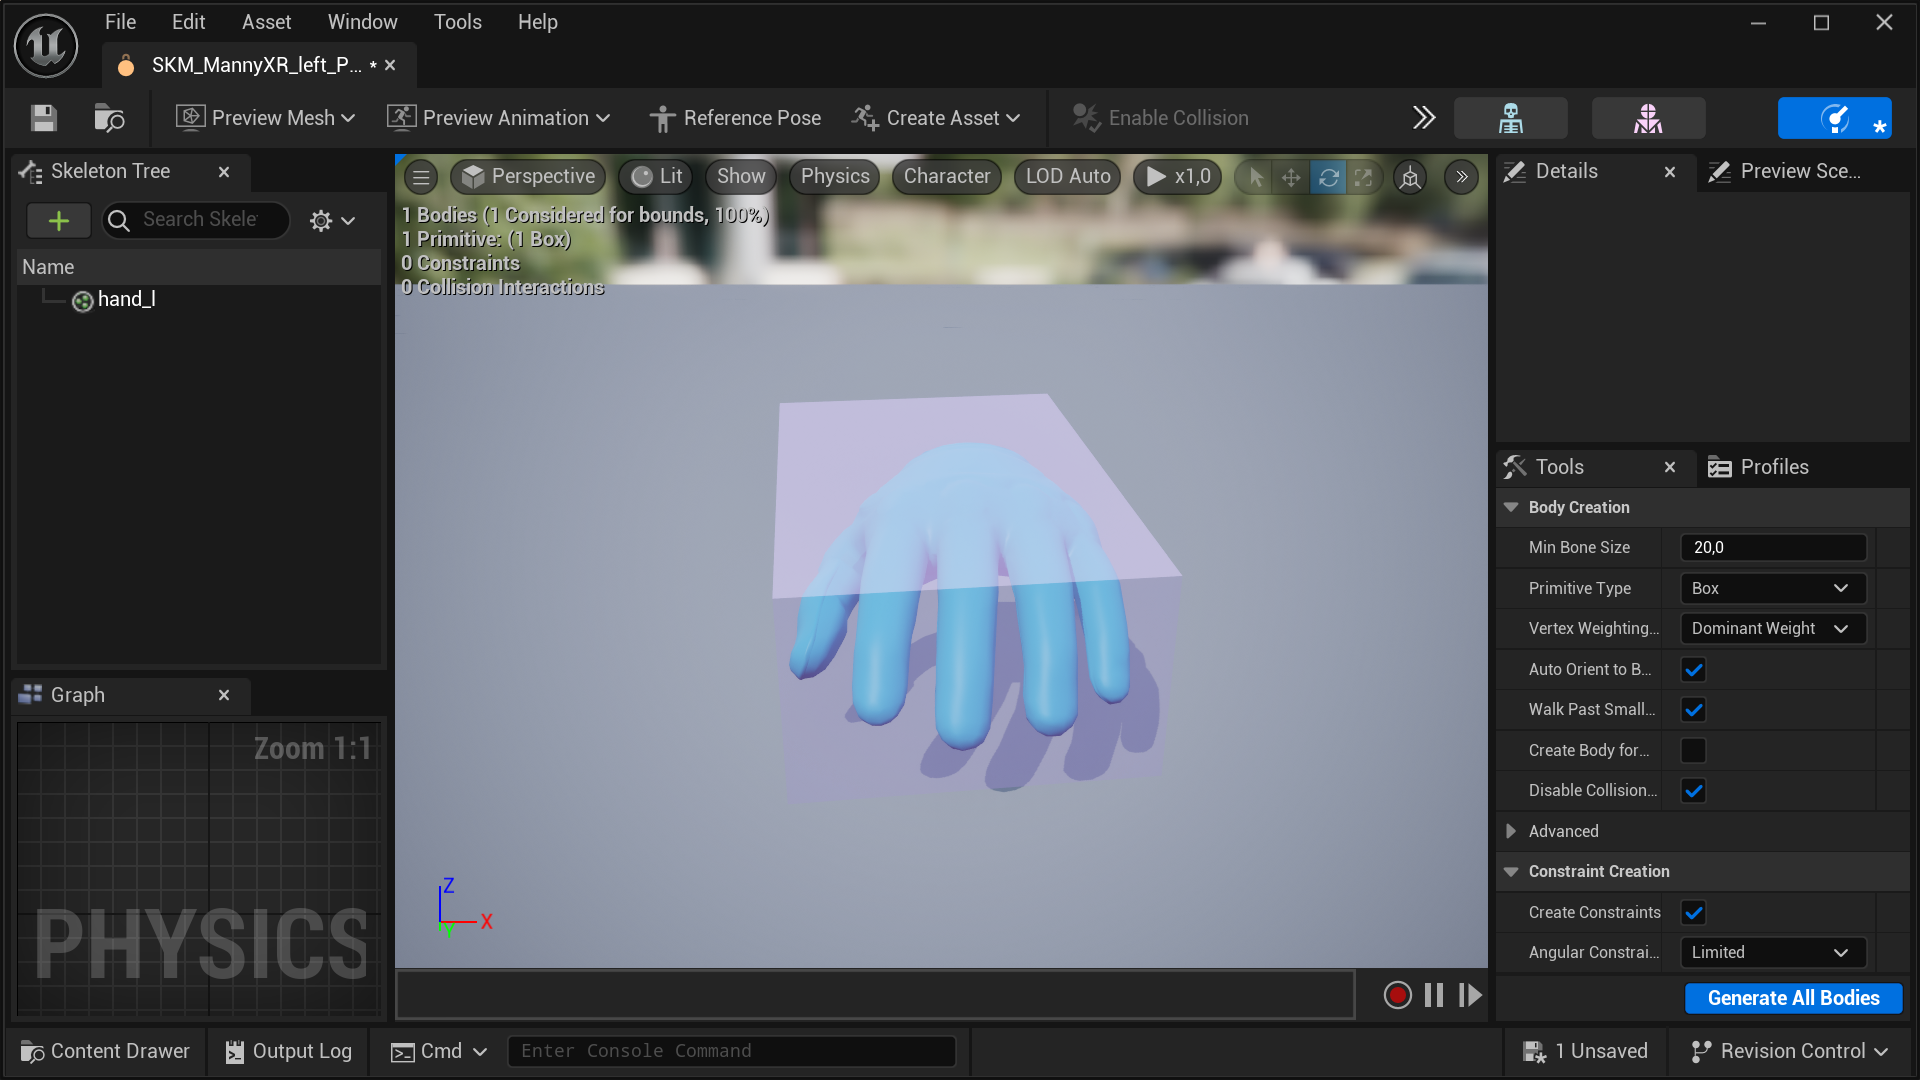
- After generating the new body, some adjustments are required for optimal interactions inside your VR simulations. Press the
rkey on your keyboard to enter scaling mode and use the arrows to resize the physics body. To reposition the body, press thewkey to switch to translation mode. For adjusting the rotation, press theekey. Toggle between these modes as needed to fine-tune the physics body to your requirements.
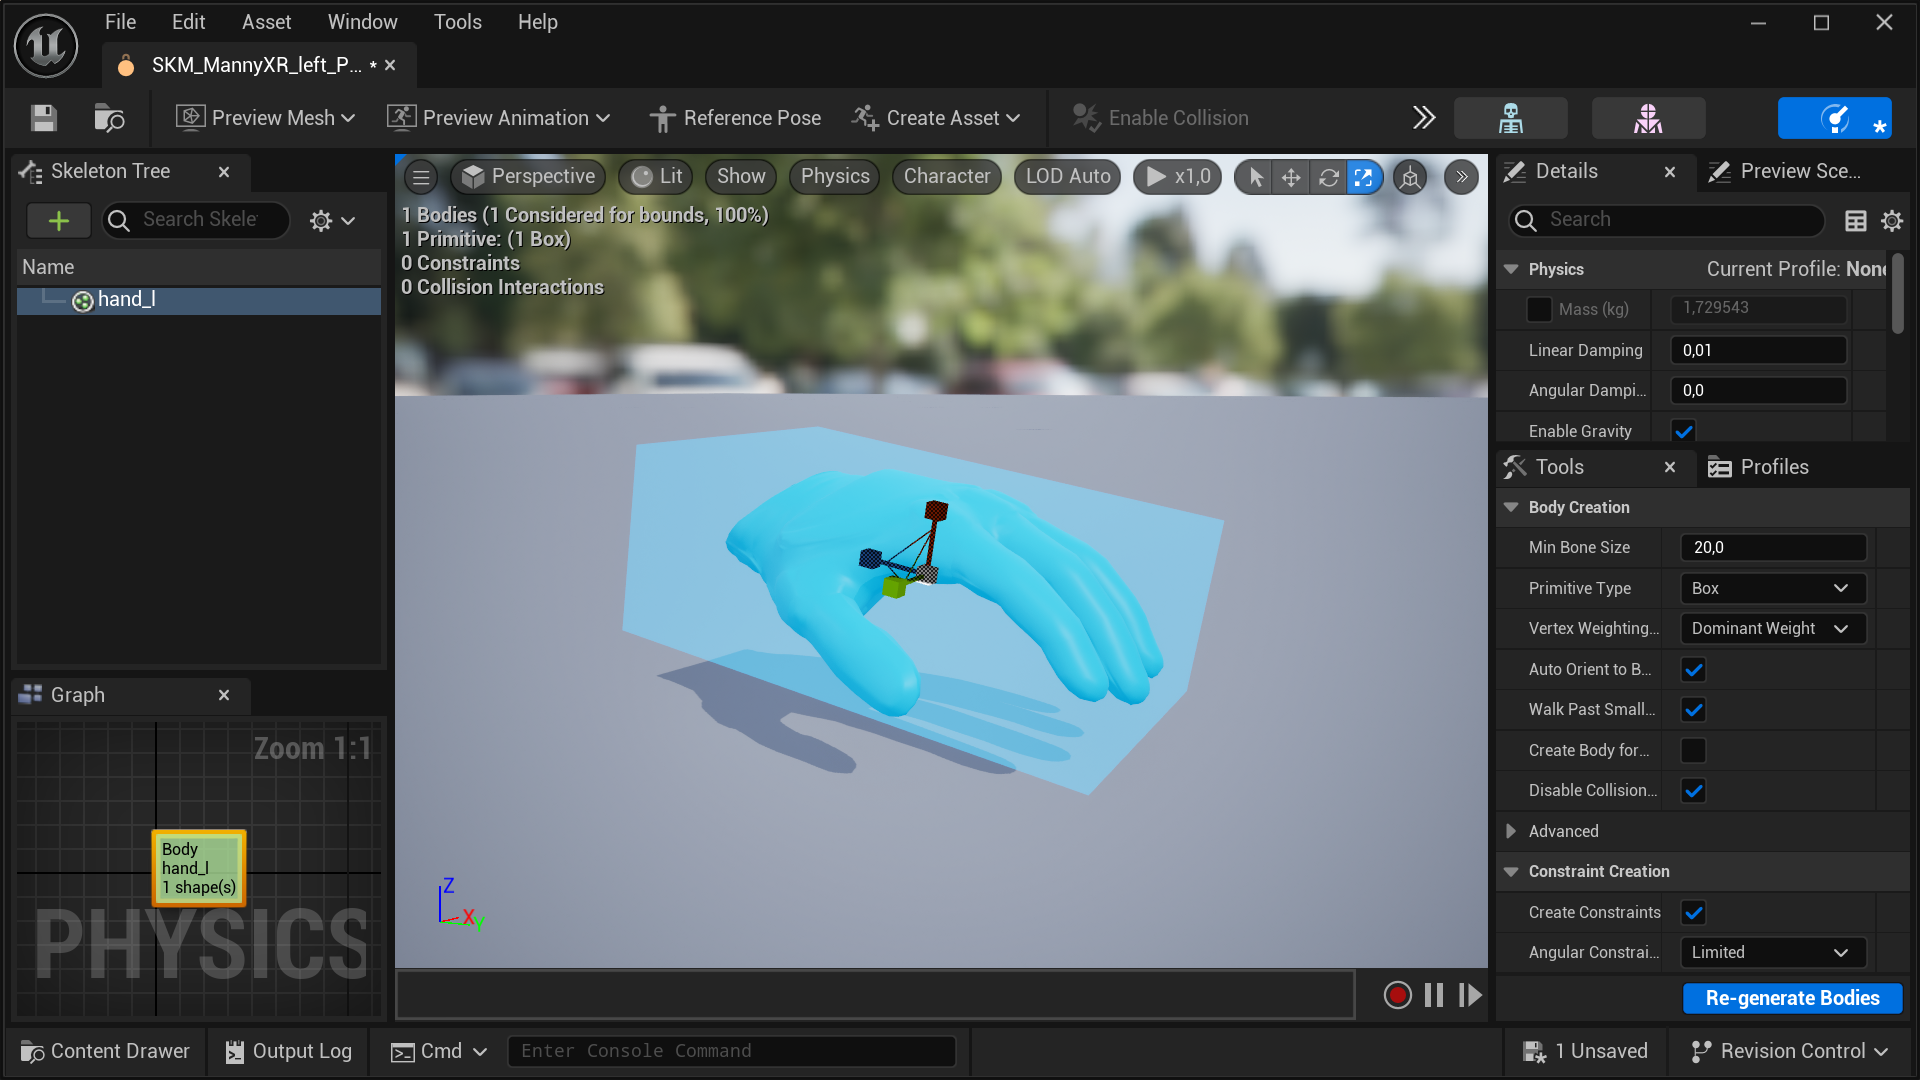
- You can always revisit and adjust the rigid body later after testing its impact in your VR simulations. For now, save the asset and close the PhAT editor.
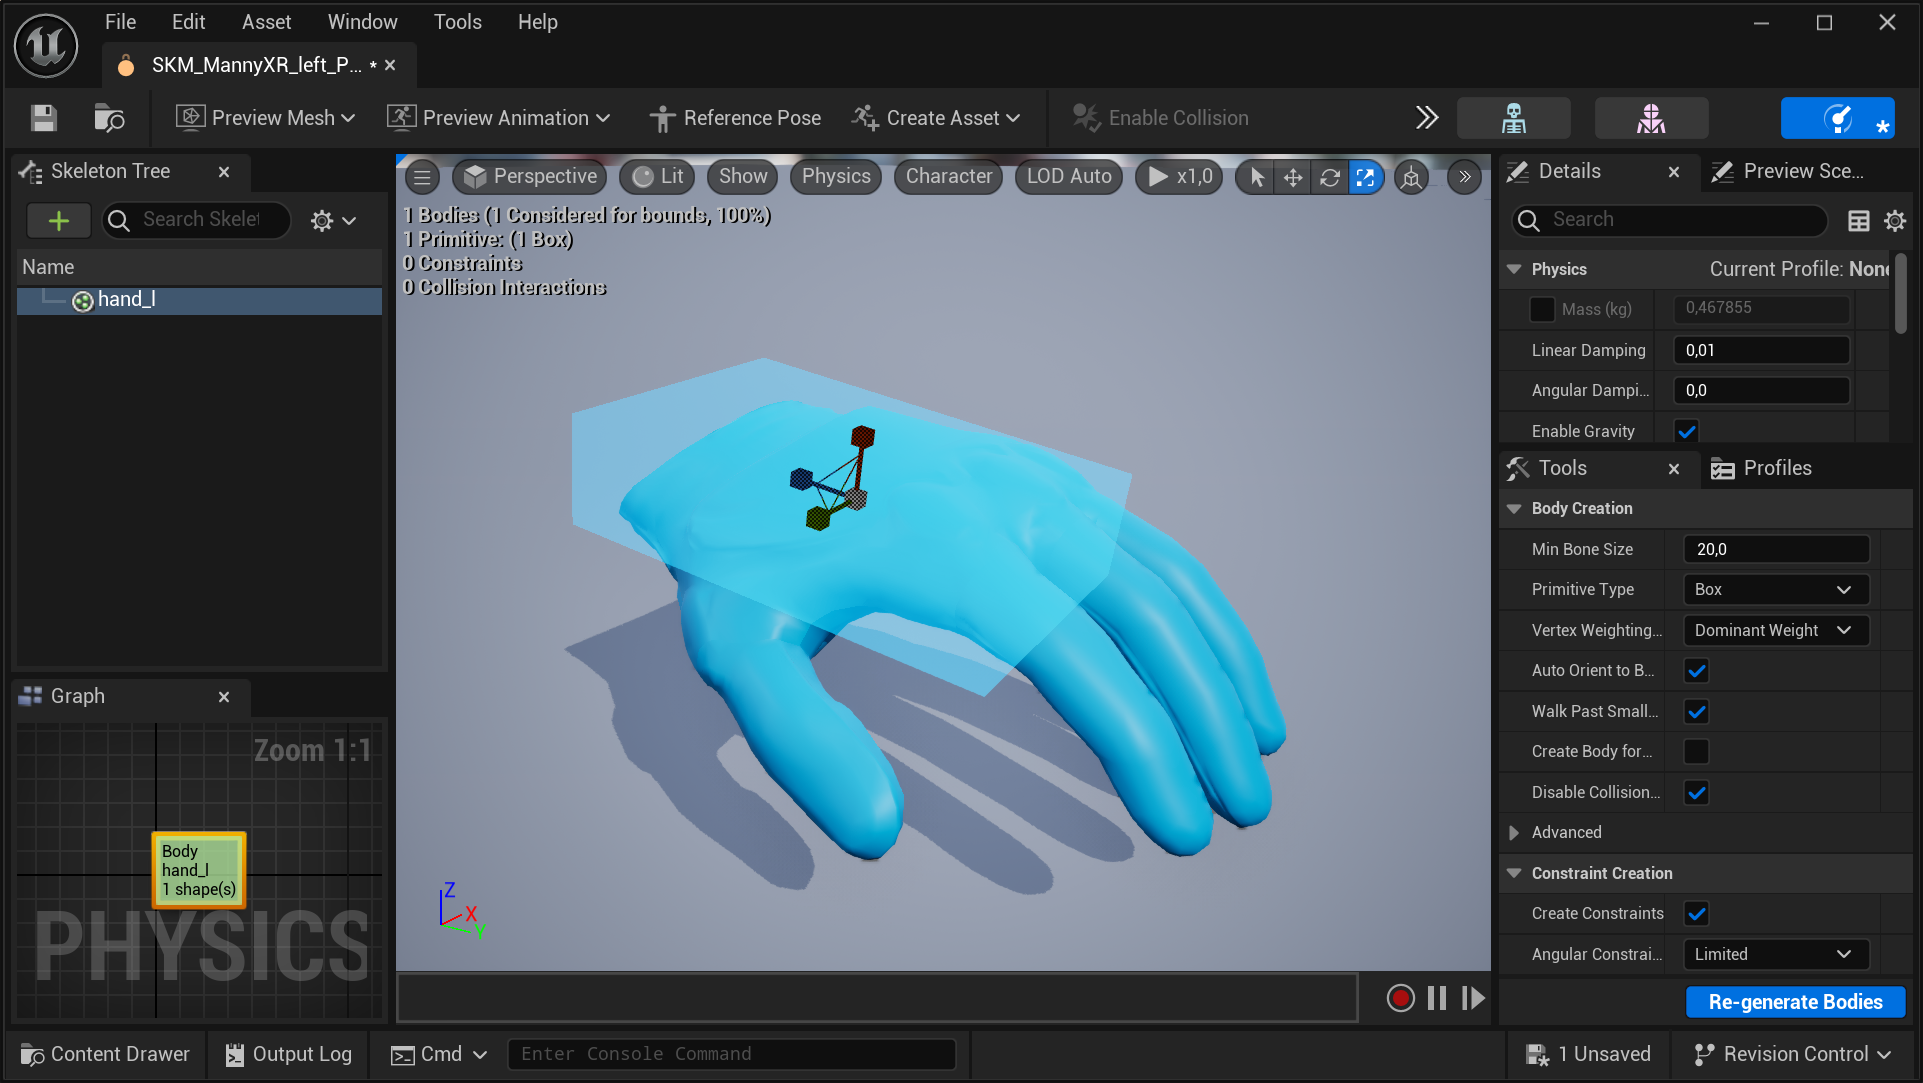
- Repeat the same procedure for the right virtual hand mesh.
Note
An older yet still relevant video tutorial demonstrating a similar procedure is also available.
Setting up the SenseGlove Grab and Touch Sockets
To ensure the Grab/Release and Touch systems function correctly, multiple sockets must be set up on each virtual hand mesh with precise locations and rotations. Before version v2.1.0 of the SenseGlove Unreal Engine Plugin, this was a manual and time-consuming process. However, with the v2.1.0 release, the plugin now includes the SenseGlove Sockets Editor, a built-in tool specifically designed for this task.
Note
If for any reason you still prefer to manually set up the sockets, a detailed video tutorial is available.
Accessing the SenseGlove Sockets Editor
The SenseGlove Sockets Editor can be utilized in three ways:
- By right-clicking on any Skeleton or Skeletal Mesh asset inside the Unreal Content Browser.
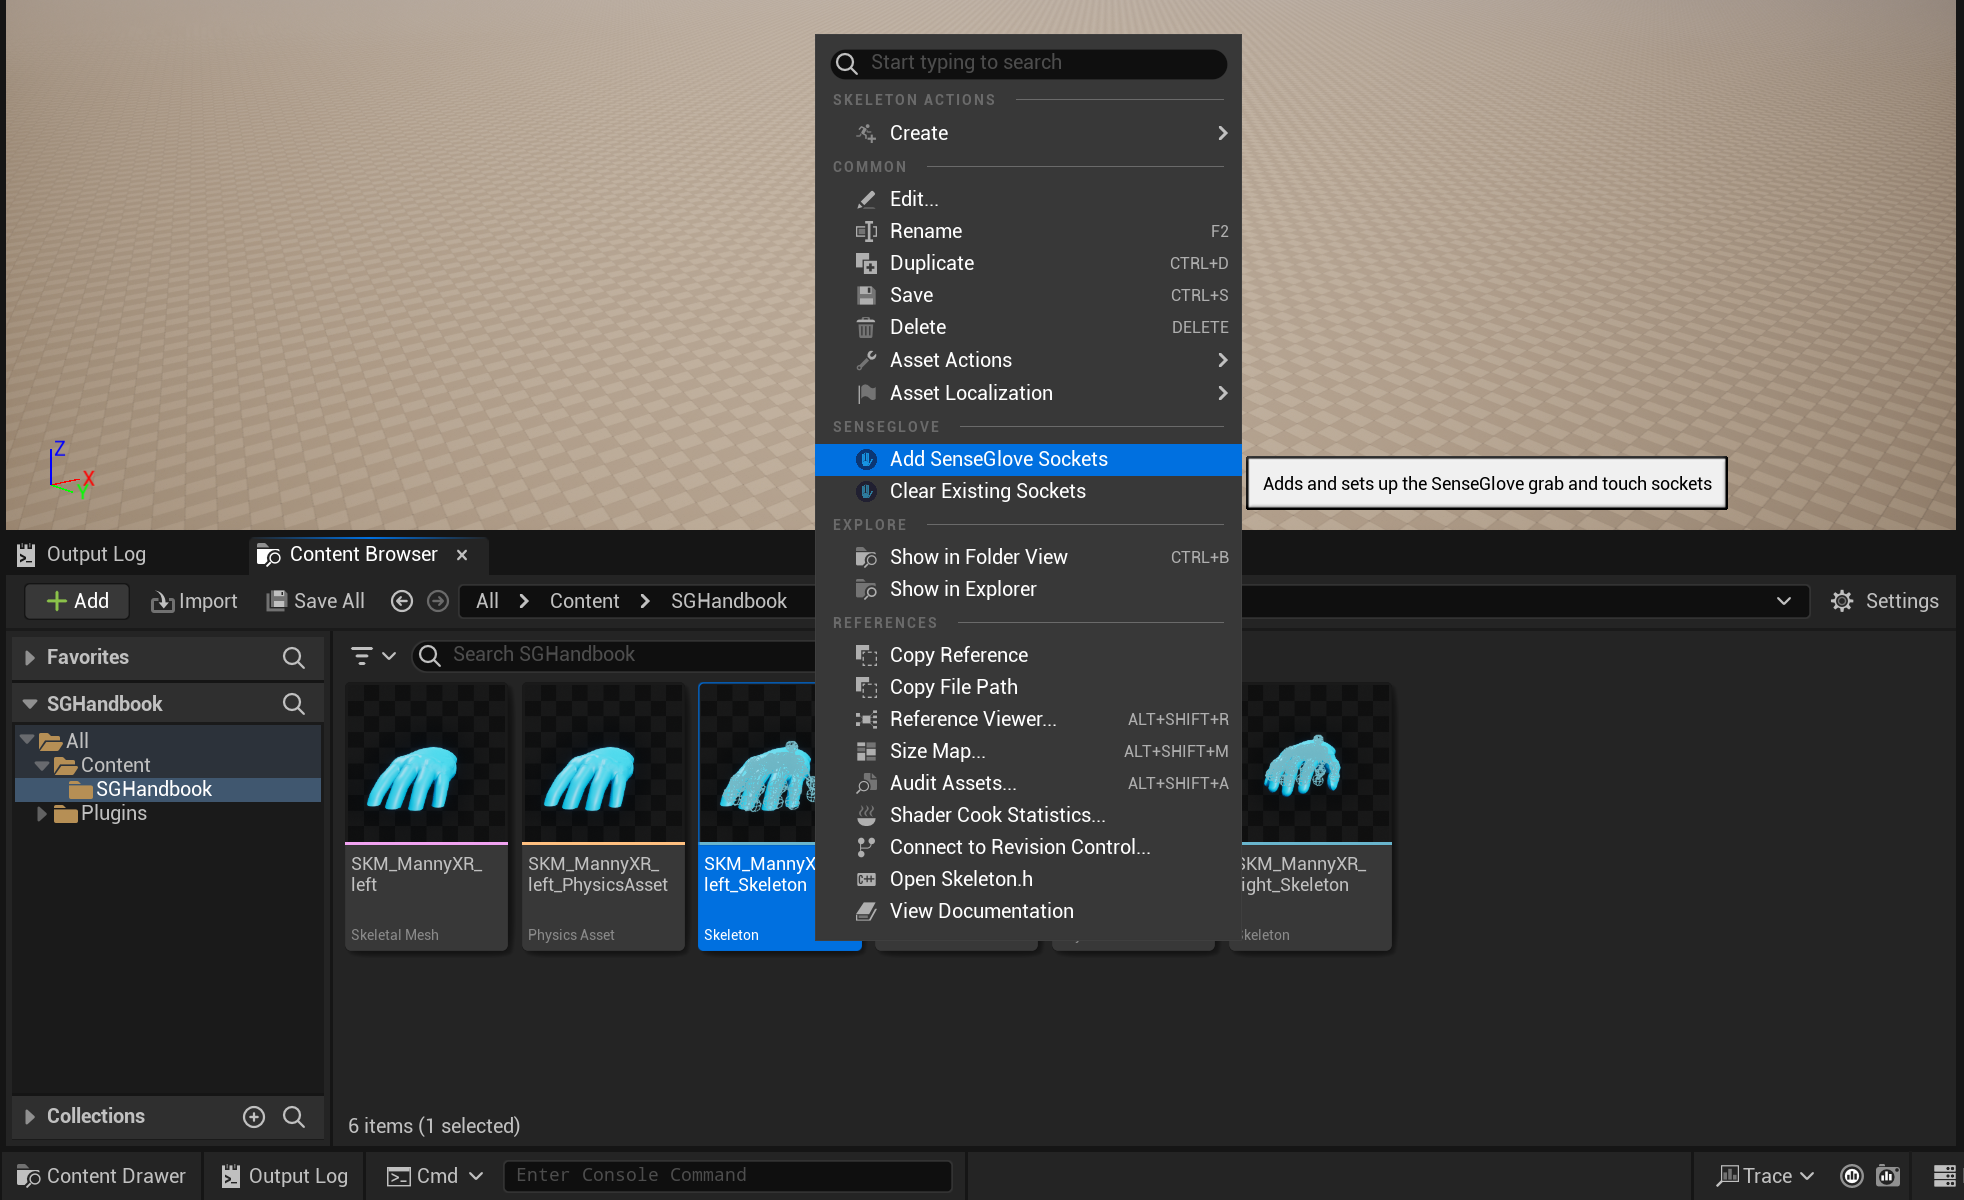
Tip
You can also perform Sockets Editor actions in bulk by selecting multiple assets of the same type and right-clicking on one of them. Note that if the selected assets are not all of the same type, Sockets Editor actions will not appear (e.g. selecting assets of type Skeletons and Skeletal Meshes together).
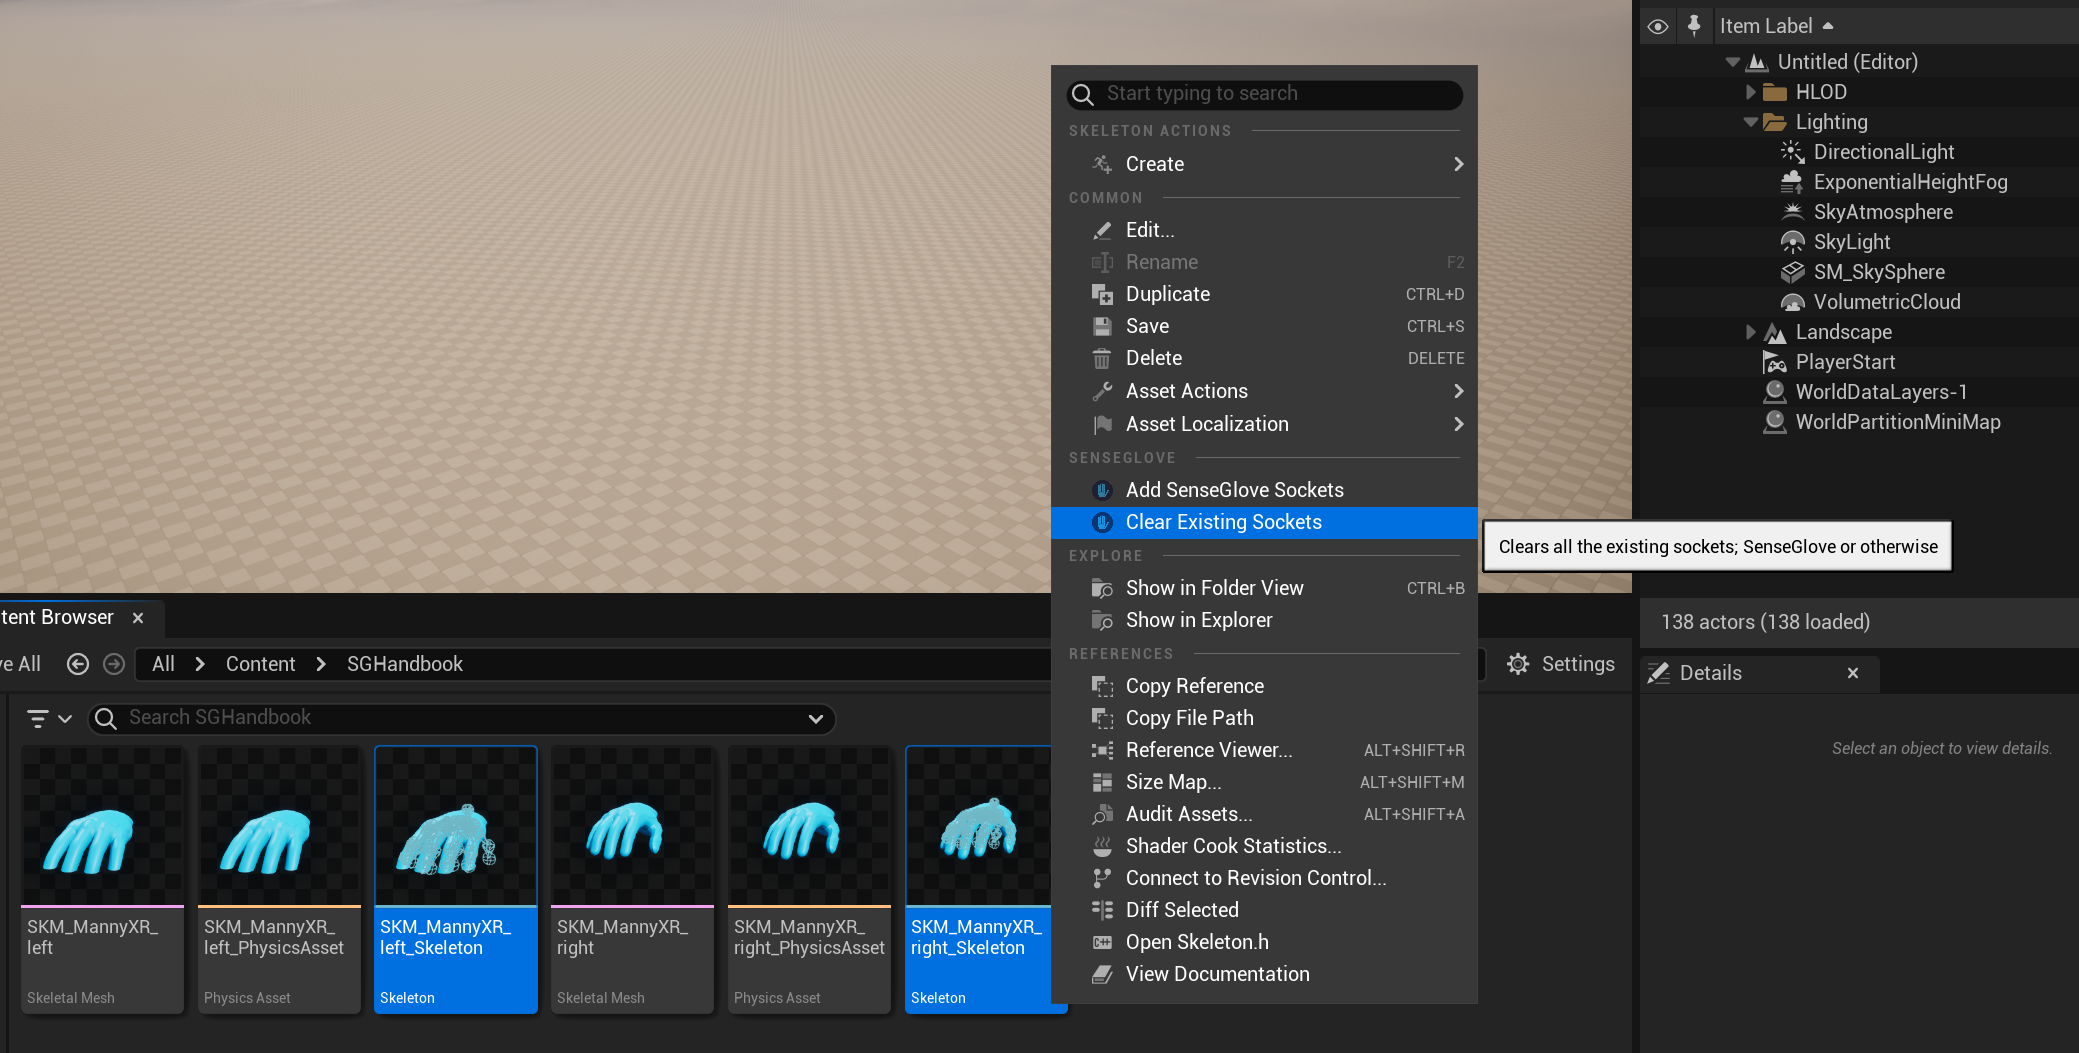
- From the
Assetmenu in the Skeleton Editor or Skeletal Mesh Editor for any open Skeleton or Skeletal Mesh asset.
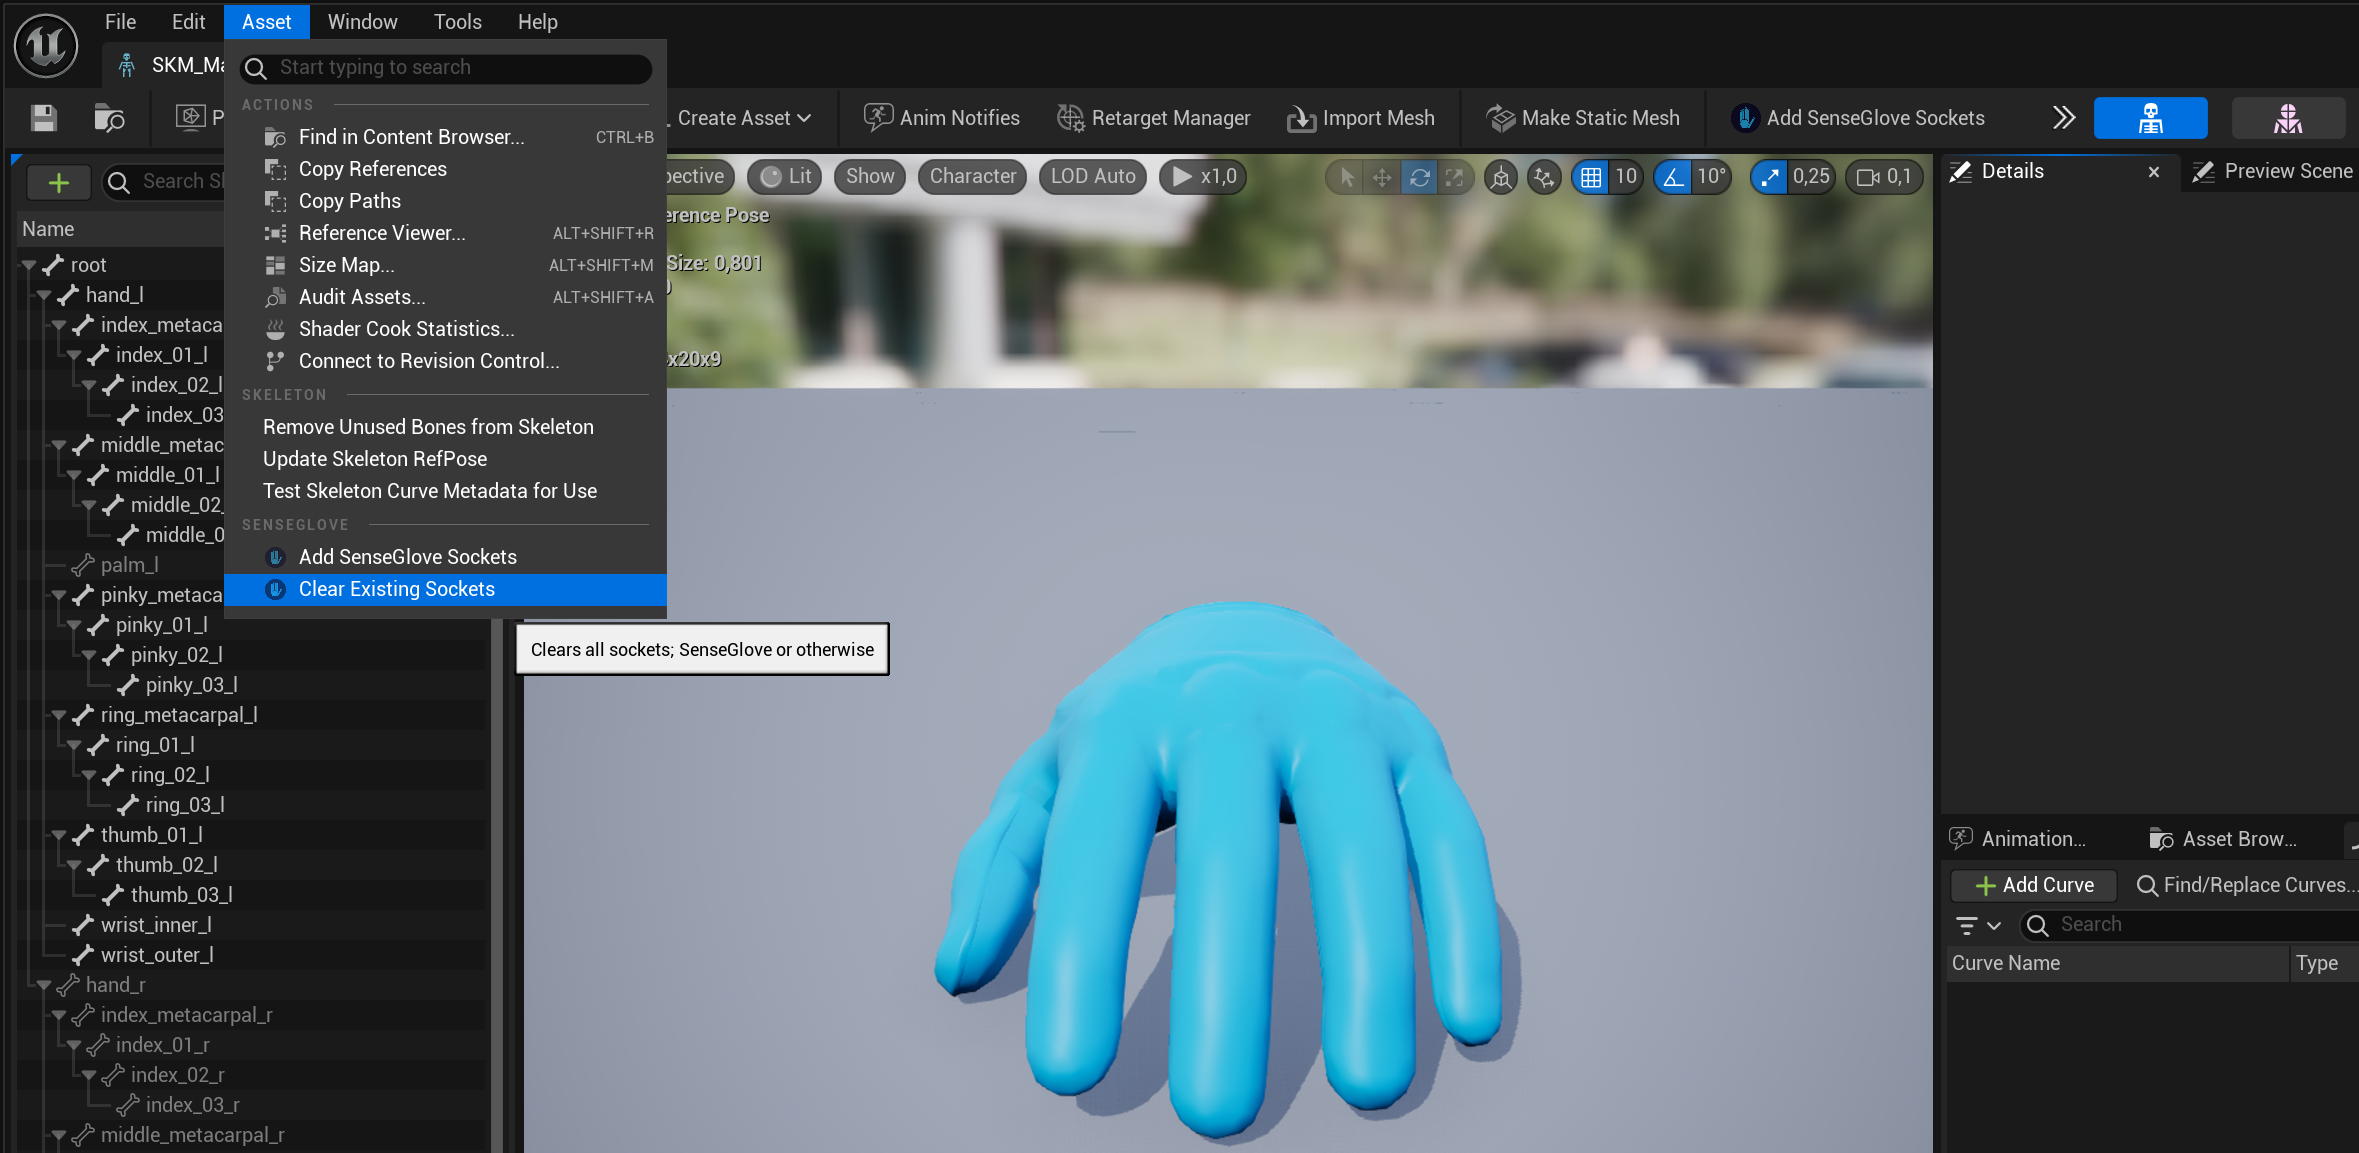
- From the Skeleton Editor or Skeletal Mesh Editor toolbar for any open Skeleton or Skeletal Mesh asset.
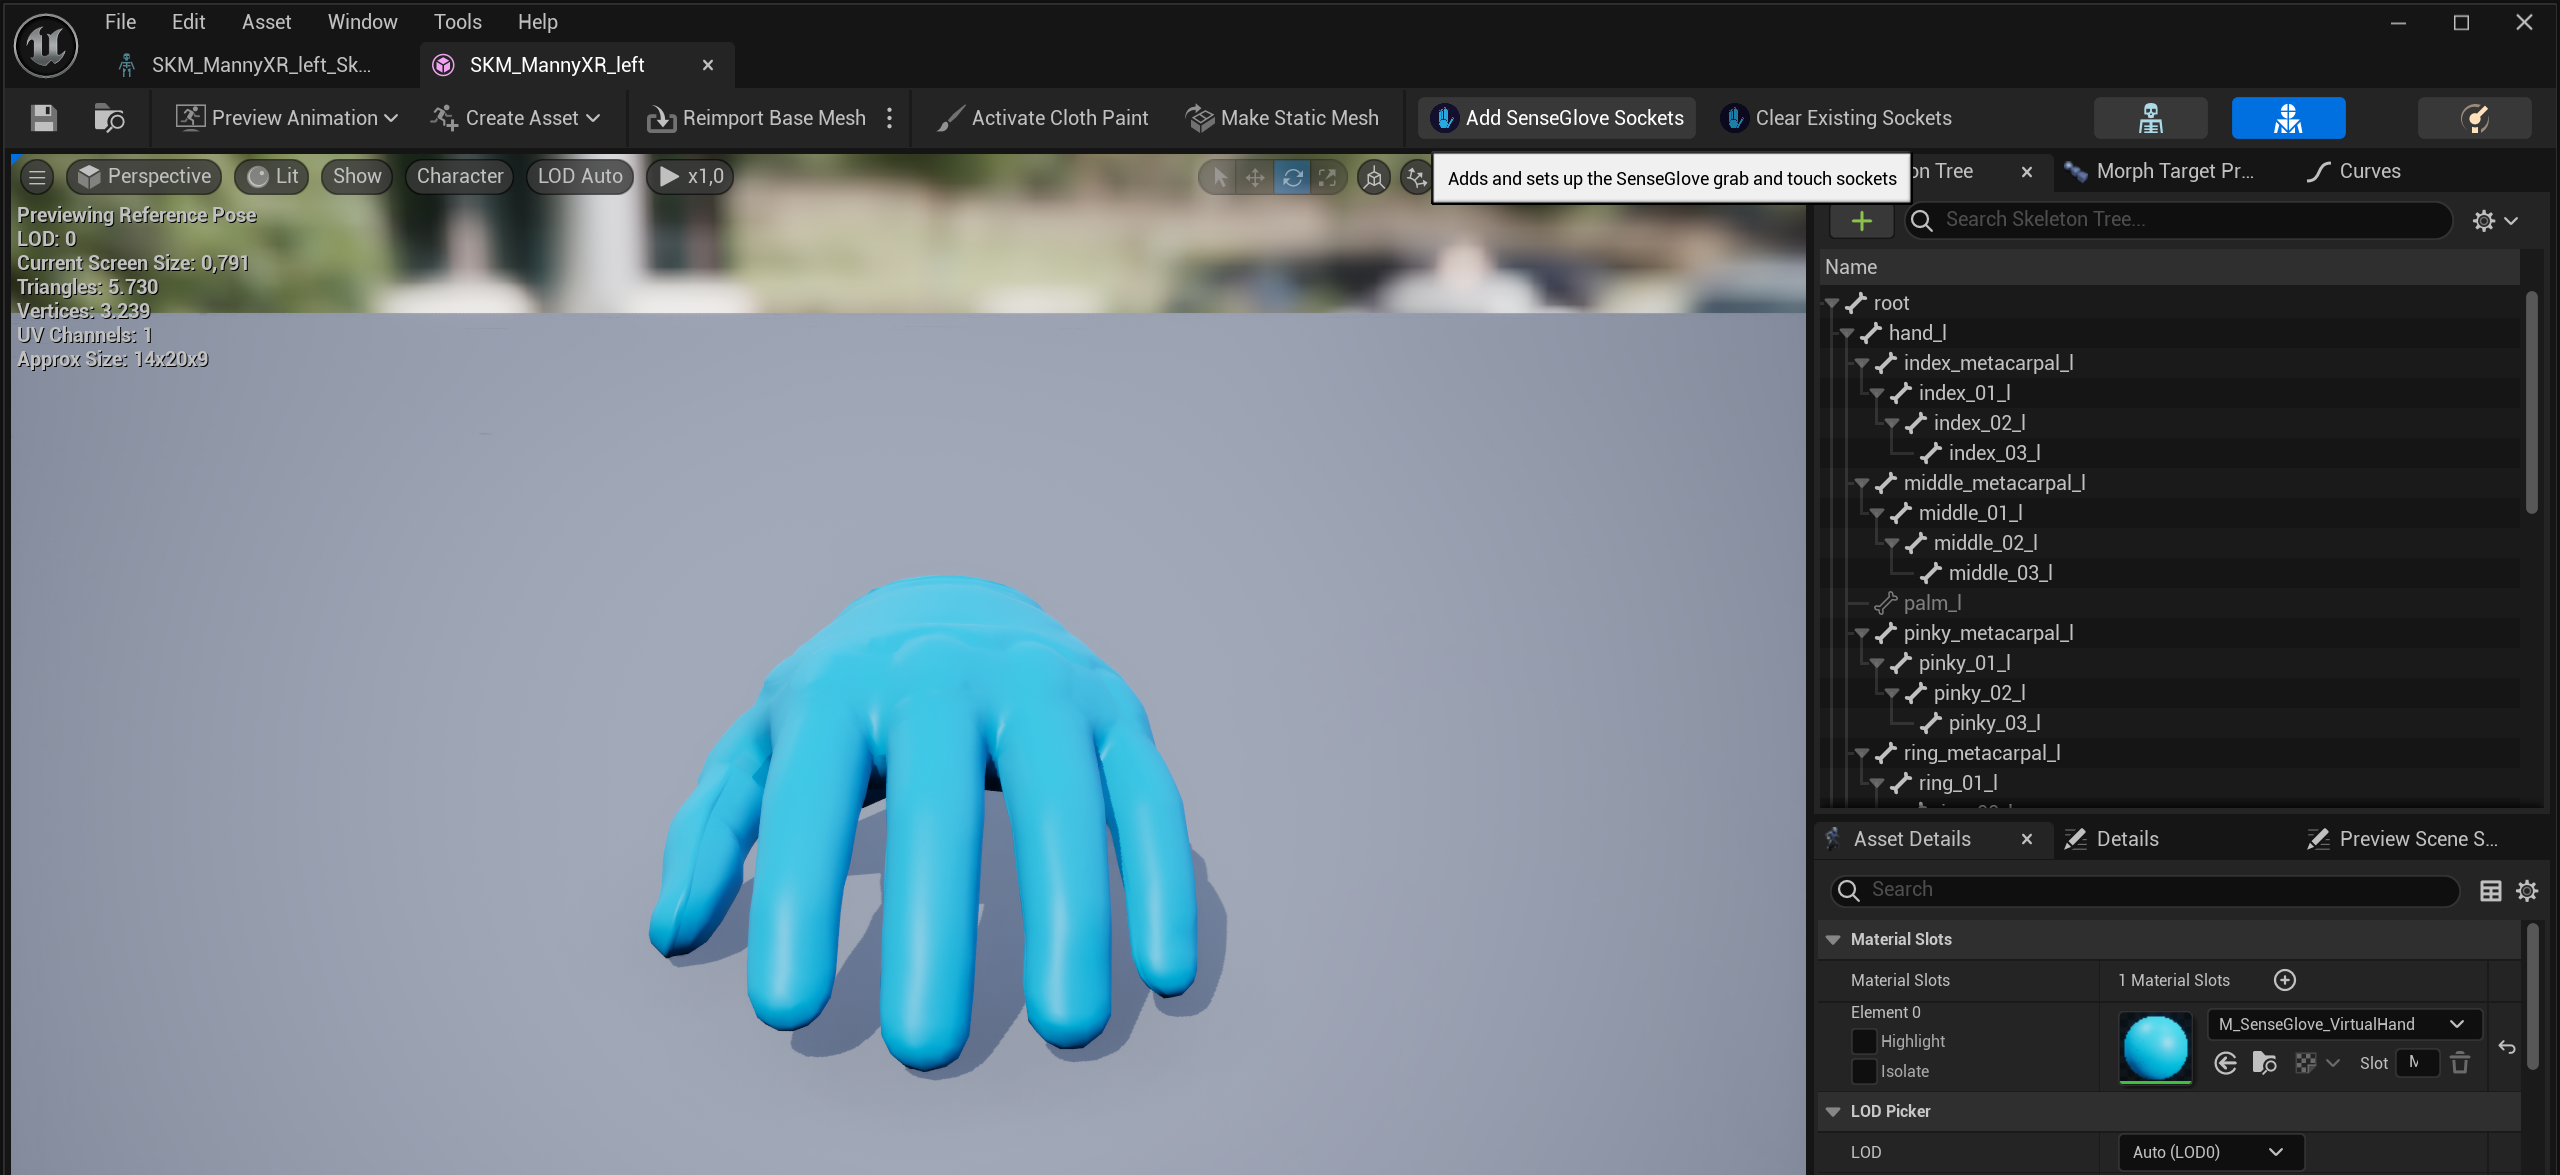
The SenseGlove Sockets Editor currently offers two actions:
Add SenseGlove Sockets: which adds and sets up the SenseGlove grab and touch sockets to any virtual hand mesh that adheres to the Epic rig and bone structure.Clear Existing Sockets: which destructively clears all existing sockets; SenseGlove or otherwise, from any mesh.
Important
Simply performing any of these actions won't permanently modify your assets. In fact, if you close the Unreal Editor without saving your assets first, all changes performed by the SenseGlove Sockets Editor will be lost forever. This is by design and the plugin will leave this final choice to the user. So, in order to apply the changes permanently, you must save the assets manually.
Adding the SenseGlove Sockets
When you invoke the Add SenseGlove Sockets action, the Sockets Editor will prompt you for confirmation:
If it succeeds at adding the standard SenseGlove sockets, you will receive a confirmation message:

After closing the dialog, the editors for the affected Skeleton and Skeletal Mesh assets will open, displaying the newly added sockets:
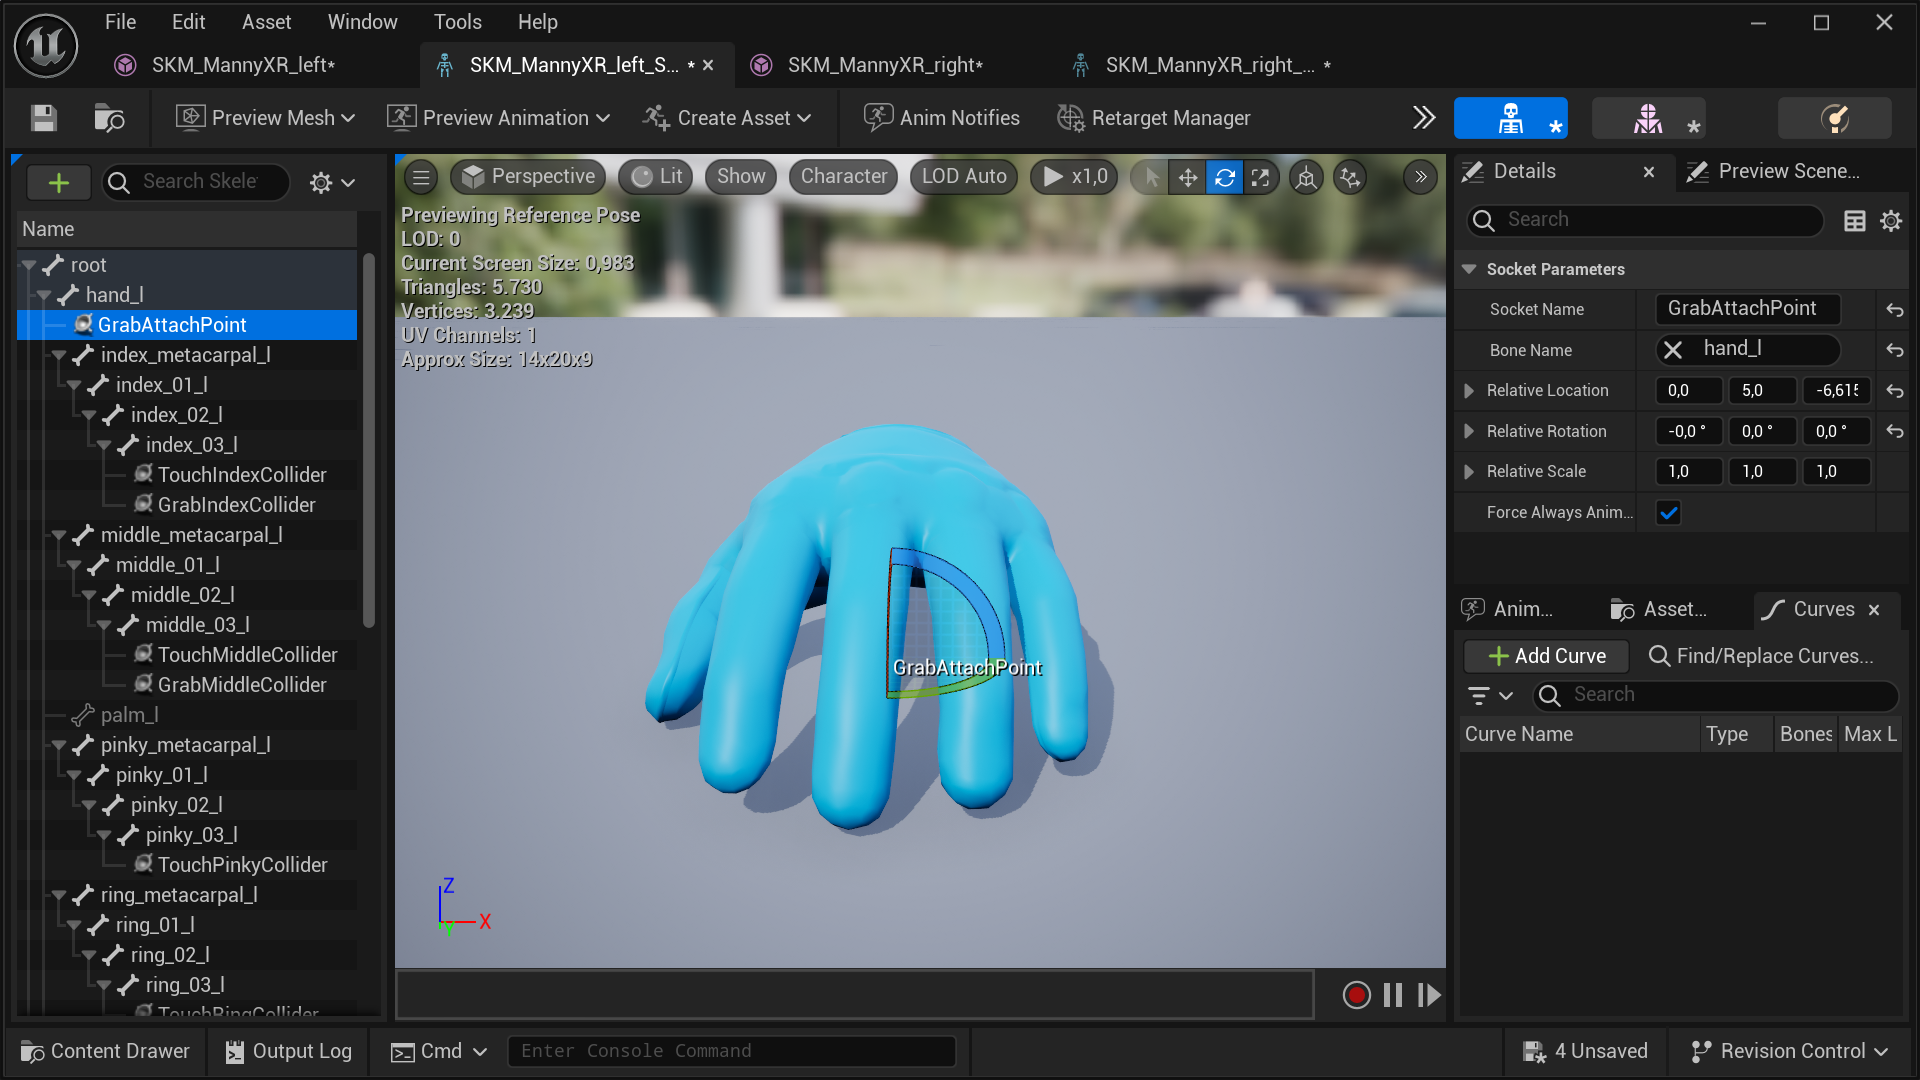
To ensure the changes persist, save the assets to disk.
Note
The
Add SenseGlove Socketsaction can fail for various reasons, so it's important to investigate and identify the cause if an issue arises.
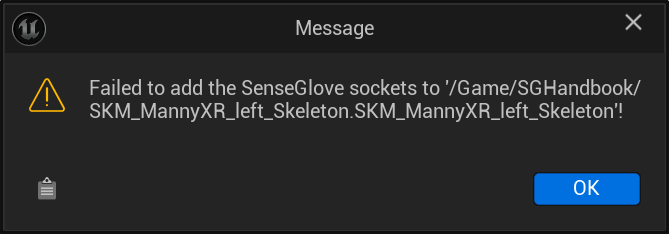
Important
A common cause of failure is that the SenseGlove sockets have already been set up, or the meshes you’re using already have the necessary sockets. In this case, consider using the
Clear Existing Socketsaction first.
Caution
Another common cause of failure is if your virtual hand meshes share a skeleton. As noted in the Compatible Virtual Hand Meshes section, the SenseGlove Sockets Editor does not support skeletal meshes that share their skeleton. You may need to export and re-import the virtual hand meshes in in a compatible manner first.
In any case, the SenseGlove Sockets Editor reports all failures in the Unreal Editor logs. To view and investigate the logs, simply head to the Window menu and click on Output Log:
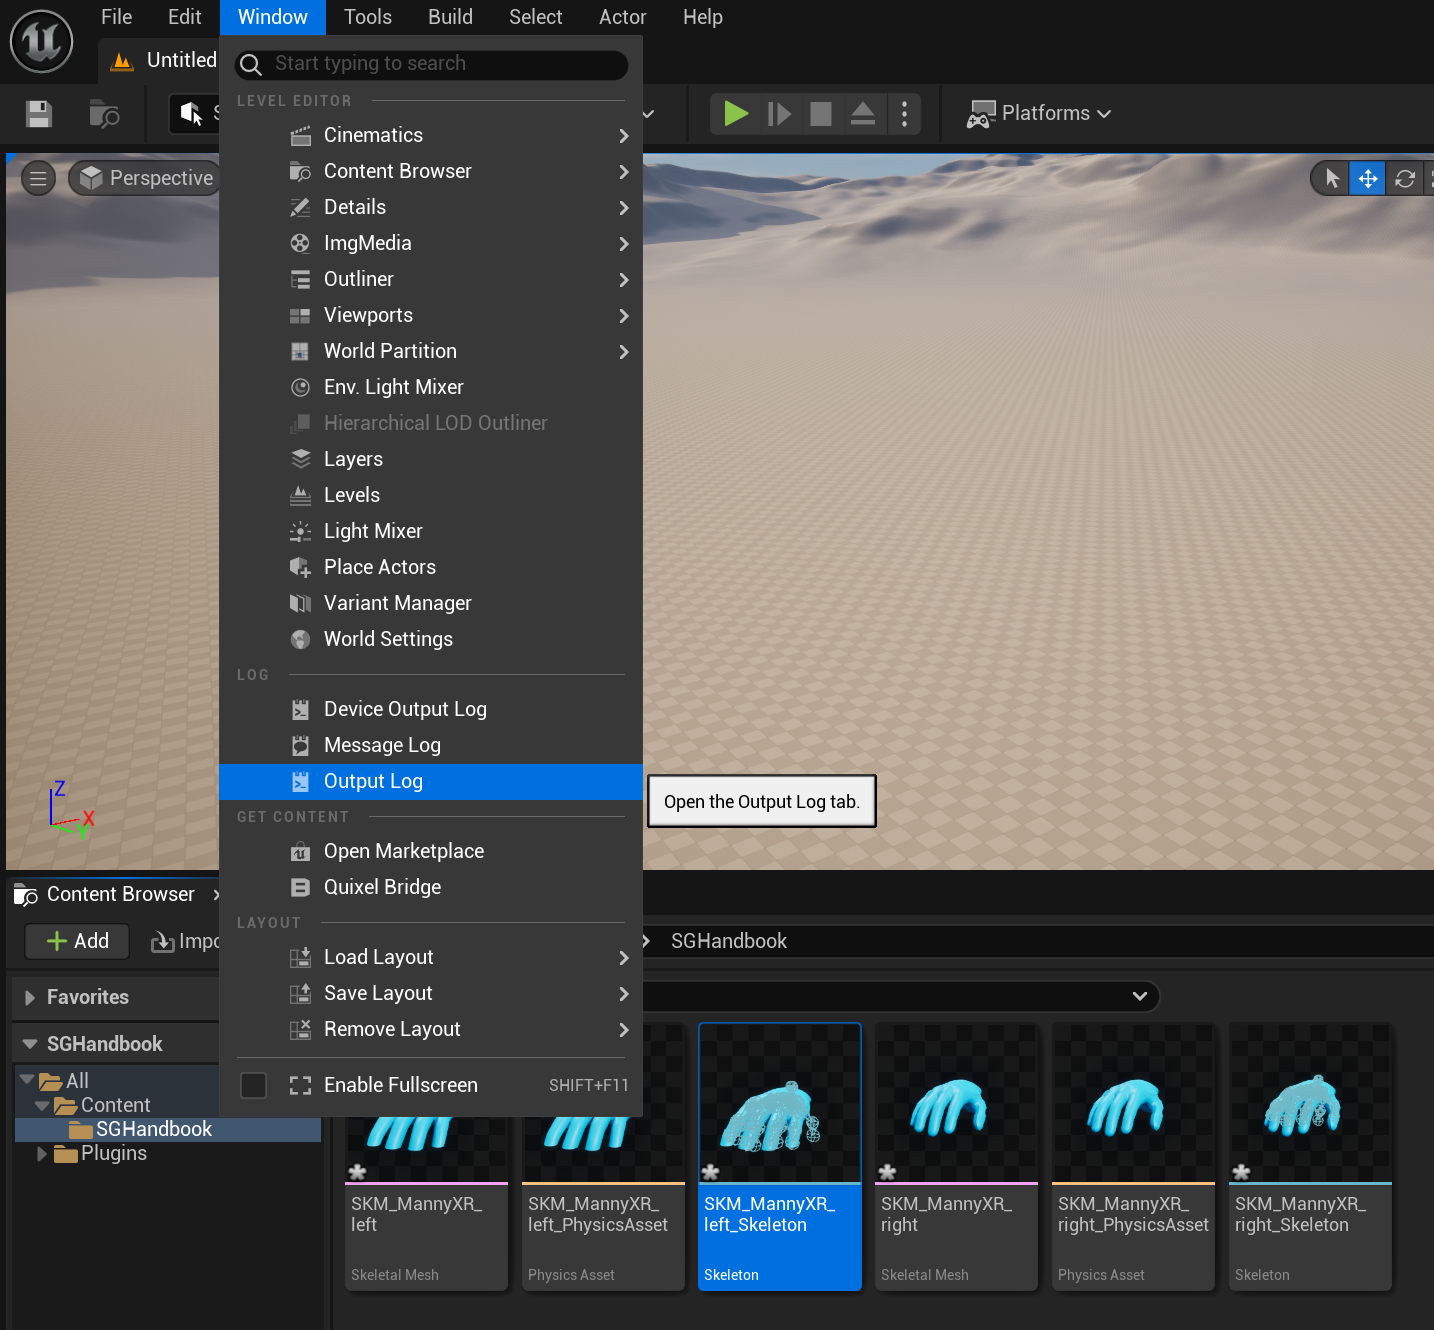
For example, in the following screenshots the following errors are stated: Socket 'GrabAttachPoint' already exists on '/Game/SGHandbook/SKM_MannyXR_left.SKM_MannyXR_left'; refuse to add a duplicate!.
LogGeneric: Error: [ERROR C:\Users\mamadou\Desktop\dev\SGHandbook\Plugins\SenseGlove\Source\SenseGloveEditor\Private\SGEditor\SGAssetUtils.cpp FSGAssetUtils::FImpl::AddSocket 394] Socket 'GrabAttachPoint' already exists on '/Game/SGHandbook/SKM_MannyXR_left.SKM_MannyXR_left'; refuse to add a duplicate!
LogGeneric: Error: [ERROR C:\Users\mamadou\Desktop\dev\SGHandbook\Plugins\SenseGlove\Source\SenseGloveEditor\Private\SGEditor\SGAssetUtils.cpp FSGAssetUtils::FImpl::AddGrabAttachPointSocket 442] Failed to add the socket 'GrabAttachPoint' to '/Game/SGHandbook/SKM_MannyXR_left.SKM_MannyXR_left'!
LogGeneric: Error: [ERROR C:\Users\mamadou\Desktop\dev\SGHandbook\Plugins\SenseGlove\Source\SenseGloveEditor\Private\SGEditor\SGAssetUtils.cpp FSGAssetUtils::FImpl::AddSenseGloveSockets 587] Failed to add the grab attach point socket to asset '/Game/SGHandbook/SKM_MannyXR_left.SKM_MannyXR_left'!
LogGeneric: Error: [ERROR C:\Users\mamadou\Desktop\dev\SGHandbook\Plugins\SenseGlove\Source\SenseGloveEditor\Private\SGEditor\SGAssetUtils.cpp FSGAssetUtils::FImpl::AddSenseGloveSockets 741] Failed to add the SenseGlove sockets to the asset '/Game/SGHandbook/SKM_MannyXR_left.SKM_MannyXR_left'!

Clearing All Existing Sockets
When you invoke the Clear Existing Sockets action, the Sockets Editor will ask for your confirmation:

If successful, you will receive a message indicating all the existing sockets have been cleared:

After closing the dialog, the editors for the affected Skeleton and Skeletal Mesh assets will open, displaying the affected assets with all sockets cleared:
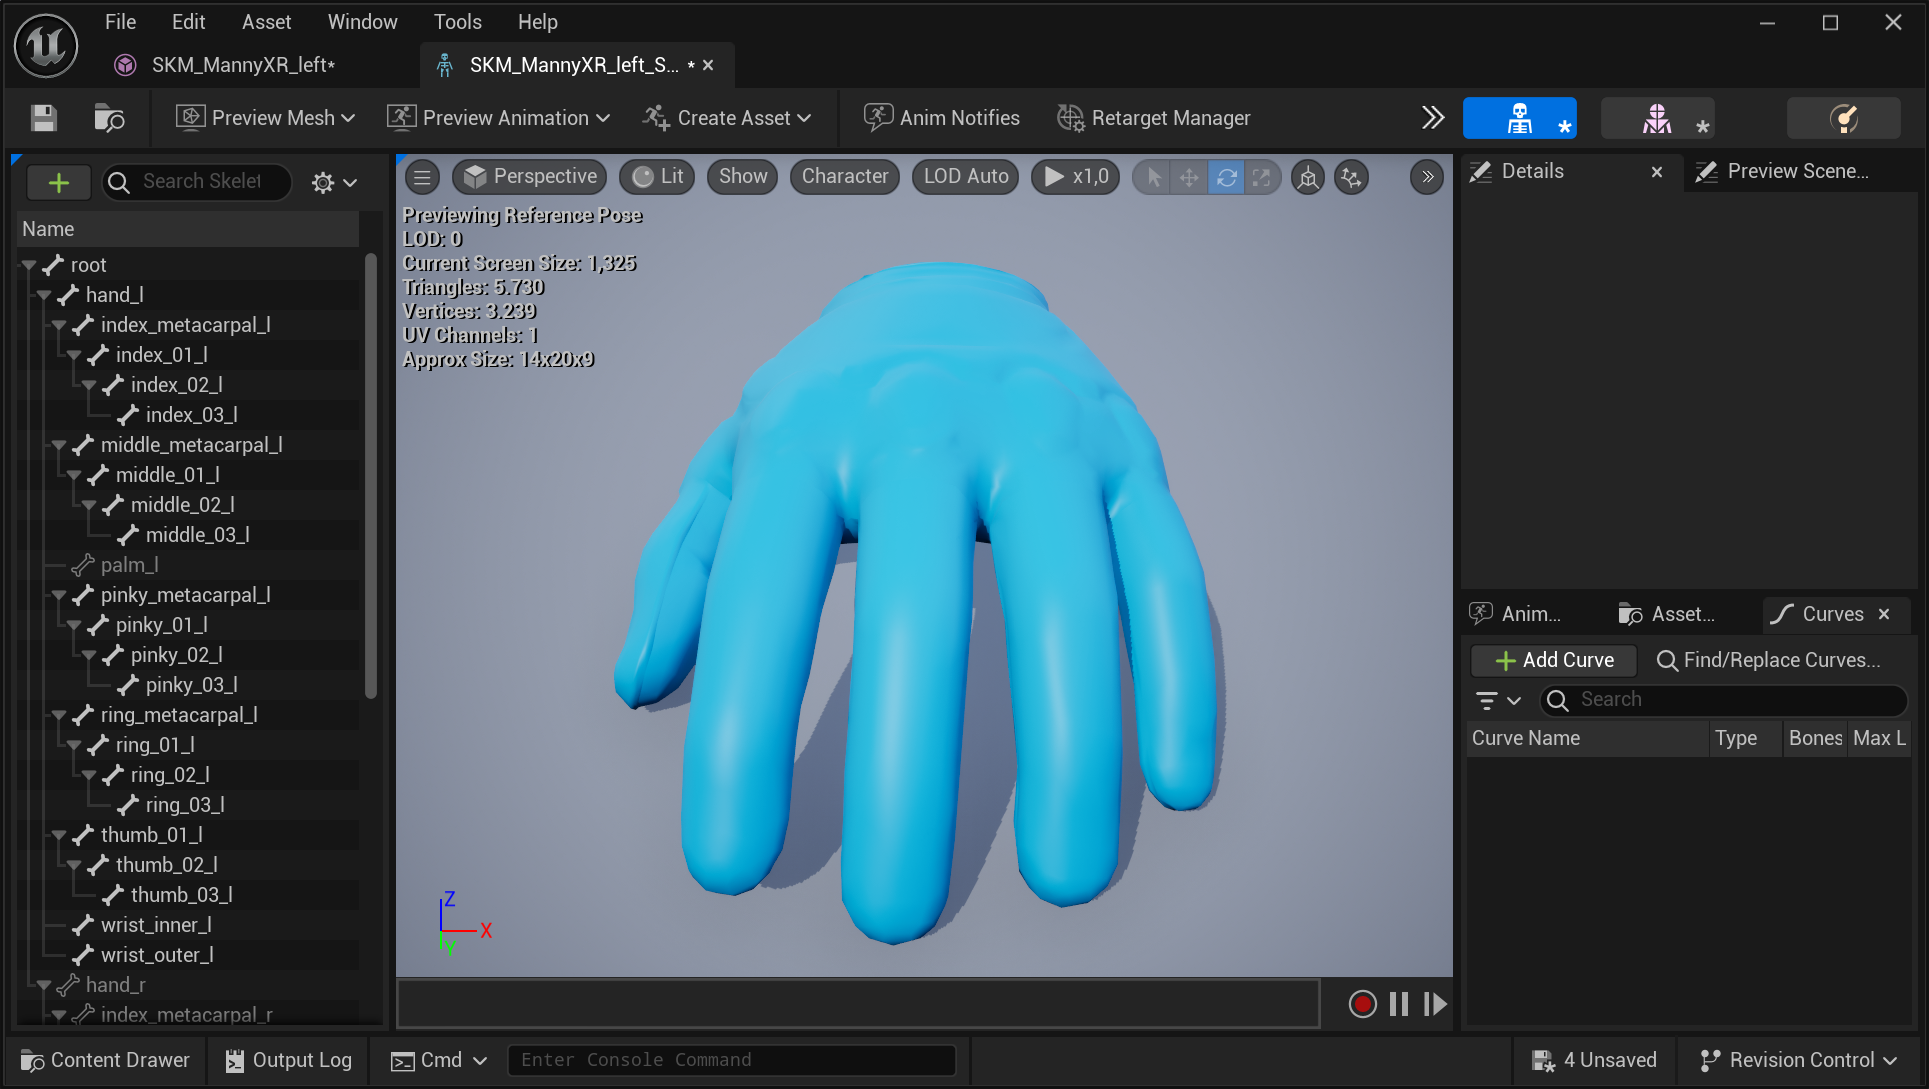
Configuring the SGPawn and Plugin Virtual Hand Mesh Settings
The final step in setting up the virtual hand meshes is to configure the SGPawn and Plugin Virtual Hand Mesh Settings to ensure they utilize the newly created virtual hand meshes.
Please visit Setting Up SGPawn, The Virtual Hand Mesh Settings, and how to setup the Wrist Tracking Hardware sections for more information.
SGPawn Configuration
In the SGPawn Blueprint class, make sure to assign the appropriate Skeletal Mesh Asset to the following components:
HandLeftHandRightRealHandLeftRealHandRight
This ensures that the correct hand meshes are used for both virtual and real hands.
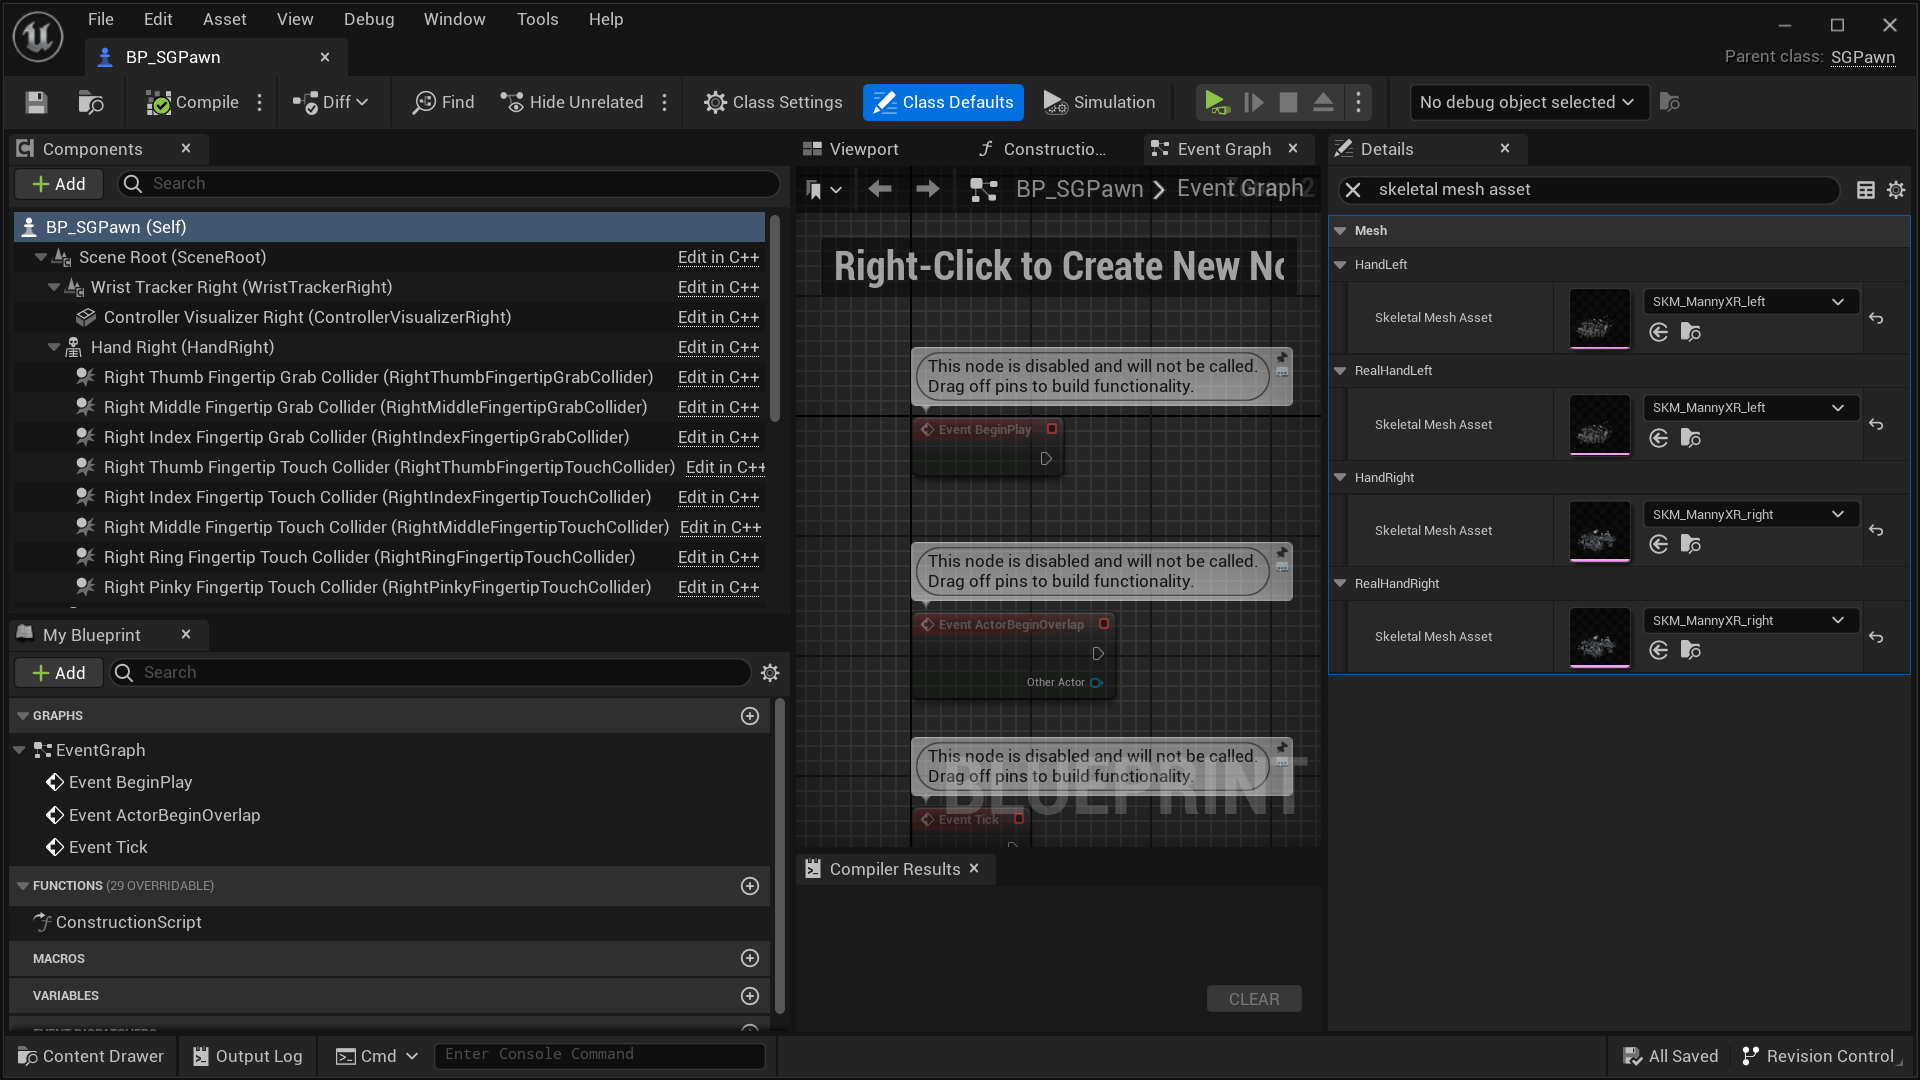
Plugin Virtual Hand Mesh Settings
Next, navigate to Project Settings > Plugins > SenseGlove > Virtual Hand Settings > Mesh Settings and specify the correct left and right-hand meshes for:
Left Hand Reference MeshRight Hand Reference Mesh
This configuration guarantees that the tracking system correctly interprets the bone transforms of the virtual hand meshes when generating FXRHandTrackingState. Additionally, it allows the animation system to accurately use these bone transforms when processing FXRHandTrackingState and animating the virtual hand meshes.
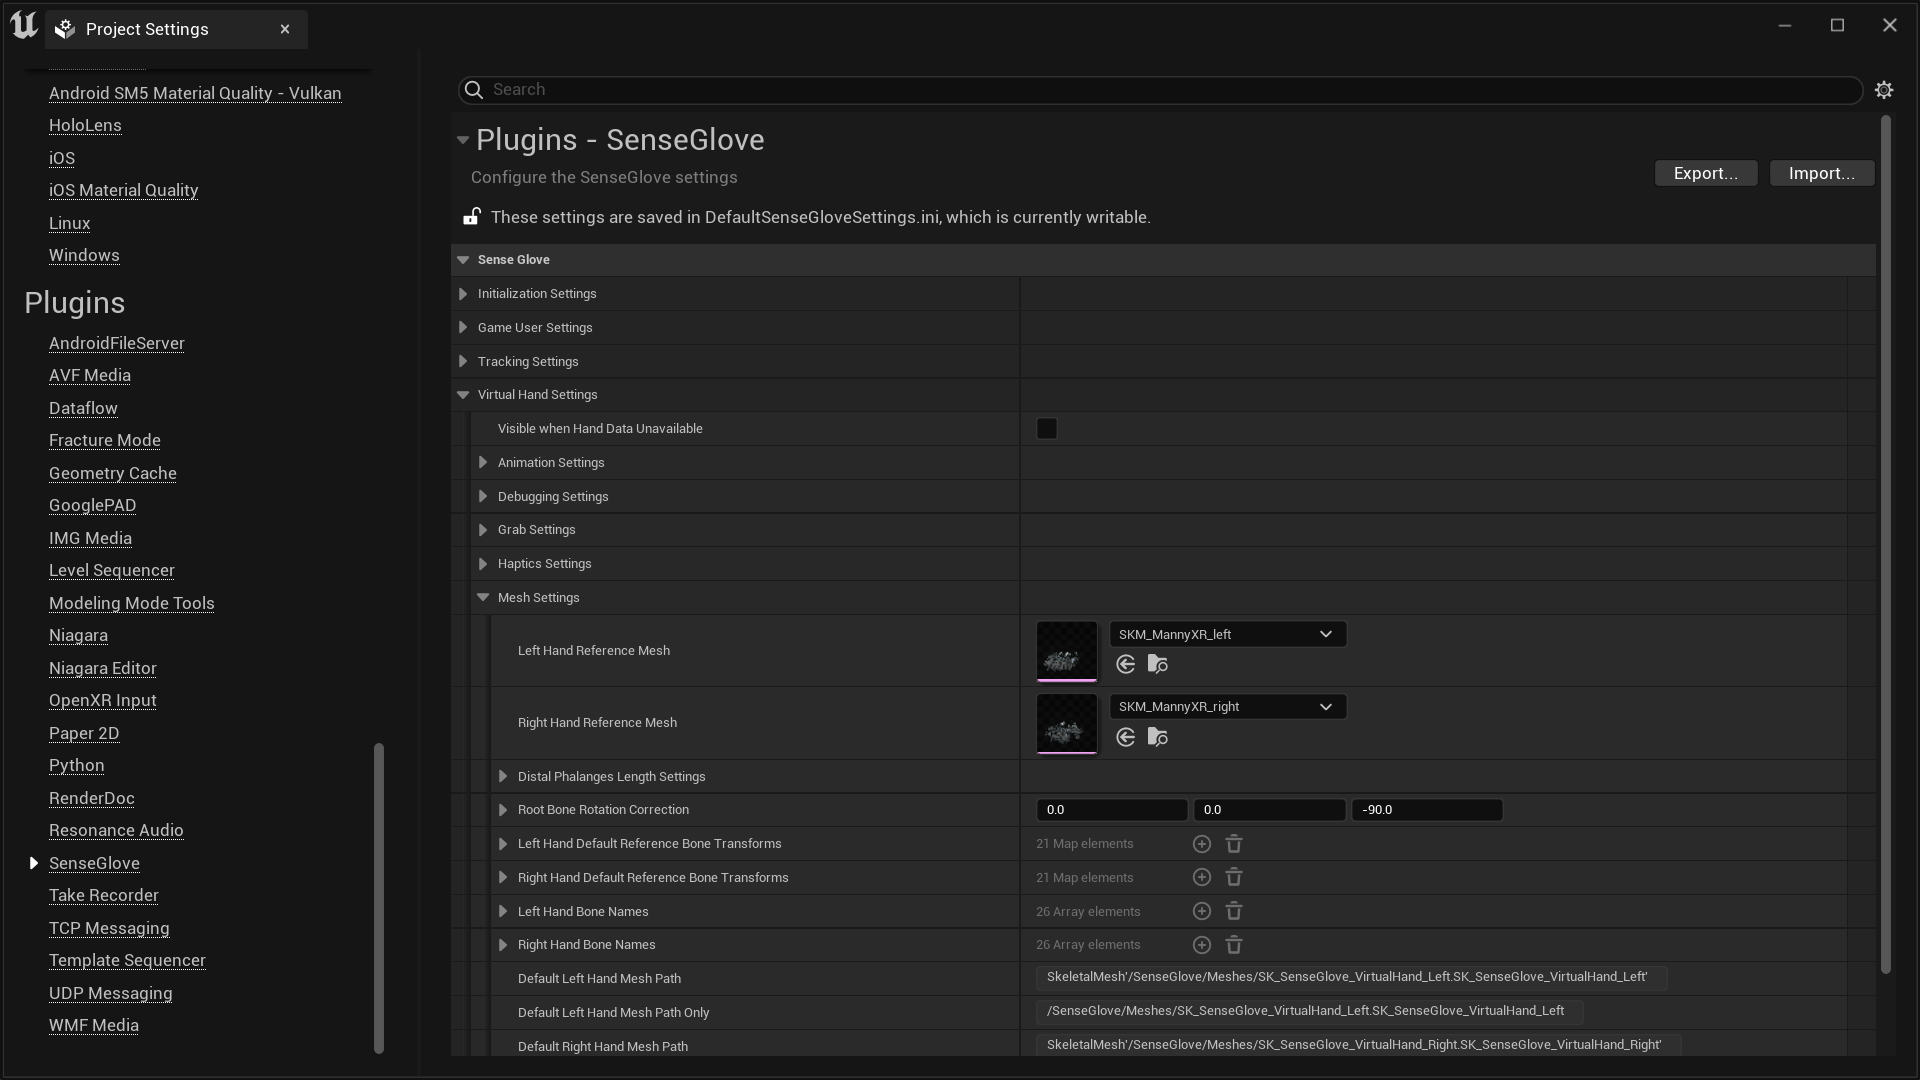
Setting Up the Wrist Tracking Hardware
To enable the SenseGlove Unreal Engine Plugin to track the gloves position and rotation in the world, you need to specify a positional tracking hardware, referred to as Wrist Tracking Hardware within the plugin. By default, if the Wrist Tracking Hardware is not explicitly set, the plugin will attempt to automatically detect it by identifying your Head-mounted display (HMD) hardware. However, this auto-detection feature may not be entirely reliable, as it is still experimental, and it may occasionally fail.
For detailed information, please visit the Wrist Tracking Hardware and HMD auto-detection configuration section.
Prerequisites
Before you even consider setting up the Wrist Tracking Settings for the SenseGlove Unreal Engine Plugin, please make sure that you have already taken all the necessary steps in the Enabling XR_EXT_hand_tracking OpenXR Extension on VR Headsets section for PCVR or Standalone modes. Otherwise, there's no guarantee that the plugin can access the location data from the wrist-tracking hardware of your choice. So, as the first troubleshooting measure, we always recommend double-checking the relevant prerequisite guides above.
Meta Quest 2 Controller
For the Meta Quest 2, whether in PCVR or Standalone mode, the functional wrist-tracking settings looks something like this:
![]()
Meta Quest Pro Controller
For the Meta Quest 3, whether in PCVR or Standalone mode, the functional wrist-tracking settings looks something like this:
![]()
Meta Quest 3 Controller
For the Meta Quest 3, whether in PCVR or Standalone mode, the functional wrist-tracking settings looks something like this:
![]()
HTC VIVE Tracker
For the HTC VIVE Pro using VIVE Trackers, which only supports the PCVR mode, the functional wrist-tracking settings looks something like this:
![]()
HTC VIVE Focus 3 Wrist Tracker
The wrist-tracking settings for the HTC VIVE Focus Vision, VIVE XR Elite, and VIVE Focus 3, when using VIVE Wrist Trackers, will vary depending on the platform and configuration in use.
PCVR Mode
When running in PCVR mode, the functional wrist-tracking settings looks something like this:
![]()
Standalone Mode
Caution
The SenseGlove Unreal Engine Plugin
v2.7.xis the last release series to support Unreal Engine5.4, and its support will be removed in future minor or major releases. This is important to keep in mind if your target development and deployment platform is HTC VIVE in Standalone Mode. Unfortunately, HTC has not released any updates to their HTC ViveOpenXR plugin since December 6, 2024. Their latest release [1] [2], ViveOpenXR Pluginv2.5.0, supports only Unreal Engine5.3and5.4. HTC VIVE PCVR Mode is unaffected and will remain fully functional because, on Microsoft Windows, it is supported via the OpenXRViveTracker Plugin, which is bundled with Unreal Engine and officially maintained by Epic Games. If you still intend to target HTC in Standalone Mode, you are welcome to continue using the latest SenseGlove Unreal Engine Pluginv2.7.x, which will retain HTC Standalone Mode support. However, please keep in mind that once newer versions of the SenseGlove Unreal Engine Plugin are released and UE5.4is no longer supported, the latest release of the plugin supporting UE5.4will not receive new features, hardware support, or bug fixes. If at any point in the future HTC releases a new version of their ViveOpenXR plugin that supports any Unreal Engine version we actively support,+ in accordance with our support policy and Platform Support Matrix, we will make every reasonable effort to reintroduce HTC Standalone Mode support.
When running in Standalone mode, the functional wrist-tracking settings looks something like this:
![]()
Setting up the Grab/Release System
Setting up the SenseGlove Grab/Release System involves two main steps. The first step, configuring the virtual hand meshes for both real and virtual hands, is handled automatically by the plugin. The second step, which is also straightforward, involves setting up any existing actor in the Unreal Blueprint Editor that you want to respond to with haptic feedback when your SenseGlove device comes into contact with it:
-
Open any existing actor in the Unreal Blueprint Editor that you would like to respond to with haptic feedback when your SenseGlove device comes into contact with it.
-
In the
Componentspanel, click the+ Addbutton, then typeSGGrabinto theSearch Componentsinput field. Once found, click onSGGrabto add it to the current actor. You can rename theSGGrabcomponent to your desired name.
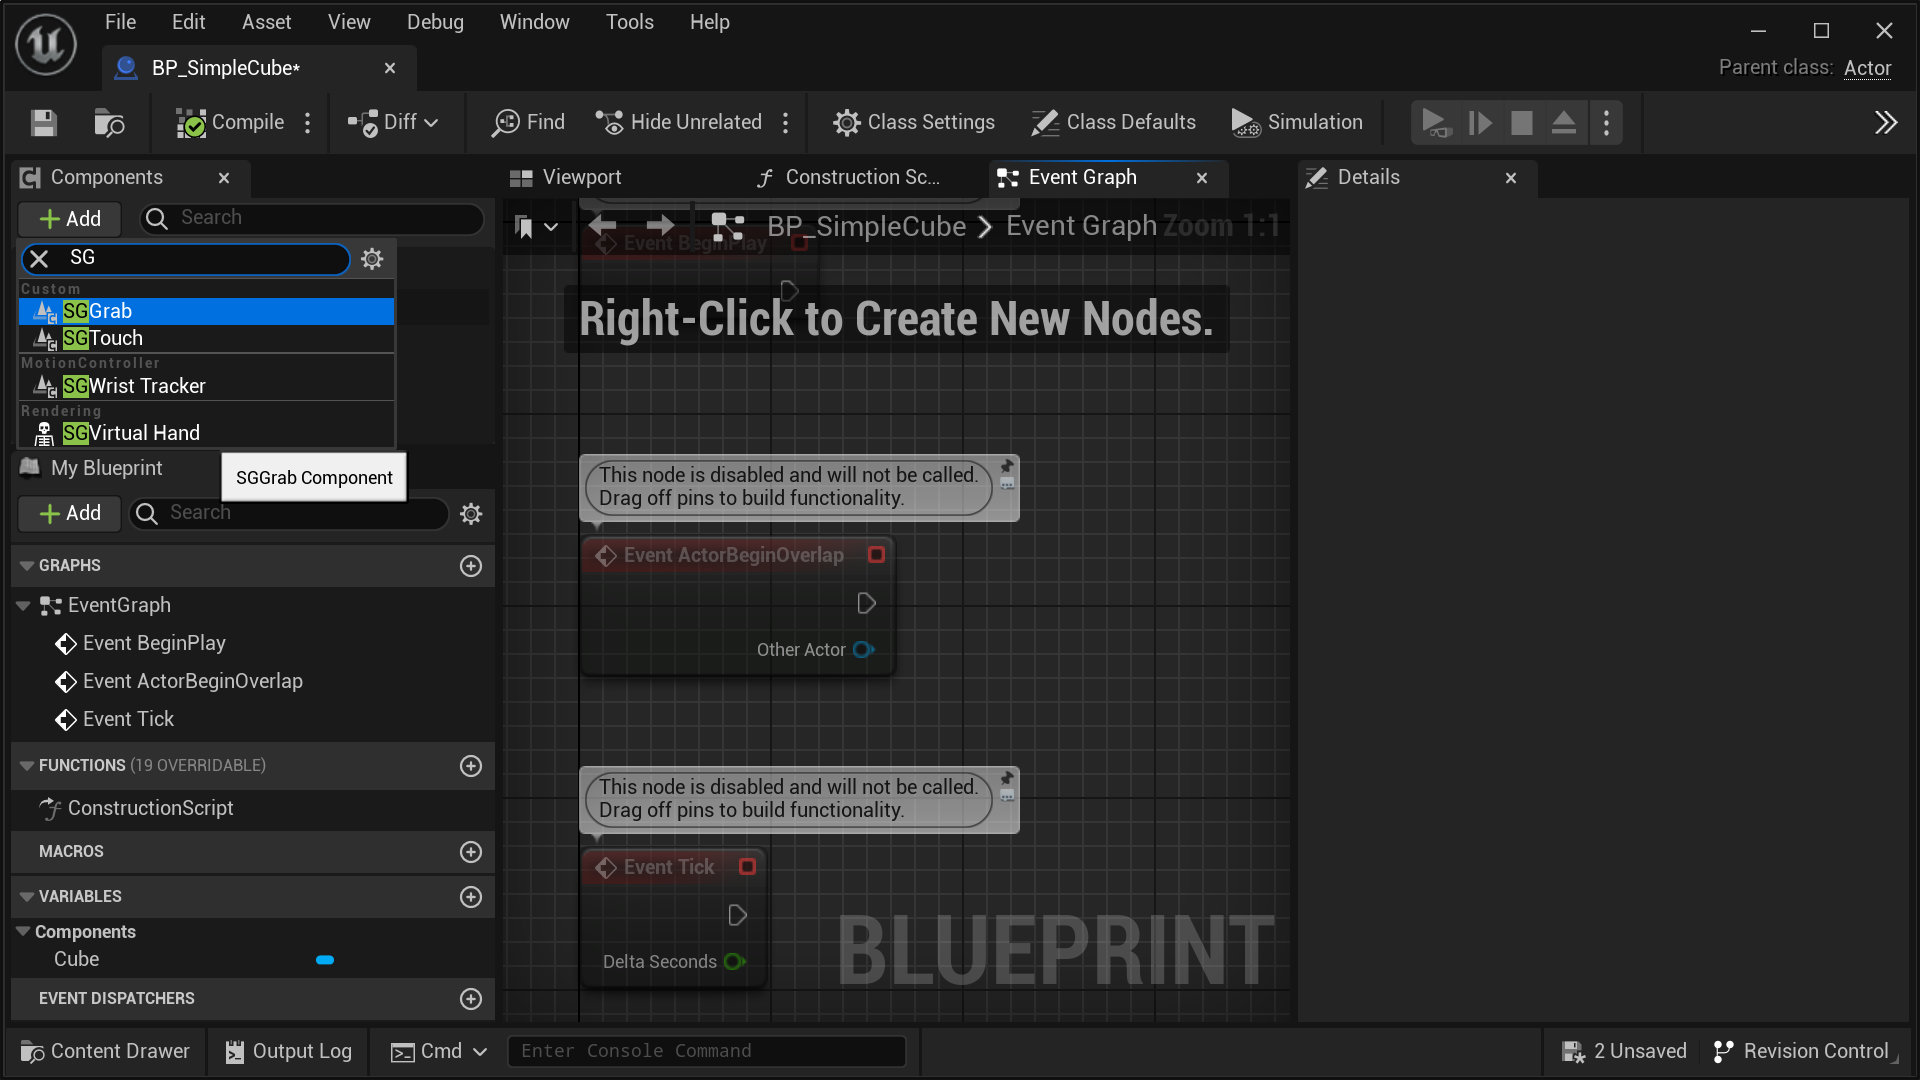
- With the
SGGrabcomponent selected in theComponentspanel, navigate to theDetailspanel. Under theSenseGlovesection, adjust the settings for the grab/release system to suit your needs.
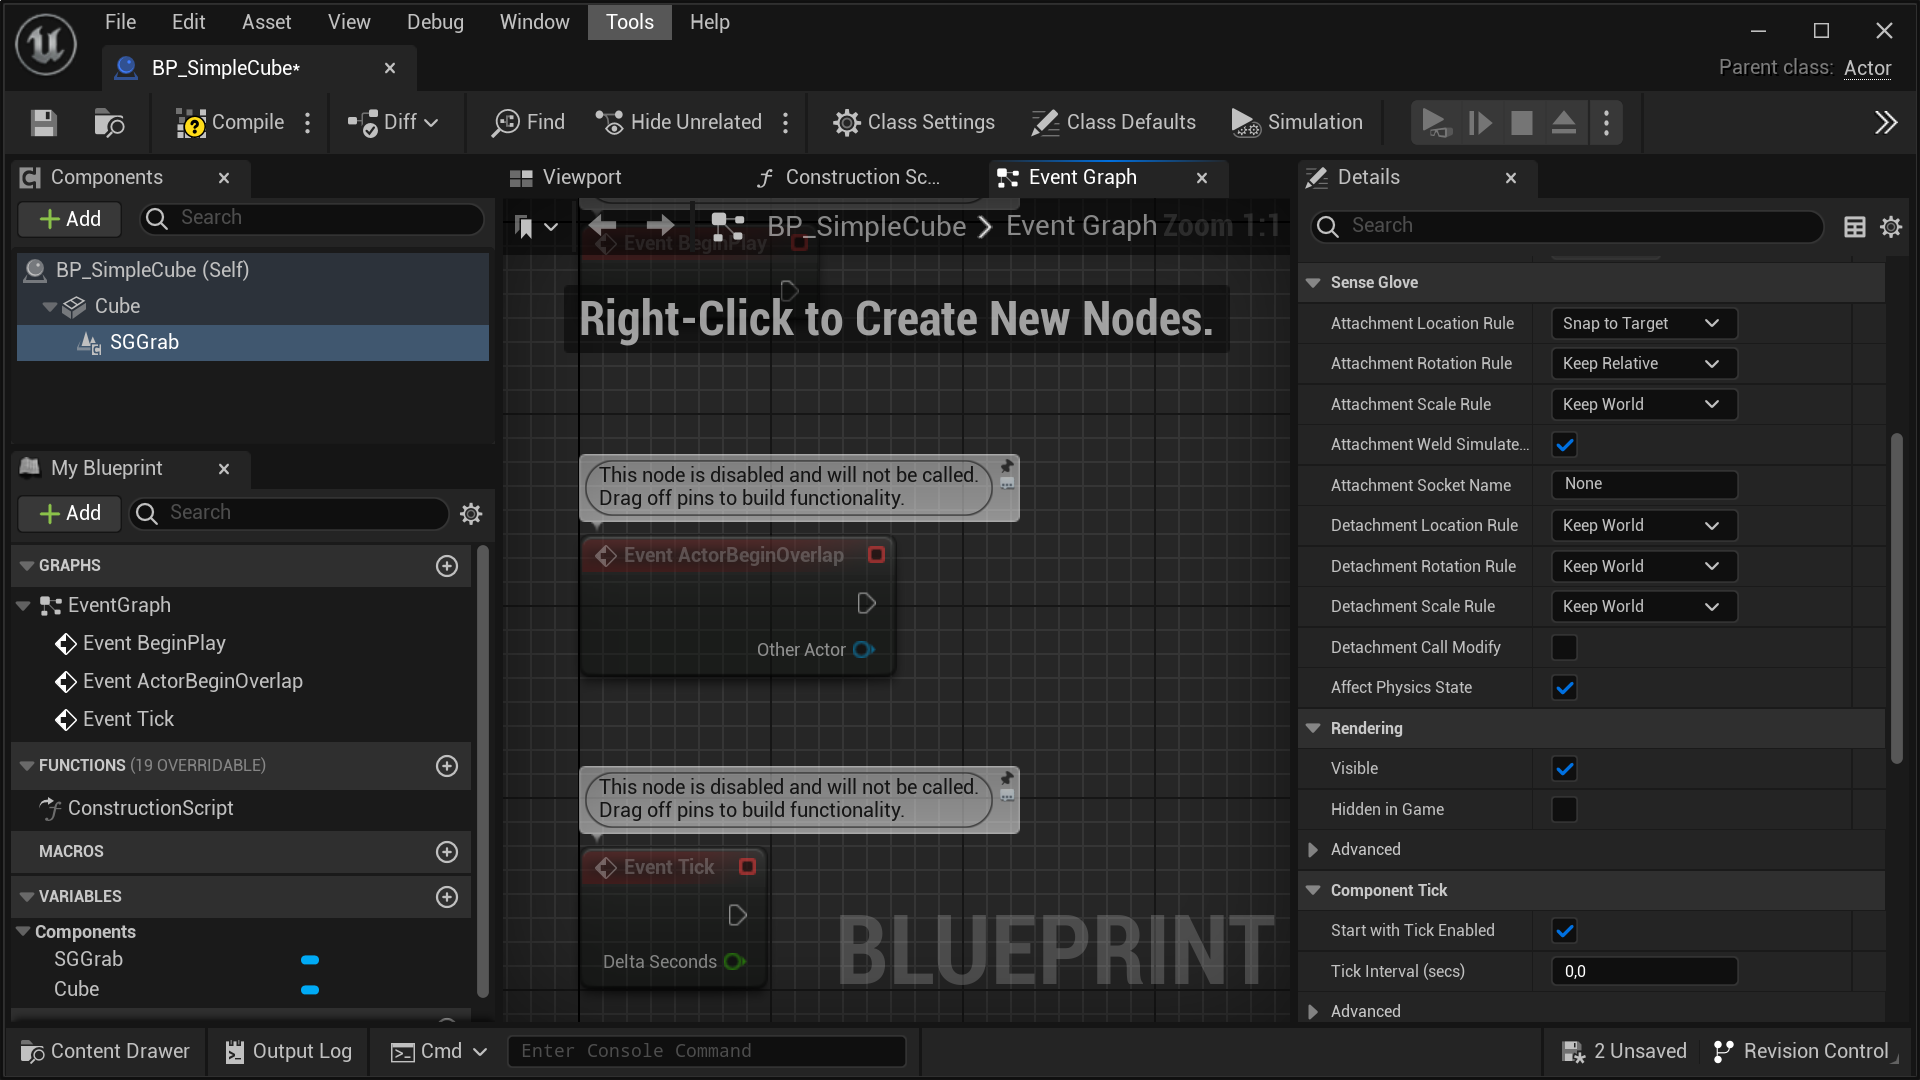
Note
Any property prefixed with
Attachmentis a parameter directly passed to Unreal'sFAttachmentTransformRulesduring the grab process, while any property prefixed withDetachmentis a parameter directly passed to Unreal'sFDetachmentTransformRulesduring the release process.
Caution
If
AttachmentSocketNameis unspecified, or incorrect the grabbable object will be attached to the root bone of the virtual hand mesh, which probably is not ideal.
- A key setting for the release system is located within your
SGPawninstance. In theDetailspanel for yourSGPawn, find theMax Number of Hand Velocity Samplessetting and adjust it according to your needs. This setting determines the velocity of objects released from the hands by averaging the specified number of frames. Optimizing this value depends on the framerate of your simulation at runtime.
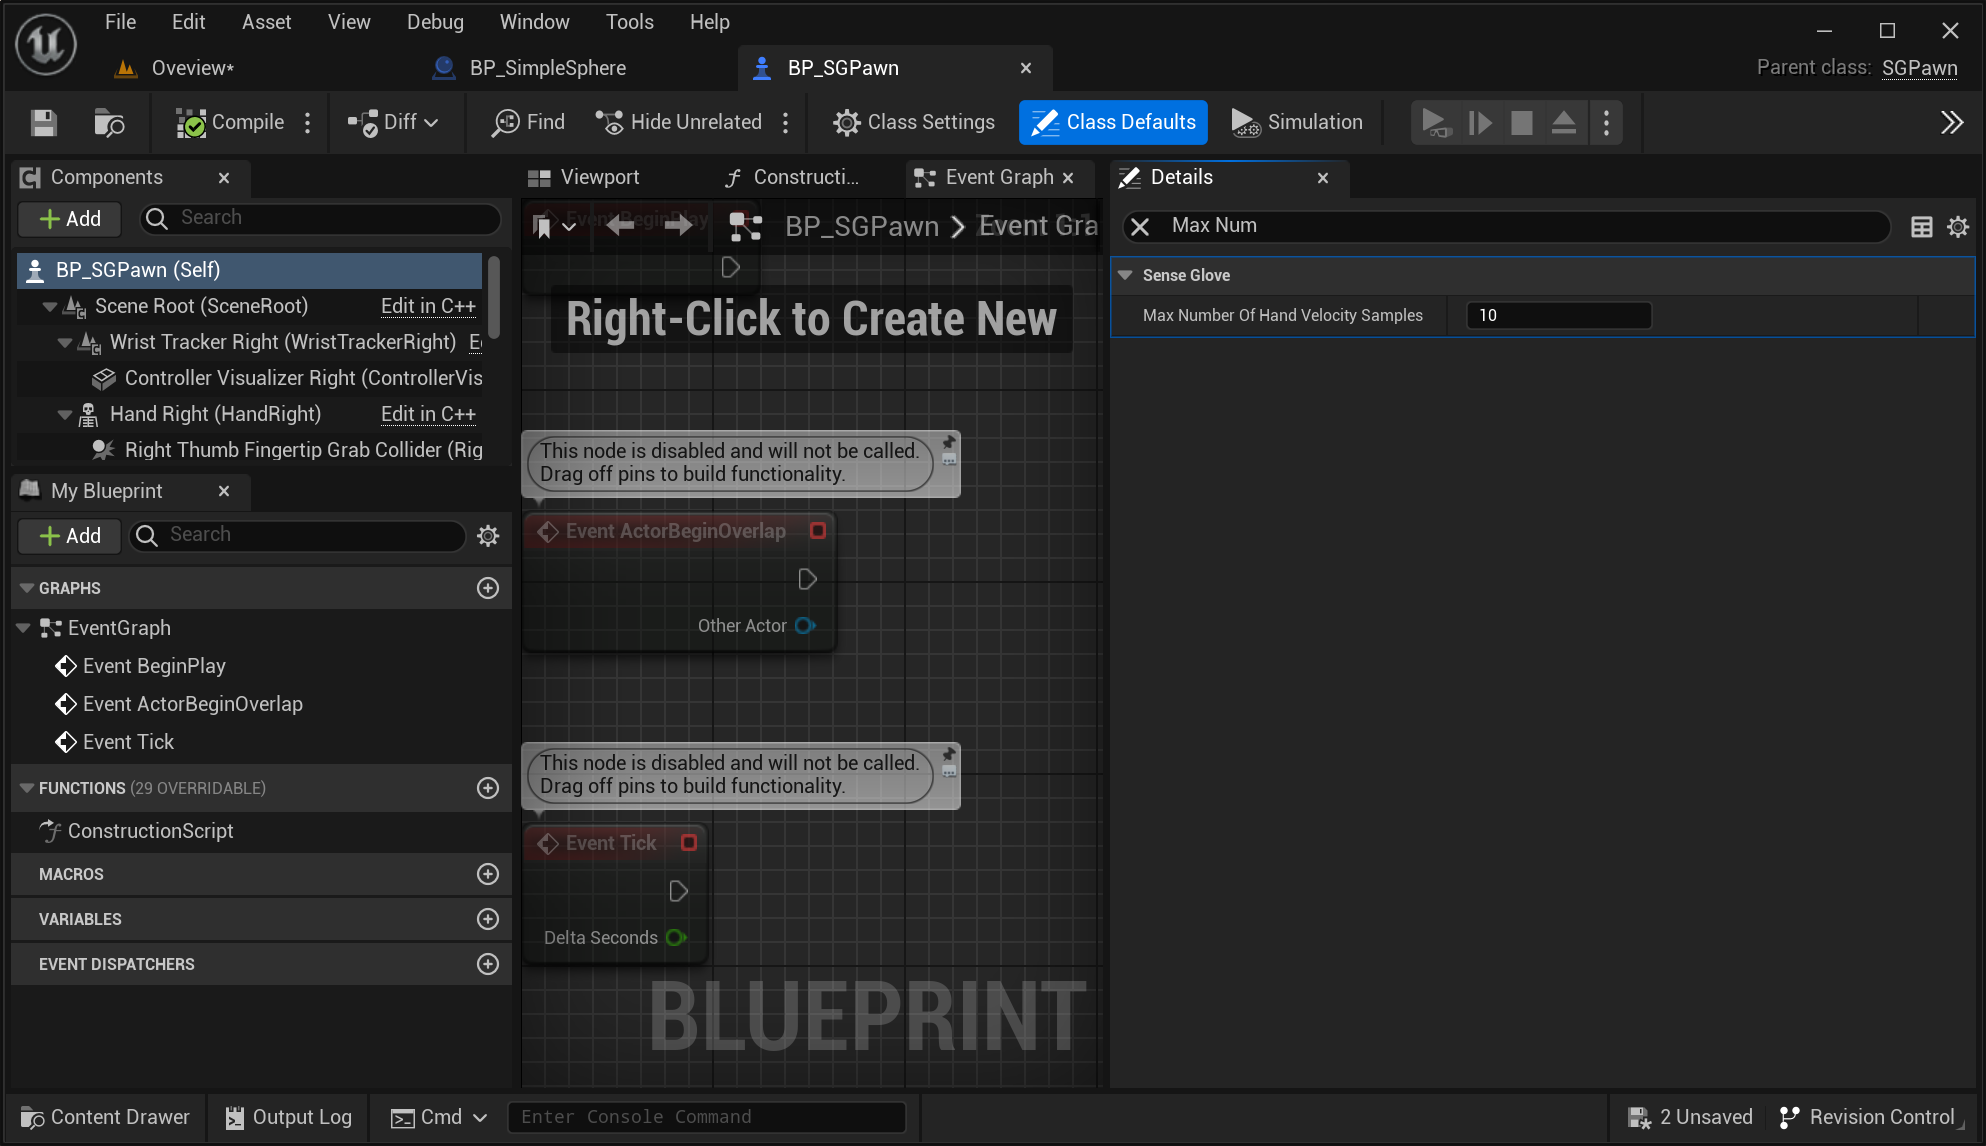
- One last aspect of the grabbable actors to take into account for the grab system to function properly is the collision settings of their mesh components. If you'd like to prevent the virtual hand meshes from passing through a grabbable actor, it's necessary to set the
Collision PresetstoBlock Allinside theDetailspanel for the actor's mesh components.
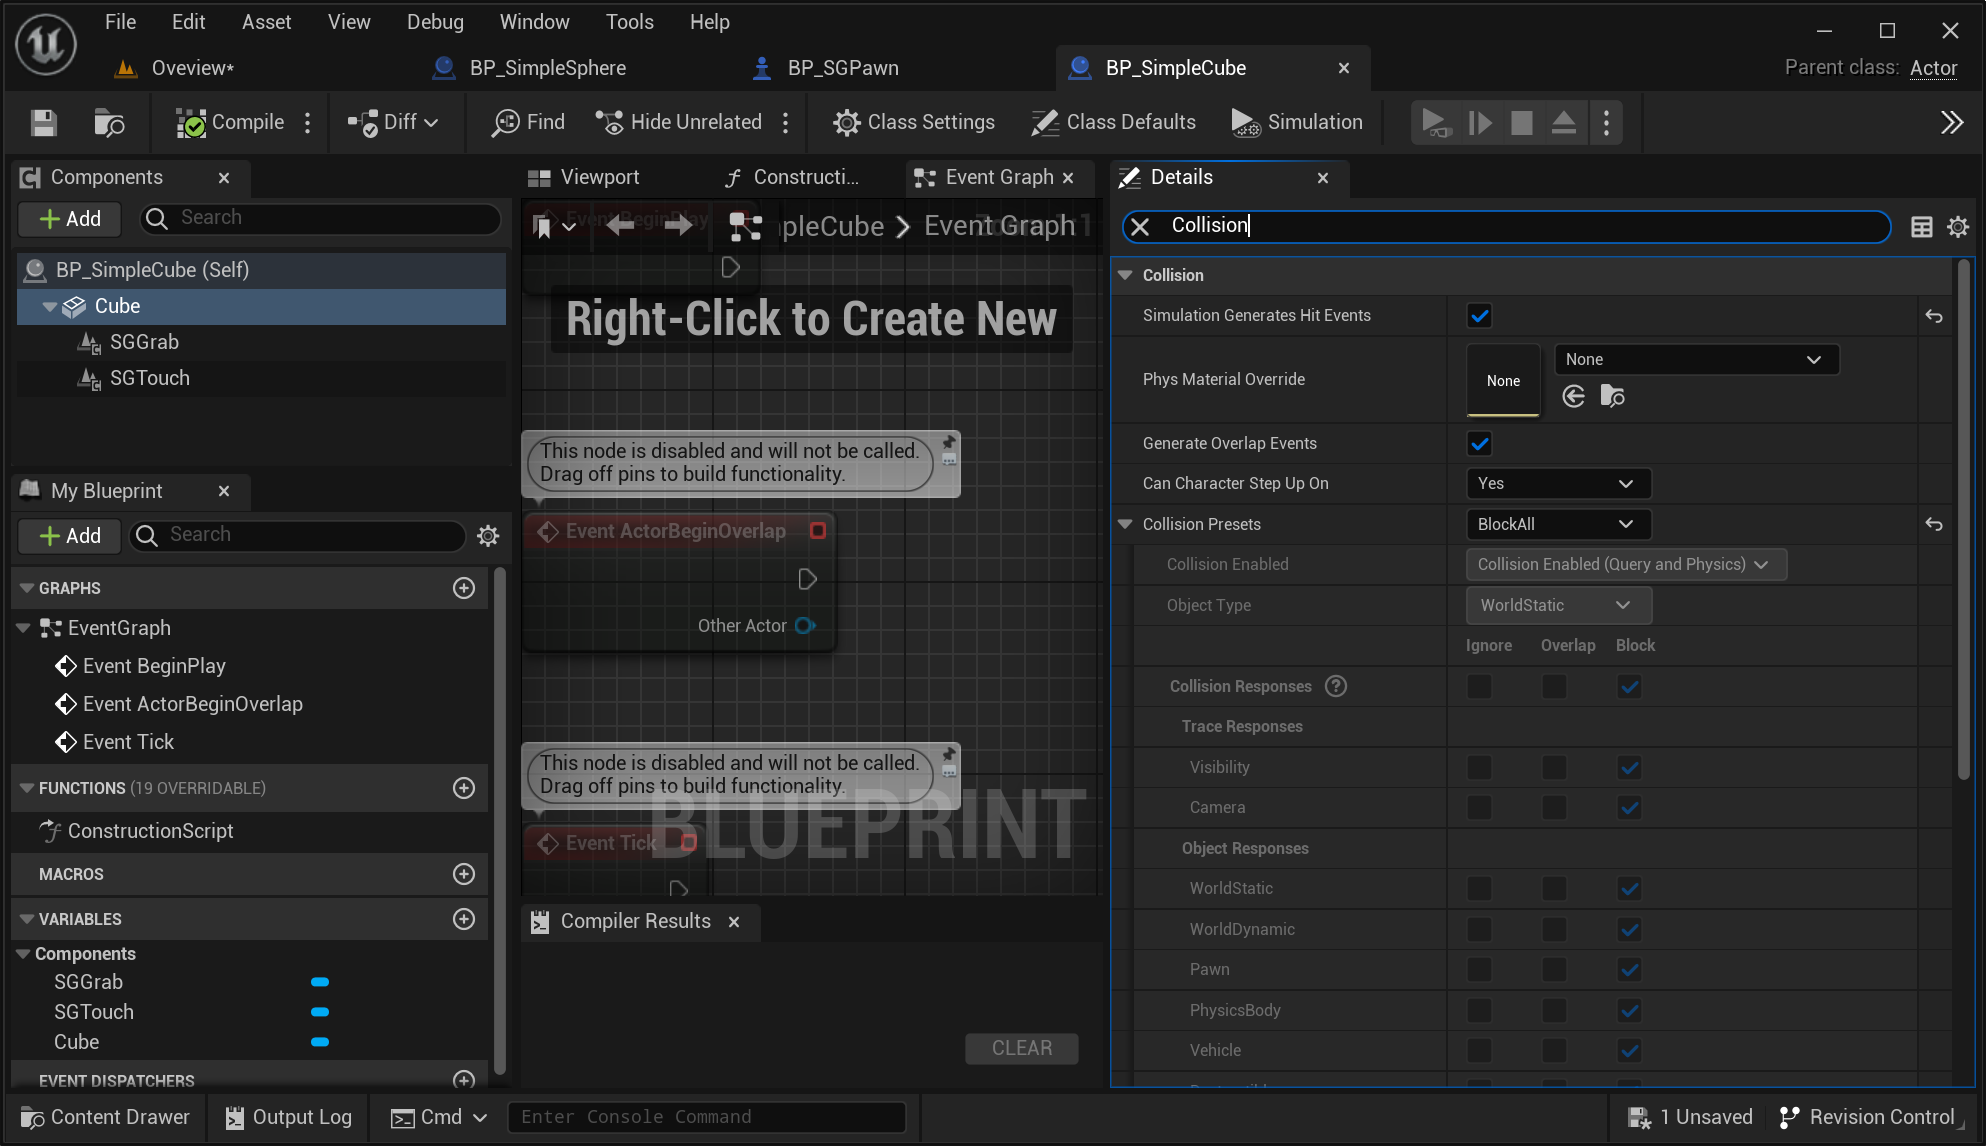
- Additionally, enabling
Simulation Generates Hit EventsandGenerate Overlap Eventson the actors mesh components is mandatory. These settings are crucial for notifying the grab system when the virtual hand meshes come into contact with the actor.
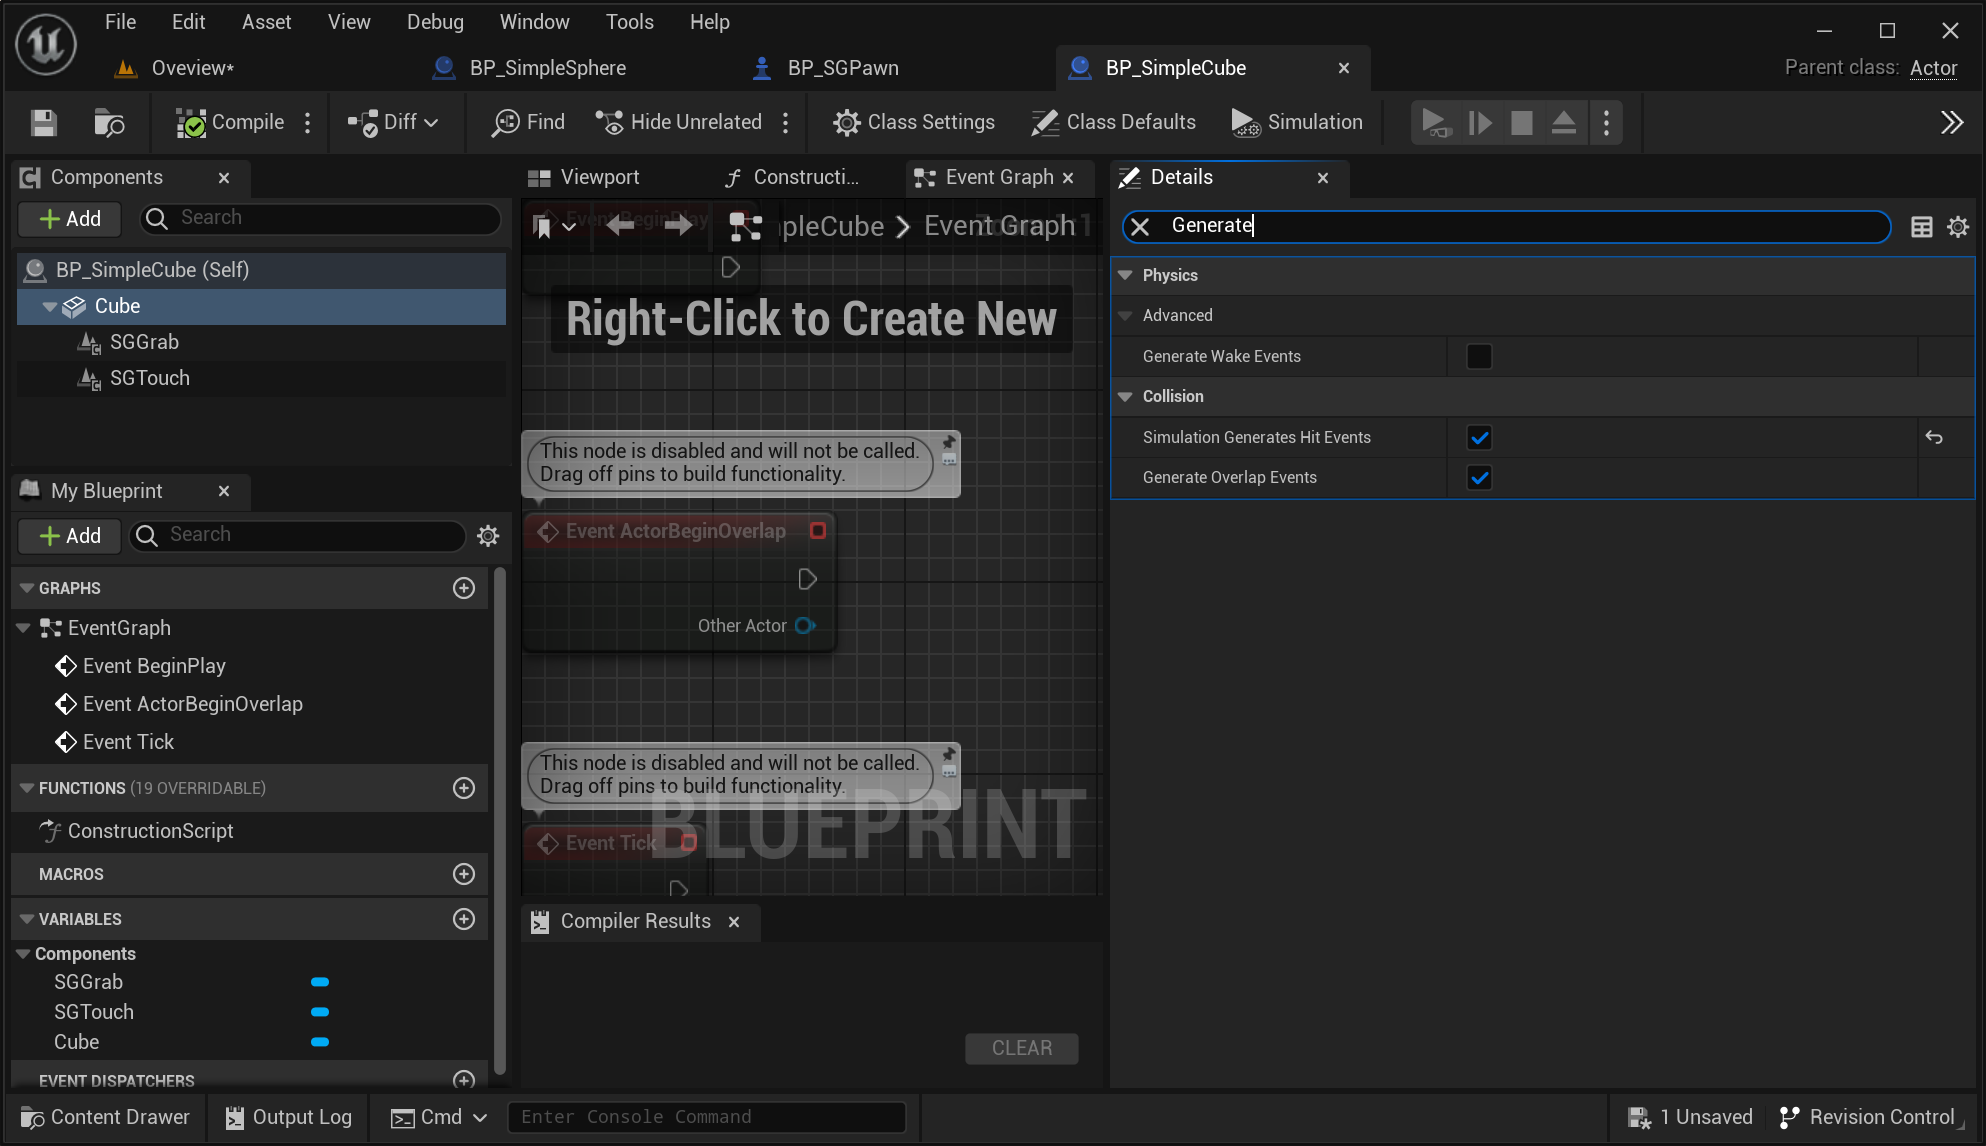
Video Tutorials
The following tutorials, though for much older releases of the plugin, still provide in-depth guidance on the same process:
Setting up the Touch System
Configuring the SenseGlove Touch System involves two key steps. The first step, which is automatically handled by the plugin, is configuring the virtual hand meshes for both real and virtual hands. The second step, which is also straightforward, involves setting up any existing actor in the Unreal Blueprint Editor that you want to respond to with haptic feedback when your SenseGlove device comes into contact with it:
-
Open any existing actor in the Unreal Blueprint Editor that you would like to respond to with haptic feedback when your SenseGlove device comes into contact with it.
-
In the
Componentspanel, click the+ Addbutton, then typeSGTouchinto theSearch Componentsinput field. Once found, click onSGTouchto add it to the current actor. You can rename theSGTouchcomponent to your desired name.
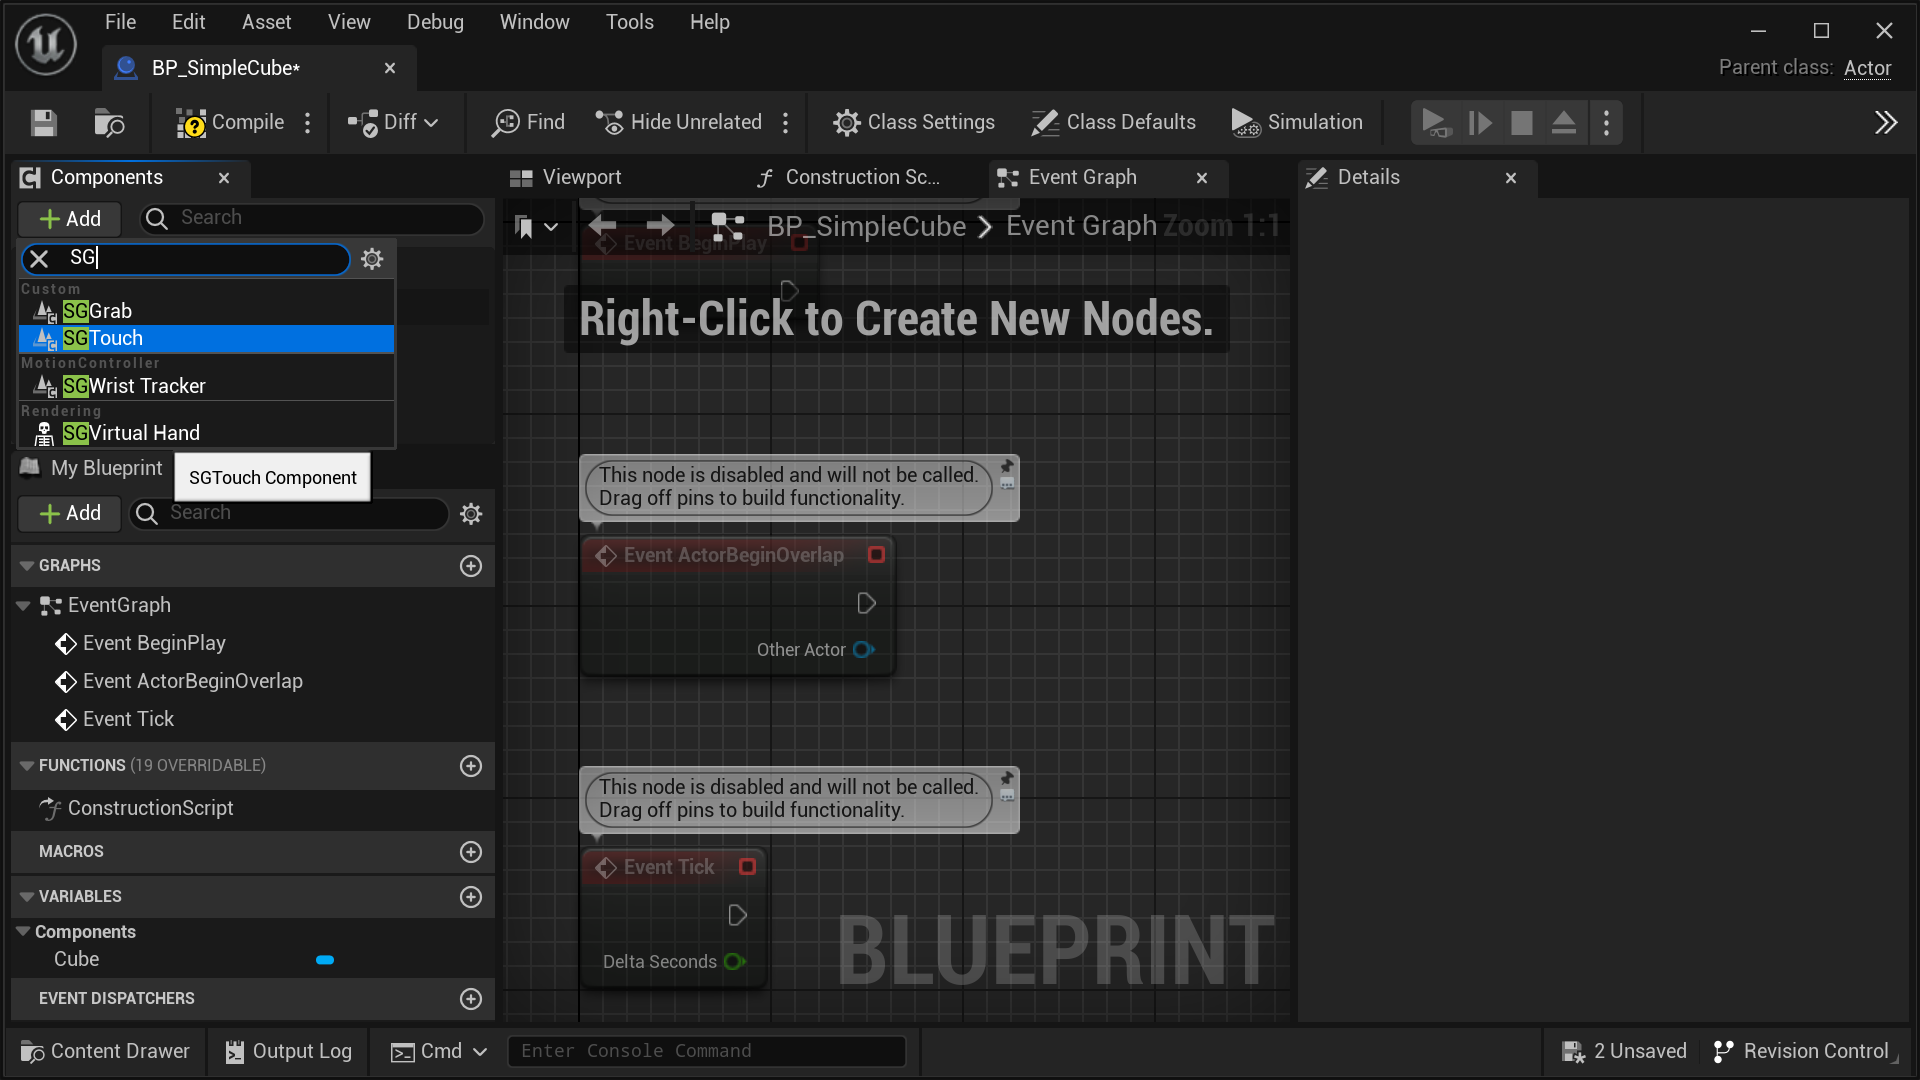
- With the
SGTouchcomponent selected in theComponentspanel, navigate to theDetailspanel. Under theSenseGlovesection, adjust the settings for the touch system to suit your needs.
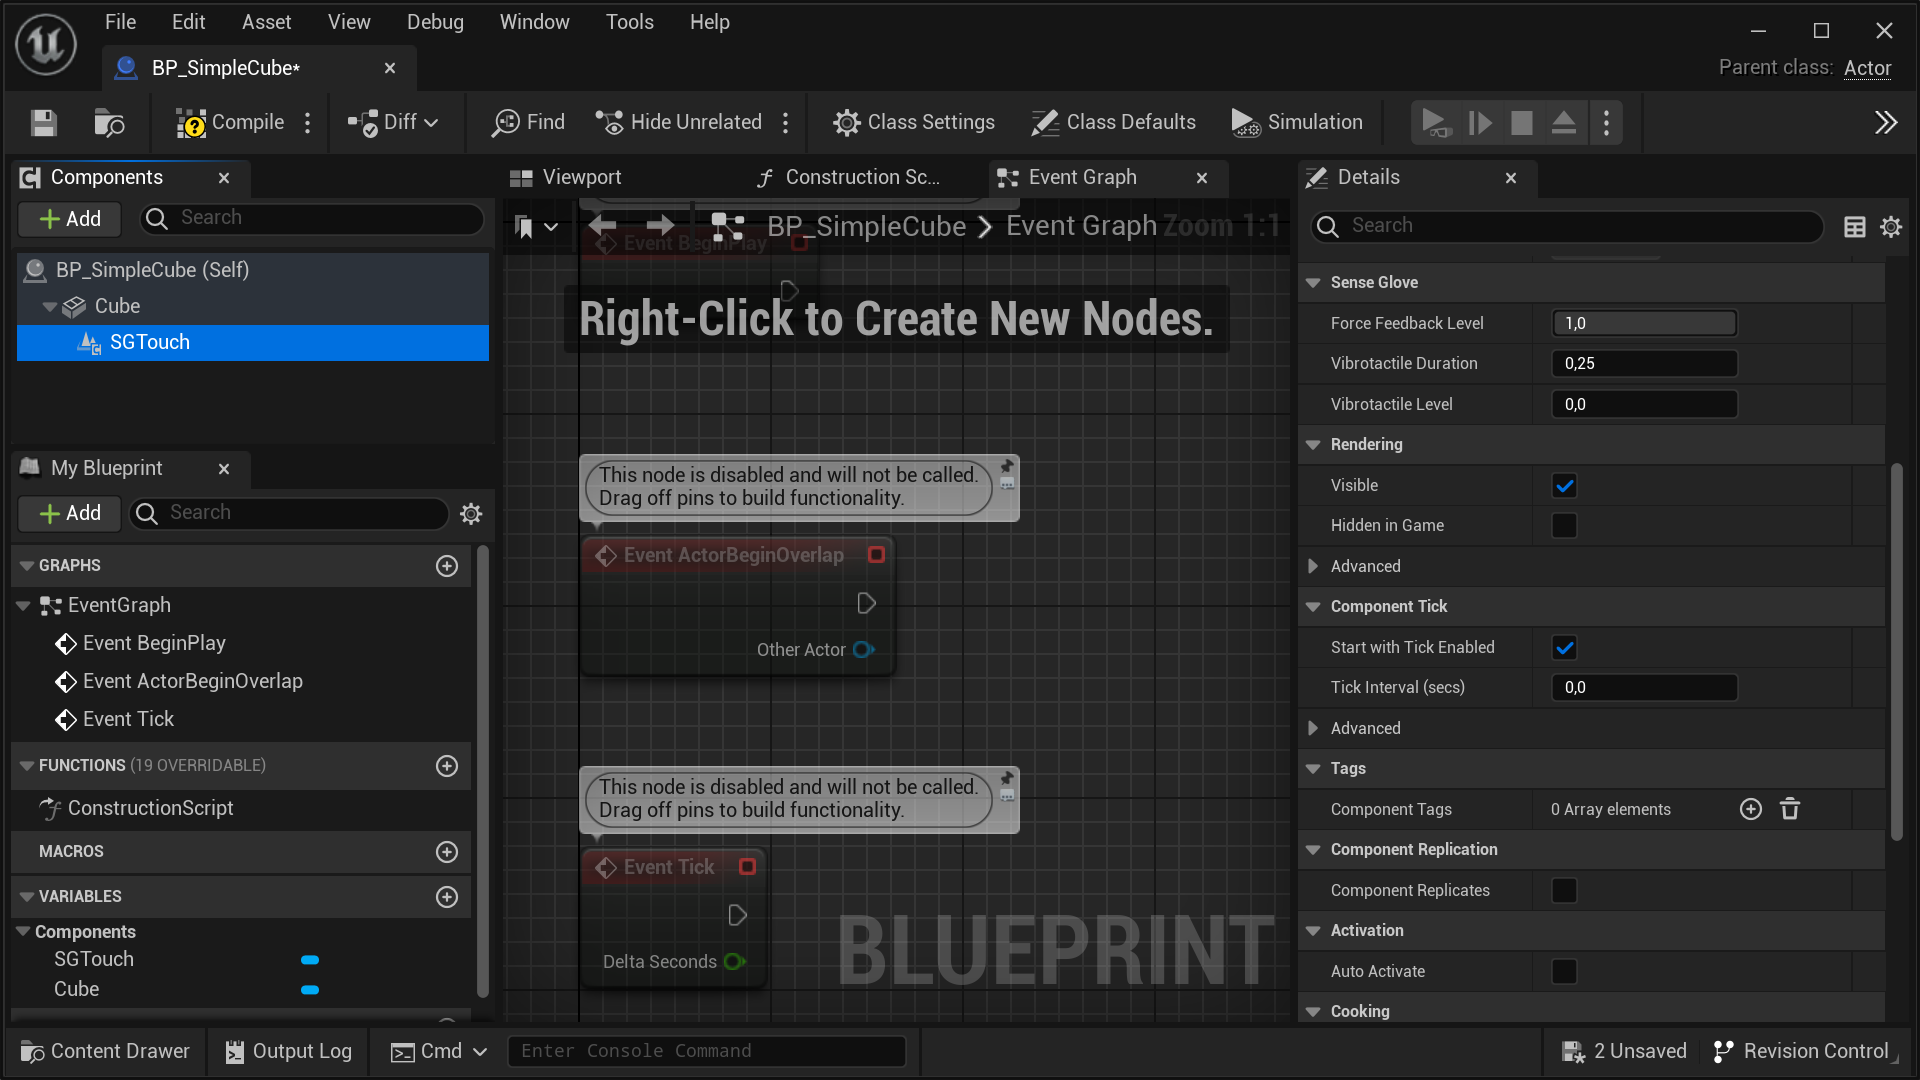
- One last aspect of the touchable actors to take into account for the touch system to function properly is the collision settings of their mesh components. If you'd like to prevent the virtual hand meshes from passing through a touchable actor, it's necessary to set the
Collision PresetstoBlock Allinside theDetailspanel for the actor's mesh components.

- Additionally, enabling
Simulation Generates Hit EventsandGenerate Overlap Eventson the actors mesh components is mandatory. These settings are crucial for notifying the touch system when the virtual hand meshes come into contact with the actor.

Video Tutorials
The following tutorials, though for much older releases of the plugin, still provide in-depth guidance on the same process:
The Plugin Settings
Once the SenseGlove Unreal Engine Plugin is enabled the plugin settings can be accessed through Edit > Project Setting... inside your project's Unreal Editor.
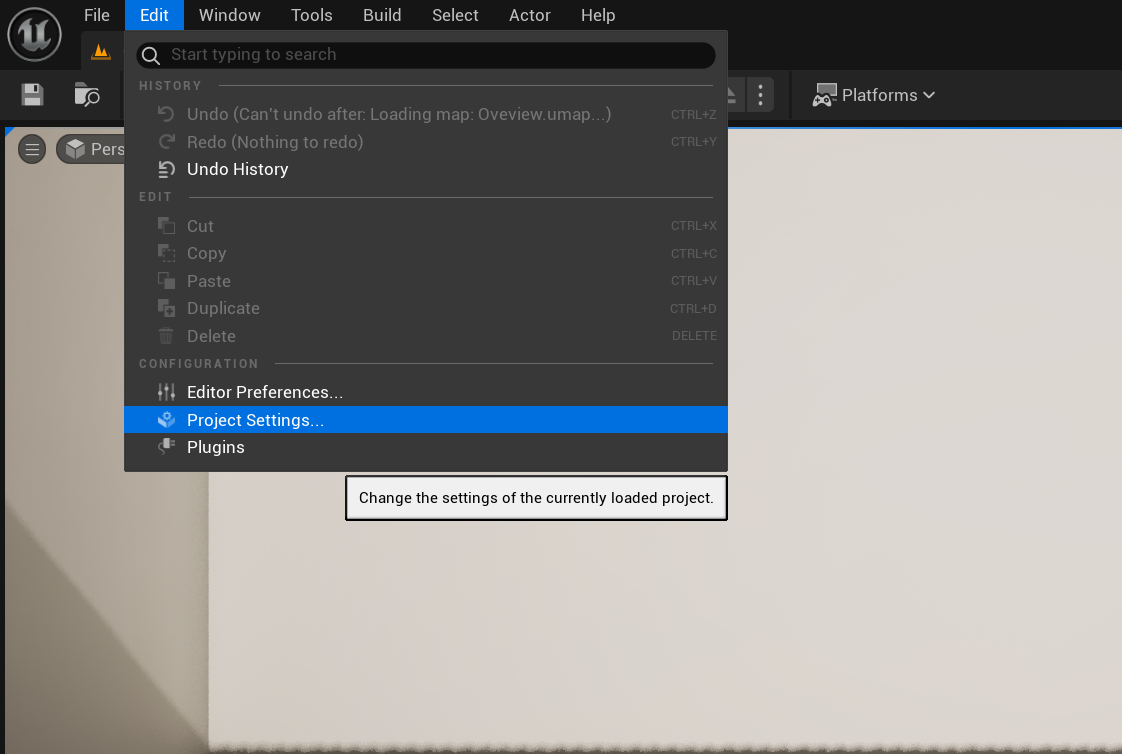
The SenseGlove Unreal Engine Plugin offers fine-grained control over various aspects of its functionality through its settings system. It also allows you to override specific settings from subcomponents when possible. In the following sections, we will explore the settings and the override system in detail.
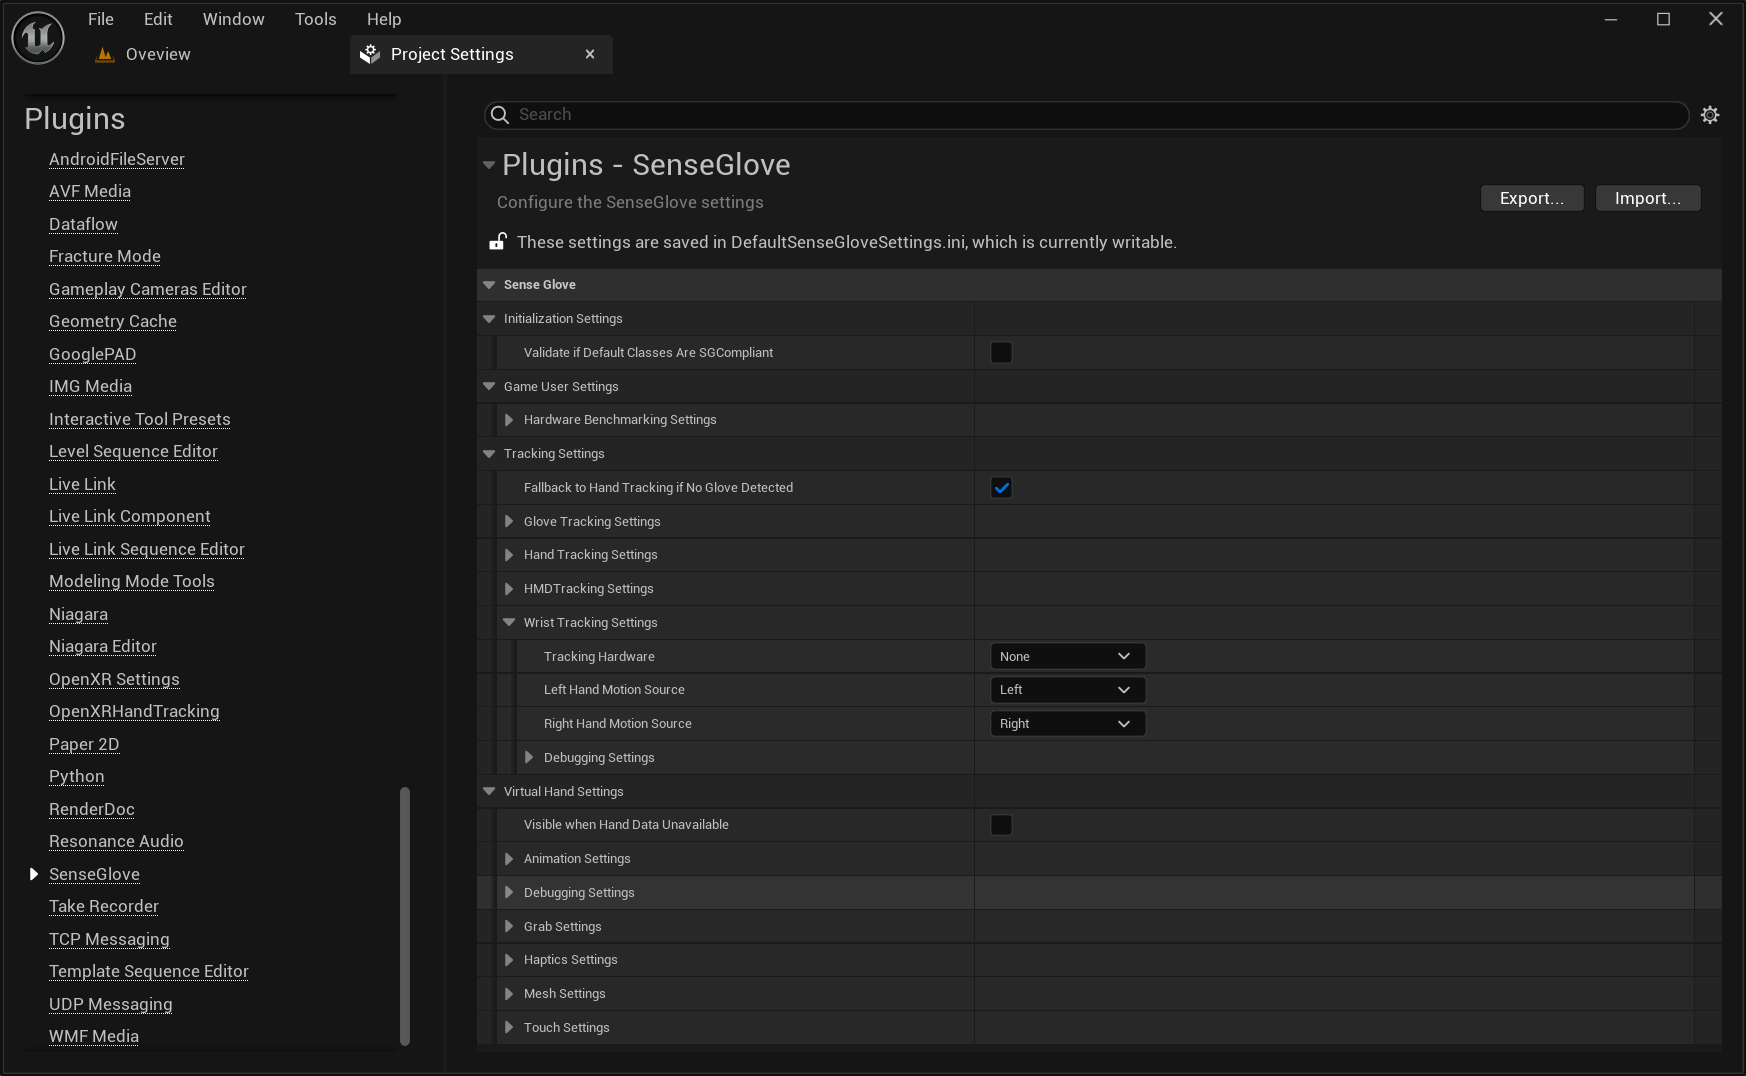
Settings Categories
The plugin settings are organized into four main categories, and each of those might contain its own sub-categories. These main categories are as follows:
The Plugin Initialization Settings
The Initialization Settings section is designed to control how the SenseGlove Unreal Engine Plugin is initialized, allowing you to customize its behavior to suit your project's needs.

bValidateIfDefaultClassesAreSGCompliant
If enabled, the plugin tries to check and validate whether the default for classes such as GameMode, GameInstance, etc. are indeed SenseGlove classes or SenseGlove-derived classes. If not, it attempts to set them. If you don't like this behavior for whatever reason, consider disabling this option.
By default, this option is disabled.
Caution
Due to the current initialization mechanism, setting the default classes might occasionally fail. Therefore, it's essential to verify that the default classes have been correctly set. You can do this by checking the following sections in the project settings:
Project Settings > Project > Maps & Modes > Default Modes > Default GameModeProject Settings > Project > Maps & Modes > Default Modes > Selected GameMode > Default Pawn ClassProject Settings > Project > Maps & Modes > Default Modes > Selected GameMode > Player Controller ClassProject Settings > Project > Maps & Modes > Game Instance > Game Instance ClassProject Settings > Engine > General Settings > Default Classes > Advanced > Game User Settings Class
For more information visit the SenseGlove default classes.
The Game User Settings
The Game User Settings control the behavior of the SenseGlove instance of UGameUserSettings. The USGGameUserSettings class extends the functionality of UGameUserSettings to provide enhanced customization options specifically for applications that utilize the SenseGlove Unreal Engine Plugin.

The Hardware-benchmarking Settings
The settings in this section are utilized by the USGGameUserSettings::SetEngineScalabilitySettings() method when the Scalability parameter is set to ESGEngineScalabilitySettings::Auto. When the engine scalability settings set to auto the graphics settings are determined by running a hardware benchmark by calling the UGameUserSettings::RunHardwareBenchmark(). The settings listed here are basically the parameters passed to UGameUserSettings::RunHardwareBenchmark().

WorkScale
The WorkScale parameter determines the intensity of the benchmark test. Higher values result in more intensive testing, which can help achieve more accurate scalability settings.
The default value is 10.
CPUMultiplier
The CPUMultiplier parameter allows you to adjust the impact of CPU performance on the benchmark results. Increasing this value will emphasize CPU performance more heavily in determining scalability settings.
The default value is 1.0f.
GPUMultiplier
The GPUMultiplier parameter lets you modify the influence of GPU performance on the benchmark outcomes. A higher value will increase the weight of GPU performance in setting scalability.
The default value is 1.0f.
The Tracking Settings
The tracking settings are primarily used by the SenseGlove Tracking module and are divided into various subsections, each focusing on a specific aspect of tracking. These subsections, along with the other settings directly provided by this section, provide comprehensive control over the tracking functionalities. The subsections are as follows:
- The Glove-tracking Settings
- The Hand-tracking Settings
- The HMD-tracking Settings
- The Wrist-tracking Settings
![]()
bFallbackToHandTrackingIfNoGloveDetected
Determines whether to fallback to hand-tracking, or not, when no SenseGlove device is detected:
- If disabled, only a real glove will be tracked.
- If enabled, the plugin will fall back to hand-tracking when it's available and supported by the HMD device.
Note
Disabling this option hides the hand-tracking settings section, while enabling it makes the hand-tracking settings visible.
Glove Tracking Settings
Provides the tracking settings related to SenseGlove devices.
Hand Tracking Settings
The settings in this section only affects the hand-tracking functionality when it's enabled and available. When enabled the bare hands can be used instead of SenseGlove devices to interact within the VR simulation, of course without the haptics feedback provided by the SenseGlove devices.
Important
If you don't see the hand-tracking settings, ensure that the option
bFallbackToHandTrackingIfNoGloveDetectedis checked.
HMD Tracking Settings
Provides the tracking settings related to head-mounted displays (HDMs) and their auto-detection functionality.
Wrist Tracking Settings
Provides the tracking settings applicable to wrist-tracking hardware.
The Glove-tracking Settings
Provides the tracking settings related to SenseGlove devices.
![]()
DataRetrievalRefreshRate
The glove data retrieval refresh rate. This affects the interval in which the tracking module checks for glove connectivity and data retrieval.
The default is s 60Hz (data retrieval operations per second).
The Hand-tracking Settings
The settings in this section only affects the hand-tracking functionality when it's enabled and available. When enabled the bare hands can be used instead of SenseGlove devices to interact within the VR simulation, of course without the haptics feedback provided by the SenseGlove devices.
Important
If you don't see the hand-tracking settings, ensure that the option
bFallbackToHandTrackingIfNoGloveDetectedis checked.
![]()
bUseMoreSpecificMotionSourceNames
If disabled, (the default) the motion sources for hand tracking will be of the form [Left|Right][Keypoint]. If enabled, they will be of the form HandTracking[Left|Right][Keypoint]. It is recommended to be enabled to avoid collisions between motion sources from different device types.
bSupportLegacyControllerMotionSources
If enabled, hand tracking supports the Left and Right legacy motion sources. If disabled, it does not. It is recommended to be disabled unless you need legacy compatibility in older unreal projects.
The HMD-tracking Settings
Provides the tracking settings related to head-mounted displays (HDMs) and their auto-detection functionality.
![]()
ViveHMDDetectionPriority
Determines which VIVE HMD to prioritize for detection, as the current detection mechanism cannot differentiate between HTC VIVE Focus Vision, HTC VIVE XR Elite, and HTC VIVE Focus 3.
The following values are possible:
/*
 * The HTC VIVE HMD detection priority for HTC devices that we cannot distinguish.
 */
UENUM(BlueprintType)
enum class ESGViveHMDDetectionPriority : uint8
{
    /* First try to detect HTC VIVE Focus Vision, then XR Elite, and then Focus 3. */
    FocusVision_XRElite_Focus3 UMETA(DisplayName = "Focus Vision (1st), XR Elite (2nd), Focus3 (3rd)"),

    /* First try to detect HTC VIVE Focus Vision, then Focus 3, and then XR Elite. */
    FocusVision_Focus3_XRElite UMETA(DisplayName = "Focus Vision (1st), Focus3 (2nd), XR Elite (3rd)"),

    /* First try to detect HTC VIVE XR Elite, then Focus Vision, and then Focus 3. */
    XRElite_FocusVision_Focus3 UMETA(DisplayName = "XR Elite (1st), Focus Vision (2nd), Focus3 (3rd)"),

    /* First try to detect HTC VIVE XR Elite, then Focus 3, and then Focus Vision. */
    XRElite_Focus3_FocusVision UMETA(DisplayName = "XR Elite (1st), Focus3 (2nd), Focus Vision (3rd)"),

    /* First try to detect HTC VIVE Focus 3, then Focus Vision, and then XR Elite. */
    Focus3_FocusVision_XRElite UMETA(DisplayName = "Focus3 (1st), Focus Vision (2nd), XR Elite (3rd)"),

    /* First try to detect HTC VIVE Focus 3, then XR Elite, and then Focus Vision. */
    Focus3_XRElite_FocusVision UMETA(DisplayName = "Focus3 (1st), XR Elite (2nd), Focus Vision (3rd)"),
};
The Wrist-tracking Settings
Provides the tracking settings applicable to wrist-tracking hardware.
OpenXRPositionalTrackingProvider
Specifies the type of OpenXR provider to use in order to extract the positional tracking data from the underlying XR system. If set to None, the plugin attempts to set this automatically by considering a combination of approaches including, the current value of TrackingHardware specified below, the platform it's targeted at, the available OpenXR plugins, along with HMD auto-detection mechanism to specify a compatible OpenXR tracking provider. Please note that the OpenXR provider depends on the combination of plugins, platform, and the settings you use. For example, it is possible to use a Vive Focus 3 Wrist Tracker on Microsoft Windows along with the Epic OpenXRViveTracker plugin and check the option Emulate VIVE Wrist Tracker as VIVE Tracker inside the VIVE Business Streaming application's Input settings. In that case, the correct OpenXR positional tracking provider to use would be OpenXRViveTracker. However, using the official ViveOpenXR plugin on Android, the correct OpenXR provider would be OpenXRViveWristTracker.
Caution
HMD auto-detection is currently an experimental feature and may fail because HMD vendors occasionally change the properties utilized by the plugin for HMD detection. If you encounter issues, such as incorrect tracker offsets, it is recommended to explicitly specify the tracking hardware.
Caution
Due to highly experimental nature of the HMD auto-detection feature, the HTC VIVE Focus Vision, HTC VIVE Focus 3, and HTC VIVE XR Elite cannot be distinguished from each other in the current iteration. However, since the tracker devices and offsets for all these headsets are the same, this should not affect the performance or any functionality. The order in which the HMD is detected can be specified through the HMD-tracker setting
ViveHMDDetectionPriority.
TrackingHardware
Specifies the type of tracking hardware to use. If set to None, the plugin attempts at HMD auto-detection to automatically specify a compatible tracking hardware. If set to Custom, any desired location and rotation can be specified.
At the moment the following hardware are supported:
- Quest 2 Controllers
- Quest 3 Controllers
- Quest Pro Controllers
- VIVE Focus 3 Wrist Trackers
- VIVE Trackers
![]()
Caution
HMD auto-detection is currently an experimental feature and may fail because HMD vendors occasionally change the properties utilized by the plugin for HMD detection. If you encounter issues, such as incorrect tracker offsets, it is recommended to explicitly specify the tracking hardware.
Caution
Due to highly experimental nature of the HMD auto-detection feature, the HTC VIVE Focus Vision, HTC VIVE Focus 3, and HTC VIVE XR Elite cannot be distinguished from each other in the current iteration. However, since the tracker devices and offsets for all these headsets are the same, this should not affect the performance or any functionality. The order in which the HMD is detected can be specified through the HMD-tracker setting
ViveHMDDetectionPriority.
TrackingHardwareLocationOffsetLeftHand
Sets a custom location offset for left hand's wrist-tracking hardware.
Note
This setting is visible and valid only if TrackingHardware is set to
Custom.
TrackingHardwareLocationOffsetRightHand
Sets a custom location offset for right hand's wrist-tracking hardware.
Note
This setting is visible and valid only if TrackingHardware is set to
Custom.
TrackingHardwareRotationOffsetLeftHand
Sets a custom rotation offset for left hand's wrist-tracking hardware.
Note
This setting is visible and valid only if TrackingHardware is set to
Custom.
TrackingHardwareRotationOffsetRightHand
Sets a custom rotation offset for right hand's wrist-tracking hardware.
Note
This setting is visible and valid only if TrackingHardware is set to
Custom.
LeftHandMotionSource
Determines the motion source for the left hand. For Oculus HMDs, this is usually Left, and for VIVE HMDs using VIVE Wrist Trackers, VIVE Business Streaming, and SteamVR, it's typically LeftFoot. For the OpenXRVive plugin on Android Standalone Mode using the VIVE Wrist Trackers, this typically is LeftWristTracker.
Note
For VIVE devices using SteamVR, the motion source hardware for the left hand can be specified by the user through the SteamVR app.
RightHandMotionSource
Determines the motion source for the right hand. For Oculus HMDs, this is usually Right, and for VIVE HMDs using VIVE Wrist Trackers, VIVE Business Streaming, and SteamVR, it's typically RightFoot. For the OpenXRVive plugin on Android Standalone Mode using the VIVE Wrist Trackers, this typically is RightWristTracker.
Note
For VIVE devices using SteamVR, the motion source hardware for the right hand can be specified by the user through the SteamVR app.
DebuggingSettings
Provides debugging options for visually debugging the wrist tracker.
Overriding the Wrist-tracking Settings from the Wrist Tracker Component
It's possible to override some of the wrist tracker settings through the details panel of any specific Wrist Tracker Component. When overriden by enabling the SenseGlove > Wrist Tracking Settings Override > Override Plugin Settings option inside the details panel, these settings take precedence over the plugin's global settings.
![]()
The Wrist-tracking Debugging Settings
Provides debugging options for visually debugging the wrist tracker.
![]()
bDrawDebugWristTracker
If enabled, visualizes the debug wrist trackers where possible.
DebugWristTrackerSettings
Visible and valid only if bDrawDebugGizmo is enabled.
The Virtual Hand Settings
The Virtual Hand Settings are utilized by various SenseGlove modules such as Debug, Editor, Tracking, and the main module. These settings are divided into several subsections, each focusing on a specific aspect of the virtual hand functionality. Together with the settings provided directly in this section, they offer comprehensive control over any system or component that utilizes the virtual hand. The subsections are as follows:
- The Animation Settings
- The Debugging Settings
- The Grab Settings
- The Haptics Settings
- The Mesh Settings
- The Touch Settings
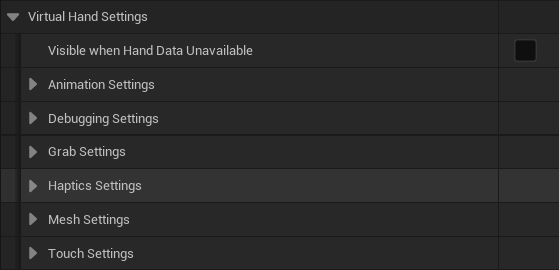
bVisibleWhenHandDataUnavailable
Used by the Virtual Hand Component to determine its visibility when no hand data, either from a SenseGlove or hand-tracking, is available. If enabled, the virtual hand mesh remains visible even when no data is available. By default, this setting is disabled, providing users of the simulation with a clear indicator that no hand data is currently available.
Animation Settings
Controls how the virtual hand model is animated by the animation system.
Debugging Settings
Primarily used for visually debugging low-level hand data. When enabled, the Virtual Hand Component visualizes a debug virtual hand by drawing all individual hand joints.
Grab Settings
Utilized by the SenseGlove Sockets Editor to automatically generate the hand sockets required by the Grab system to function.
The SGPawn also utilizes these settings to set up the grab colliders on the virtual hand components.
Haptics Settings
Utilized by the haptics system.
Mesh Settings
Utilized by the SenseGlove Tracking module to account for the current virtual hand mesh when generating hand pose data, resulting in more accurate glove or hand data representation and also smoother animations.
Touch Settings
Utilized by the SenseGlove Sockets Editor to automatically generate the hand sockets required by the Touch system to function.
The SGPawn also utilizes these settings to set up the touch colliders on the virtual hand components.
Overriding the Virtual Hand Settings from the Wrist Tracker Component
It's possible to override some of the virtual hand settings through the details panel of any specific Virtual Hand Component. When overriden by enabling the SenseGlove > Virtual Hand Settings Override > Override Plugin Settings option inside the details panel, these settings take precedence over the plugin's global settings.
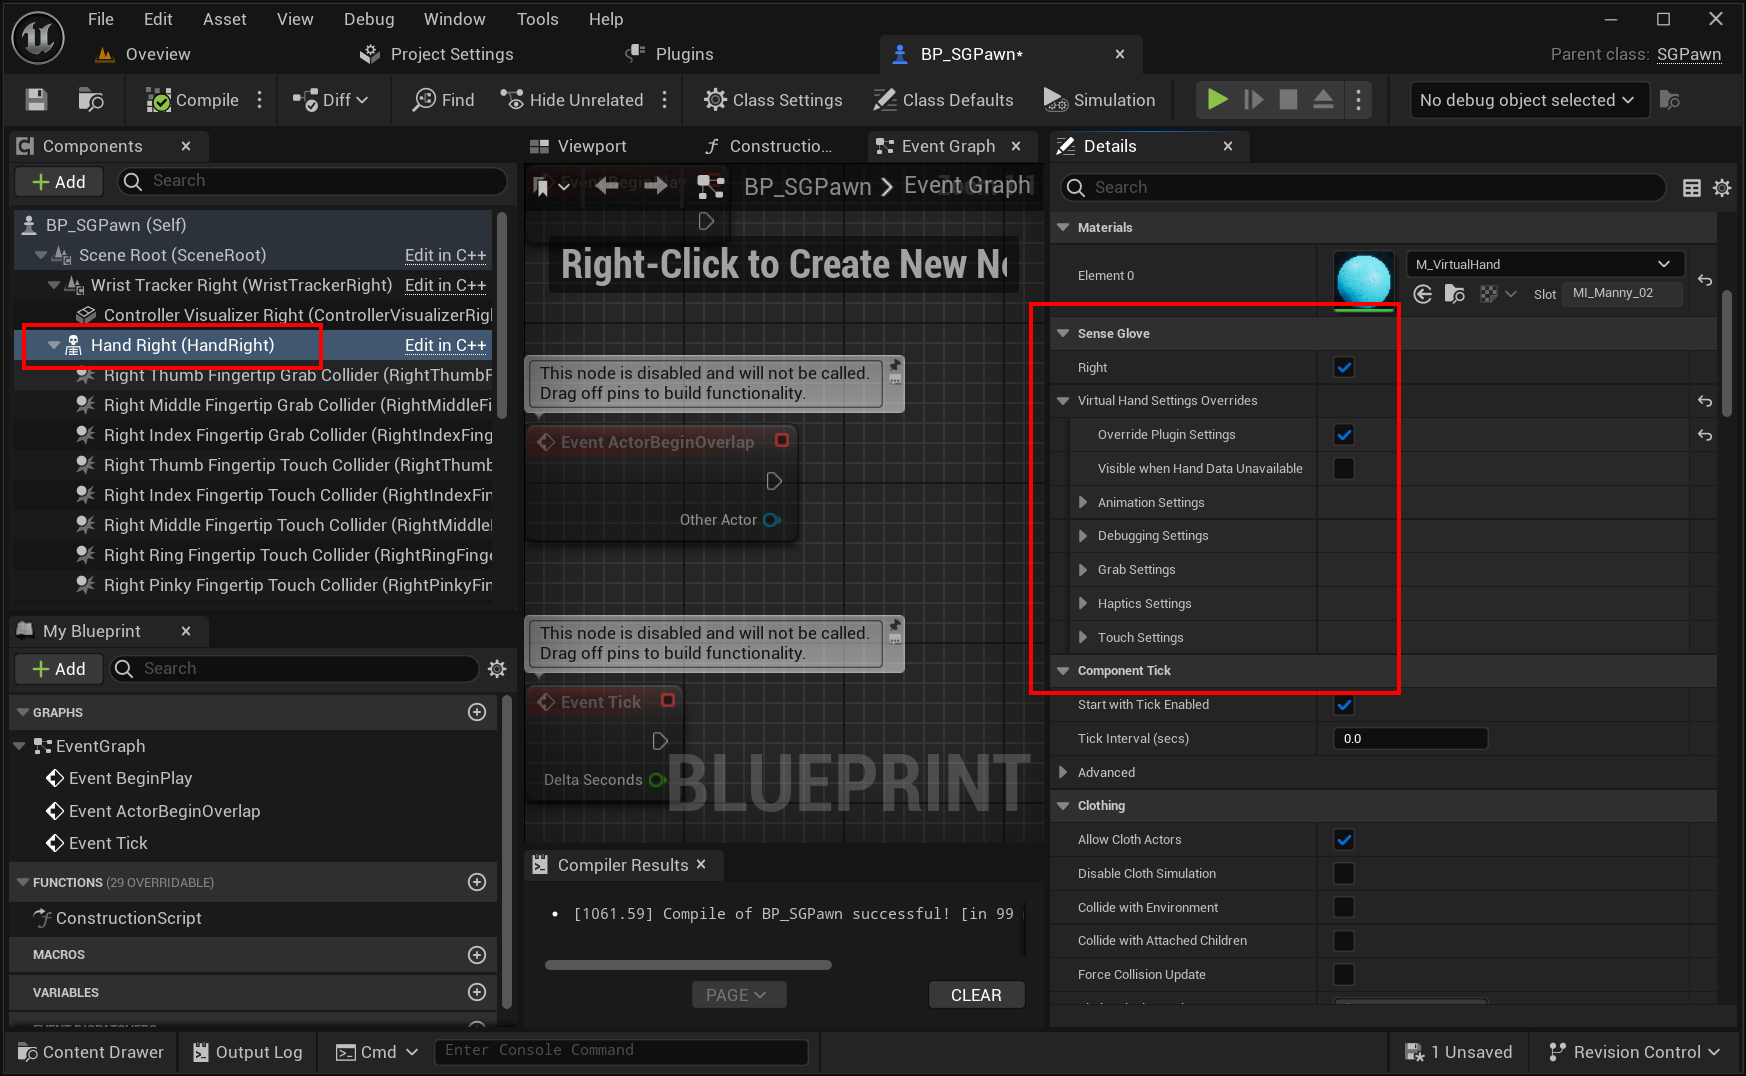
The Virtual Hand Animation Settings
Controls how the virtual hand model is animated by the animation system.
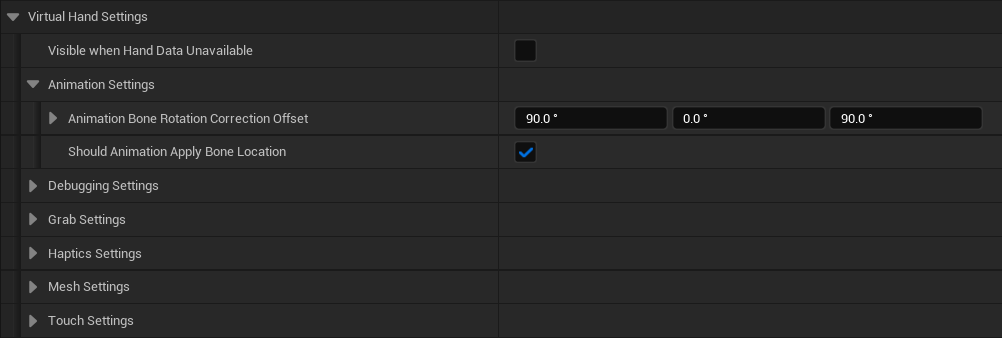
AnimationBoneRotationCorrectionOffset
Specifies the offset to apply to each bone's rotation when translating hand pose data to the virtual hand bones. This is useful if the virtual hand mesh was imported with an initial rotation. For example, the virtual hand model shipped with Unreal Engine's VRTemplate typically has an initial 90.0f degrees rotation on the Yaw axis. By default, this option has been set up with the Unreal Engine's VRTemplate virtual hand model in mind.
bShouldAnimationApplyBoneLocation
When enabled, the animation system applies the joint locations to the current virtual hand mesh bones in addition to the joint rotation. Otherwise, only the joint rotations are applied, and joint locations are ignored, leaving the bone locations untouched on the virtual hand mesh when animating it. Enabling this option typically improves the virtual hand animation. By default, this option is enabled.
The Virtual Hand Debugging Settings
Primarily used for visually debugging low-level hand data. When enabled, the Virtual Hand Component visualizes a debug virtual hand by drawing all individual hand joints.
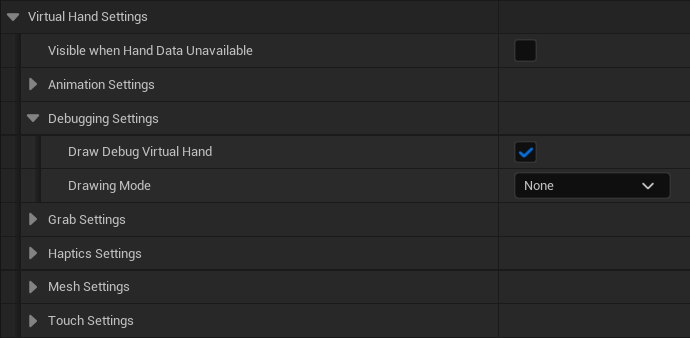
bDrawDebugVirtualHand
If enabled, visualizes the debug virtual hand where possible.
DrawingMode
Determines the virtual hand drawing mode. If set to CubicJoints, for every joint a debug cube will be drawn. If set to GizmoJoints, for every joint a debug gizmo will be drawn.
DebugCubicHandSettings
Visible and valid only if bDrawDebugVirtualHand is enabled and DrawingMode has been set to ESGDebugVirtualHandDrawingMode::CubicJoints.
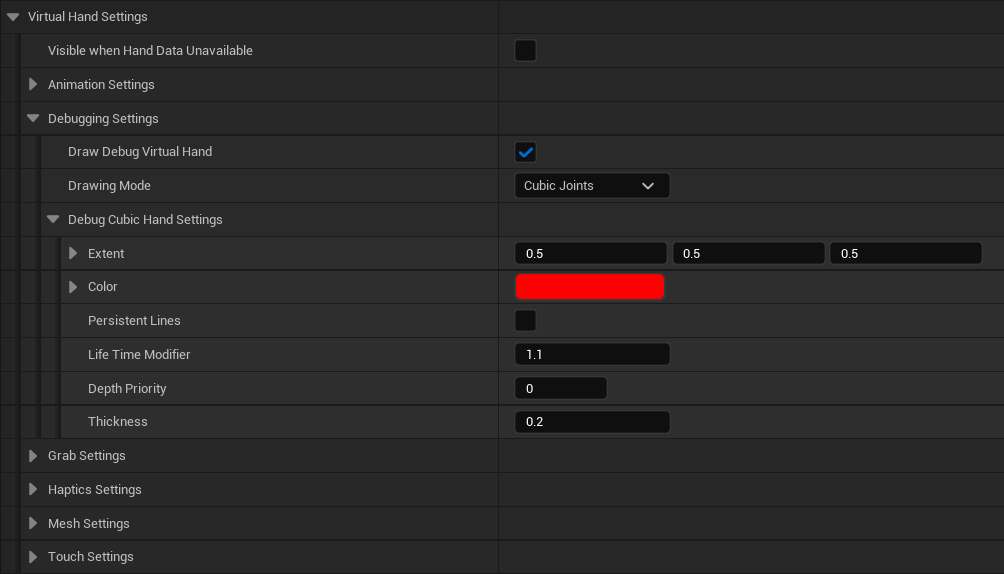
DebugGizmoHandSettings
Visible and valid only if bDrawDebugVirtualHand is enabled and DrawingMode has been set to ESGDebugVirtualHandDrawingMode::GizmoJoints.
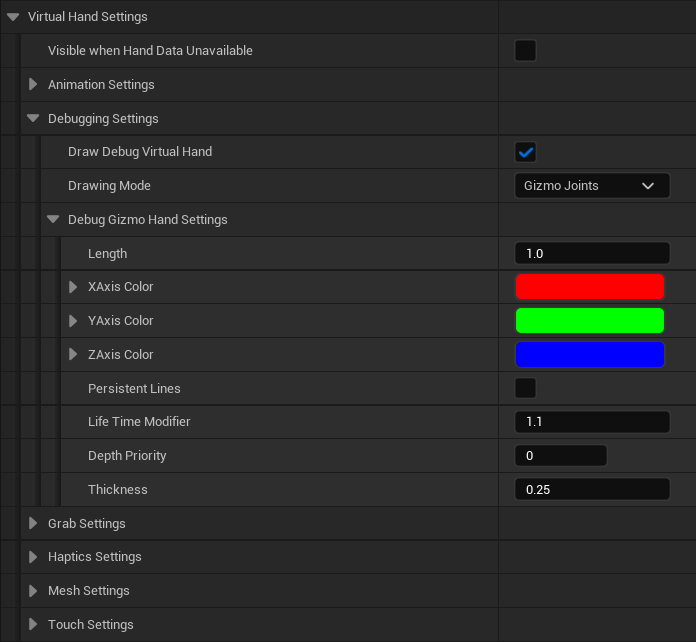
The Virtual Hand Grab Settings
Utilized by the SenseGlove Sockets Editor to automatically generate the hand sockets required by the Grab system to function.
The SGPawn also utilizes these settings to set up the grab colliders on the virtual hand components.
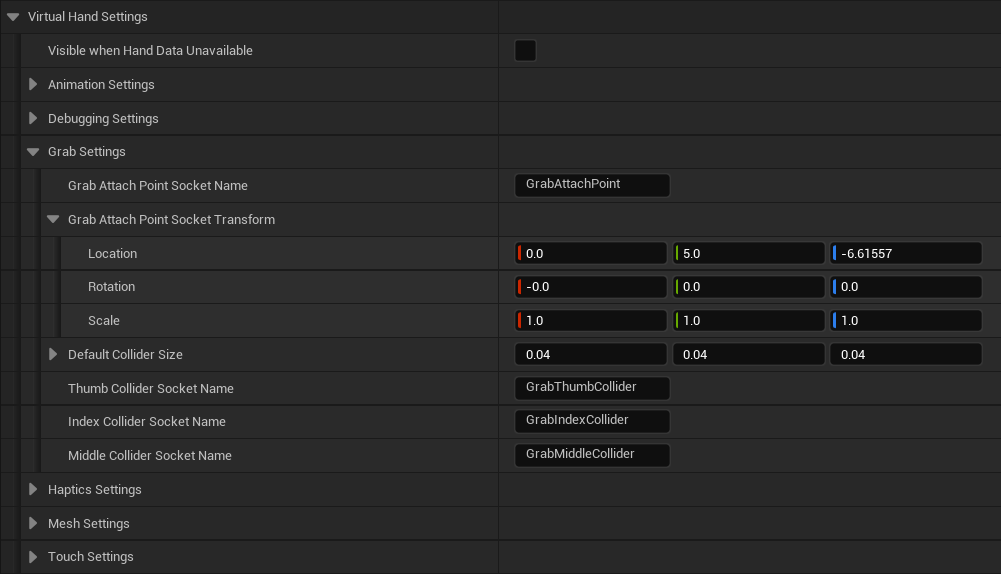
GrabAttachPointSocketName
The default socket name for the grab attach point, usually located at the palm of the hand.
GrabAttachPointSocketTransform
The default socket transform (location, rotation, scale) for the grab attach point, usually located at the palm of the hand.
DefaultColliderSize
The default collider size for the fingers' grab colliders.
ThumbColliderSocketName
The default socket name for the thumb finger's grab collider, usually located at the tip of the thumb finger.
IndexColliderSocketName
The default socket name for the index finger's grab collider, usually located at the tip of the index finger.
MiddleColliderSocketName
The default socket name for the middle finger's grab collider, usually located at the tip of the middle finger.
The Virtual Hand Haptics Settings
Utilized by the haptics system.
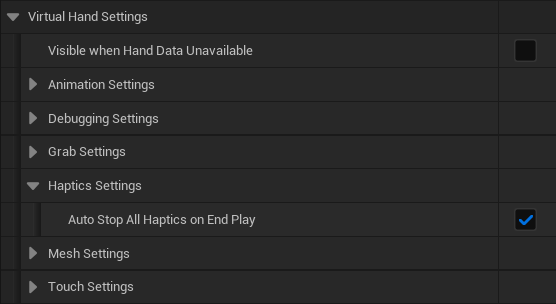
bAutoStopAllHapticsOnEndPlay
Forces all haptics to stop automatically on the EndPlay event. This is useful for situations where the simulation has ended, but ongoing haptic feedback might remain active on the glove indefinitely. By default, this setting is enabled.
The Virtual Hand Mesh Settings
Utilized by the SenseGlove Tracking module to account for the current virtual hand mesh when generating hand pose data, resulting in more accurate glove or hand data representation and also smoother animations.
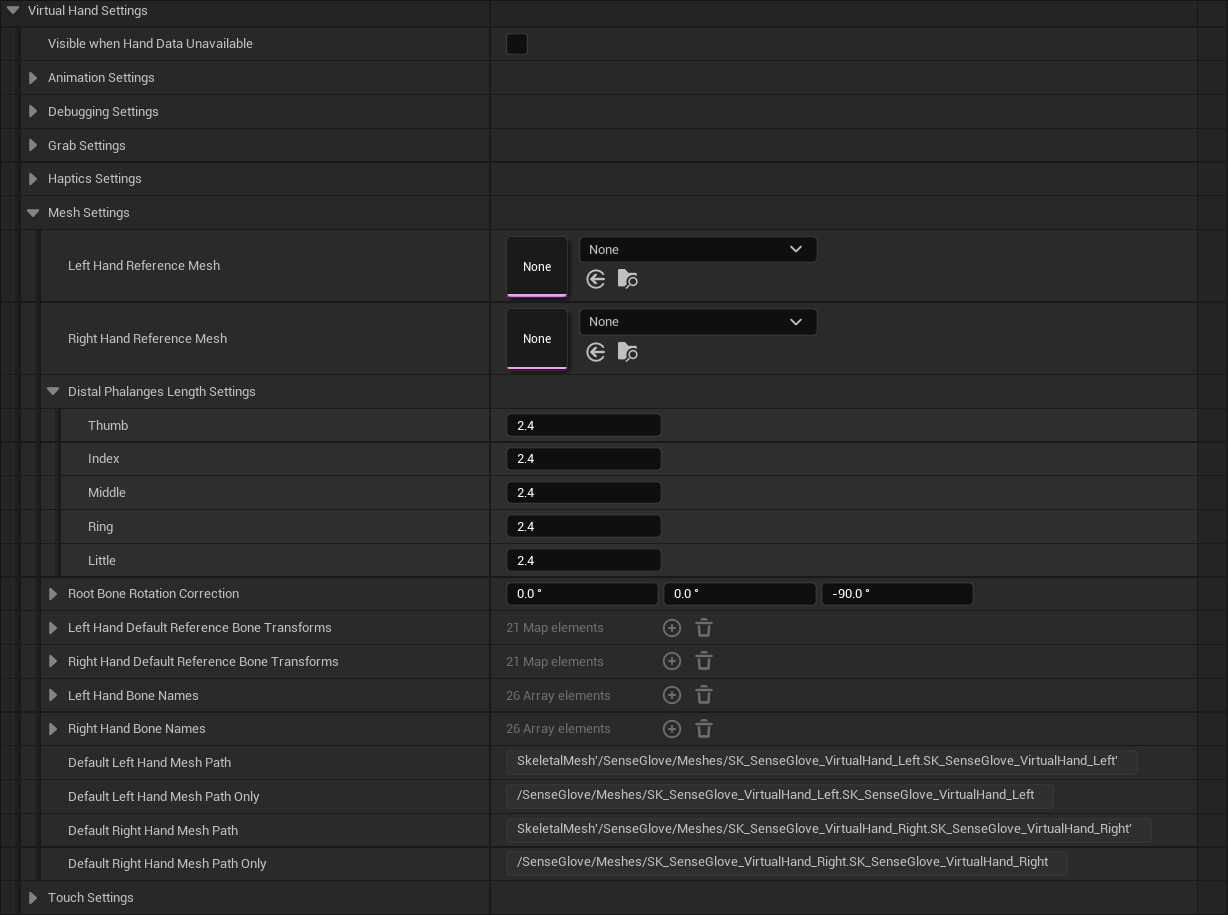
LeftHandReferenceMesh
The virtual hand model for the left hand is to be used by the SenseGlove Tracking module to generate all the 26 joint data present in the FXRHandTrackingState. The main reason the Tracking module requires a virtual hand mesh as a reference is the SenseGlove Hand Pose format only provides 15 joints. So, the remaining joint data for FXRHandTrackingState are calculated from a virtual hand mesh compatible with the Epic rig and also the values specified by DistalPhalangesLengthSettings. Furthermore, when calculating the existing joints data, their current locations and rotations are taken into account in calculating the resulting FXRHandTrackingState.
By default, no virtual hand mesh is set.
Caution
If no virtual hand mesh is set, the
Trackingmodule will fall back to hard-coded values extracted from the standard virtual hand model shipped by Unreal Engine VRTemplate. This may result in distorted hand mesh while animating a hand in case a different hand mesh other than the default Epic virtual hand mesh is being set on the virtual hand components.
RightHandReferenceMesh
The virtual hand model for the right hand is to be used by the SenseGlove Tracking module to generate all the 26 joint data present in the FXRHandTrackingState. The main reason the Tracking module requires a virtual hand mesh as a reference is the SenseGlove Hand Pose format only provides 15 joints. So, the remaining joint data for FXRHandTrackingState are calculated from a virtual hand mesh compatible with the Epic rig and also the values specified by DistalPhalangesLengthSettings. Furthermore, when calculating the existing joints data, their current locations and rotations are taken into account in calculating the resulting FXRHandTrackingState.
By default, no virtual hand mesh is set.
Caution
If no virtual hand mesh is set, the
Trackingmodule will fall back to hard-coded values extracted from the standard virtual hand model shipped by Unreal Engine VRTemplate. This may result in distorted hand mesh while animating a hand in case a different hand mesh other than the default Epic virtual hand mesh is being set on the virtual hand components.
DistalPhalangesLengthSettings
The length of distal phalanges that cannot be retrieved from any virtual hand mesh compliant with the Epic standard rig. Also, the SenseGlove Hand Pose format does not provide these. This is used by SenseGlove Tracking module to calculate an FXRHandTrackingState the all 26 joints. The values you specify here depend on the shape of the virtual hand mesh and the defaults are approximated for the virtual hand model shipped with the Unreal Engine VRTemplate.
RootBoneRotationCorrection
Used mostly by the SenseGlove Tracking module and SGPawn to offset for any initial rotation during the virtual hand mesh import process. This is the case for example with the virtual hand model shipped with Unreal Engine's VRTemplate, which typically has an initial -90.0f degrees rotation on the Yaw axis. By default, this option has been set up with the Unreal Engine's VRTemplate virtual hand model in mind.
LeftHandDefaultReferenceBoneTransforms
Read-only and for internal use only.
RightHandDefaultReferenceBoneTransforms
Read-only and for internal use only.
LeftHandBoneNames
Read-only and for internal use only.
RightHandBoneNames
Read-only and for internal use only.
DefaultLeftHandMeshPath
Read-only and for internal use only.
DefaultLeftHandMeshPathOnly
Read-only and for internal use only.
DefaultRightHandMeshPath
Read-only and for internal use only.
DefaultRightHandMeshPathOnly
Read-only and for internal use only.
The Virtual Hand Touch Settings
Utilized by the SenseGlove Sockets Editor to automatically generate the hand sockets required by the Touch system to function.
The SGPawn also utilizes these settings to set up the touch colliders on the virtual hand components.
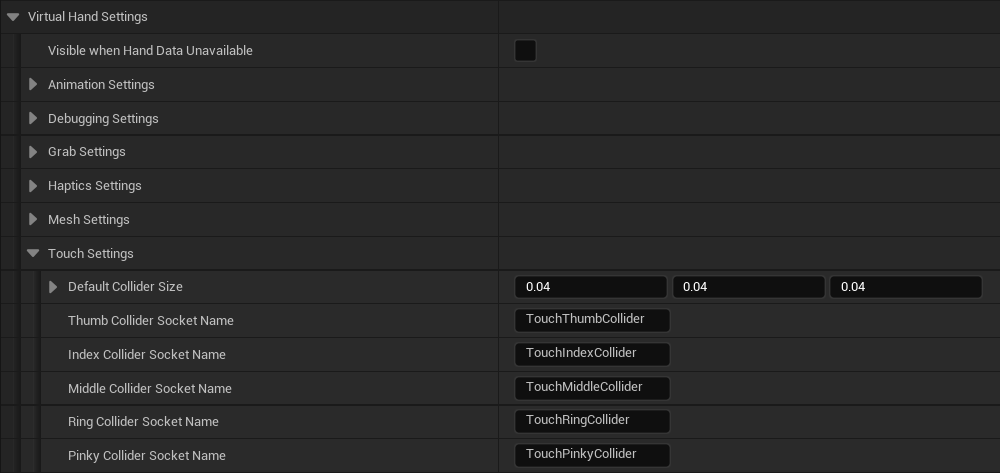
DefaultColliderSize
The default collider size for the fingers' touch colliders.
ThumbColliderSocketName
The default socket name for the thumb finger's touch collider, usually located at the tip of the thumb finger.
IndexColliderSocketName
The default socket name for the index finger's touch collider, usually located at the tip of the index finger.
MiddleColliderSocketName
The default socket name for the middle finger's touch collider, usually located at the tip of the middle finger.
RingColliderSocketName
The default socket name for the ring finger's touch collider, usually located at the tip of the ring finger.
PinkyColliderSocketName
The default socket name for the pinky finger's touch collider, usually located at the tip of the pinky finger.
Overriding The Plugin Settings
The override system allows you to customize and override the global settings for the SenseGlove Unreal Engine Plugin through specific subcomponents where applicable. This feature enables more precise control over the behavior of individual components within your project.
The SenseGlove Virtual Hand Component
The Virtual Hand Component provides the ability to override certain aspects of the global plugin settings, allowing for tailored interactions and behaviors specific to virtual hands. For more details, refer to the Virtual Hand Settings section.
The SenseGlove Wrist Tracker Component
The Wrist Tracker Component enables overriding of specific global plugin settings, providing flexibility in wrist tracking configurations. For additional information, see the Wrist-tracker Settings section.
The SenseGlove Console Commands
The SenseGlove Unreal Engine Plugin offers a variety of utility console commands to enhance your development experience.
Important
To ensure the SenseGlove console commands are registered and recognized by Unreal Engine, set the default Game Instance class to
SGGameInstanceor a subclass of it. This can be done through:Project Settings > Project > Maps & Modes > Game Instance > Game Instance Class. Failing to do so will result in the error:Command not recognized: SG_*in the logs. For more details, refer toSGGameInstance.
SGGameUserSettings Console Commands
Caution
Before running any of the following console commands, ensure that the default Game User Settings class is set to
SGGameUserSettingsor a subclass of it. This can be configured via:Project Settings > Engine > General Settings > Default Classes > Advanced > Game User Settings Class. Failure to set this correctly will cause your simulation or editor to crash upon calling any of the following console commands. For more information, refer toSGGameUserSettings.
SG_GetEngineScalabilitySettings
This console command prints the current Engine Scalability Settings to the logs.
SG_SetEngineScalabilitySettings
This console command sets the Engine Scalability Settings for both the current game and the editor. It accepts a Scalability parameter with the following valid values:
LowMediumHighEpicCinematicAuto
Note
The
Autooption is used for benchmarking purposes. It will adjust the engine scalability settings to one of the other levels based on the benchmarking results.
Deploying to Android (Standalone)
Epic Games provides official documentation for setting up Unreal projects targeting Android:
Here are a few important notes to consider:
- Since SenseGlove provides native libraries built for Android, it’s crucial to consult the Platform Support Matrix before deciding to deploy your project to Android.
- Currently, all third-party native libraries are built against Android NDK API Level
29. - On Meta Quest devices, building against Android SDK API Level
29or32has been tested and is supported. - A video tutorial on deploying to Oculus Quest devices and Android is also available.
Caution
As of the
v2.1.0release of the SenseGlove Unreal Engine Plugin, theXR_EXT_hand_trackingOpenXR extension is required for the plugin to function. Without this OpenXR extension, the plugin won't output any glove data. Unreal Engine providesXR_EXT_hand_trackingsupport through theOpenXRandOpenXRHandTrackingplugins. However, for this to function on Android in standalone mode in conjunction with other plugins such asMeta XRorViveOpenXRplugins, or hand-tracking as a fallback mechanism when no glove data is available, extra configuration steps and considerations are required.
Third-Party Tutorials
This Android Standalone Mode Deployment tutorials series covers how to build and deploy Unreal Engine 5.5 Projects APK to Android and Meta Quest 3S/3/Pro/2 in standalone mode. Furthermore, it covers the how-to on enabling OpenXR hand-tracking on Android with Meta XR (Quest 3S/3/Pro/2) and HTC VIVE OpenXR (Focus Vision/XR Elite/Focus 3) plugins.
Third-Party Tutorials: Android Standalone Mode Deployment
On-Click Unreal Engine 5.7 Android Packaging & APK Build Tutorial | Meta Quest & HTC VIVE Standalone
This tutorial provides a complete, streamlined guide to packaging and deploying Unreal Engine 5.7 projects to Android devices in standalone mode, with full support for Meta Quest and HTC VIVE headsets. Viewers learn how to correctly install and configure every required component, including Android Studio, SDK, NDK, JDK, and Visual Studio, using either a manual setup, or an open-source one-click PowerShell installer featured in the video.
The tutorial walks through creating a fresh Unreal Engine VR Template project, configuring Android project settings, enabling ADB device debugging, and generating a working APK using the updated Project Launcher workflow in UE 5.7. It also covers how to integrate the Meta XR and HTC VIVE OpenXR plugins to ensure proper VR recognition and hand-tracking functionality on each platform.
By the end, developers understand how to go from a blank project to a fully packaged and deployable Android APK, with functioning VR, correct device targeting, and reliable deployment pipelines on both Meta Quest and HTC VIVE standalone headsets.
Build & Deploy Unreal Engine 5.5 Projects APK to Android & Meta Quest 3S/3/Pro/2 in Standalone Mode
This video will guide you through the process of building and deploying an Unreal Engine 5.5 project (or any version newer than 4.24) to Android Standalone Mode for Meta Quest 2 and Quest 3 devices. The steps outlined here should also apply to other Android-based VR headsets.
It will show you where and how to download and install the necessary prerequisites, such as the Android SDK, NDK, Java Development Kit (JDK), and Microsoft Visual Studio. Next, it will configure both the development environment and Unreal Engine for a successful build. Finally, it will walk you through deploying your project to your VR headset and troubleshooting common errors to ensure a smooth experience.
Unreal Engine OpenXR Hand-Tracking on Android with Meta XR (Quest 3S/3/Pro/2) and HTC VIVE OpenXR (Focus Vision/XR Elite/Focus 3) Plugins
The OpenXR hand-tracking provided by Epic won't work out of the box on Android when projects are deployed in standalone mode to HMDs such as Meta Quest or HTC VIVE devices.
In this tutorial you'll learn how to deploy your Unreal Engine projects to Android with functional hand-tracking on the following head-mounted displays:
- Meta Quest 3S
- Meta Quest 3
- Meta Quest Pro
- Meta Quest 2
- HTC VIVE Focus Vision
- HTC VIVE XR Elite
- HTC VIVE Focus 3
Upgrade Guide
Upgrading from v2.7.x to v2.8.x
Summary of Breaking Changes
Starting with SenseGlove Unreal Engine Plugin v2.8.x, support for FXRMotionControllerData has been removed.
Although:
- Unreal Engine 5.5 and 5.6 still support the deprecated
FXRMotionControllerData, and - These engine versions are still supported by plugin v2.8.x,
the plugin now fully transitions to FXRHandTrackingState, which is the modern and recommended API introduced in Unreal Engine 5.5+ for OpenXR hand tracking.
Additionally:
- Plugin v2.8.x no longer supports Unreal Engine 5.4.
- Because
FXRHandTrackingStateis the forward-compatible OpenXR API, continued support forFXRMotionControllerDatais no longer maintained in the plugin.
We have supported FXRHandTrackingState since v2.2.0 (released 2024-10-22), and it has been stable in production for several releases.
Who Is Affected?
This change only affects you if:
- You maintain a custom hand manipulation or tracking system, and
- Your implementation directly consumes
FXRMotionControllerDataprovided by the SenseGlove plugin.
If you rely solely on the plugin’s provided components and standard integration workflow, no action is required.
Required Migration
If you are directly consuming FXRMotionControllerData, for your project to build or function as expected, you must migrate to:
FXRHandTrackingState
The migration is straightforward because both structures represent similar hand tracking data concepts within Unreal’s OpenXR framework.
A step-by-step explanation of how to work with FXRHandTrackingState is available in this third-party tutorial:
👉 Introduction to Virtual Reality, OpenXR Hand Tracking, and Gesture Detection in Unreal Engine
Why This Change?
FXRMotionControllerDatais deprecated.FXRHandTrackingStateis the future-proof OpenXR hand tracking API.- The existing Unreal Engine’s OpenXR implementation is centered around
FXRHandTrackingStateandFXRMotionControllerDatahas been completely removed form UE5.7+. - Removing legacy support simplifies the plugin architecture and aligns it with Unreal’s forward direction.
If you are already using FXRHandTrackingState or not directly consuming the OpenXR data, no changes are required when upgrading to v2.8.x.
Upgrading from v2.0.x to v2.1.x
The transition from v2.0.x to v2.1.x introduces numerous changes, including several breaking changes. The effort required to upgrade your project will vary depending on its complexity and which features of the SenseGlove Unreal Engine Project you are using. However, if you are working with a simple Blueprint project like SGBasicDemo, the upgrade process is quite straightforward. We successfully upgraded SGBasicDemo to SGBasicDemo-OpenXR by following the procedure outlined below.
These are the notable changes that might affect your project:
- The SenseGlove Virtual Hand and Wrist Tracker components no longer rely on the SenseGlove Hand Pose data from the underlying SenseGlove API. Instead, they use
FXRMotionControllerData. - The virtual hand animation system has been revamped to use
FXRMotionControllerDataand no longer relies on SenseGlove Hand Angles. This means the virtual hand meshes are animated using world space transforms instead of parent bone space transforms. - The Allbreaker virtual hand meshes have been removed and are no longer supported as they are incompatible with the new OpenXR tracking and animation system.
Caution
Please consult the changelog before upgrading your project to see if any change affects or breaks your current project.
Note
For upgrading older versions of the plugin to
v2.0.0, a YouTube tutorial is available.
-
Remove the existing
Plugins/SenseGlovefolder from your project. -
Obtain the latest
v2.1.xversion of the plugin either from the Epic Games Launcher or Microsoft Azure DevOps Repositories and place it in thePlugins/SenseGlovefolder that you've just removed. -
It might be best to clean up and remove the following folders from your project before generating the project files or attempting to open your project with the Unreal Editor. This might prevent a certain class of build issues:
- Binaries
- Intermediate
- Saved
-
Build your project using your favorite IDE if it's a C++ project, or open your project's
.uprojectfile with the Unreal Editor and wait for the Editor to build the necessary binaries and open the project. -
Remove the Allbreaker virtual hand meshes if you are using them, as they are no longer compatible with the new animation system.
-
Import and set up a set of compatible virtual hand meshes such as the VRTemplate virtual hand meshes, and configure the materials, rigid bodies, and the SenseGlove Grab and Touch Sockets using the SenseGlove Sockets Editor.
-
Set up the SGPawn to use the new virtual hand meshes for the
HandLeft,HandRight,RealHandLeft, andRealHandRightcomponents. -
Adjust the Virtual Hand Mesh Settings and ensure the
Left Hand Reference MeshandRight Hand Reference Meshare set correctly. -
Check and adjust the Virtual Hand Animation Settings as needed.
-
You might also want to set up the Wrist Tracking Hardware to use the new experimental HMD auto-detection feature. This allows the plugin to automatically configure the wrist tracking hardware at runtime, rather than limiting your builds to a specific HMD.
-
Set up the
SGGameInstanceandSGGameUserSettingsif you want to use the new SenseGlove console commands or take advantage of the Engine Scalability Settings to achieve higher framerates in your project. -
Additionally, the latest release introduces the ability to use hand-tracking as an alternative to SenseGlove hardware—albeit without haptic feedback—for rapid development and testing. It's also recommended to enable the Fallback to HandTracking if No Glove Detected feature to seamlessly switch to hand-tracking when a glove isn't connected.
-
If all steps have been followed correctly, your project should now be fully compatible with the new plugin release.
Optimizing Your Project for Higher FPS
Enhancing the performance and framerate of Unreal Engine VR applications, whether running standalone or streaming from a PC, can sometimes be challenging depending on the nature of your project. This guide will walk you through generic strategies that can significantly boost your project's performance and framerate with minimal effort.
Meta Quest Link Advanced Graphics Preferences
When streaming from a PC to Meta Quest devices, the default refresh rate is set at 72 Hz. However, you can increase this to 120 Hz, which not only enhances the refresh rate but also reduces the rendering resolution, potentially improving performance. Follow these steps to make the adjustment:
- Open the Meta Quest Link app and navigate to the
Devicestab.
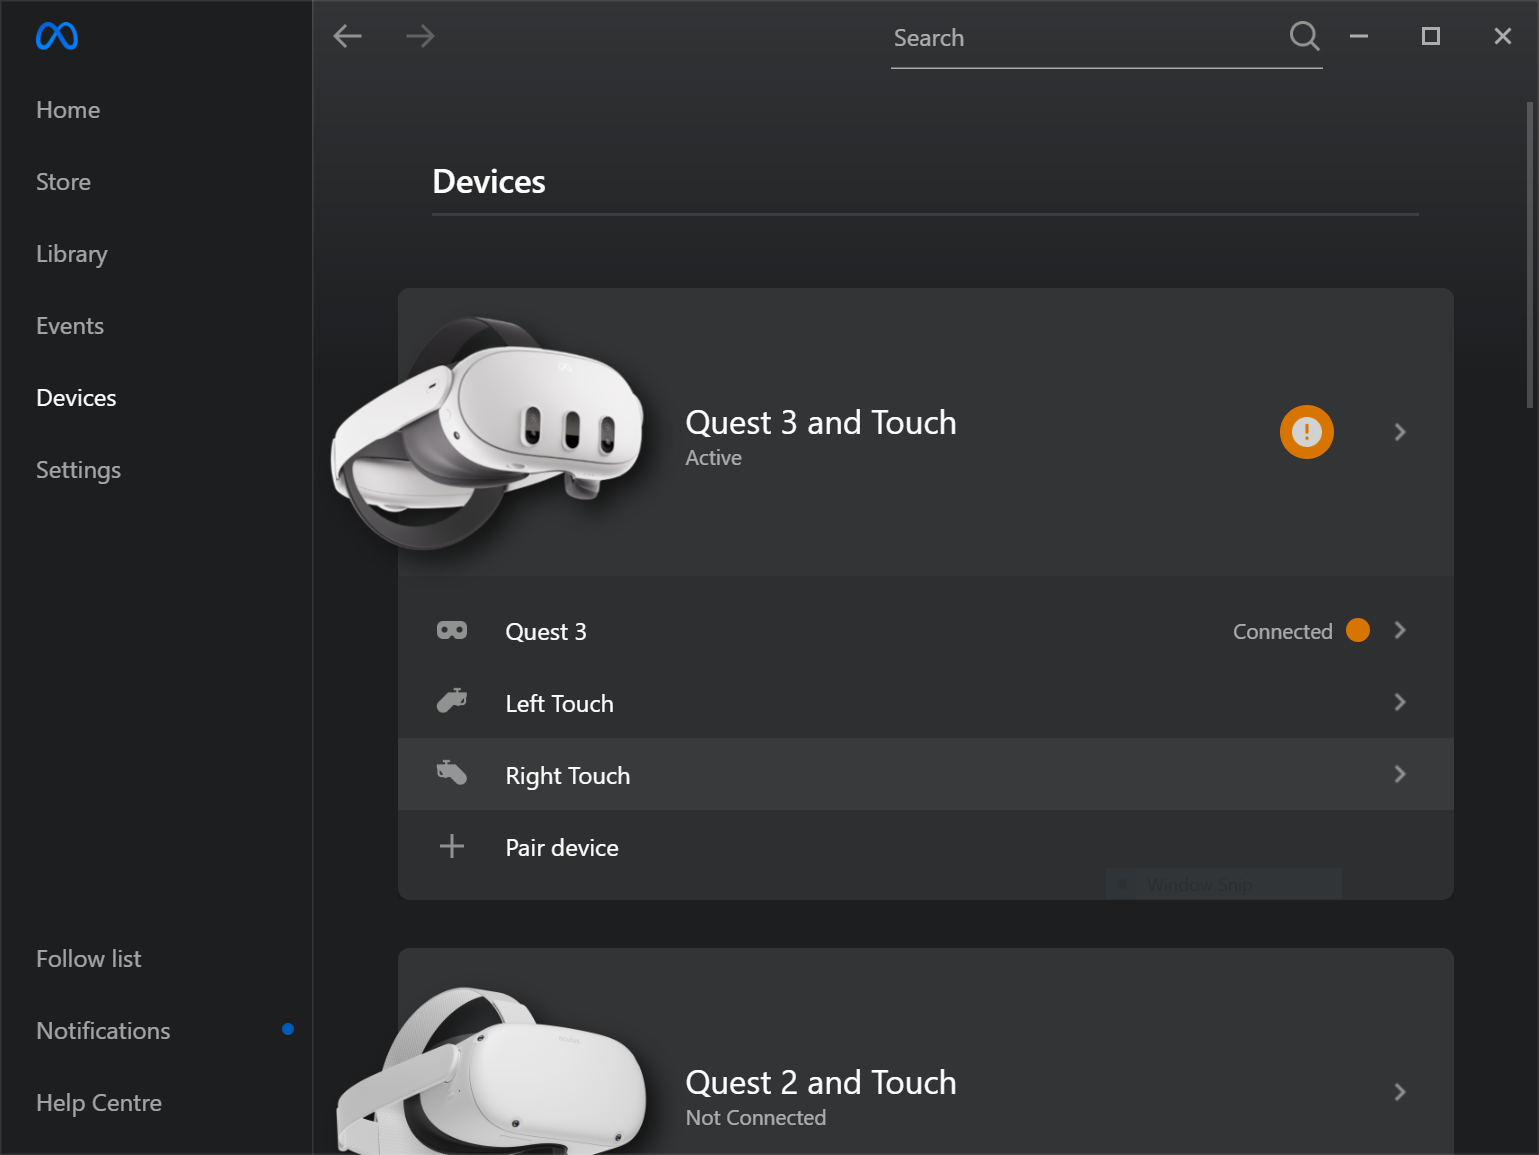
- Choose the device for which you would like to tweak the refresh rate.
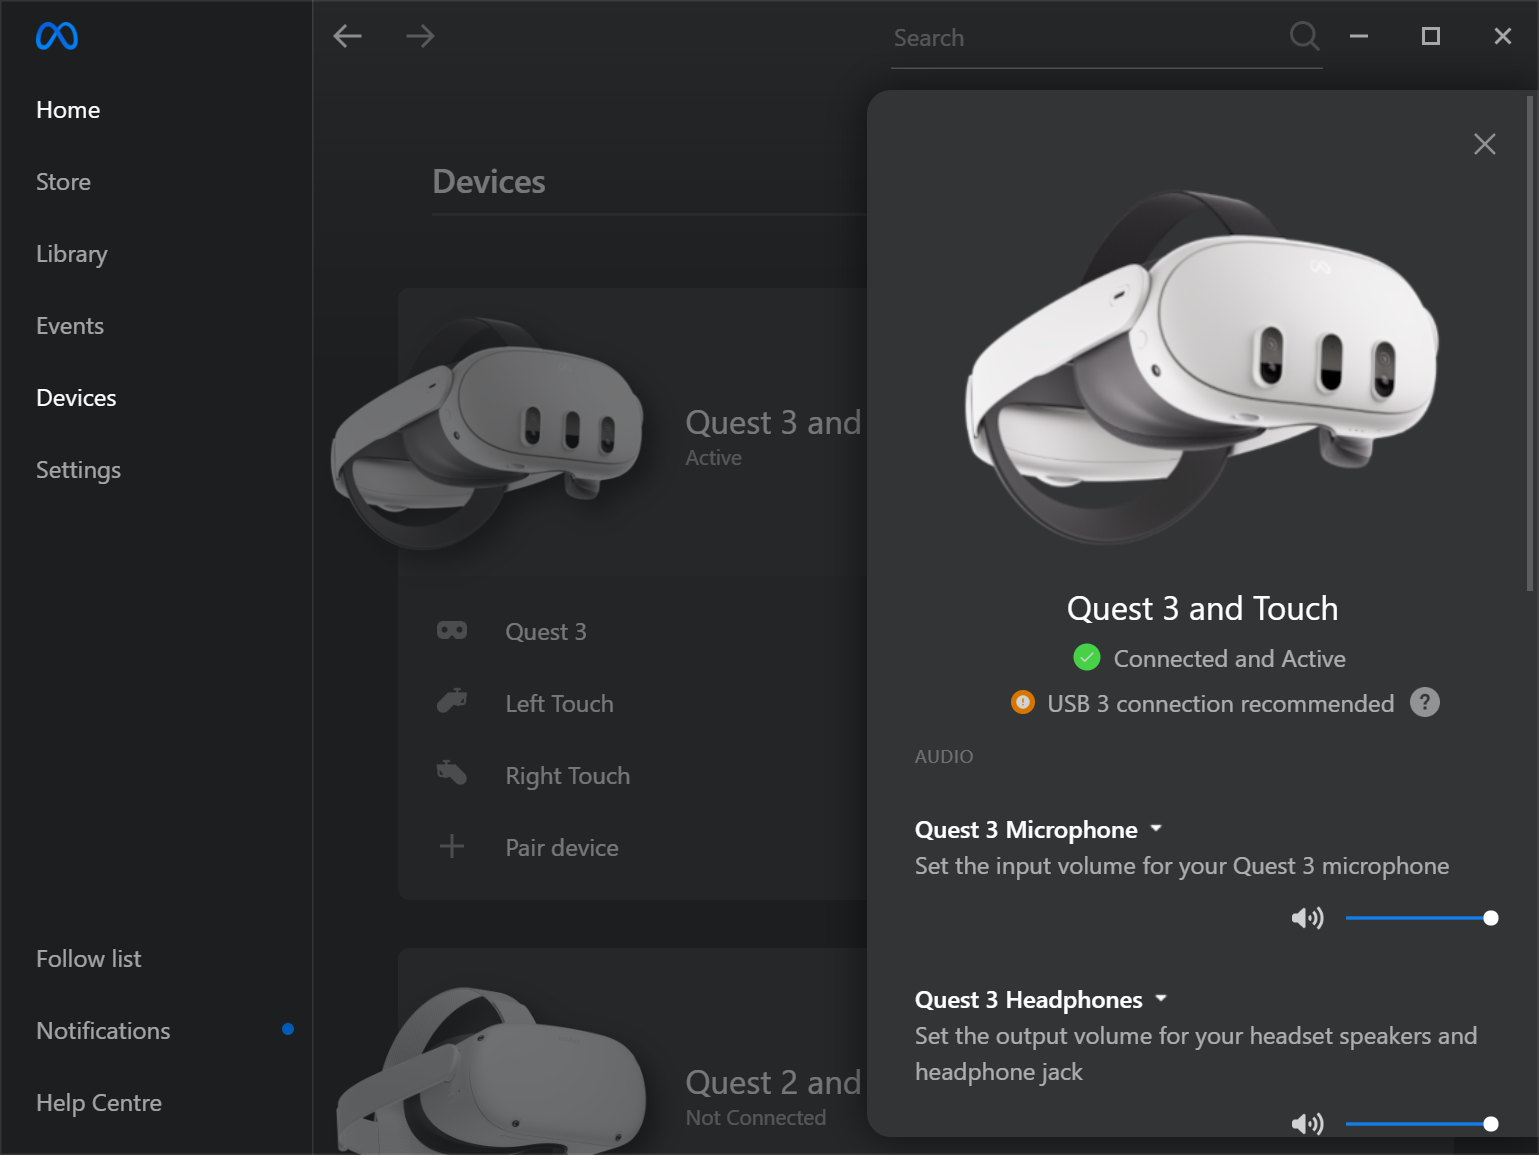
- In the device settings, scroll down to the
Advancedsection and selectGraphics Preferences.
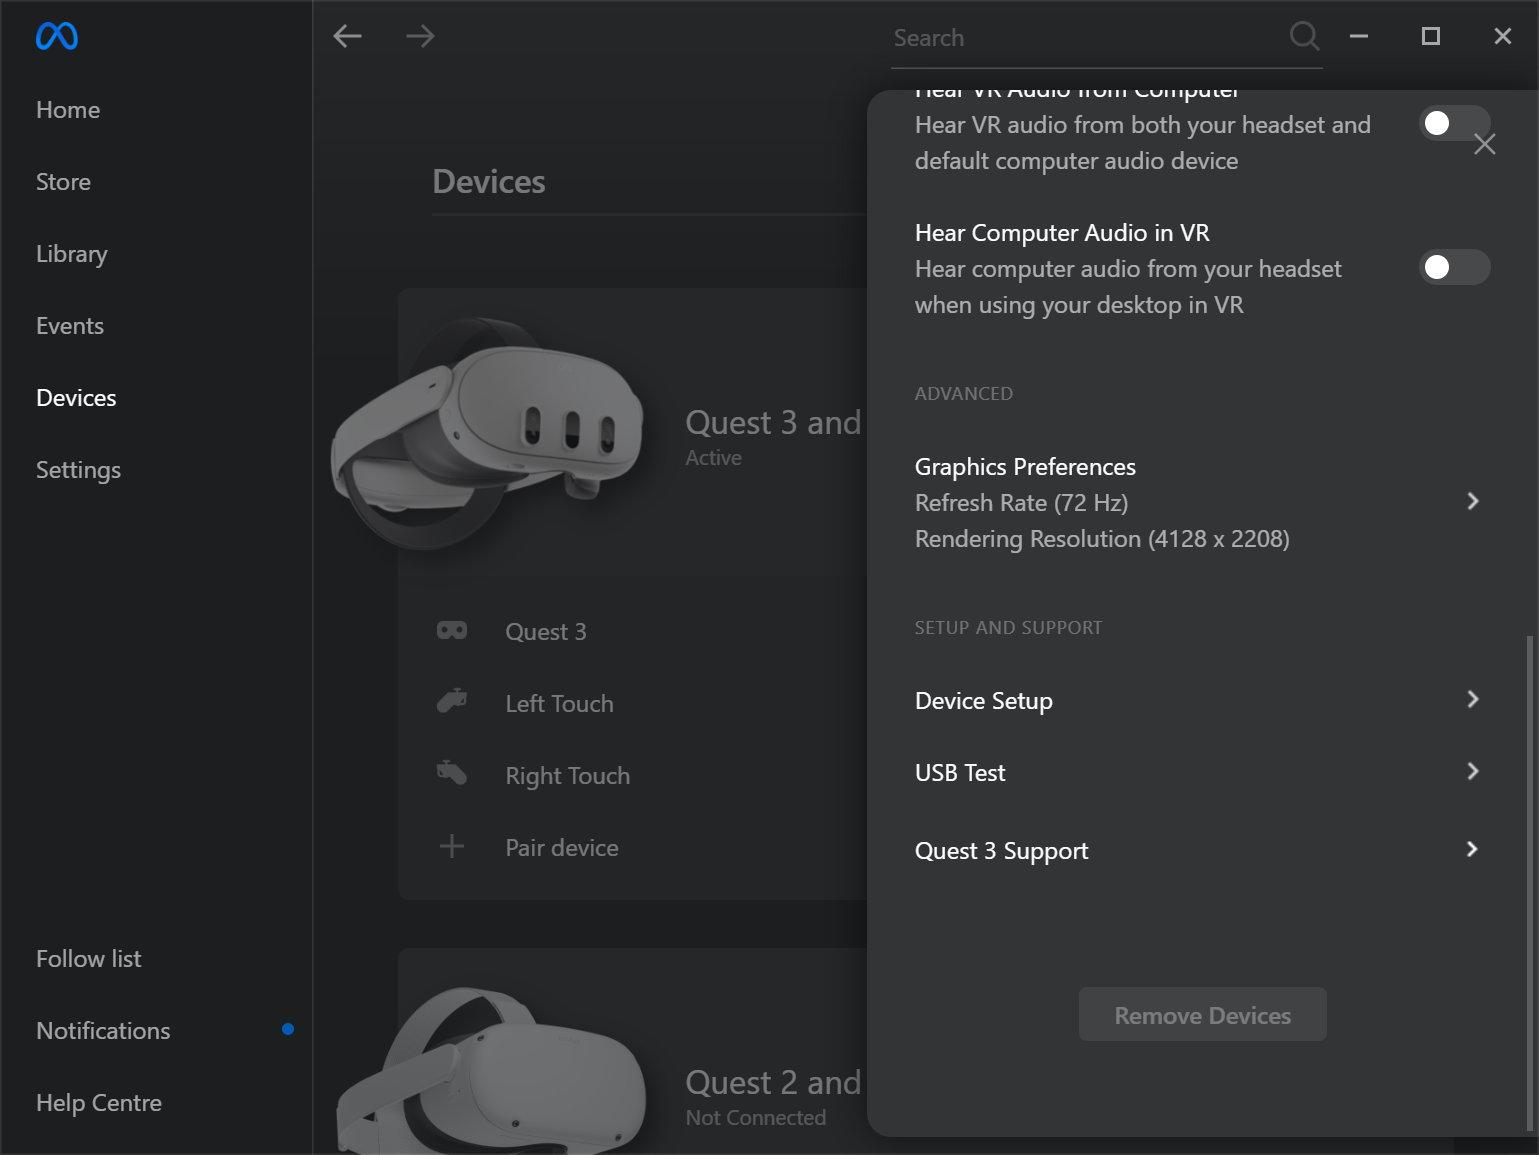
- Choose your desired refresh rate. In this case select a refresh rate of
120 Hz. After making your selection, clickOK, and the Meta Quest Link app will restart to apply the changes.
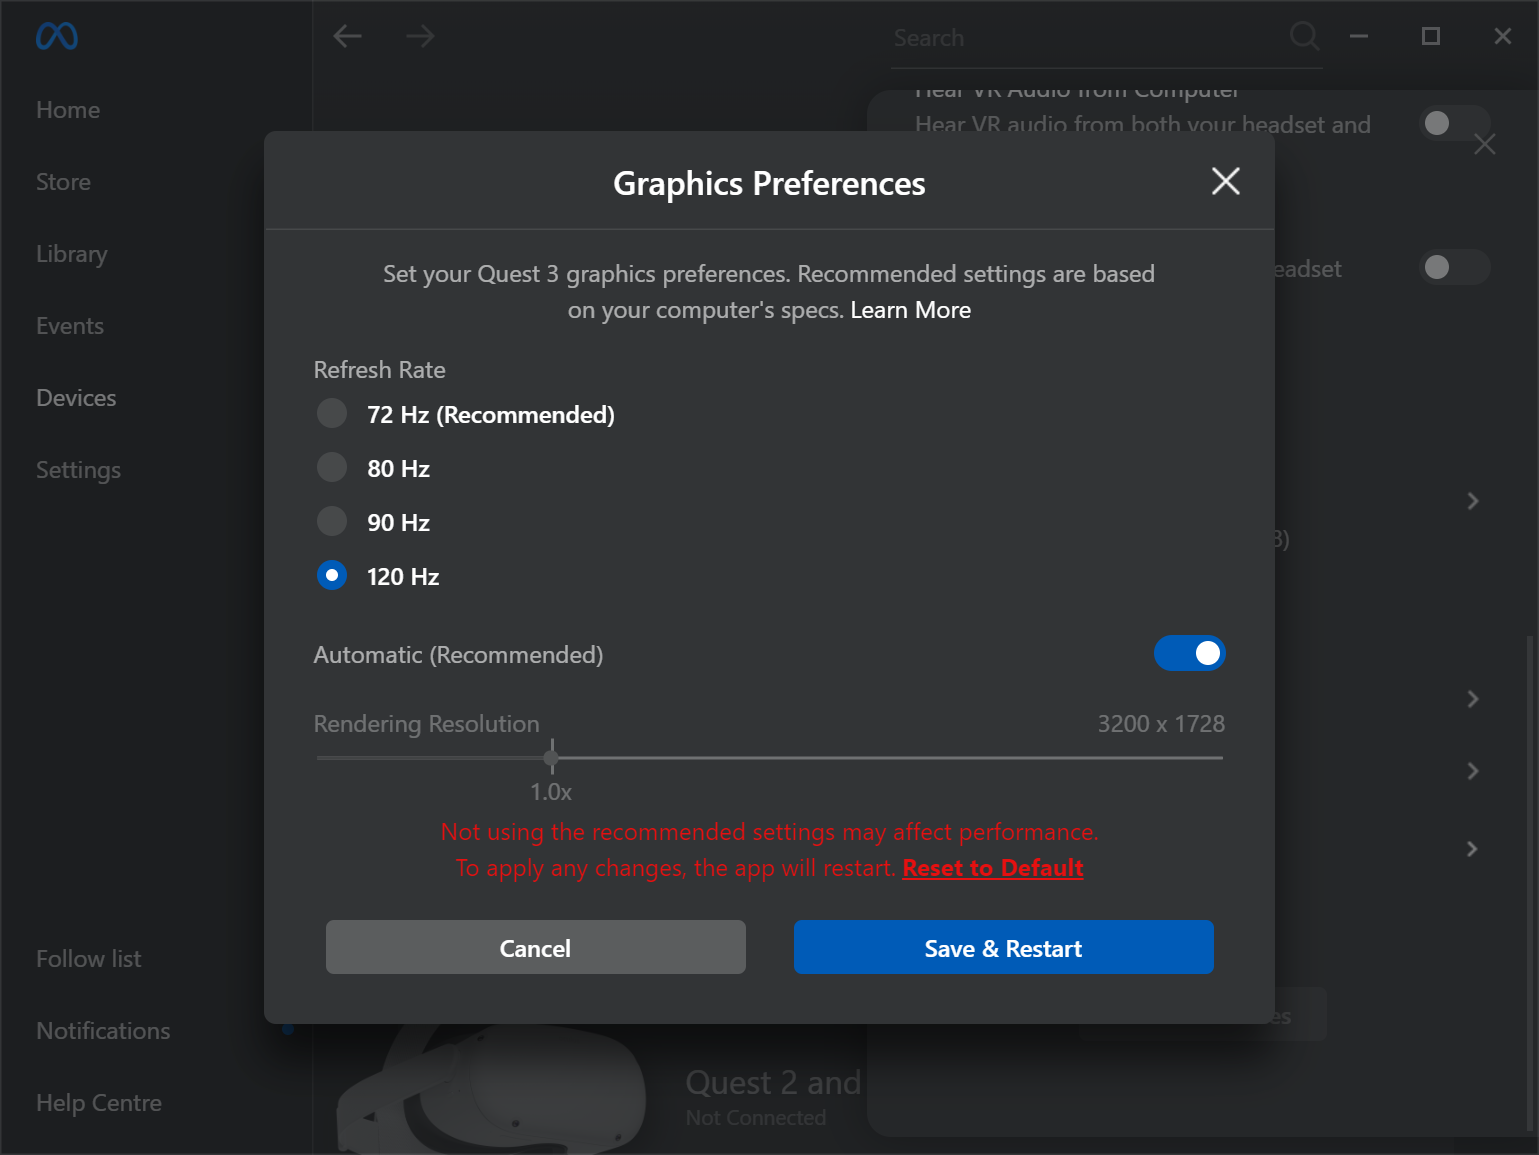
- Once the Meta Quest Link app restarts, go back to the
Devicestab, select your device, and confirm the refresh rate setting underAdvanced > Graphics Preferences.
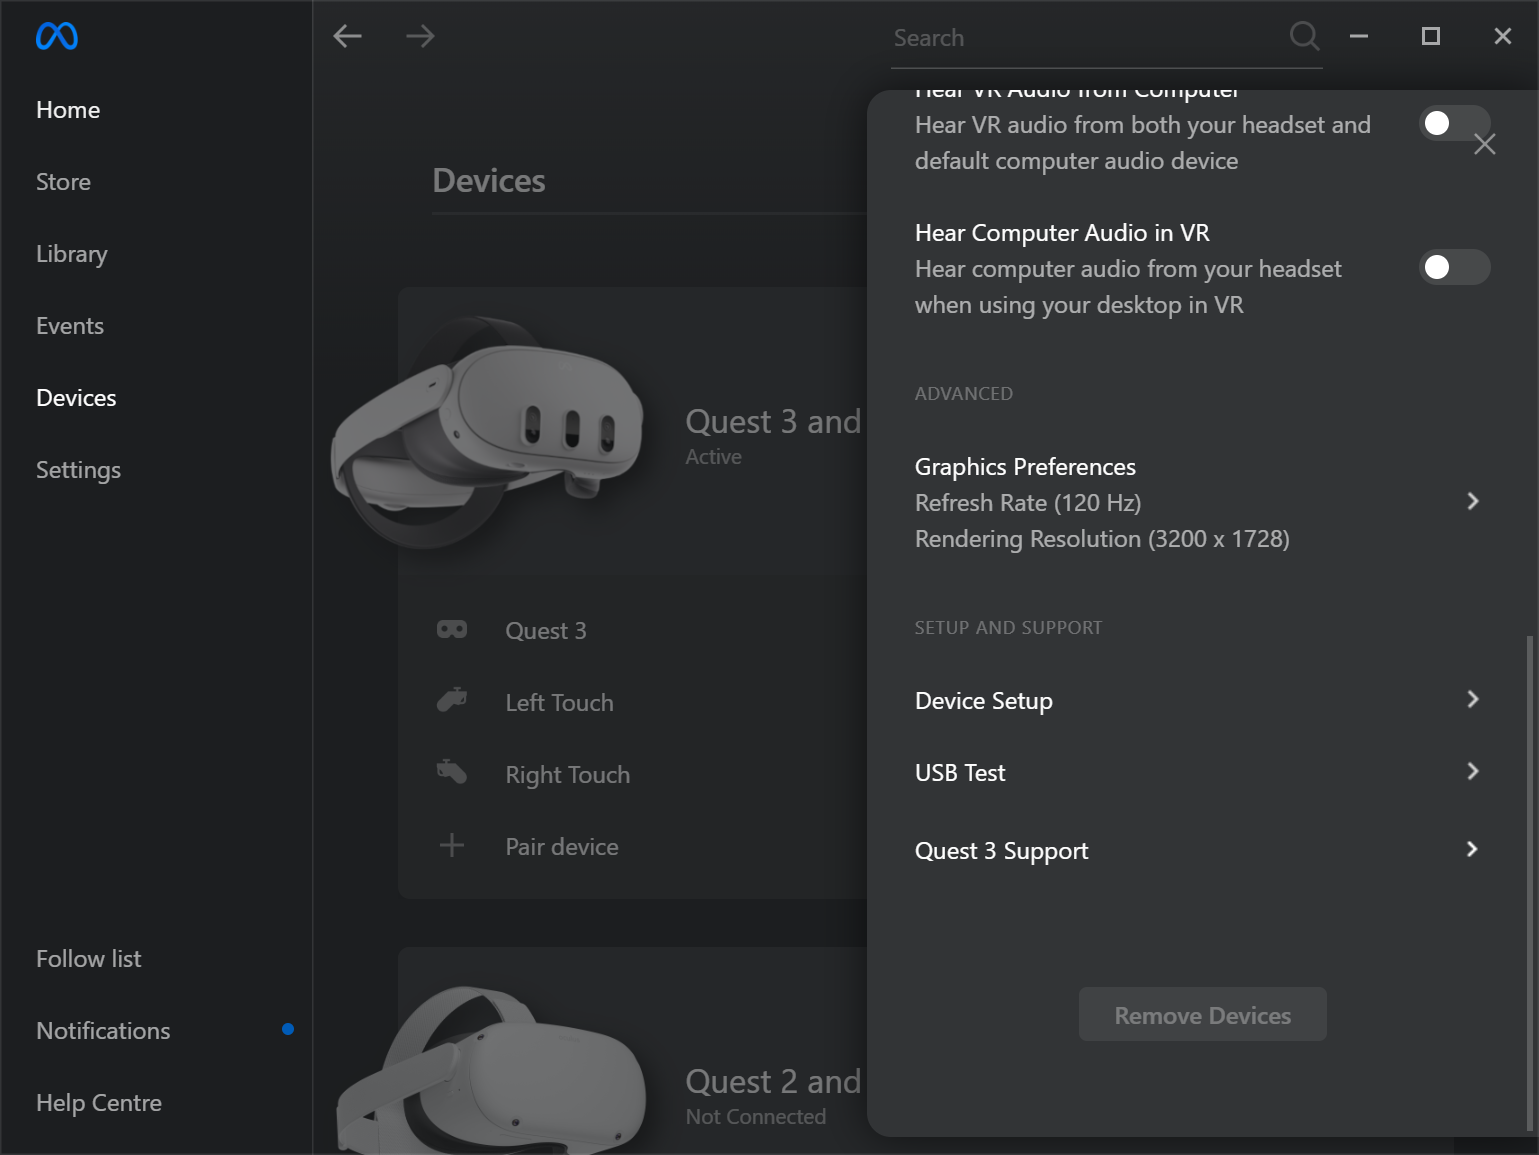
- Now, open your Unreal Engine project and navigate to
Project Settings. UnderEngine > General Settings > Framerate, you can fine-tune and experiment with the framerate settings to match your project's requirements.
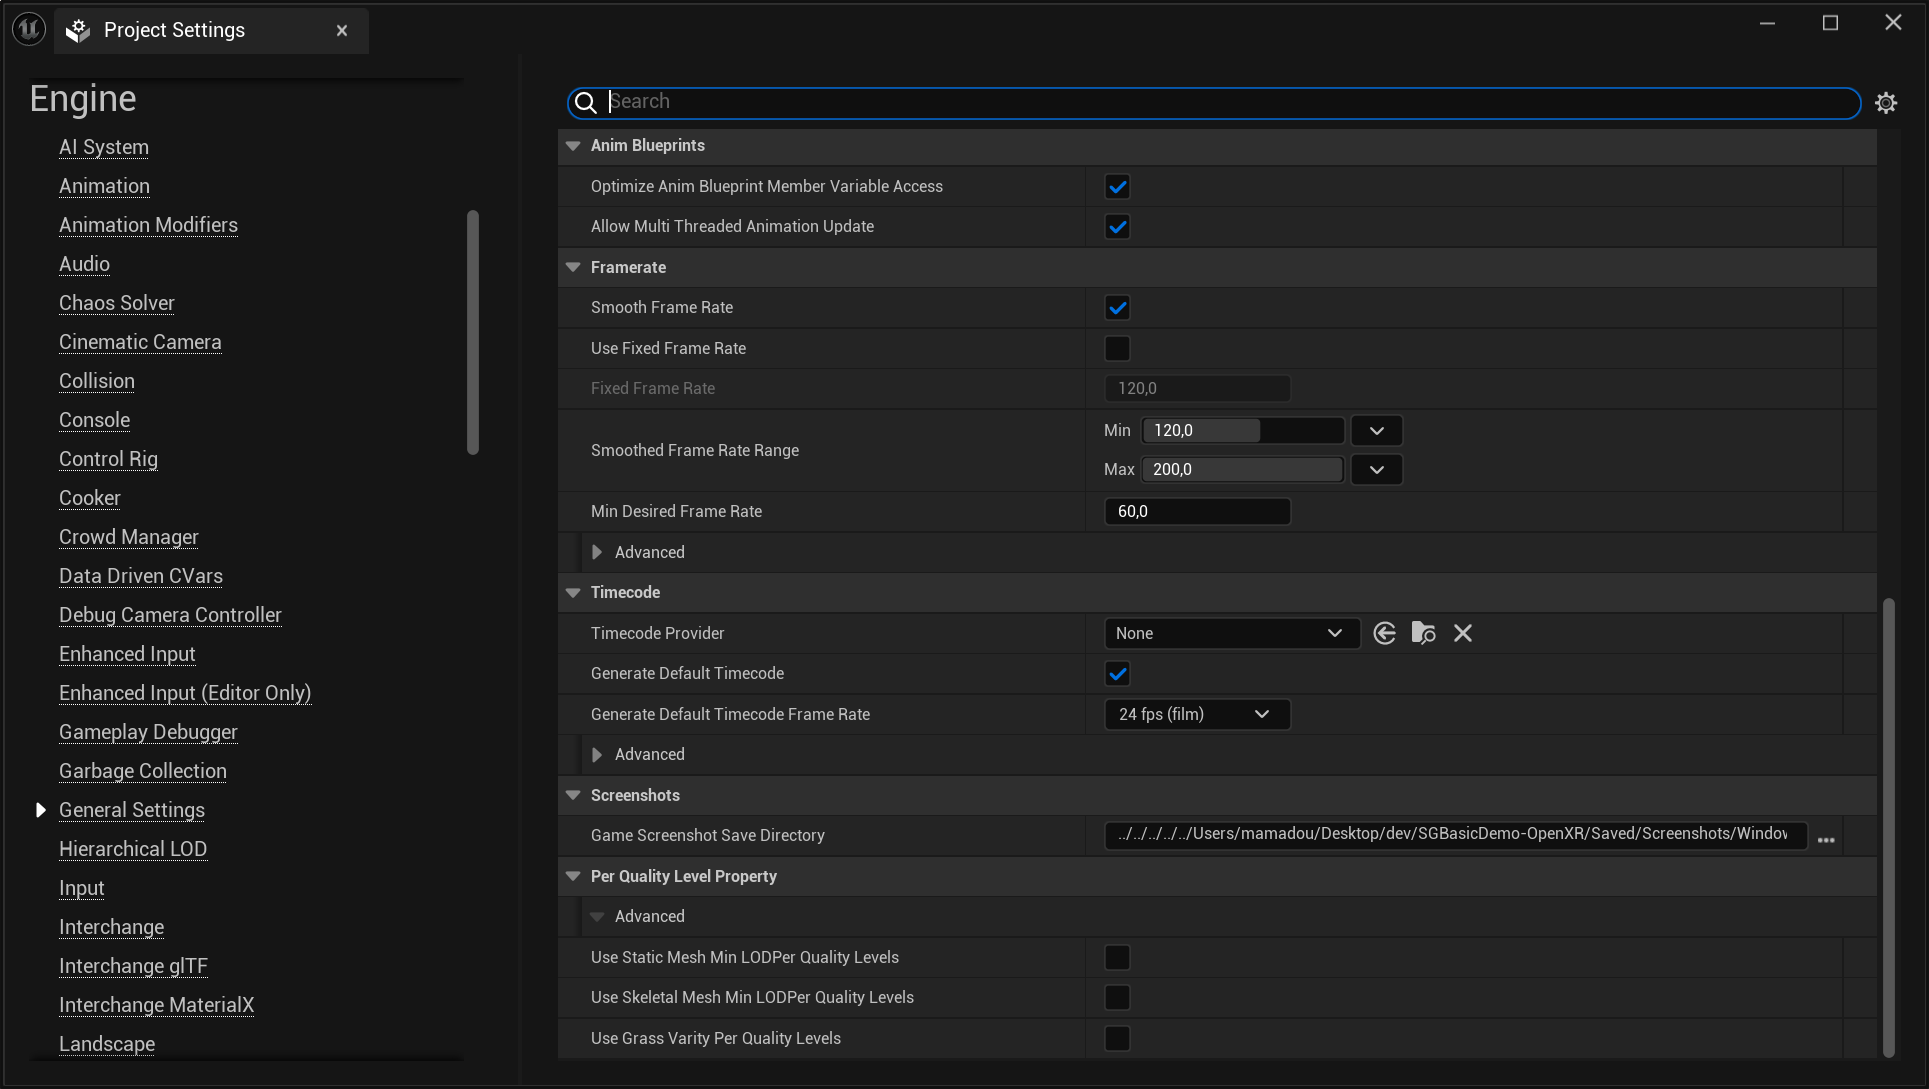
HTC VIVE Specific Optimizations in Standalone Mode
Headsets like the HTC VIVE Focus 3 and Focus Vision have larger framebuffers, higher eye-buffer size, wider fields of view (FOV), and varying refresh rates compared to HMDs like the Meta Quest series. As a result, performance can differ when running the same content across these devices.
Setting a Custom Pixel Density
If performance on the Focus 3 or Focus Vision is lower than on the Quest, we recommend adjusting the Pixel Density to approximately 0.8 (or a value suited to your content). This reduces the eye buffer size, and matches the resolution of Quest 2, hence increasing FPS:
![]()
Setting a Lower Refresh Rate
The ViveOpenXR plugin provides various Blueprint functions to query the supported refresh rates and adjust the current refresh rate according to your needs:
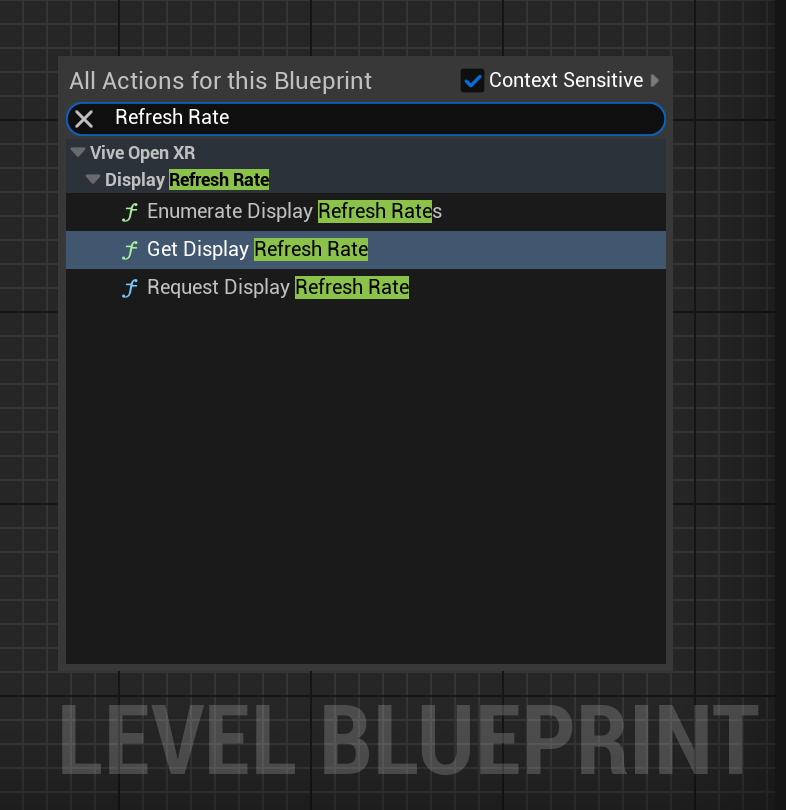
But, before you'd be able to make these adjustments you have to enable the relevant settings by navigating to Edit > Project Settings > Plugins > Vive OpenXR and ensure the Enable Display Refresh Rate option is checked. This option enables the OpenXR extension XR_FB_display_refresh_rate support which allows your application to dynamically adjust the display refresh rate in order to improve the overall user experience. Please note that You need to restart the engine to apply new settings after changing this setting.
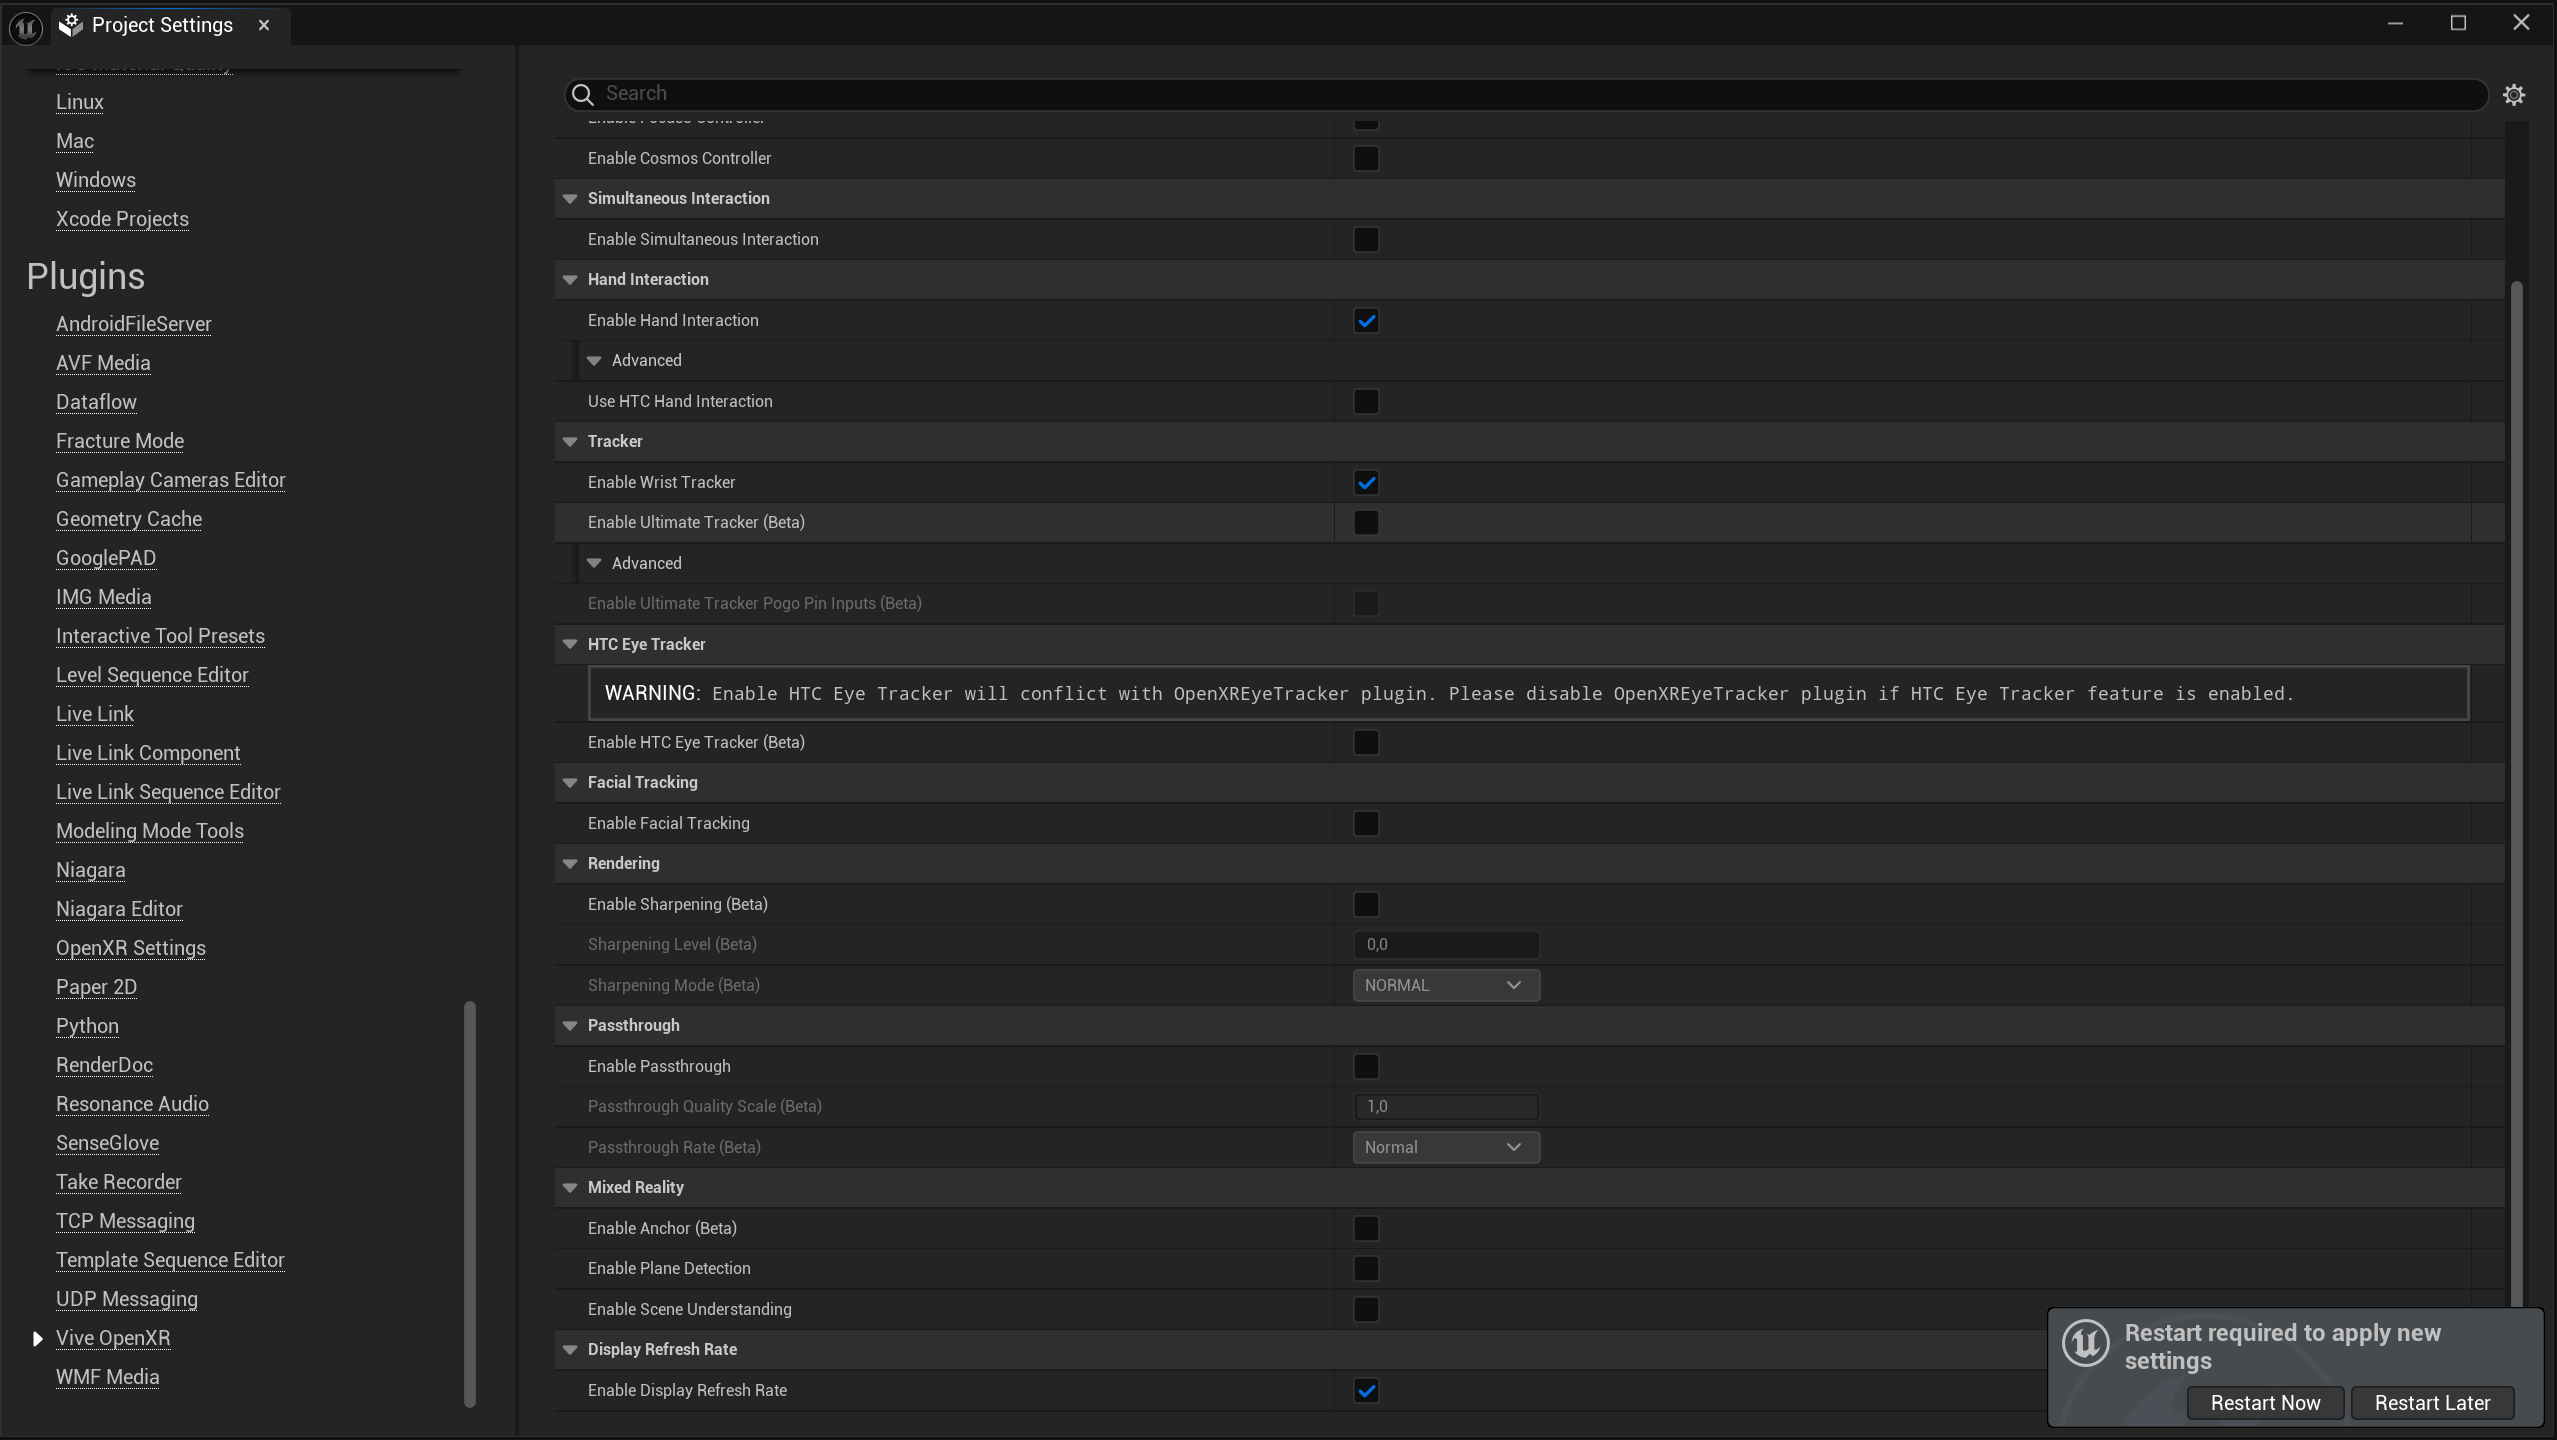
In order to query all the available display refresh rates use the Blueprint function Enumerate Display Refresh Rates:
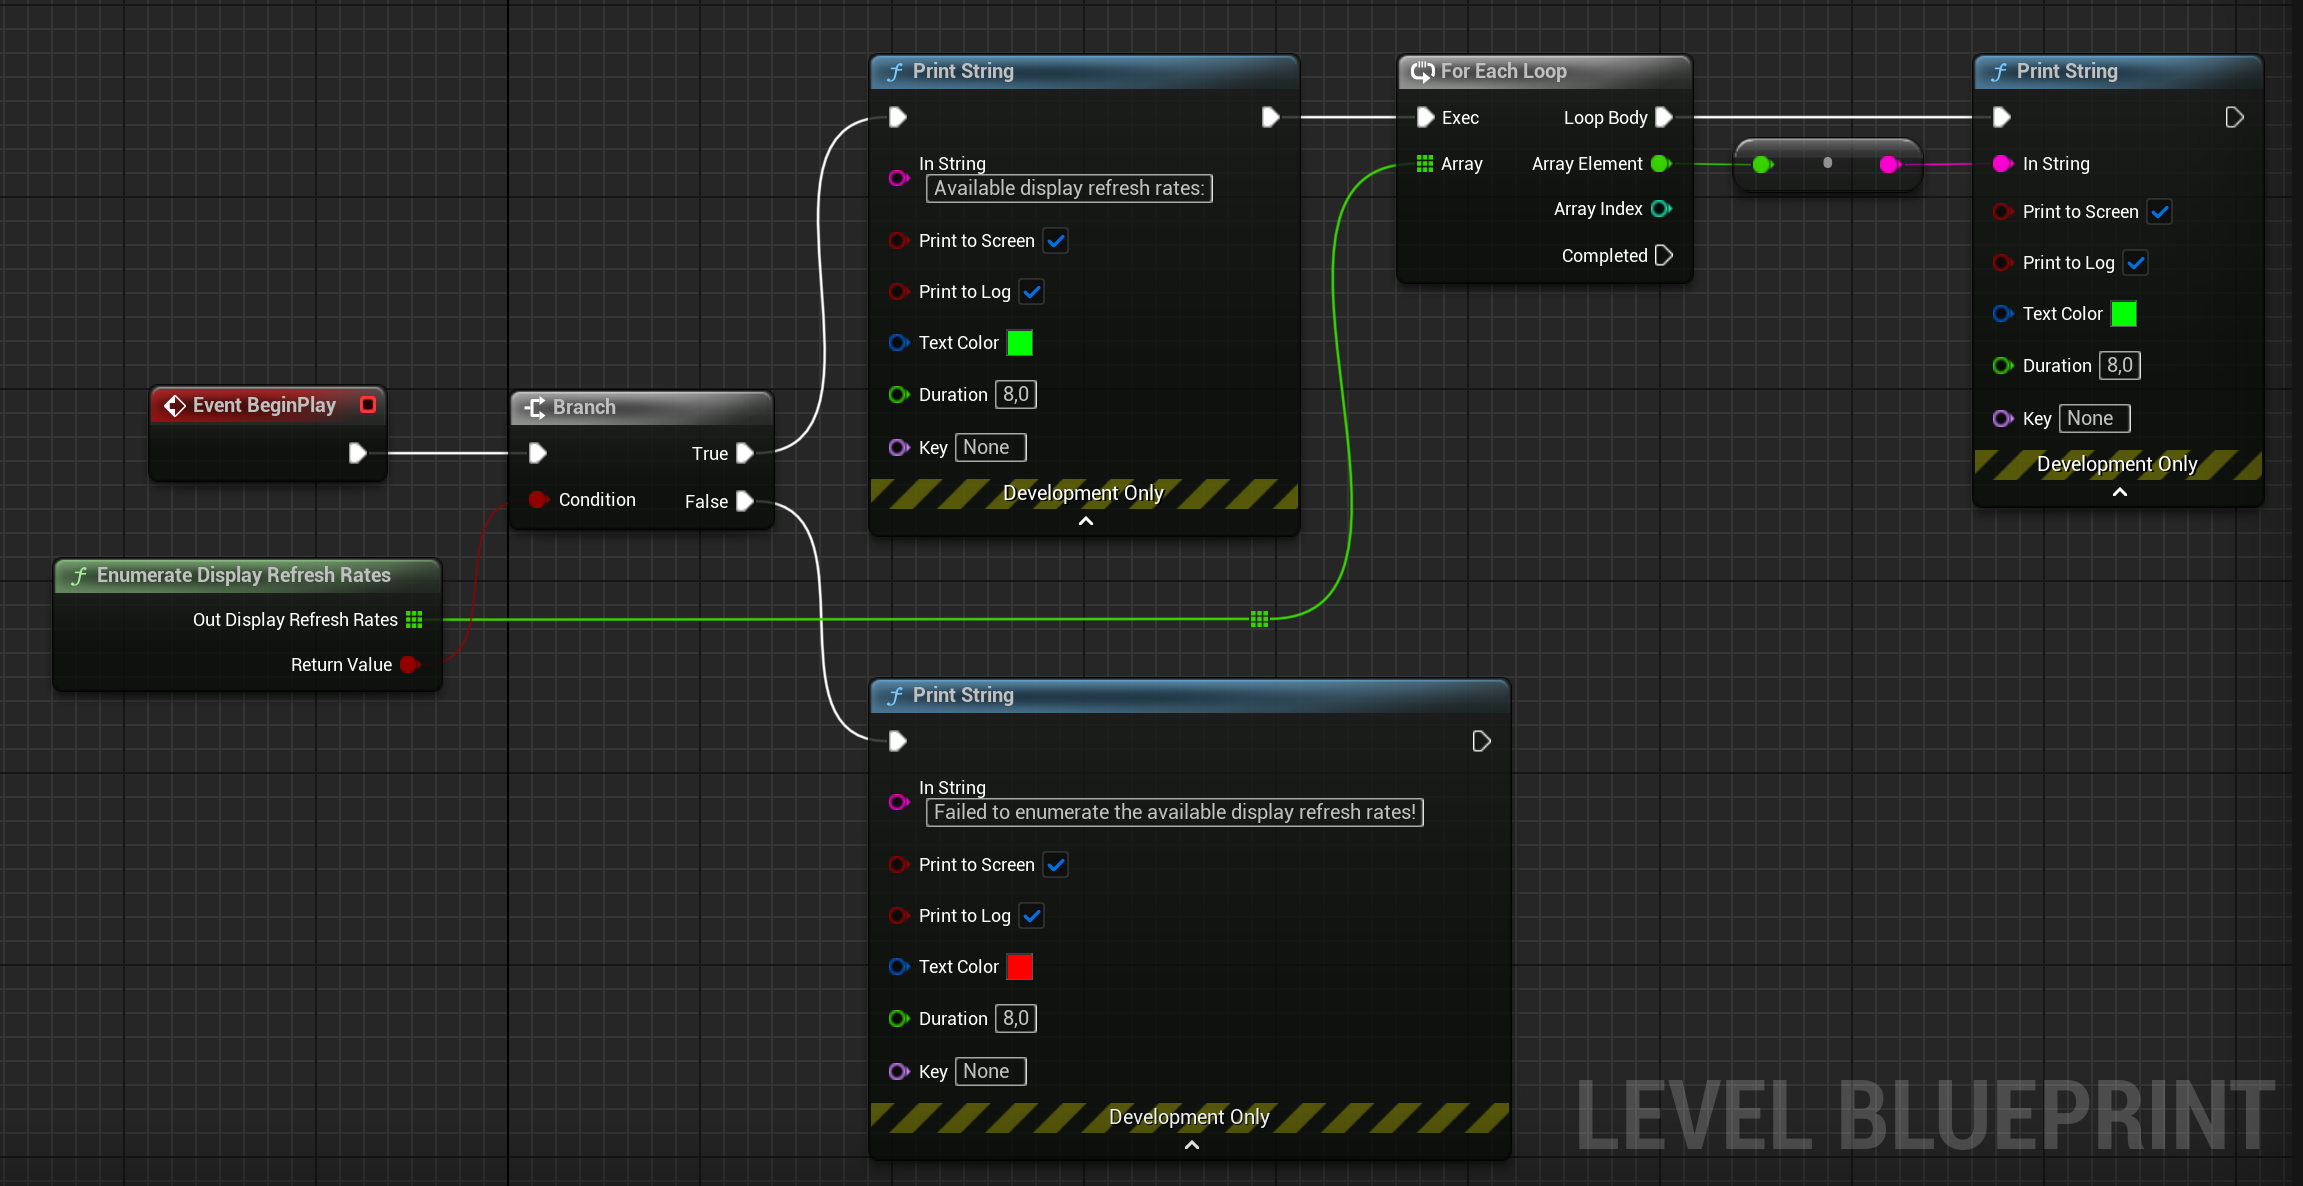
At the moment with most devices it returns 75.0 and 90.0 hz values.
To change the current display refresh rate use the Blueprint function Request Display Refresh Rate:
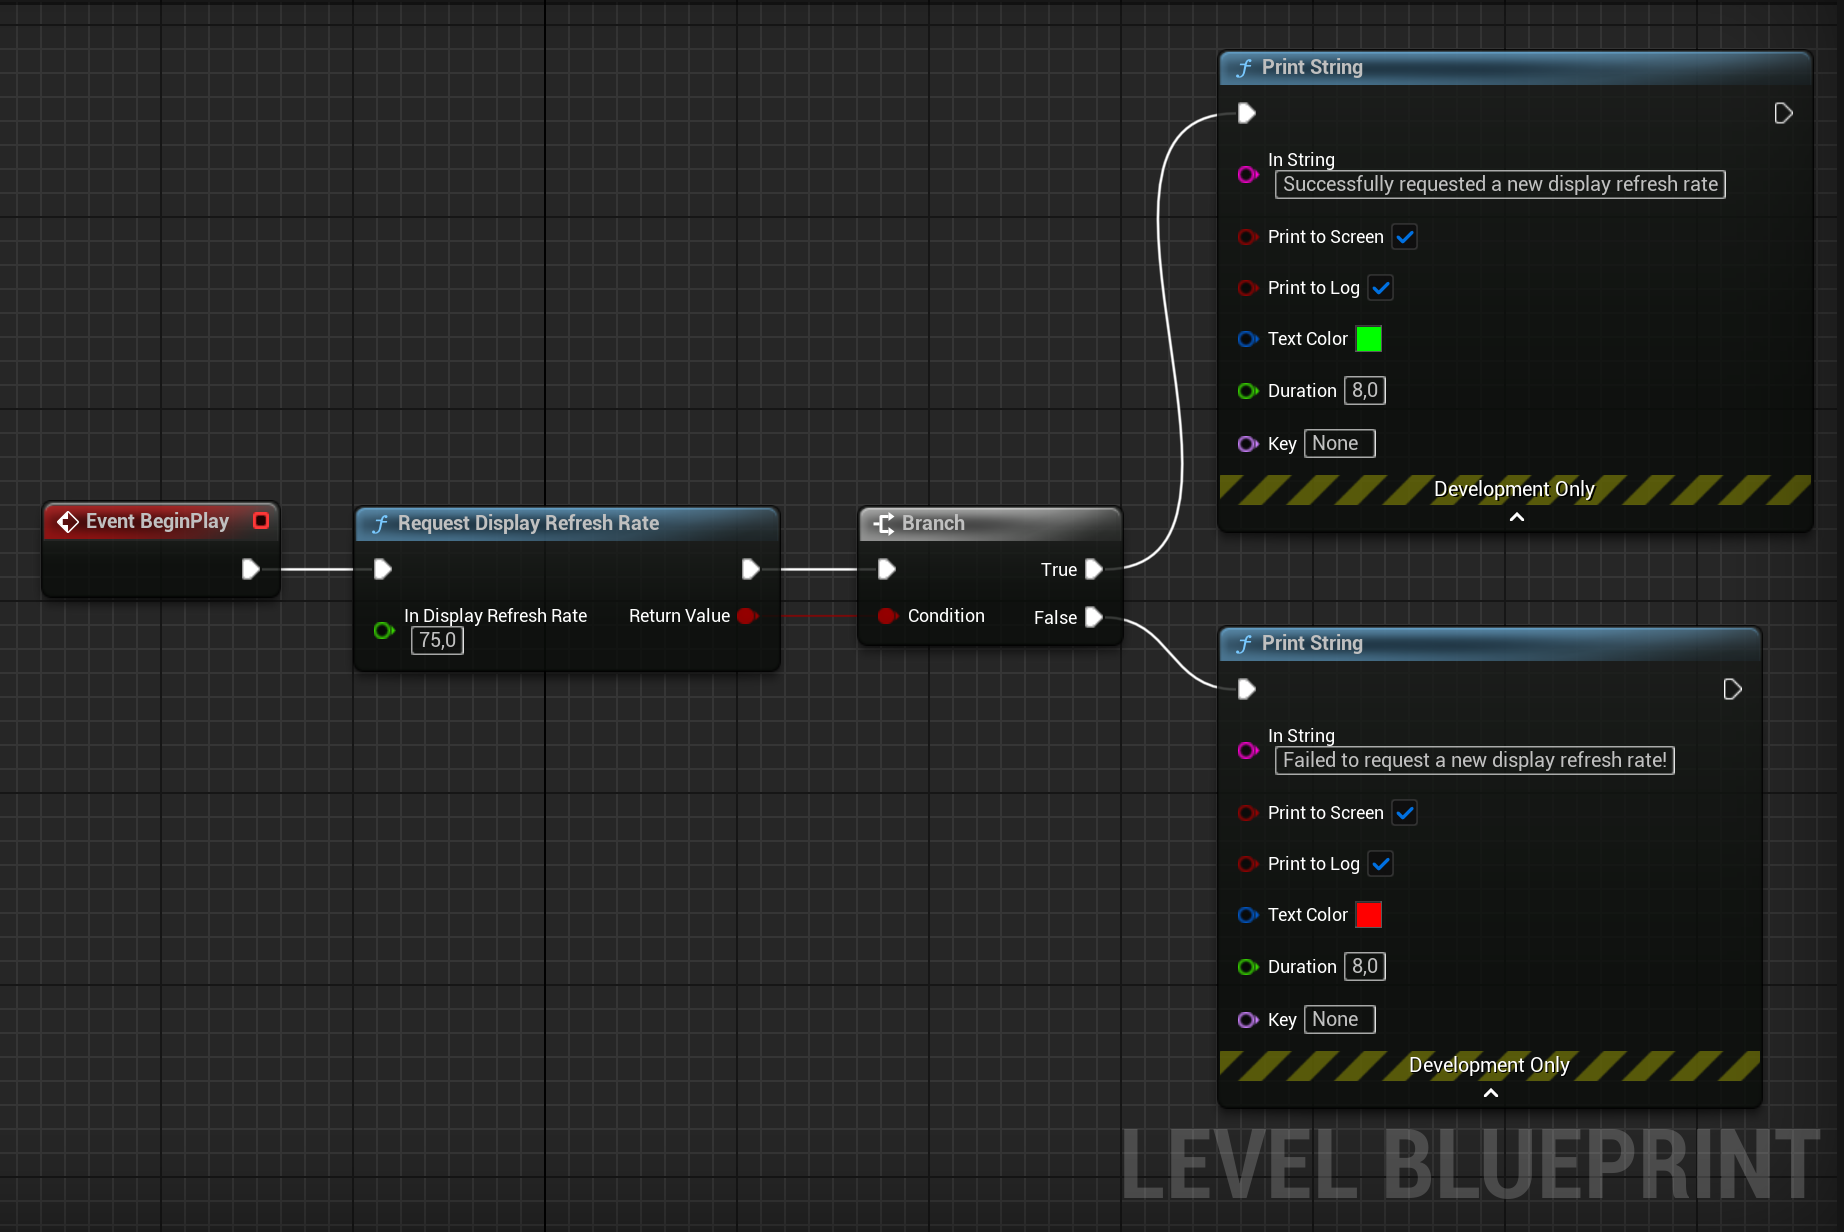
To obtain the current display refresh rate use the Blueprint function Get Display Refresh Rate:
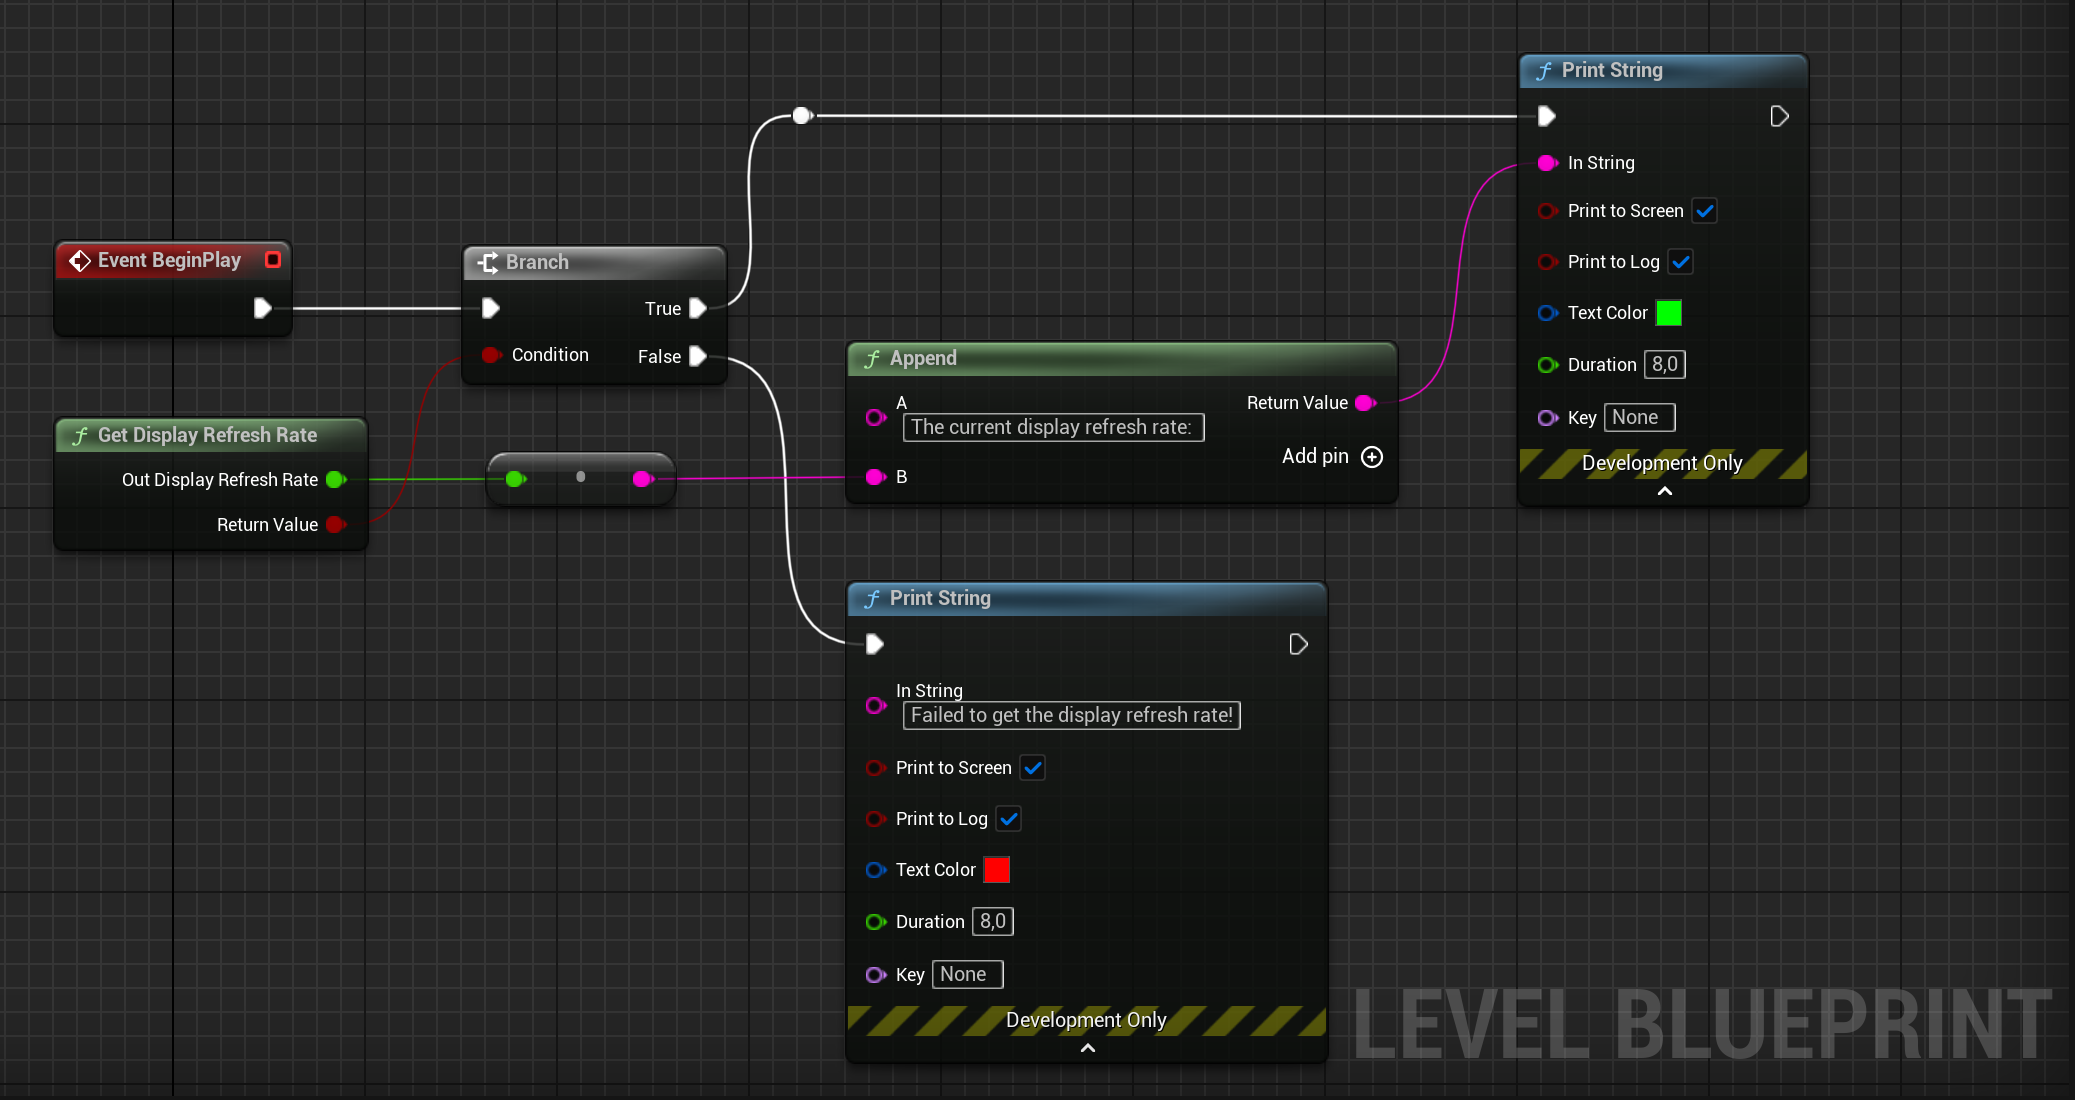
If you're looking to squeeze more performance out of your HTC VIVE HMD in standalone mode, consider lowering the target refresh rate from 90hz to 75hz. This can help reduce GPU workload and improve overall stability while still maintaining a somewhat smooth experience.
HTC VIVE Optimal Rendering Settings
As a last resort consider adding the following rendering settings to your project's DefaultEngine.ini under the /Script/Engine.RendererSettings section and experiment with them until you obtain your desired results:
[/Script/Engine.RendererSettings]
r.Mobile.DisableVertexFog=True
r.Mobile.AllowDitheredLODTransition=False
r.Mobile.AllowSoftwareOcclusion=False
r.Mobile.VirtualTextures=False
r.DiscardUnusedQuality=False
r.AllowOcclusionQueries=True
r.MinScreenRadiusForLights=0.030000
r.MinScreenRadiusForDepthPrepass=0.030000
r.MinScreenRadiusForCSMDepth=0.010000
r.PrecomputedVisibilityWarning=False
r.TextureStreaming=True
Compat.UseDXT5NormalMaps=False
r.VirtualTextures=False
r.VirtualTexturedLightmaps=False
r.VT.TileSize=128
r.VT.TileBorderSize=4
r.vt.FeedbackFactor=16
r.VT.EnableCompressZlib=True
r.VT.EnableCompressCrunch=False
r.ClearCoatNormal=False
r.ReflectionCaptureResolution=128
r.ReflectionEnvironmentLightmapMixBasedOnRoughness=True
r.ForwardShading=True
r.VertexFoggingForOpaque=True
r.AllowStaticLighting=True
r.NormalMapsForStaticLighting=False
r.GenerateMeshDistanceFields=False
r.DistanceFieldBuild.EightBit=False
r.GenerateLandscapeGIData=False
r.DistanceFieldBuild.Compress=False
r.TessellationAdaptivePixelsPerTriangle=48.000000
r.SeparateTranslucency=True
r.TranslucentSortPolicy=0
TranslucentSortAxis=(X=0.000000,Y=-1.000000,Z=0.000000)
r.CustomDepth=1
r.CustomDepthTemporalAAJitter=True
r.PostProcessing.PropagateAlpha=2
r.DefaultFeature.Bloom=False
r.DefaultFeature.AmbientOcclusion=False
r.DefaultFeature.AmbientOcclusionStaticFraction=True
r.DefaultFeature.AutoExposure=False
r.DefaultFeature.AutoExposure.Method=0
r.DefaultFeature.AutoExposure.Bias=1.000000
r.DefaultFeature.AutoExposure.ExtendDefaultLuminanceRange=True
r.DefaultFeature.AutoExposure.ExtendDefaultLuminanceRange=True
r.EyeAdaptation.EditorOnly=False
r.DefaultFeature.MotionBlur=False
r.DefaultFeature.LensFlare=False
r.TemporalAA.Upsampling=False
r.SSGI.Enable=False
r.AntiAliasingMethod=3
r.DefaultFeature.LightUnits=1
r.DefaultBackBufferPixelFormat=4
r.Shadow.UnbuiltPreviewInGame=True
r.StencilForLODDither=False
r.EarlyZPass=3
r.EarlyZPassOnlyMaterialMasking=False
r.DBuffer=True
r.ClearSceneMethod=1
r.VelocityOutputPass=0
r.Velocity.EnableVertexDeformation=0
r.SelectiveBasePassOutputs=False
bDefaultParticleCutouts=False
fx.GPUSimulationTextureSizeX=1024
fx.GPUSimulationTextureSizeY=1024
r.AllowGlobalClipPlane=False
r.GBufferFormat=1
r.MorphTarget.Mode=True
r.GPUCrashDebugging=False
vr.InstancedStereo=True
r.MobileHDR=False
vr.MobileMultiView=True
r.Mobile.UseHWsRGBEncoding=True
vr.RoundRobinOcclusion=False
vr.ODSCapture=False
r.MeshStreaming=False
r.WireframeCullThreshold=5.000000
r.RayTracing=False
r.RayTracing.UseTextureLod=False
r.SupportStationarySkylight=True
r.SupportLowQualityLightmaps=True
r.SupportPointLightWholeSceneShadows=True
r.SupportAtmosphericFog=True
r.SupportSkyAtmosphere=True
r.SupportSkyAtmosphereAffectsHeightFog=False
r.SkinCache.CompileShaders=False
r.SkinCache.DefaultBehavior=1
r.SkinCache.SceneMemoryLimitInMB=128.000000
r.Mobile.EnableStaticAndCSMShadowReceivers=True
r.Mobile.EnableMovableLightCSMShaderCulling=True
r.Mobile.AllowDistanceFieldShadows=True
r.Mobile.AllowMovableDirectionalLights=True
r.MobileNumDynamicPointLights=4
r.MobileDynamicPointLightsUseStaticBranch=True
r.Mobile.EnableMovableSpotlights=False
r.Mobile.EnableMovableSpotlightsShadow=False
r.GPUSkin.Support16BitBoneIndex=False
r.GPUSkin.Limit2BoneInfluences=False
r.SupportDepthOnlyIndexBuffers=True
r.SupportReversedIndexBuffers=True
r.LightPropagationVolume=False
r.Mobile.AmbientOcclusion=False
r.GPUSkin.UnlimitedBoneInfluences=False
r.GPUSkin.UnlimitedBoneInfluencesThreshold=8
r.Mobile.PlanarReflectionMode=0
bStreamSkeletalMeshLODs=(Default=False,PerPlatform=())
bDiscardSkeletalMeshOptionalLODs=(Default=False,PerPlatform=())
VisualizeCalibrationColorMaterialPath=None
VisualizeCalibrationCustomMaterialPath=None
VisualizeCalibrationGrayscaleMaterialPath=None
r.Mobile.AntiAliasing=3
r.Mobile.FloatPrecisionMode=2
r.OpenGL.ForceDXC=0
r.DynamicGlobalIlluminationMethod=1
r.ReflectionMethod=1
r.Shadow.Virtual.Enable=0
r.Lumen.TranslucencyReflections.FrontLayer.EnableForProject=False
Game User Settings and Engine Scalability Settings
Unreal Engine offers predefined graphics quality profiles known as Engine Scalability Settings, which can be easily adjusted to optimize performance. These settings can be modified directly within the Unreal Editor through the Settings menu on the toolbar or dynamically at runtime using code. Importantly, these settings are universal, meaning changes made in the Unreal Editor will apply to the game when run in PIE (Play In Editor) mode, and settings adjusted via code will also affect the editor itself.
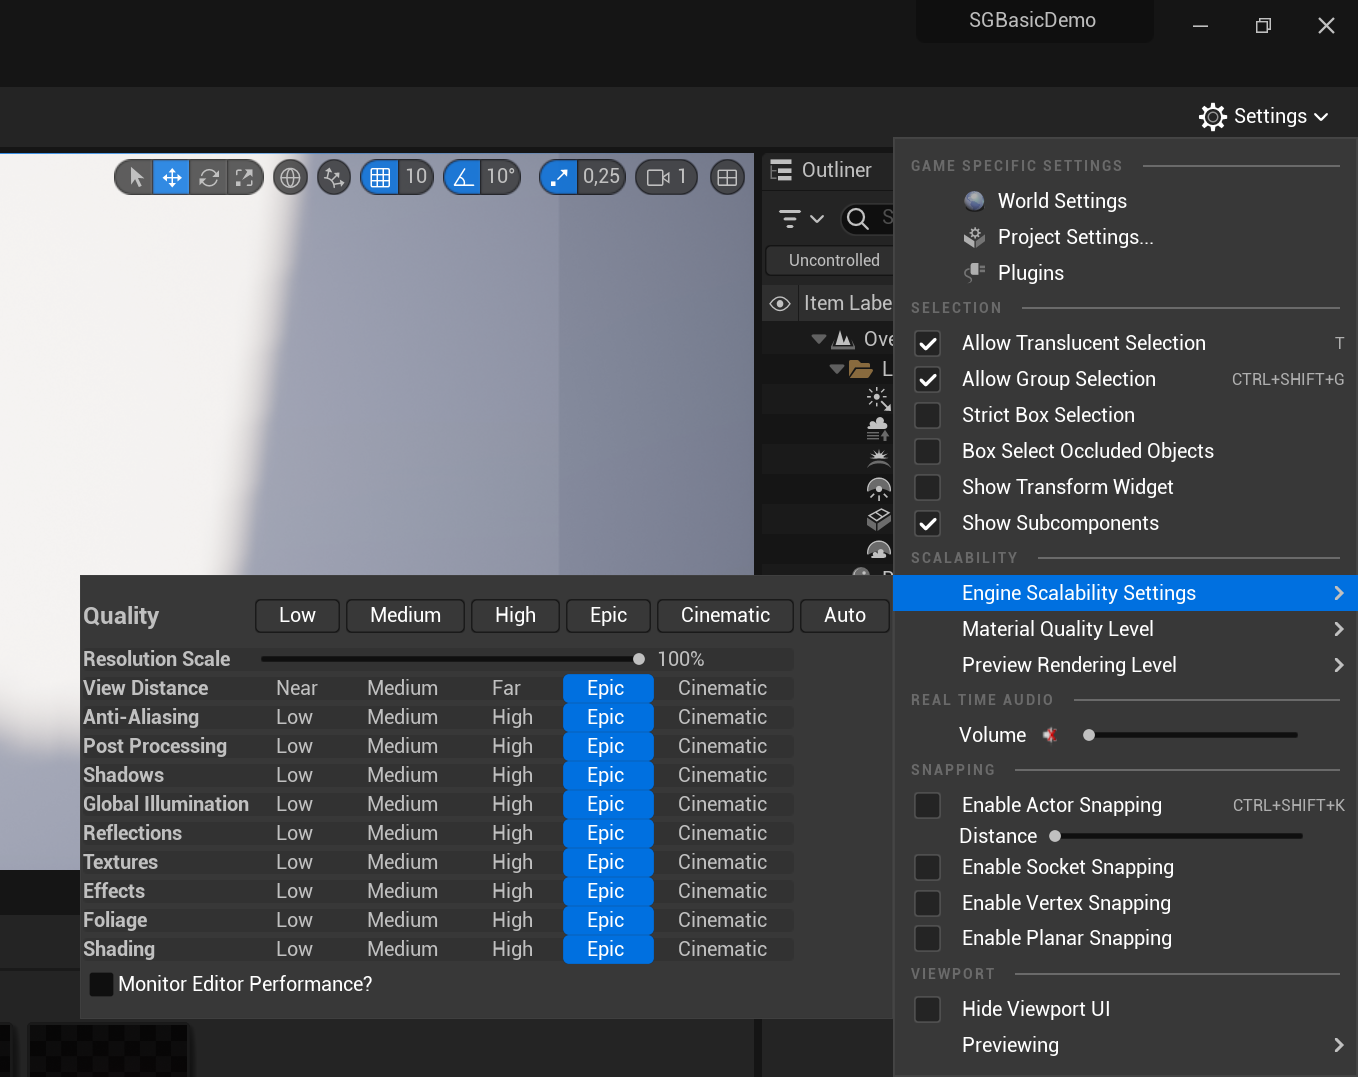
Note
The SenseGlove Unreal Engine Plugin includes specialized console commands that allow you to switch between different Engine Scalability Settings on the fly. Please note that these commands require you to set up SGGameInstance and
SGGameUserSettings.
In order to switch between various Engine Scalability Settings, you can use the Get Game User Settings Blueprint function and then cast it to SGGameInstance.
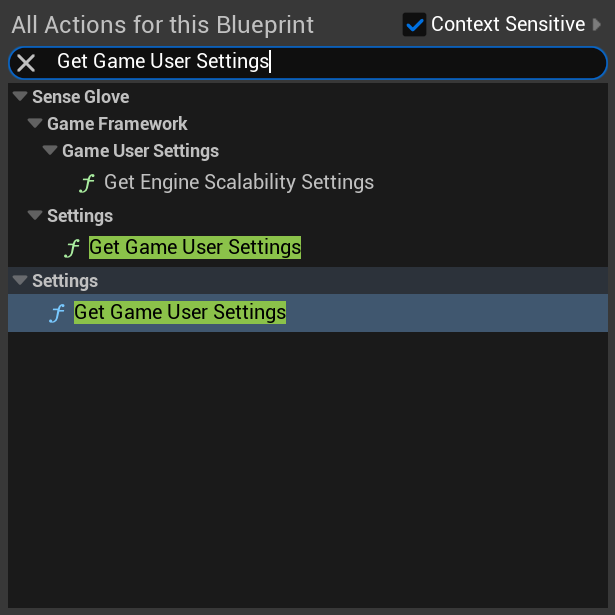
Important
Unreal Engine's default Blueprint functions only allow you to set Engine Scalability Settings to
LoworEpic. To access the full range of settings,SGGameUserSettingsextends Blueprint access to all Engine Scalability Settings and includes hardware benchmarking to detect the optimal settings. Therefore, it's essential to makeSGGameUserSettingsor a subclass of it the default Game User Settings class to utilize all these features.
The following Blueprint code from the SGBasicDemo-OpenXR example scene demonstrates how to bind numeric keys 1 to 5 to set various Engine Scalability Settings, and key 0 to utilize hardware benchmarking to determine the optimal Engine Scalability Settings:
0: Use hardware-benchmarking to determine the optimal Engine Scalability Settings.1: Set Engine Scalability Settings toLow.2: Set Engine Scalability Settings toMedium.3: Set Engine Scalability Settings toHigh.4: Set Engine Scalability Settings toEpic.5: Set Engine Scalability Settings toCinematic.
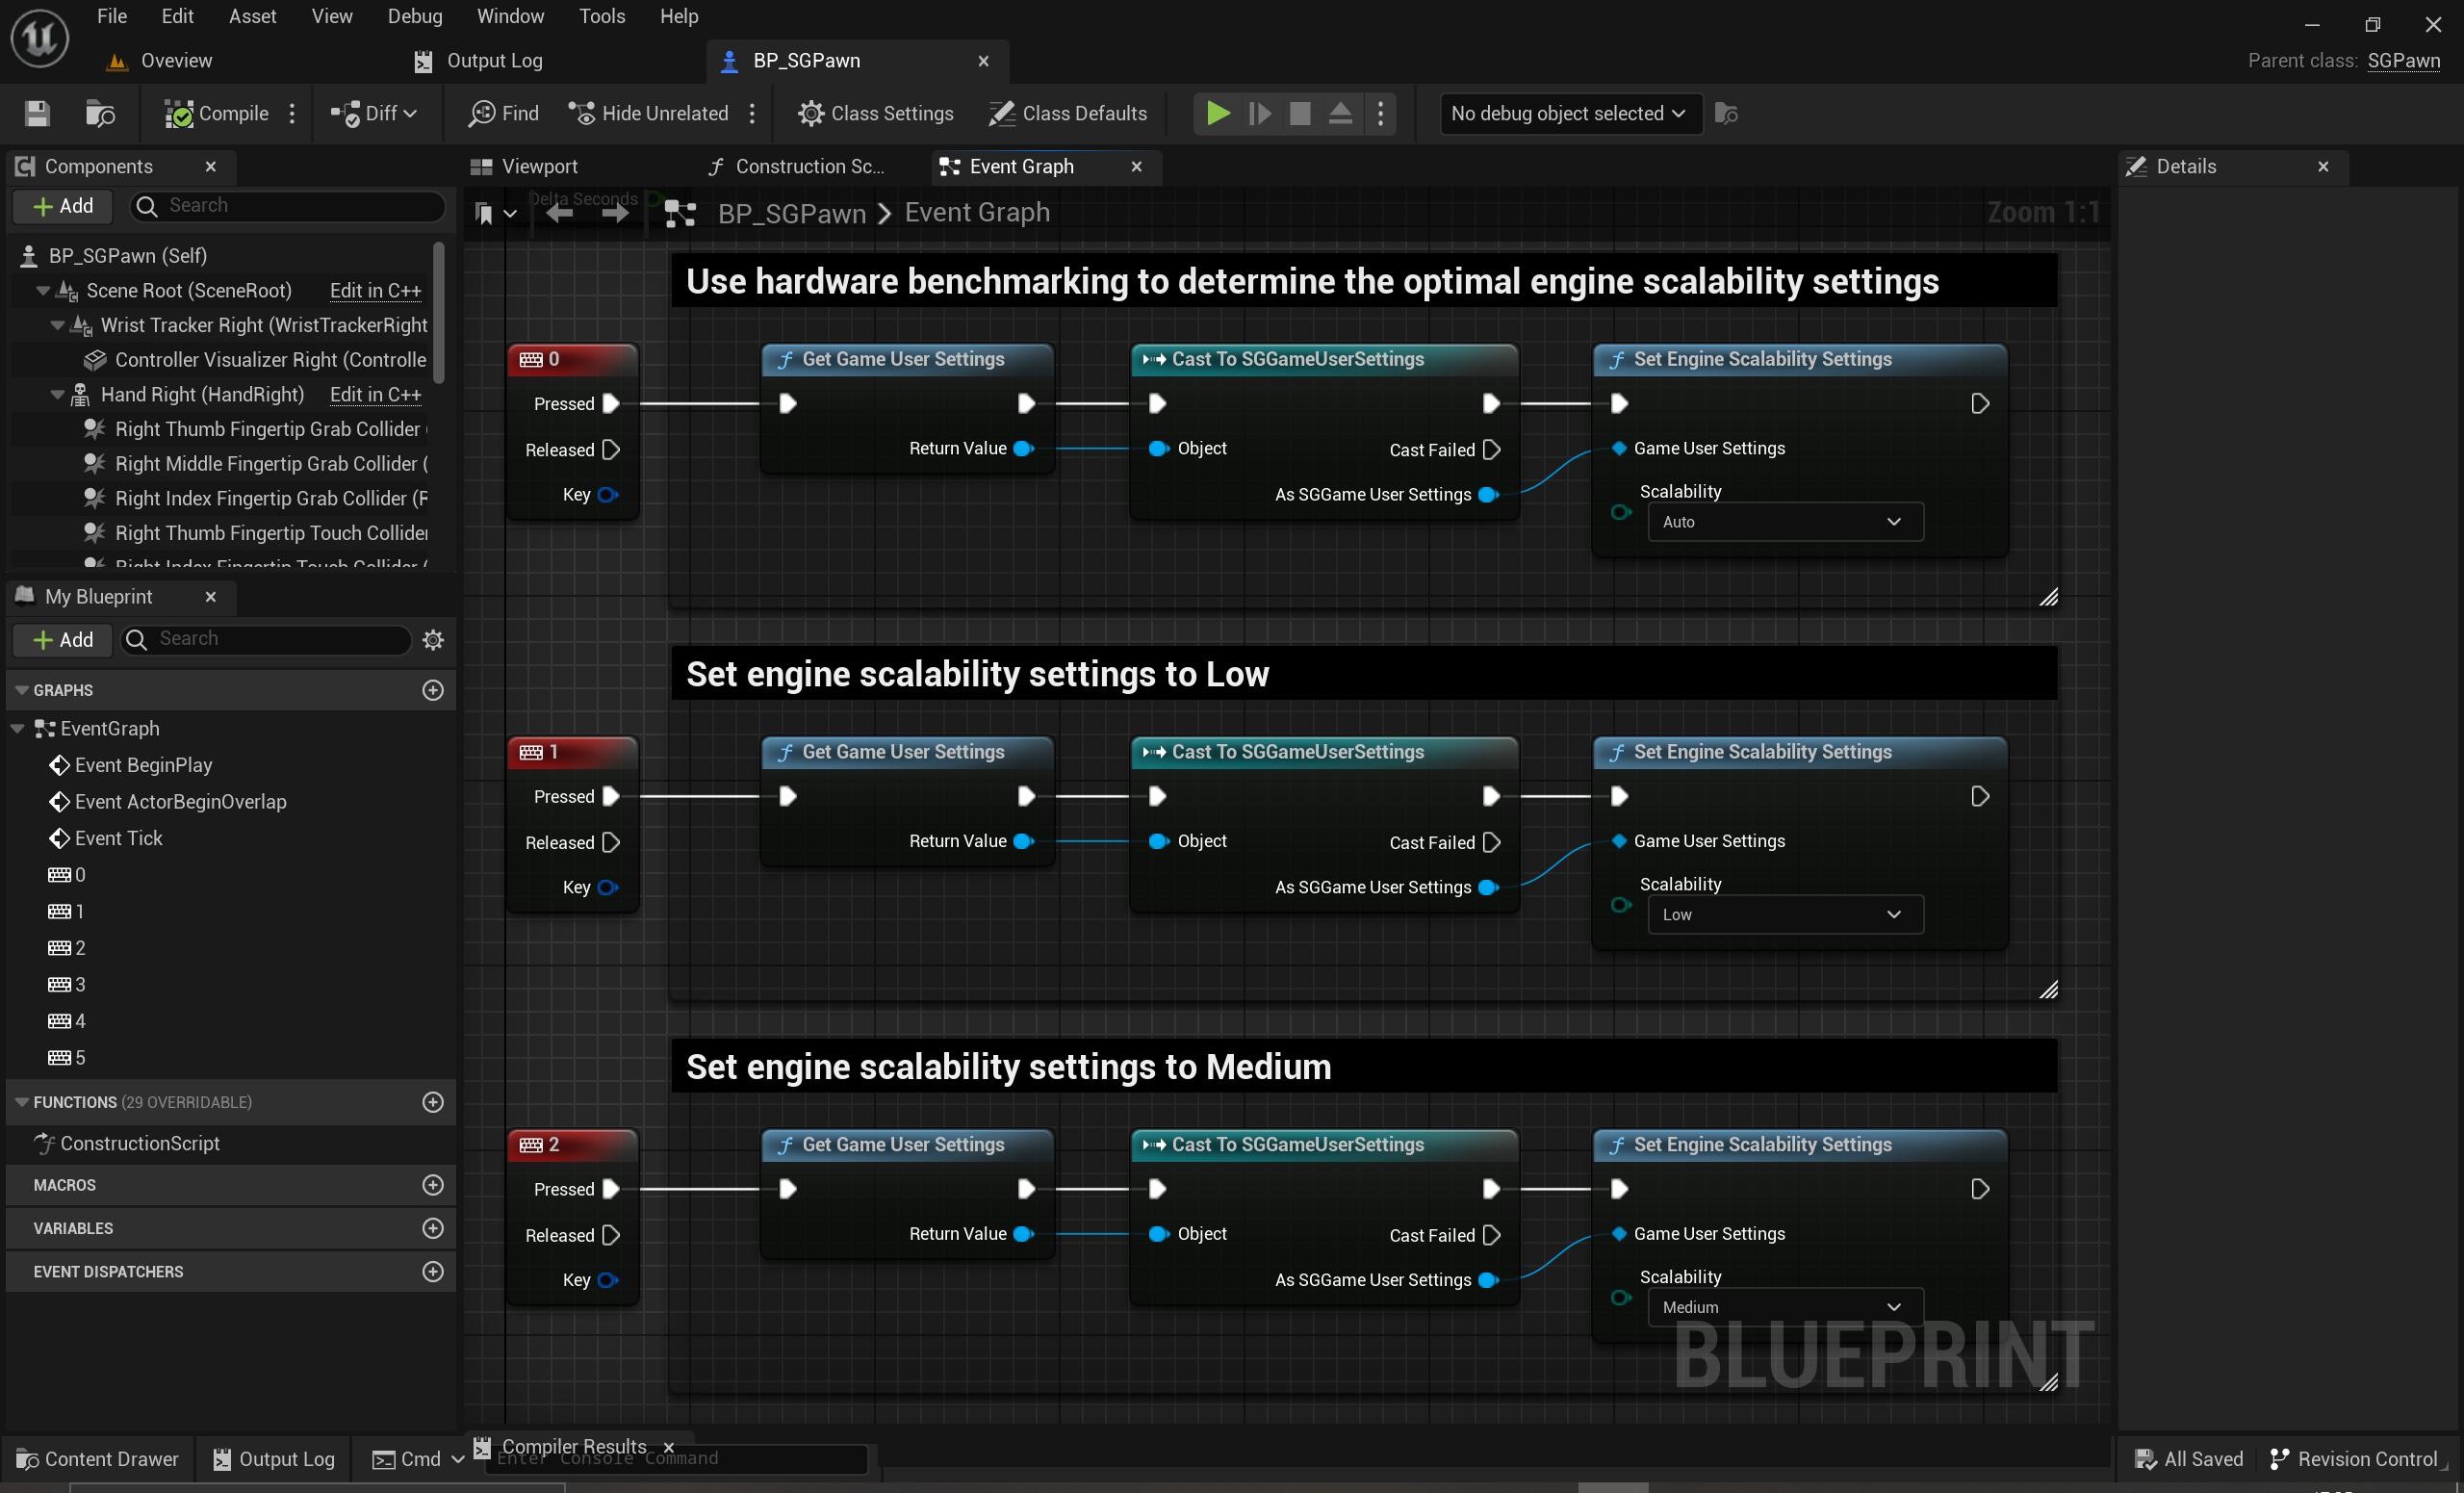
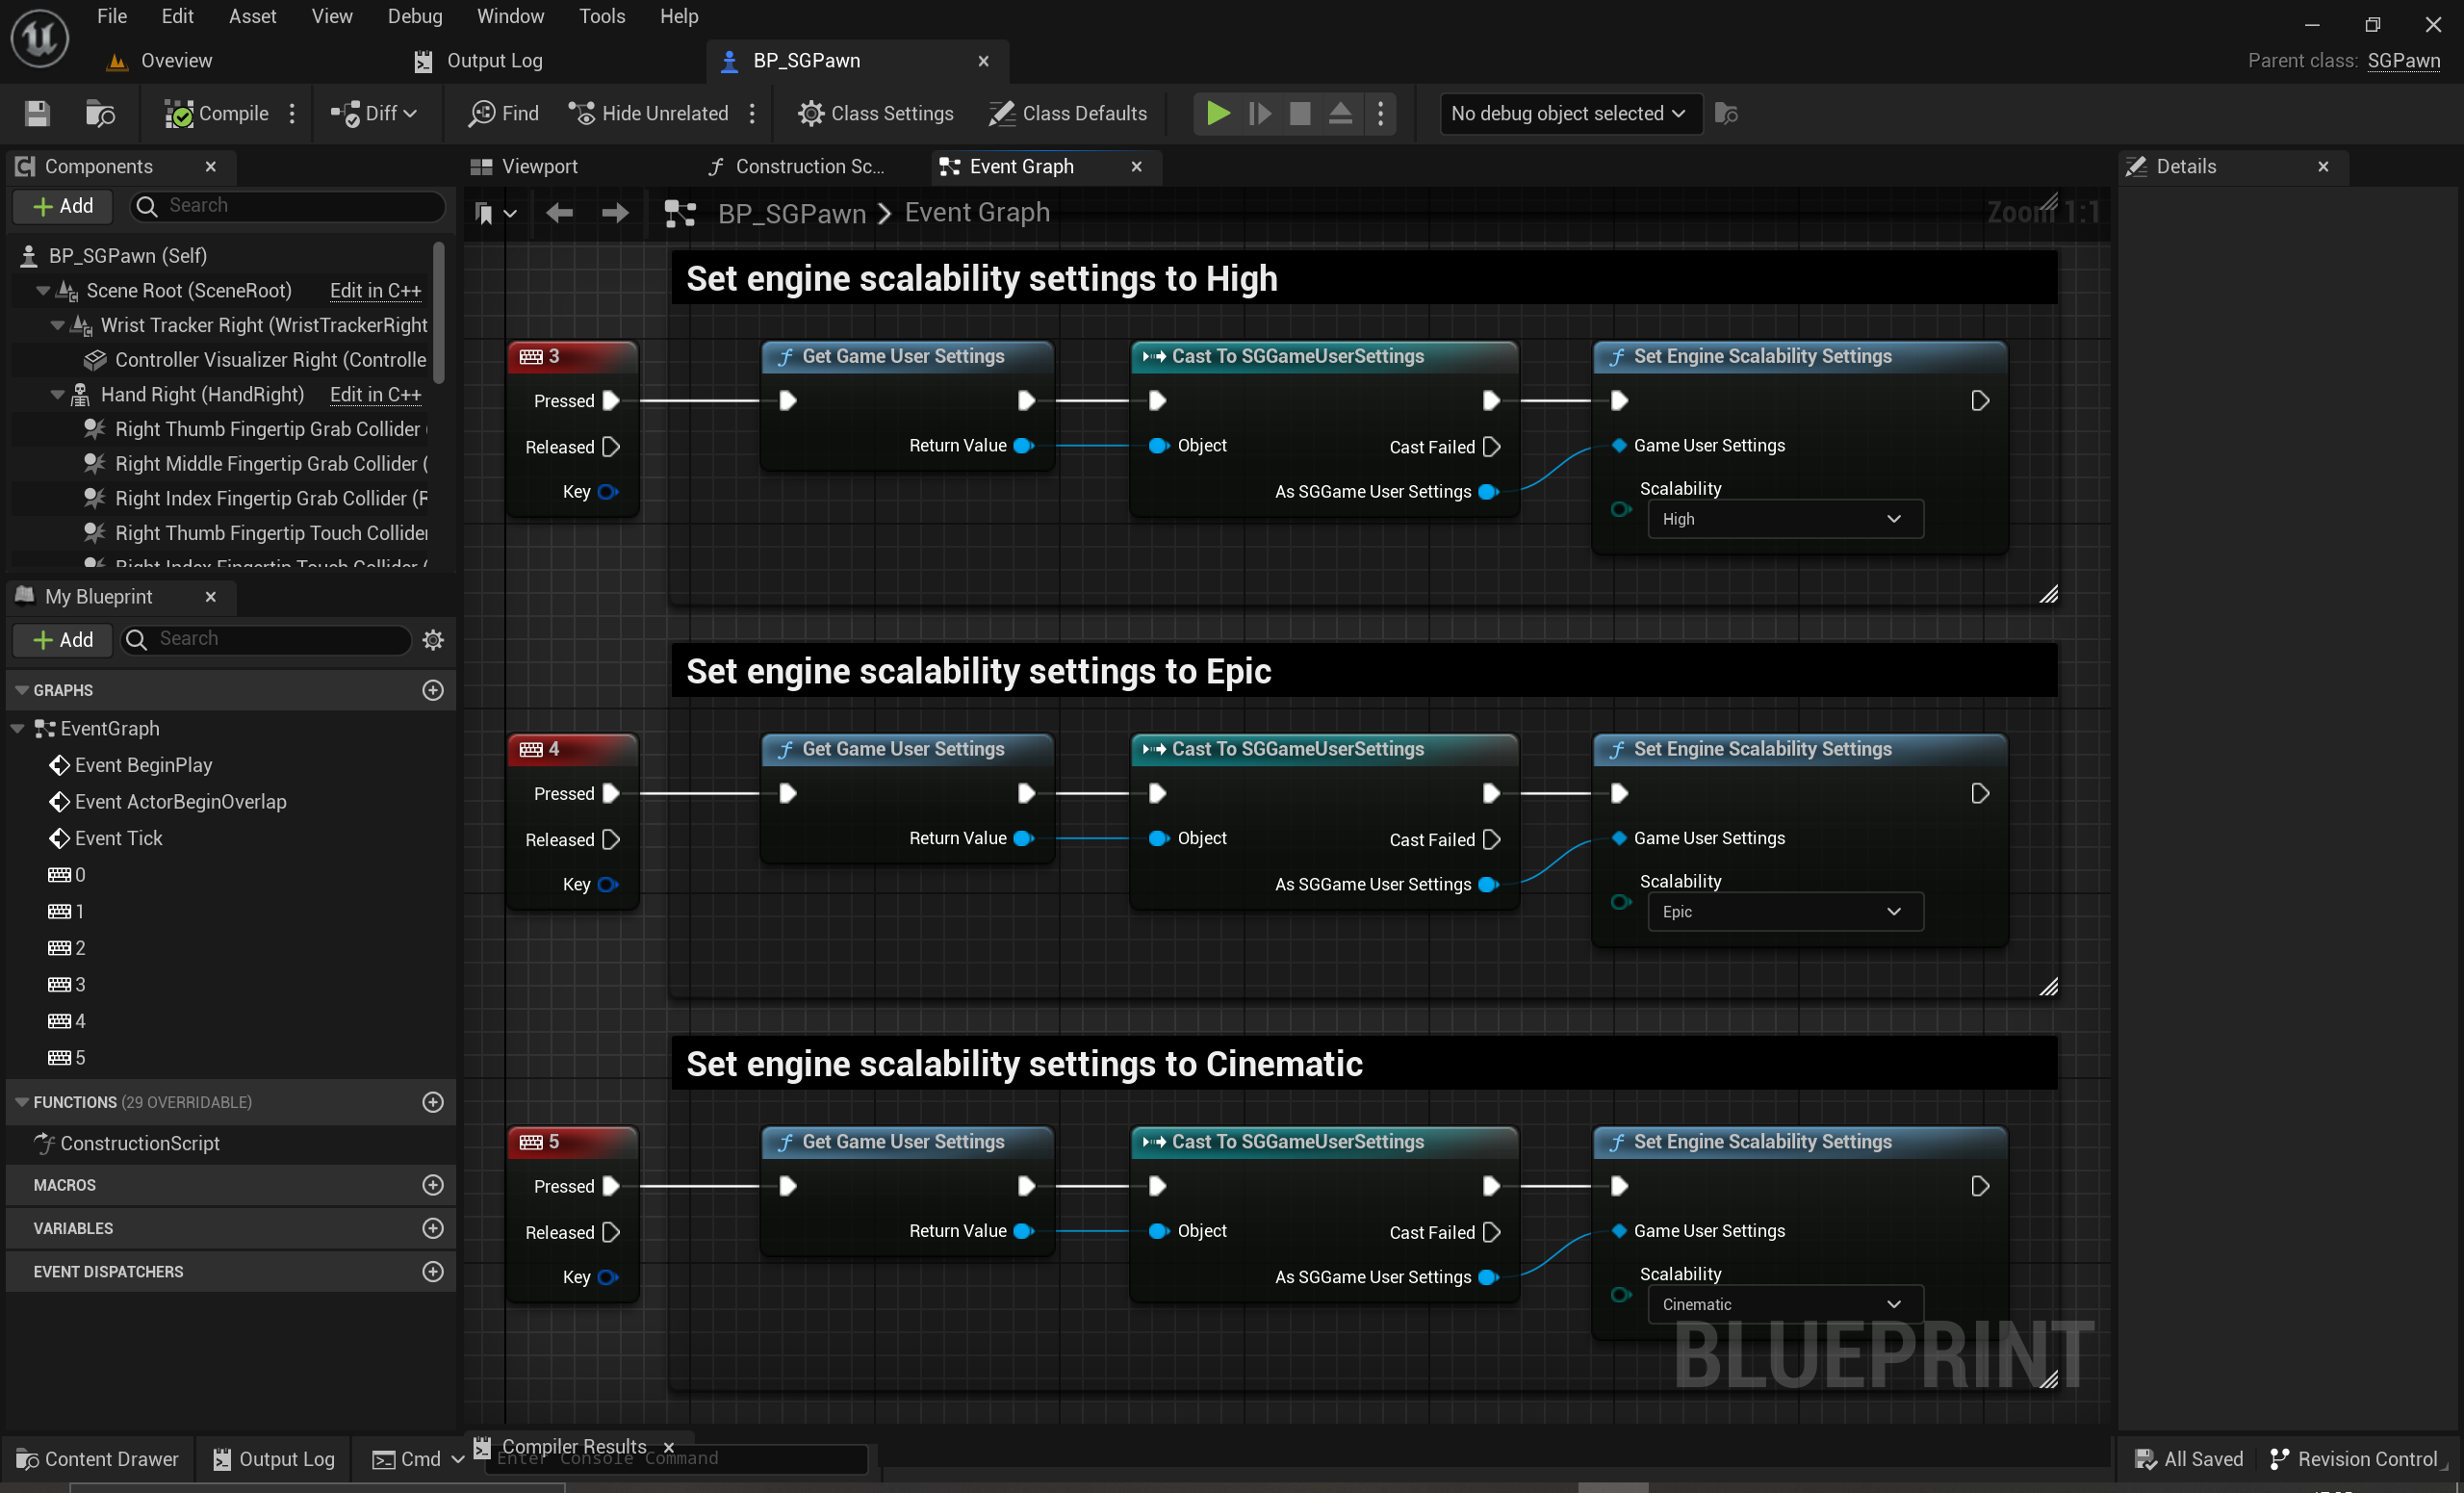
Tip
The SGBasicDemo-OpenXR includes an example 3D widget actor that displays the current FPS and Engine Scalability Settings. This widget can be placed within a VR scene and is located in
All > Content > Blueprints > UI > BP_FPS3DWidget. The underlying UMG widget can be found atAll > Content > Blueprints > UI > WB_FPSwithin the Content Browser for the SGBasicDemo-OpenXR example scene.
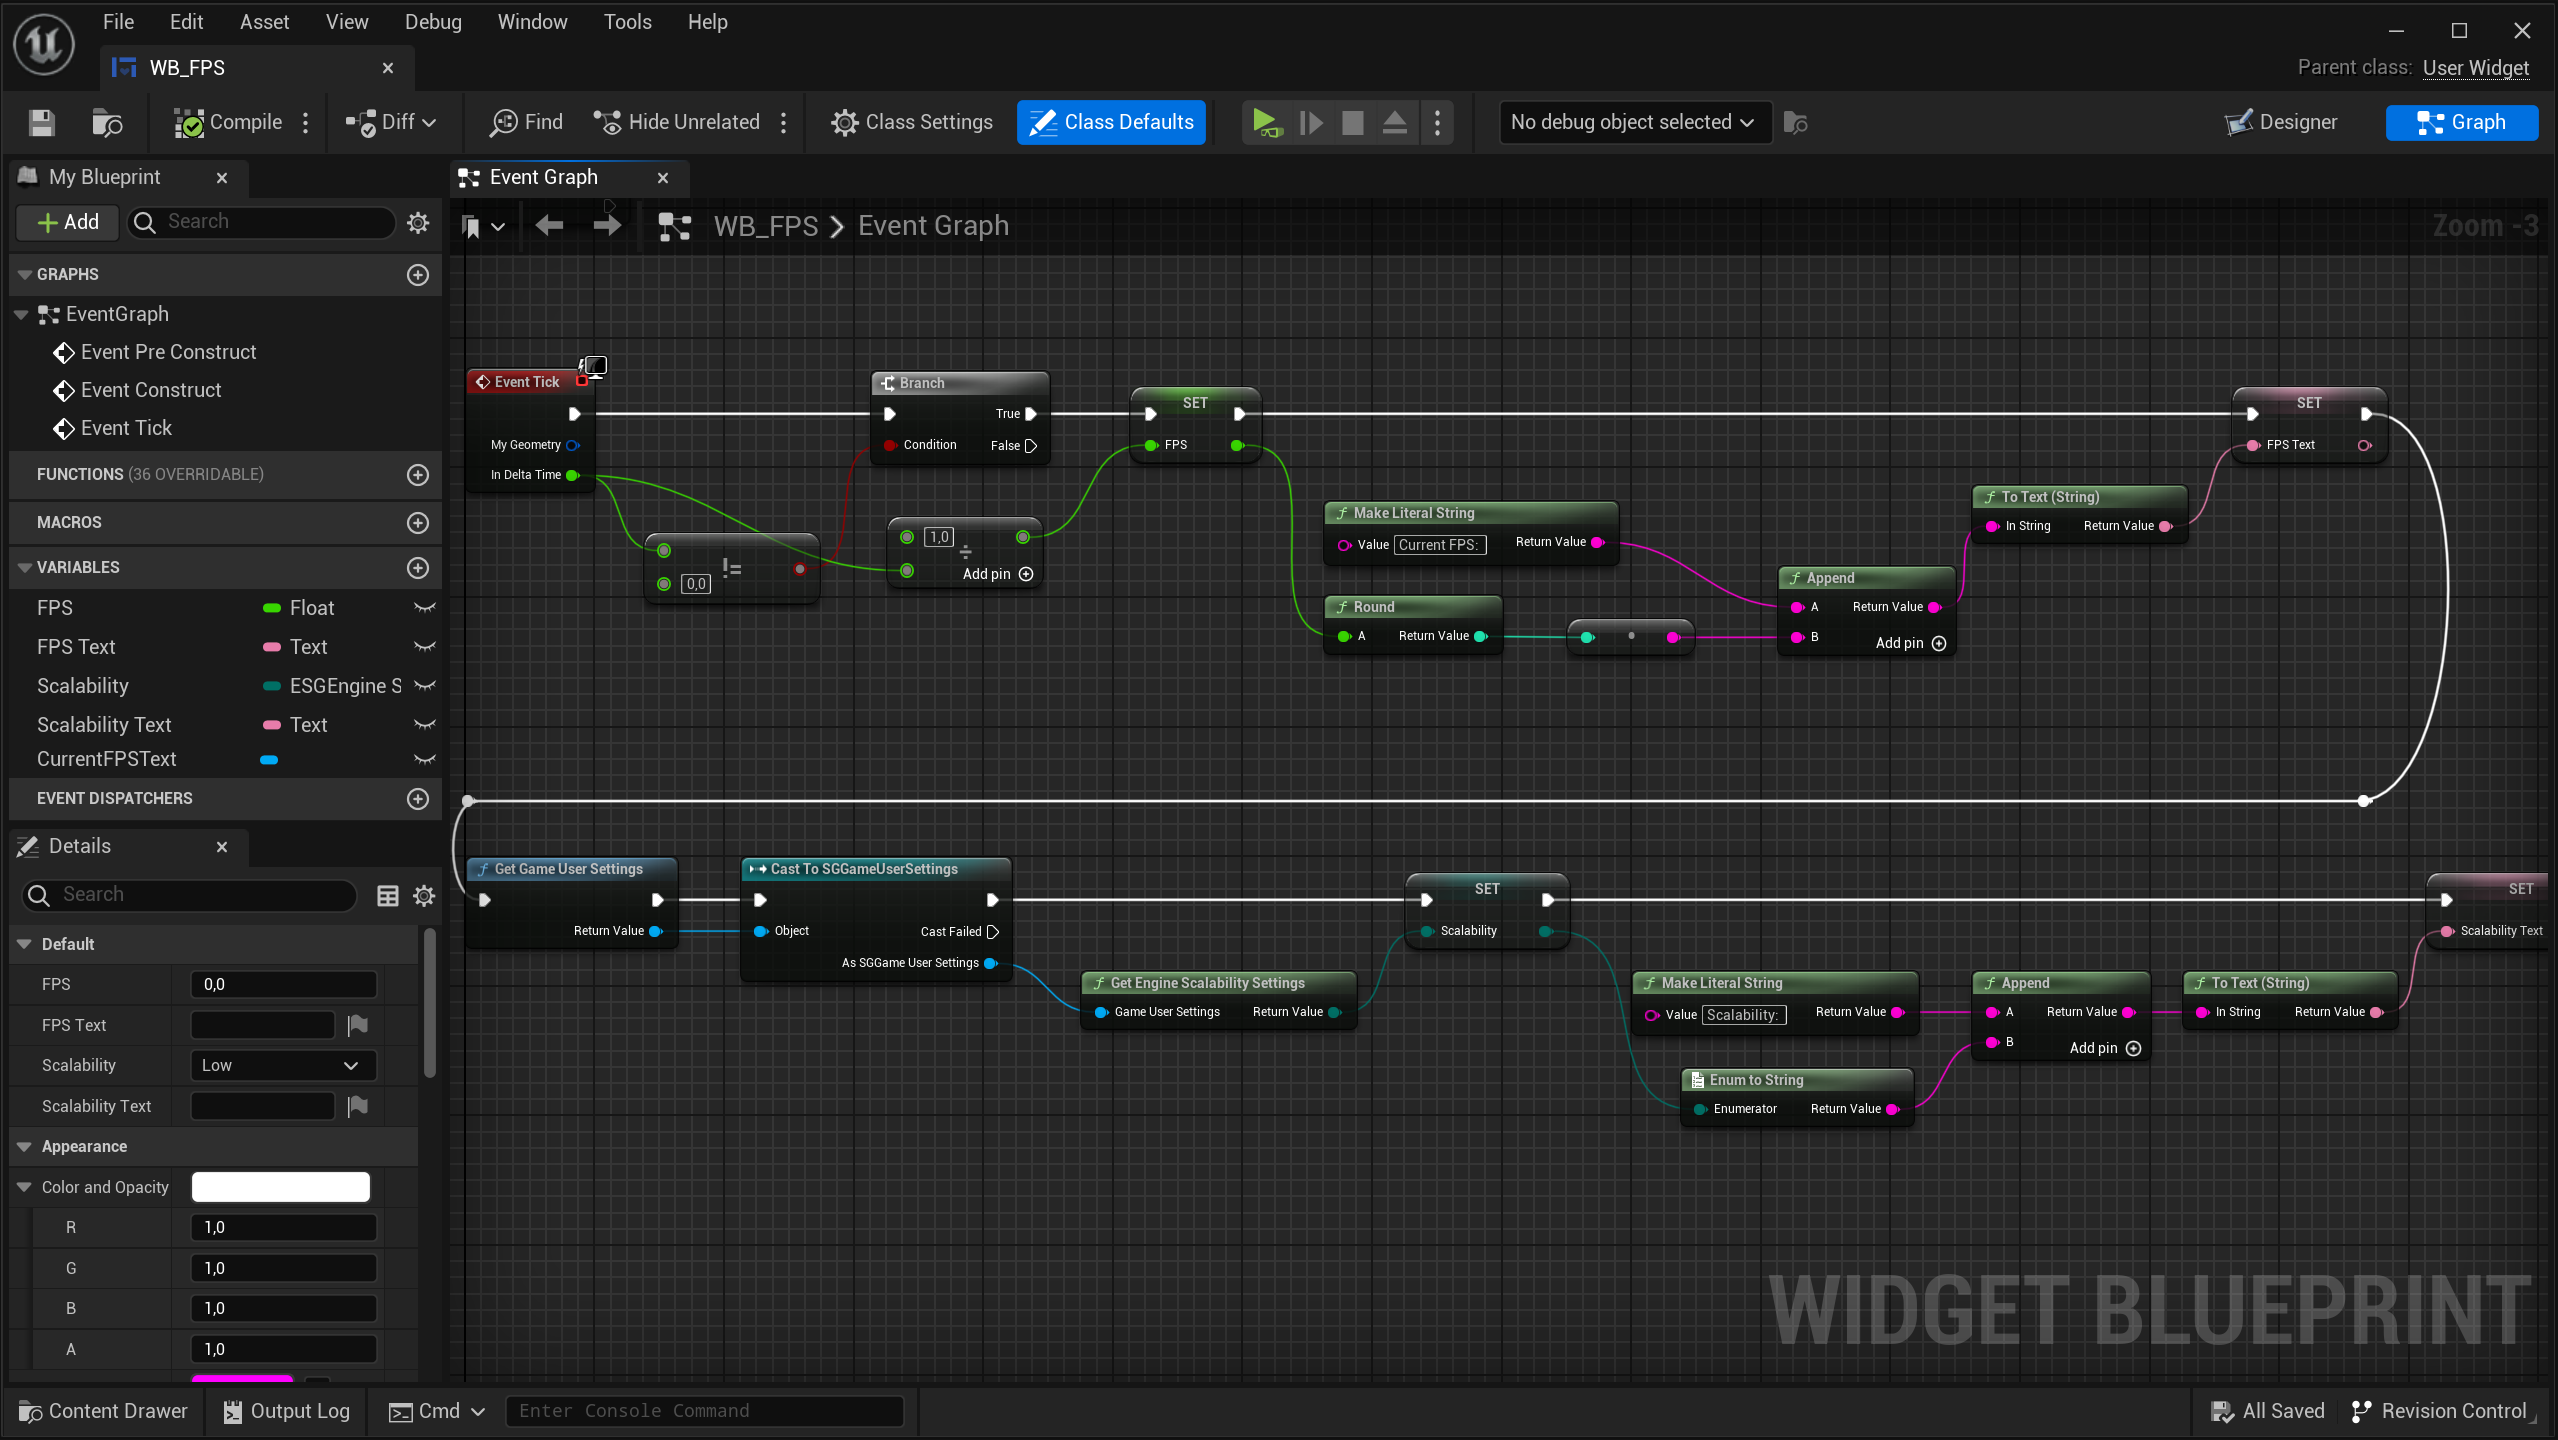
Optimizing Unreal Projects for Mobile
We have the SGBasicDemo-OpenXR project, which has been optimized for mobile. You can explore the project configuration by reviewing the settings inside the Config folder and compare them with your own project settings. In addition, here are some crucial guidelines and settings that you may want to adjust for further optimization:
General Rendering Settings
Forward Shading: Enable Forward Shading for better performance. It’s more efficient on mobile platforms.
Mobile HDR: Disable this setting. Mobile HDR can significantly affect performance, especially on lower-end devices.
Instanced Stereo: Enable this setting. It is a rendering technique used in Unreal Engine primarily for virtual reality (VR) applications. Its main purpose is to optimize the rendering process when creating VR experiences by reducing the workload associated with rendering two slightly different images for each eye.

Mobile Multi-View: Enable this setting. It is a rendering feature in Unreal Engine designed to optimize the performance of Virtual Reality (VR) applications on mobile devices, particularly when using VR platforms like Google Daydream or Samsung Gear VR. It is similar in concept to Instanced Stereo, but specifically optimized for mobile hardware.

Mobile Anti-Aliasing Method: Use FXAA (Fast Approximate Anti-Aliasing) or MSAA (Multisample Anti-Aliasing). MSAA is often preferred for mobile as it gives better visual quality without a huge performance hit.

Reflection Capture Resolution: Reduce this value (e.g., 128 or 256) to decrease the memory usage.
Texture Settings
Enable virtual texture support: Disable this setting.
Texture Streaming: Enable texture streaming to ensure textures load progressively, which helps in reducing memory usage.
Texture Quality: Lower the overall texture quality to Medium or Low depending on the target device capabilities.
Texture Compression: Use ASTC compression for Android to ensure the textures are optimized for mobile devices.
Lighting Settings
Use Static Lighting: Prefer static lighting over dynamic lighting for better performance.
Lightmap Resolution: Use a lower lightmap resolution (e.g., 32 or 64) for mobile to reduce memory usage.
Dynamic Shadows: Disable or minimize the use of dynamic shadows. If required, use CSM (Cascaded Shadow Maps) with low resolution and distance.
Distance Field Shadows/Ambient Occlusion: Disable these features as they are costly on mobile platforms.
Post-Processing Settings
Bloom, Lens Flares, and Auto Exposure: Minimize or disable these effects as they can be performance-intensive.

Screen Space Reflections: Disable this setting as it is costly in terms of performance on mobile devices.
Motion Blur: Disable this feature to save on processing power.

Materials and Shaders
Material Complexity: Use simple materials with few instructions and limit the number of textures and shader nodes.
Specular Highlights: Consider reducing or disabling specular highlights on materials to save on performance.
LOD (Level of Detail) Models: Ensure that LODs are set up correctly for all models, with appropriate reduction in polygon count for distant objects.
Level of Detail (LOD) Settings
Mesh LODs: Configure LODs for all meshes to reduce polygon count at distances.
Screen Size: Adjust screen size settings for LODs to ensure they switch at appropriate distances for mobile screens.
Engine Scalability Settings
Resolution Scale: Lower the resolution scale (e.g., 70% or 80%) to improve performance while maintaining visual quality.
View Distance: Set to Medium or Low to reduce the amount of detail rendered at long distances.
Shadows: Set to Low or Off for better performance.
Textures: Set to Medium or Low depending on the device’s capabilities.
Effects: Set to Low to reduce the complexity of visual effects.
Note
See Game User Settings and Engine Scalability Settings for more details.
Physics and Collision
Physics Simulation: Limit the use of physics simulation where possible, as it can be expensive on mobile devices.
Collision Complexity: Use simple collision meshes instead of complex ones to improve performance.
Audio Settings
Sample Rate: Lower the sample rate to reduce memory usage and processing load.
Number of Audio Channels: Limit the number of audio channels used in the project to reduce CPU usage.
Rendering API
Vulkan vs OpenGL ES: Test your project with both Vulkan and OpenGL ES to see which provides better performance on your target devices. Vulkan often offers better performance but may not be supported on all devices.
Culling
Frustum Culling: Ensure that frustum culling is enabled to avoid rendering objects outside of the camera’s view.
Occlusion Culling: Enable occlusion culling to avoid rendering objects that are not visible due to being blocked by other objects.
Third-Party Tutorials: Optimizing Your Project for Higher FPS
Optimizing Unreal Engine VR Projects for Higher Framerates (Meta Quest, HTC VIVE, FFR, ETFR, NVIDIA DLSS, AMD FSR, and Intel XeSS Tips Included!)
This beginner-friendly tutorial, covers how to significantly boost the performance of your Unreal Engine VR projects, whether you're building for standalone (mobile) or PCVR (desktop) on devices such as Meta Quest, HTC VIVE, Varjo, or Valve Index.
It covers step-by-step how to:
- Convert a regular project into a VR-ready experience.
- Optimize for both standalone (Android) and PCVR (Windows) platforms.
- Tweak key rendering, lighting, and texture settings for smoother gameplay.
- Configure Meta XR and HTC VIVE OpenXR plugins to fine-tune settings for the best performance possible.
- Utilize and fine-tune engine scalability settings.
- Explore powerful optimization features like DLSS, FSR, XeSS, and Foveated Rendering
Even if you’re new to VR development, this guide breaks it down with visuals, clear examples, and actionable tips to take your framerate from sluggish to silky smooth.
Safe and Reliable Glove Access in Blueprint
Since the Blueprint API uses the underlying C++ API to access the SenseGlove hardware, it often has to deal with C++ pointers. Those who are familiar with C++ and in particular with the Unreal Engine UObject Garbage Collection System are aware that:
- As a general rule of thumb, a pointer should be validated before dereferenced, meaning before accessing the pointer a
NULLcheck should be performed, otherwise if the pointer isNULLthe program is going to crash upon access. - Unreal implements a garbage collection scheme whereby UObjects that are no longer referenced or have been explicitly flagged for destruction will be cleaned up at regular intervals. The engine builds a reference graph to determine which UObjects are still in use and which ones are orphaned. The ones that are orphaned will be evaluated to
NULLon the next GC cycle and their allocated memory will be released. Hence,NULLchecks on UObjects are always mandatory.
Glove objects inside the SenseGlove Unreal Engine Plugin, utilize the UObject system, and since communication for Nova gloves happens over SenseCom and the Bluetooth protocol, and also the gloves are running on battery, there's always the possibility for a glove variable to become NULL and therefore invalidated when the glove hardware for any reason is not accessible.
The recommended way to work with a glove instance without any performance penalty, and in a safe manner in Blueprint is:
- Cache the glove instance inside a global variable if it passes certain tests so that you don't have to perform all those checks on every access. This usually could happen inside the
Tickfunction. - The first check inside the
Tickfunction is to check whether the cached glove instance is valid. If it's valid we continue to the next step, if not, we ask the API for a new glove instance. - If the glove instance is valid, then it's best to perform a connectivity check next. If the glove is connected we don't have to do anything else in regards to obtaining a new glove instance and caching it. If however the glove is not connected, we might ask the API for a new glove instance.
- If any of the above steps fail, then we can actually ask the API for a new glove instance, and if the result is successful we're going to cache the new glove instance.
- From here on, anywhere else inside your code, whenever you need to access the glove data or perform an operation like for example sending or stopping haptics you always perform a validity check and only proceed when the glove instance is valid. This way you will always ensure you are accessing the glove instances in a safe and reliable manner, thus avoiding any unexpected behaviors or crashes.
The following Blueprint examples implement the above approach and also demonstrate good and bad glove instance accesses:
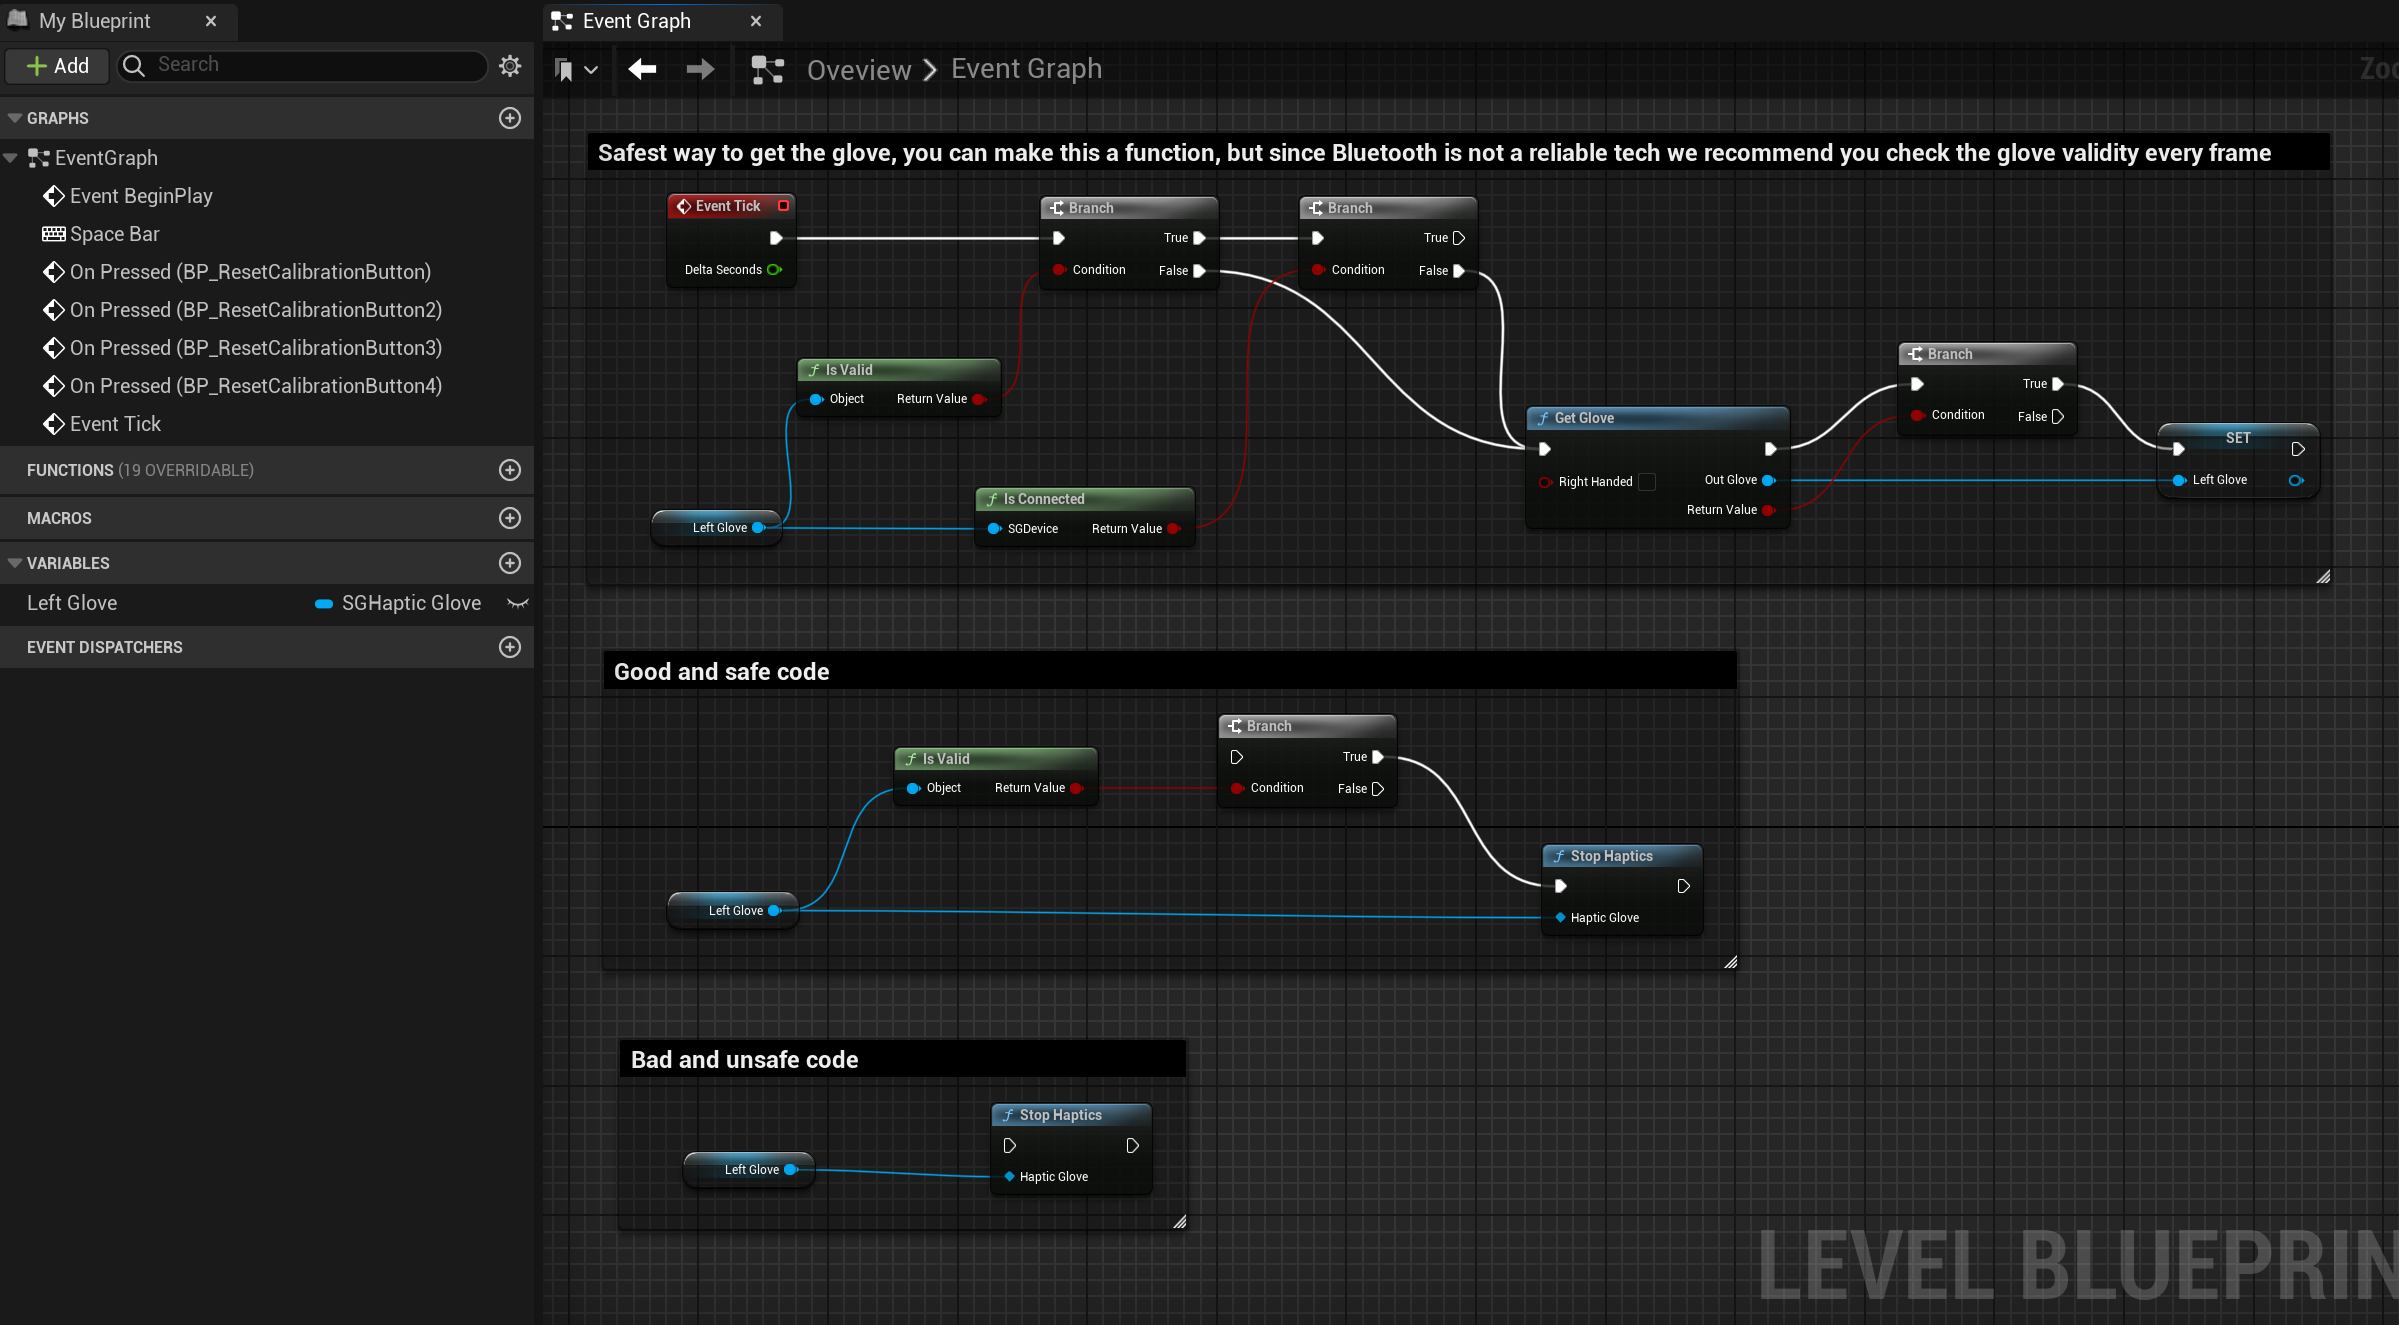
OpenXR
The SenseGlove Unreal Engine Plugin has provided OpenXR-compatible hand tracking by implementing XR_EXT_hand_tracking since v2.1.0.
Typically a user does not need to know anything about OpenXR to use the plugin, so this section of the handbook is for advanced users who are looking for a way to directly consume the OpenXR data coming directly from either a SenseGlove device or if enabled in the plugin settings from hand-tracking.
Since the SenseGlove Unreal Engine Plugin registers itself as an OpenXRHandTracking motion controller device it becomes a hand-tracking provider for Unreal Engine, thus the OpenXR data from SenseGlove could always be retrieved from the Unreal Engine's IXTrackingSystem with one caveat. The caveat is if another OpenXR-compatible hand-tracking plugin, e.g. Epic's own OpenXRHandTracking, is enabled simultaneously it's not guaranteed that the FXRHandTrackingState structs retrieved from the IXTrackingSystem::GetMotionControllerData() and IXTrackingSystem::GetHandTrackingState() methods are coming from SenseGlove, as these methods return the first hand-tracking plugin they could find. Thus, SenseGlove provides its own implementation of GetMotionControllerData() and GetHandTrackingState() which guarantee the retrieved FXRHandTrackingState are coming from the SenseGlove Unreal Engine Plugin; and this is the preferred way to that.
Note
In order to retrieve the latest
FXRHandTrackingStateavailable, The SenseGlove Unreal Engine Plugin provides an alternative implementation forIXTrackingSystem::GetMotionControllerState()as well . However, since this method does not rely on theOpenXRHandTrackingprovider, it may become redundant. As a result, we might consider removing this functionality in future updates in favor of the one that Unreal Engine provides.
In the next sections we'll see:
-
How we can directly consume the
FXRHandTrackingStateon UE5.5to draw and animate debug virtual hands in both Blueprint and C++. -
The Consuming OpenXR Hand-Tracking Data tutorial series provides a comprehensive introduction to virtual reality, OpenXR hand-tracking, and gesture detection in Unreal Engine. Additionally, this tutorial series covers procedural virtual hand mesh animation using the OpenXR hand-tracking data.
Consuming FXRHandTrackingState
Taking a closer look at the FXRHandTrackingState declaration inside the Unreal Engine's HeadMountedDisplay module at Engine/Source/Runtime/HeadMountedDisplay/Public/HeadMountedDisplayTypes.h, figuring out the data structure might not seem very straightforward:
USTRUCT(BlueprintType)
struct FXRHandTrackingState
{
    GENERATED_USTRUCT_BODY();

    // The state is valid if poses have ever been provided.
    UPROPERTY(BlueprintReadOnly, Category = "XR")
    bool bValid = false;
    UPROPERTY(BlueprintReadOnly, Category = "XR")
    FName DeviceName;
    UPROPERTY(BlueprintReadOnly, Category = "XR")
    FGuid ApplicationInstanceID;

    UPROPERTY(BlueprintReadOnly, Category = "XR")
    EXRSpaceType XRSpaceType = EXRSpaceType::UnrealWorldSpace;

    UPROPERTY(BlueprintReadOnly, Category = "XR")
    EControllerHand Hand = EControllerHand::Left;

    UPROPERTY(BlueprintReadOnly, Category = "XR")
    ETrackingStatus TrackingStatus = ETrackingStatus::NotTracked;

    // The indices of this array are the values of EHandKeypoint (Palm, Wrist, ThumbMetacarpal, etc).
    UPROPERTY(BlueprintReadOnly, Category = "XR")
    TArray<FVector> HandKeyLocations;

    // The indices of this array are the values of EHandKeypoint (Palm, Wrist, ThumbMetacarpal, etc).
    UPROPERTY(BlueprintReadOnly, Category = "XR")
    TArray<FQuat> HandKeyRotations;

    // The indices of this array are the values of EHandKeypoint (Palm, Wrist, ThumbMetacarpal, etc).
    UPROPERTY(BlueprintReadOnly, Category = "XR")
    TArray<float> HandKeyRadii;
};
Which on the Blueprint side it looks like this:
![]()
But, fear not, we've got you covered!
FXRHandTrackingState in Unreal Engine
FXRHandTrackingState is a structure in Unreal Engine designed to hold detailed information about the state of a hand-tracking device at a given moment. This structure is essential for handling hand-tracking inputs in virtual reality (VR) applications, providing the necessary data to accurately track and represent the user's hand movements and actions within the virtual environment.
Structure Members of FXRHandTrackingState
-
bValid
- Description: A boolean flag indicating whether the data is valid or not.
- Usage: This is used to check if the motion controller data is correctly initialized and can be used for further processing.
-
DeviceName
- Type:
FName - Description: The name of the device.
- Usage: Identifies which device the data is coming from, useful when multiple devices are in use.
- Type:
-
ApplicationInstanceID
- Type:
FString - Description: A unique identifier for the application instance.
- Usage: Helps in differentiating data from different instances of an application, ensuring the correct instance processes the data.
- Type:
-
XRSpaceType
- Type:
EXRSpaceType - Description: Enum specifying the type of XR space being used (e.g., unreal world or tracking space).
- Usage: Specifies the coordinate system the XR Device is tracking itself in.
- Type:
-
Hand
- Type:
EControllerHand - Description: Enum indicating which hand is being tracked (left or right).
- Usage: Helps identify whether the hand-tracking data pertains to the left or right hand, essential for hand-specific actions or interactions.
- Type:
-
TrackingStatus
- Type:
EXRTrackingStatus - Description: Enum indicating the tracking status of the hand-tracking device.
- Usage: Shows whether the hand-tracking device is being tracked accurately, with possible statuses like
Tracked,NotTracked, etc.
- Type:
-
HandKeyLocations
- Type:
TArray<FVector> - Description: An array of vectors representing key locations of the hand.
- Usage: Provides detailed locations of key points on the hand, useful for precise hand-tracking and interaction.
- Type:
-
HandKeyRotations
- Type:
TArray<FQuat> - Description: An array of quaternions representing key rotations of the hand.
- Usage: Complements the hand key locations with rotational data, ensuring accurate representation of hand movements.
- Type:
-
HandKeyRadii
- Type:
TArray<float> - Description: An array of floats representing the radii of key points of the hand.
- Usage: Gives the size of the hand key points, aiding in collision detection and interaction fidelity.
- Type:
Organization of FXRHandTrackingState
The structure is organized to encapsulate all relevant data needed for hand-tracking in a coherent and accessible manner. Boolean flag bValid provides quick checks on the state of the controller data. Identifiers DeviceName and ApplicationInstanceID ensure the correct association of data. Arrays HandKeyLocations, HandKeyRotations, and HandKeyRadii allow detailed hand-tracking, which is critical for immersive VR experiences. Lastly, the tracking status TrackingStatus informs the system of the reliability of the data being processed and whether the hands are actively being tracked or they are inactive at the moment.
Processing the Data for Drawing and Animating a Virtual Hand
In order to draw and animate a virtual hand in real-time whether the data is coming from hand-tracking or a SenseGlove device, we could consume the data from the HandKeyLocations and HandKeyRotations fields of the FXRHandTrackingState struct.
Both HandKeyLocations and HandKeyRotations contain 26 elements as defined by OpenXR's XR_HAND_JOINT_COUNT_EXT and XrHandJointLocationsEXT, etc.
Unreal Engine also provides an enum called EHandKeypoint naming the 26 joints, and the equivalent of XR_HAND_JOINT_COUNT_EXT as EHandKeypointCount inside Engine/Source/Runtime/HeadMountedDisplay/Public/HeadMountedDisplayTypes.h as follows:
/**
 * Transforms that are tracked on the hand.
 * Matches the enums from WMR to make it a direct mapping
 */
UENUM(BlueprintType)
enum class EHandKeypoint : uint8
{
    Palm,
    Wrist,
    ThumbMetacarpal,
    ThumbProximal,
    ThumbDistal,
    ThumbTip,
    IndexMetacarpal,
    IndexProximal,
    IndexIntermediate,
    IndexDistal,
    IndexTip,
    MiddleMetacarpal,
    MiddleProximal,
    MiddleIntermediate,
    MiddleDistal,
    MiddleTip,
    RingMetacarpal,
    RingProximal,
    RingIntermediate,
    RingDistal,
    RingTip,
    LittleMetacarpal,
    LittleProximal,
    LittleIntermediate,
    LittleDistal,
    LittleTip
};

const int32 EHandKeypointCount = static_cast<int32>(EHandKeypoint::LittleTip) + 1;
So, getting the any joint's location or rotation is as easy as casting the enum value and passing it as the array index.
    FXRHandTrackingState HandTrackingState;
    const bool bGotHandTrackingState = FSGXRTracker::GetHandTrackingState(
        GetWorld(), EXRSpaceType::UnrealWorldSpace, EControllerHand::Left, HandTrackingState);

    // Return if the struct data is invalid!
    if (!bGotHandTrackingState || !HandTrackingState.bValid)
    {
        return;
    }

    // Return if the device is not being tracked!
    if (HandTrackingState.TrackingStatus == ETrackingStatus::NotTracked)
    {
        return;
    }

    // Ensure that HandTrackingState.HandKeyLocations has the location data
    // for 26 joints!
    if (!ensureAlwaysMsgf(HandTrackingState.HandKeyLocations.Num()
                          == EHandKeypointCount,
                          TEXT("Invalid HandKeyLocations count!")))
    {
        return;
    }

    // Ensure that HandTrackingState.HandKeyRotations has the rotation data
    // for 26 joints!
    if (!ensureAlwaysMsgf(HandTrackingState.HandKeyRotations.Num()
                          == EHandKeypointCount,
                          TEXT("Invalid HandKeyRotations count!")))
    {
        return;
    }

    static constexpr int32 PalmIndex = static_cast<int32>(EHandKeypoint::Palm);

    const FVector& PalmLocation{
        HandTrackingState.HandKeyLocations[PalmIndex]
    };
    const FRotator& PalmRotation{
        HandTrackingState.HandKeyRotations[PalmIndex].Rotator()
    };
The equivalent Blueprint code for the above looks something like this:
![]()
OK, now that we've got a glimpse of how the virtual hand's joint data could be processed we are going to draw and animate a virtual hand in both Blueprint and C++ in the upcoming sections.
Consuming FXRHandTrackingState in Blueprint
Before continuing this section, please ensure you've studied the Consuming FXRHandTrackingState section, first.
Drawing and Animating Virtual Hands
-
Create a new Virtual Reality project based the Unreal VR Template.
-
Make sure the SenseGlove UnrealEngine plugin is installed and enabled inside your new project.
![]()
-
You could use either hand-tracking or a SenseGlove device as the input data, or both of the inside the same project. Whether you would like to use hand-tracking or a SenseGlove device, please make sure the required steps are taken for each of those first.
-
You could add the required Blueprint code for drawing virtual hands to either your Level Buleprint or the VRPawn Blueprint Class located at
/Content/VRTemplate/Blueprints/VRPawn. In this guide we are going to add the code to our VRPawn. -
Add a new function named
Draw Handwith an input parameter of typeEController HandnamedHand.
![]()
- Inside this function's event graph add a
Get Hand Tracking Statenode fromSenseGlove > Tracking > XR Tracker > Get Hand Tracking State.
![]()
- Then connect the functions
Handinput parameter to theGet Hand Tracking State'sHandinput and right-click on theOutHandTrackingStateparameter and use theBreak XRHandTrackingStatenode to break the struct to it's fields.
![]()
- After this, we need to perform data validation by checking the return status of the
Get Hand Tracking Statefunction andFXRHandTrackingState'sValidfield. Then, we check if the hand-tracking device is being tracked and indeed coming from a hand-tracking source. And, finally, we check whether we have the positions and rotations for exactly26joints or not.
![]()
- OK, now it's time to draw the joints! If we check out the SenseGlove Debug module's draw option, we notice there are various ways to draw the debug virtual hand. Drawing a cube or a gizmo per joint, or draw the whole hand all at once by passing the retrieved
FXRHandTrackingStateto theDebugVirtualHand::Drawfunction! But, since the point of this tutorial is to learn how to consume theFXRHandTrackingStatewe ignore the last option. Between the debug cubes or gizmos, we are going to choose the gizmos since they better represent the rotations than the cubes.
![]()
- In the last step inside the
Draw Handfunction, in order to draw a virtual hand with26joints, we have to first iterate through either of theHand Key PositionsorHand Key Rotationsarrays from theFXRHandTrackingStatestruct. Since we made sure both arrays have26elements before we reached this step, it's safe to just iterate over one and use theArray Indexinside aFor Each Loopor aFor Loopto access the position and rotation of every joint. Then we use each arrayGet (a ref)method to access the position and rotation data inside the loop and call theDrawfunction fromSenseGlove > Debug > Gizmoper every joint. Please note that there are twoDrawfunctions and the only difference between the two is that one accepts anFQuatand the other aFRotatorfor itsRotationinput parameter. In this case, we use theFQuatvariant to avoid an extra conversion toFRotator. Also, please adjust theThicknessoption for theSettingsparameter from1.0to0.2, as the default value might be too thick for drawing a joint gizmo.
![]()
- Well, now the full implementation for the
Draw Handfunction insde theVRPawnshould look something like this:
![]()
- Finally, go back to
VRPawn's event graph and the following code to theTickevent. Basically what we do here is call our newly implementedDraw Handtwice, once for each hand.
![]()
- Now, go back to the
VRTemplateMapand use the VR Preview button to run the game. If everything's done correctly, you should be able to see the virtual hands inside your VR simulation.
![]()
Consuming FXRHandTrackingState in C++
Before continuing this section, please ensure you've first studied the Consuming FXRHandTrackingState section.
Drawing and Animating Virtual Hands
-
Create a new Virtual Reality project based the Unreal VR Template.
-
Make sure the SenseGlove UnrealEngine plugin is installed and enabled inside your new project.
![]()
-
You could use either hand-tracking or a SenseGlove device as the input data, or both of the inside the same project. Whether you would like to use hand-tracking or a SenseGlove device, please make sure the required steps are taken for each of those first.
-
From the
Toolsmenu chooseNew C++ class....
![]()
- Choose the Unreal Engine's
APawnclass as the parent class for the new C++ pawn class.
![]()
- Name the new pawn class
DebugPawn.
![]()
-
Since we have created a new C++ class, this converts the current Blueprint VRTemplateMap project to a C++ one. That's why the Unreal Editor will give us a few prompts regarding opening the project in the default IDE and rebuilding the code. It might be simpler to just close the editor, then rebuild the source code inside your favorite IDE, and then start the editor with the converted project again.
-
Find and open the VRPawn Blueprint Class located at
/Content/VRTemplate/Blueprints/VRPawninside the Blueprint Editor and from theFilemenu choose theReparent Blueprintclass.
![]()
- In the new
Reparent blueprintwindow chooseDebugPawnas the new parent.
![]()
- By looking at the
Parent Classlabel located under the Blueprint Editor window control buttons verify that theADebugPawnclass has been set as the new parent.
![]()
- Locate the project's main Build file, in our case
VirtualHandCpp/Source/VirtualHandCpp/VirtualHandCpp.Build.csand add theInputDevice,OpenXRHMD,SenseGloveBuildHacks,SenseGloveDebug,SenseGloveSettings, andSenseGloveTrackingmodules as either a private or public dependency.
// Fill out your copyright notice in the Description page of Project Settings.

using UnrealBuildTool;

public class VirtualHandCpp : ModuleRules
{
    public VirtualHandCpp(ReadOnlyTargetRules Target) : base(Target)
    {
        PCHUsage = PCHUsageMode.UseExplicitOrSharedPCHs;

        PublicDependencyModuleNames.AddRange(new string[] { "Core", "CoreUObject", "Engine", "InputCore" });

        PrivateDependencyModuleNames.AddRange(new string[]
        {
            "InputDevice",
            "OpenXRHMD",
            "SenseGloveBuildHacks",
            "SenseGloveDebug",
            "SenseGloveSettings",
            "SenseGloveTracking"
        });

        // Uncomment if you are using Slate UI
        // PrivateDependencyModuleNames.AddRange(new string[] { "Slate", "SlateCore" });

        // Uncomment if you are using online features
        // PrivateDependencyModuleNames.Add("OnlineSubsystem");

        // To include OnlineSubsystemSteam, add it to the plugins section in your uproject file with the Enabled attribute set to true
    }
}
-
Locate the C++ header and source file for the
ADebugPawninside the project in your C++ IDE. In our case they are located atVirtualHandCpp/Source/VirtualHandCpp/DebugPawn.handVirtualHandCpp/Source/VirtualHandCpp/DebugPawn.cpp. -
Modify the
DebugPawn.hheader file to look like this:
// Fill out your copyright notice in the Description page of Project Settings.

#pragma once

#include "CoreMinimal.h"
#include "GameFramework/Pawn.h"

#include "SGSettings/SGDebugGizmoSettings.h"

#include "DebugPawn.generated.h"

UCLASS()
class VIRTUALHANDCPP_API ADebugPawn : public APawn
{
    GENERATED_BODY()

private:
    // The virtual hand drawing settings.
    UPROPERTY(EditDefaultsOnly, Category="DebugPawn",
        meta=(AllowPrivateAccess="false"))
    FSGDebugGizmoSettings HandDrawingSettings;

public:
    // Sets default values for this pawn's properties
    ADebugPawn();

protected:
    // Called when the game starts or when spawned
    virtual void BeginPlay() override;

public:
    // Called every frame
    virtual void Tick(float DeltaTime) override;

    // Called to bind functionality to input
    virtual void SetupPlayerInputComponent(class UInputComponent* PlayerInputComponent) override;

private:
    // The method responsible for drawing a virtual hand.
    void DrawHand(EControllerHand Hand) const;
};
- Modify the
DebugPawn.cppimplementation file to look like this:
// Fill out your copyright notice in the Description page of Project Settings.


#include "DebugPawn.h"

#include "SGDebug/SGDebugGizmo.h"
#include "SGTracking/SGXRTracker.h"

// Sets default values
ADebugPawn::ADebugPawn()
{
    // Set this pawn to call Tick() every frame.  You can turn this off to improve performance if you don't need it.
    PrimaryActorTick.bCanEverTick = true;

    // Set the default virtual hand drawing settings.
    HandDrawingSettings = FSGDebugGizmoSettings{
        1.0f,
        FColor{255, 0, 0, 255},
        FColor{0, 255, 0, 255},
        FColor{0, 0, 255, 255},
        false,
        1.1f,
        0,
        0.2f,
    };
}

// Called when the game starts or when spawned
void ADebugPawn::BeginPlay()
{
    Super::BeginPlay();
}

// Called every frame
void ADebugPawn::Tick(float DeltaTime)
{
    Super::Tick(DeltaTime);

    // Attempt at drawing the left/right virtual hands every frame.
    DrawHand(EControllerHand::Left);
    DrawHand(EControllerHand::Right);
}

// Called to bind functionality to input
void ADebugPawn::SetupPlayerInputComponent(UInputComponent* PlayerInputComponent)
{
    Super::SetupPlayerInputComponent(PlayerInputComponent);
}

void ADebugPawn::DrawHand(const EControllerHand Hand) const
{
    // Get the world and cache it, if it's null we return early.
    UWorld* World{GetWorld()};
    if (!IsValid(World))
    {
        return;
    }

    FXRHandTrackingState HandTrackingState;
    const bool bGotHandTrackingState = FSGXRTracker::GetHandTrackingState(
        World, EXRSpaceType::UnrealWorldSpace, Hand, HandTrackingState);

    // Return if the struct data is invalid!
    if (!bGotHandTrackingState || !HandTrackingState.bValid)
    {
        return;
    }

    // Return if the device is not being tracked!
    if (HandTrackingState.TrackingStatus == ETrackingStatus::NotTracked)
    {
        return;
    }

    // Ensure that HandTrackingState.HandKeyLocations has the location data
    // for 26 joints!
    if (!ensureAlwaysMsgf(HandTrackingState.HandKeyLocations.Num()
                          == EHandKeypointCount,
                          TEXT("Invalid HandKeyLocations count!")))
    {
        return;
    }

    // Ensure that HandTrackingState.HandKeyRotations has the rotation data
    // for 26 joints!
    if (!ensureAlwaysMsgf(HandTrackingState.HandKeyRotations.Num()
                          == EHandKeypointCount,
                          TEXT("Invalid HandKeyRotations count!")))
    {
        return;
    }

    // Iterate over the hand joint locations and rotations!
    for (int32 JointIndex = 0; JointIndex < EHandKeypointCount; ++JointIndex)
    {
        const FVector& JointLocation{
            HandTrackingState.HandKeyLocations[JointIndex]
        };
        const FQuat& JointRotation{
            HandTrackingState.HandKeyRotations[JointIndex]
        };

        // Draw a single joint's gizmo!
        // Please note that we could alternatively:
        // Use FSGDebugCube::Draw() to draw a cube.
        // Or use the FSGDebugVirtualHand::Draw() method and pass the
        // HandTrackingState directly to draw the virtual hand
        // all at once without iterating the joints. But, that's not
        // goal of this tutorial.
        FSGDebugGizmo::Draw(World, JointLocation, JointRotation, HandDrawingSettings);
    }
}
- Now, rebuild the source code and go back to the
VRTemplateMap, then use the VR Preview button to run the game. If everything's done correctly, you should be able to see the virtual hands inside your VR simulation.
![]()
Third-Party OpenXR Integrations
The SenseGlove Unreal Engine Plugin registers itself as an OpenXRHandTracking provider, making it a fully compatible, drop-in replacement for Epic’s own OpenXRHandTracking plugin in Unreal Engine. This allows it to integrate seamlessly with any third-party system or plugin that can consume OpenXR hand-tracking data.
One notable example is the open-source, MIT-licensed VR Expansion Plugin (VRE).
Important
As explained in the Third-Party Tutorials: Consuming OpenXR Hand-Tracking Data section, it’s entirely possible to build your own custom hand interaction system without relying on SGPawn or any third-party OpenXR-compatible interaction plugin altogether.
If your project requires finer-grained control than what these solutions offer, the tutorials in that section will guide you through understanding the OpenXR hand-tracking data format in Unreal Engine and help you implement a fully tailored interaction system from the ground up in a few hours.
As the SenseGlove Unreal Engine Plugin is fully OpenXR-compliant, it provides OpenXR hand-tracking data in the expected format and takes over as the active provider within Unreal. If your existing interaction system (e.g. VRE plugin) already uses OpenXR hand-tracking, SenseGlove will function as a direct tracking source instead of a real hand.
Note
Since most hand-tracking systems are not capable of haptics feedback, integrating SenseGlove's haptic feedback requires a small amount of additional effort.
The SenseGlove API is fully exposed to Unreal Engine via C++ and Blueprint, so triggering haptic feedback is as simple as calling a function. For more information, refer to the Blueprint Changes section below.
Important
If you're using a third-party OpenXR hand interaction system, configuring the Wrist-Tracker Hardware Settings will likely have no effect, and your hand offsets may appear at the incorrect location in the scene.
This is because those settings are only recognized by SenseGlove’s native actors and components such as
SGPawn,SGWristTrackerComponent, etc. Most third-party plugins are unaware of these settings. As a result, you'll need to figure out how to manually apply the appropriate offsets within your chosen OpenXR hand interaction system.For example, the VRE plugin provide similar configurations in their plugin's settings section. For more information refer to the Changing Wrist-Tracker Offsets section below.
Comparison of Supported OpenXR Hand-Interaction Systems
| Built-in? | Works out of the box? | Beginner-friendly? | Learning Curve | Featureful | Customizable? | Supports Custom Gestures? | |
|---|---|---|---|---|---|---|---|
| SGPawn | ✅ Yes | ✅ Yes | ✅ Most beginer-friendly | ✅ Very easy | ⚠️ Very basic | ⚠️ Very limited | ❌ Not yet, maybe added in the future |
| SenseGlove OpenXR | ✅ Yes | ❌ Requires Blueprint or C++ coding | ✅ Requires a few hours of watching tutotrials | ✅ Moderate | ❌ You need to develop your own features and functionalities from scratch | ✅ Your imagination, creativity, and skill level are your limits | ✅ You have to implement your own recognition logic; example pinch detection algorithm is taught in the tutorial series |
| VR Expansion Plugin | ❌ No | ⚠️ Partially – requires setup | ❌ Best suited for intermediate or advanced users | ⚠️ Steep | ✅ Diverse features and functionalities | ✅ Highly customizable | ✅ Via custom logic |
| Other OpenXR-compatible Plugins | ❌ No | ❓ Check their documentation | ❓ Check their documentation | ❓ Check their documentation | ❓ Check their documentation | ❓ Check their documentation | ❓ Check their documentation |
VR Expansion Plugin
The VR Expansion Plugin (VRE) is a robust, community-driven plugin for Unreal Engine that focuses on advanced VR interaction and gameplay mechanics. It is open-source (MIT licensed), actively maintained, and has received support from Epic via the MegaGrants program.
Designed to extend Unreal’s capabilities for virtual reality, VRE offers a modular set of tools covering:
- Multiplayer and networking
- Locomotion systems
- Object gripping and interaction
- Custom movement and physics handling
The plugin is particularly useful for teams building sophisticated VR experiences. While it's beginner-friendly to an extent, its depth and flexibility are best suited for intermediate to advanced Unreal Engine developers. Whether you're prototyping with built-in features or extracting specific systems for your own framework, VRE offers a rich foundation for VR development.
Note
For support and assistance with the VRE plugin, you can join its active and welcoming Discord community, known for being responsive and supportive.
SGVRETemplate Demo Scene
To showcase how SenseGlove can be integrated with OpenXR-compatible third-party interaction systems, SenseGlove provides a ready-to-use VR Expansion Plugin Integration Demo for Unreal Engine 5.4.
This repository includes UE 5.4–compatible versions of both the SenseGlove and VR Expansion plugins, with all necessary setup and configuration already in place. Simply download the project and it should run out of the box, allowing you to explore the integration without additional setup.
Note
SenseGlove provides this demo to demonstrate the potential for integrating with third-party OpenXR-based hand interaction systems. Please note that the VR Expansion Plugin is a third-party solution, and as such, we do not offer official support for it.
For help with the VRE plugin, refer to its documentation at vreue4.com and consider joining the official VRE Discord community, which is active, supportive, and very responsive.
SGVRETemplate Modifications
The SGVRETemplate is built on top of the VR Expansion Plugin Example Template. However, since the original template is not directly compatible with SenseGlove, several adjustments were necessary.
In addition, a few known issues with OpenXR support in the VR Expansion Plugin for Unreal Engine 5.4 required us to modify the plugin itself to ensure smooth integration.
Below is an overview of the key modifications made to both the project template and this version of the VRE plugin.
Blueprint Changes
- Content/VRE/Core/Character/BP_VRCharacter: Four functions were added:
SendVibration,SendFFB,SendSqueeze, andResetHaptics. These functions retrieve the glove instance and send the appropriate haptic command to it. In theOnPossessedevent,Load Controller by Namewas added along with a string upropertyTracking Offset, which is used to load the correct tracking offsets based on the selected profile.
Note
If you'd like to implement your own haptic functions, the most convenient approach is to safely acquire a glove instance. Once you have the glove instance, applying haptic feedback is as simple as calling the appropriate function.
SenseGlove supports three types of haptics: Vibrations, Force-feedback, and Wrist-squeeze.
- Using
Send Custom Waveform, you can send vibrations to the glove instance.- Using
Queue Command Force Feedback Levels, you can send force-feedback.- Using
Queue Command Wrist Squeeze, you can send a wrist-squeeze command to the glove.Each of these functions can be called directly on the glove instance to trigger the desired haptic feedback.
- Content/VRE/Core/GraspingHands/GraspingHandManny: In the
SetupFingerAnimationsfunction, replace the hardcoded check forHandType == Leftwith a string comparison: convert the enum to a string and check if it contains"Left". This allows compatibility with alternative tracking sources such as"Left Foot".
C++ Changes
- Plugins/VRExpansionPlugin/Source/VRExpansionPlugin/Public/Grippables/HandSocketComponent.h: The following line was added as a public
UPROPERTYin the header file:
UPROPERTY(EditAnywhere, BlueprintReadWrite, Category = "Hand Animation")
float HandAnimationProgress = 0.0f;
- Plugins/VRExpansionPlugin/Source/VRExpansionPlugin/Private/Grippables/HandSocketComponent.cpp: In the function
bool UHandSocketComponent::GetBlendedPoseSnapShot(FPoseSnapshot& PoseSnapShot, USkeletalMeshComponent* TargetMesh, bool bSkipRootBone, bool bFlipHand), theTrackLocationcalculation was modified from:
if (TrackIndex != INDEX_NONE && (!bSkipRootBone || TrackIndex != 0))
{
    double TrackLocation = 0.0f;
    HandTargetAnimation->GetBoneTransform(LocalTransform, FSkeletonPoseBoneIndex(TrackMap[TrackIndex].BoneTreeIndex), TrackLocation, false);
}
else
{
To:
if (TrackIndex != INDEX_NONE && (!bSkipRootBone || TrackIndex != 0))
{
    double TrackLocation = HandTargetAnimation->GetPlayLength() * HandAnimationProgress;
    HandTargetAnimation->GetBoneTransform(LocalTransform, FSkeletonPoseBoneIndex(TrackMap[TrackIndex].BoneTreeIndex), TrackLocation, false);
}
else
{
- Plugins/VRExpansionPlugin/Source/VRExpansionPlugin/Private/GripMotionControllerComponent.cpp: In the function
void UGripMotionControllerComponent::GetCurrentProfileTransform(bool bBindToNoticationDelegate), the following logic was updated from:
if (HandType == EControllerHand::Left || HandType == EControllerHand::AnyHand || !VRSettings->bUseSeperateHandTransforms)
{
    NewControllerProfileTransform = VRSettings->CurrentControllerProfileTransform;
}
else if (HandType == EControllerHand::Right)
{
    NewControllerProfileTransform = VRSettings->CurrentControllerProfileTransformRight;
}
To:
if (UEnum::GetDisplayValueAsText(HandType).ToString().Contains("Left") || HandType == EControllerHand::AnyHand || !VRSettings->bUseSeperateHandTransforms)
{
    NewControllerProfileTransform = VRSettings->CurrentControllerProfileTransform;
}
else if (UEnum::GetDisplayValueAsText(HandType).ToString().Contains("Right"))
{
    NewControllerProfileTransform = VRSettings->CurrentControllerProfileTransformRight;
}
The following function was also updated; from:
void UGripMotionControllerComponent::GetHandType(EControllerHand& Hand)
{
    if (!IMotionController::GetHandEnumForSourceName(MotionSource, Hand))
    {
        // Check if the palm motion source extension is being used
        // I assume eventually epic will handle this case
        if (MotionSource.Compare(FName(TEXT("RightPalm"))) == 0 || MotionSource.Compare(FName(TEXT("RightWrist"))) == 0)
        {
            Hand = EControllerHand::Right;
        }
        // Could skip this and default to left now but would rather check
        else if (MotionSource.Compare(FName(TEXT("LeftPalm"))) == 0 || MotionSource.Compare(FName(TEXT("LeftWrist"))) == 0)
        {
            Hand = EControllerHand::Left;
        }
        else
        {
            Hand = EControllerHand::Left;
        }
    }
}
To:
void UGripMotionControllerComponent::GetHandType(EControllerHand& Hand)
{
    if (!IMotionController::GetHandEnumForSourceName(MotionSource, Hand))
    {
        // Check if the palm motion source extension is being used
        // I assume eventually epic will handle this case
        if (MotionSource.Compare(FName(TEXT("RightPalm"))) == 0 || MotionSource.Compare(FName(TEXT("RightWrist"))) == 0 || MotionSource.ToString().Contains("Right"))
        {
            Hand = EControllerHand::Right;
        }
        // Could skip this and default to left now but would rather check
        else if (MotionSource.Compare(FName(TEXT("LeftPalm"))) == 0 || MotionSource.Compare(FName(TEXT("LeftWrist"))) == 0 || MotionSource.ToString().Contains("Left"))
        {
            Hand = EControllerHand::Left;
        }
        else
        {
            Hand = EControllerHand::Left;
        }
    }
}
Changing Wrist-Tracker Offsets
If you are using wrist-tracking hardware supported by the SenseGlove plugin, you can change the offsets inside BP_VRCharacter using the uproperty Tracking Offset typing or copying any of the following, depending on your hardware:
-
SenseGlove_Quest3: The wrist-tracking controller profile for for Meta Quest3.
-
SenseGlove_ViveWristTrackers: The wrist-tracking controller profile for HTC VIVE wrist trackers.
Changing Motion Source
In BP_VRCharacter, you can change the wrist-tracking motion source for each hand. This is required depending on which tracker you are using.
Adding More Gestures
In the GraspingHandManny Blueprint, we’ve created a simple function called SaveHandPose. If you press the Space Bar while the game is running, it will save the current pose of the corresponding hand. The pose is stored in a gestures database located under Content/SenseGlove with the default name NewHandPose. You should rename the pose to something meaningful when you intend to use it.
It’s helpful to add an Event Dispatcher to the GraspingHandManny Blueprint, which is triggered in the Event Graph by the On New Gesture Detected event from the OpenXRHandPose component. This system is index-based rather than name-based, so keep that in mind when adding more dispatchers. By default, we’ve included examples for Teleport, Grab, Release, and Use.
Video Summary
This short video provides an overview of some of the key changes and modifications behind the SGVRETemplate demo scene, mentioned above.
SGVRETemplate Demo Calibration Scene
The SGVRETemplate includes a basic Calibration Scene located at Content/SenseGlove/Maps/Calibration. Inside this level, you’ll find a copy of Content/SenseGlove/Blueprints/Calibration/BP_Calibrator Blueprint responsible for transitioning to your desired target map after the calibration process is complete. You can configure the target map directly within this Blueprint by adjusting the Level to Load uproperty.
Third-Party Tutorials: Consuming OpenXR Hand-Tracking Data
Introduction to Virtual Reality, OpenXR Hand-Tracking, and Gesture Detection in Unreal Engine
In this tutorial, you'll learn how to get the OpenXR Hand-Tracking Data from the Unreal Engine API and how to consume it to draw virtual hand models using cubes (as hand joints). It will also dive into gesture recognition by implementing a simple pinch gesture recognition.
In the first part, it will focus on UE 4.26 to 5.4 API. And, in the second part, you'll learn how to update the project to work with 5.5.
Procedural Virtual Hand Mesh Animation Using OpenXR Hand-Tracking Data
Building on the Introduction to Virtual Reality, OpenXR Hand-Tracking, and Gesture Recognition in Unreal Engine tutorial, this slightly more advanced tutorial will dive deeper into the following topics:
- Transitioning seamlessly between motion controller and hand-tracking modes in Unreal Engine.
- Adding custom debugging gizmos to improve development and testing workflows.
- Visualizing debug virtual hands by incorporating the custom gizmos.
- Animating virtual hand meshes with OpenXR hand-tracking data, moving beyond basic joint representation with cubes.
- Re-using and adapting the gesture recognition code from the introductory tutorial to integrate with the new animated virtual hand meshes. This guide will help you take your VR projects to the next level with polished and practical implementations.
Part 1:
Part 2:
Low-level Blueprint API
Unfortunately, due to Unreal Engine's limited availability of automated documentation generation tools, there is no updated online documentation for the SenseGlove Blueprint API. However, this does not mean that no documentation is available. In fact, most of the Blueprint code is already documented within the relevant header files. Any modules with the Kismet postfix in the name contain the Blueprint documentation. For example, the Blueprint documentation for the Core module can be found inside the Source/SenseGloveCoreKismet/Public/SGCoreKismet directory.
There is also an outdated Blueprint documentation hosted on GitLab. This documentation was generated for the early releases of the plugin using kamrann/KantanDocGenPlugin and kamrann/KantanDocGenTool, which is no longer maintained.
Efforts are ongoing to generate comprehensive documentation using PsichiX/unreal-doc, but progress has been hindered by various known issues.
There are also other outdated materials that might still be partially relevant. These include an example Unreal Engine Blueprint project and a video tutorial:
Low-level C++ API
Due to Unreal Engine's limited availability of automated documentation generation tools, there is no updated online documentation for the SenseGlove Unreal Engine C++ API. However, this does not mean that no documentation is available. A significant portion of the API is documented within the relevant header files. For example, the C++ API documentation for the Core module can be found inside the Source/SenseGloveCore/Public/SGCore directory.
Efforts are ongoing to generate comprehensive documentation using PsichiX/unreal-doc, but progress has been hindered by various known issues.
Nevertheless, since this plugin builds on top of the SGConnect and SGCoreCpp third-party C++ libraries, the upstream documentation provides detailed information on various aspects of the underlying SenseGlove C++ API.
There are also other outdated materials that might still be partially relevant. These include an example Unreal Engine C++ project and a video tutorial:
Platform Support Matrix
Platform Support Matrix
| Windows (MSVC 2017) | Windows (MSVC 2019) | Windows (MSVC 2022) | Linux x86-64 (Native Toolchain) | Linux AArch64 (Native Toolchain) | Meta Quest Standalone (Android NDK) | HTC VIVE Standalone (Android NDK) | Fab | Azure DevOps Version | |
|---|---|---|---|---|---|---|---|---|---|
| 5.7 | ❌ | ❌ | ✅ v2.7.x | ✅ v2.7.x | ✅ v2.7.x | ✅ v2.7.x (r25b) | ❓ | ✅ v2.7.3 | ✅ v2.7.3 |
| 5.6 | ❌ | ❌ | ✅ v2.7.x | ✅ v2.7.x | ✅ v2.7.x | ✅ v2.7.x (r25b) | ❓ | ✅ v2.7.3 | ✅ v2.7.3 |
| 5.5 | ❌ | ❌ | ✅ v2.7.x | ✅ v2.7.x | ✅ v2.7.x | ✅ v2.7.x (r25b) | ❓ | ✅ v2.7.3 | ✅ v2.7.3 |
| 5.4 | ❌ | ❌ | ⚠️ v2.7.x | ⚠️ v2.7.x | ⚠️ v2.7.x | ⚠️ v2.7.x (r25b) | ⚠️ v2.7.x (r25b) | ⚠️ v2.7.3 | ⚠️ v2.7.3 |
| 5.3 | ❌ | ⚠️ v2.6.x | ⚠️ v2.6.x | ⚠️ v2.6.x | ⚠️ v2.6.x | ⚠️ v2.6.x (r25b) | ⚠️ v2.6.x (r25b) | ⚠️ v2.6.3 | ⚠️ v2.6.3 |
| 5.2 | ❌ | ⚠️ v2.4.x | ⚠️ v2.4.x | ⚠️ v2.4.x | ⚠️ v2.4.x | ⚠️ v2.4.x (r25b) | ❓ | ⚠️ v2.4.2 | ⚠️ v2.4.2 |
| 5.1 | ❌ | ⚠️ v2.0.x | ⚠️ v2.0.x | ⚠️ v2.0.x | ⚠️ v2.0.x | ⚠️ v2.0.x (r25b) | ❓ | ⚠️ v2.0.0 | ⚠️ v2.0.2 |
| 5.0 | ❌ | ⚠️ v1.6.x | ⚠️ v1.6.x | ⚠️ v1.6.x | ⚠️ v1.6.x | ⚠️ v1.6.x (r21e) | ❓ | ⚠️ v1.6.1 | ⚠️ v1.6.1 |
| 4.27 | ⚠️ v1.4.x | ⚠️ v1.4.x | ⚠️ v1.4.x | ⚠️ v1.4.x | ⚠️ v1.4.x | ⚠️ v1.4.x (r21e) | ❓ | ⚠️ v1.3.1 | ⚠️ v1.4.3 |
| 4.26 | ⚠️ v1.0.x | ⚠️ v1.0.x | ❌ | ⚠️ v1.0.x | ❌ | ❌ | ❌ | ❌ | ⚠️ v1.0.4 |
| 4.25 | ⚠️ v1.0.x | ⚠️ v1.0.x | ❌ | ⚠️ v1.0.x | ❌ | ❌ | ❌ | ❌ | ⚠️ v1.0.4 |
| 4.24 | ⚠️ v1.0.x | ⚠️ v1.0.x | ❌ | ⚠️ v1.0.x | ❌ | ❌ | ❌ | ❌ | ⚠️ v1.0.4 |
| 4.23 | ⚠️ v1.0.x | ⚠️ v1.0.x | ❌ | ⚠️ v1.0.x | ❌ | ❌ | ❌ | ❌ | ⚠️ v1.0.4 |
| 4.22 | ⚠️ v1.0.x | ⚠️ v1.0.x | ❌ | ⚠️ v1.0.x | ❌ | ❌ | ❌ | ❌ | ⚠️ v1.0.4 |
✅Supported⚠️End-of-life (EOL) release that is not supported anymore and might be lacking features❌Not supported at all❓Unknown or untested
Remarks:
- Per Epic's Marketplace Guidelines in regards to Code Plugins (sections
2.6.3.d and3.1.b), we are only able to distribute or update the SenseGlove plugin for the last3stable versions of Unreal Engine. As a result, we won't be able to publish updates or bug fixes for the older versions of the Engine except on rare occasions and only through our official repository on Microsoft Azure DevOps. - All third-party libraries on Windows built against Windows SDK
10.0. - Oculus and VIVE support is only provided through the recommended Android NDK versions by Epic Games.
- wjwwood/serial requires Android NDK API Level
28+in order to be built successfully. - All third-party libraries target Android NDK API Level
29, thus any project relying on the plug-in should be build with the same NDK API Level. - Meta Quest PCVR-mode support is only provided through the Epic OpenXR plugin. Furthermore, the Standalone-mode support is also provided through the Epic OpenXR plugin only. Please note that enabling the Meta XR plugin will result in crashes or unexpected behavior. Meta XR plugin compatibility is being worked on at the moment and might be supported in the future.
- While HTC VIVE PCVR-mode support is only provided through the Epic OpenXR plugin, the standalone-mode support is only provided through the official HTC
ViveOpenXRplugin and no other plugin is supported.
Planned Features Completion Status
Planned Features Completion Status
Implemented as of v2.7.x
- Full SenseGlove low-level core API access through Unreal C++.
- Full SenseGlove low-level core API access through Blueprint.
- DK 1 Support.
- Nova 1 Support.
- Nova 2 Support.
- Support for Microsoft Windows as a development platform.
- Support for GNU/Linux as a development platform.
- Support for Microsoft Windows as a deployment platform.
- Support for GNU/Linux x64 as a deployment platform.
- Support for GNU/Linux AArch64 as a deployment platform.
- Support for Android as a deployment platform.
- Support for Oculus Quest 2, Oculus Quest Pro, Oculus Quest 3, and Oculus Quest 3s.
- Support for HTC VIVE Pro, HTC VIVE Focus 3, HTC XR Elite, and HTC VIVE Focus Vision.
- Support for HTC VIVE Trackers and HTC VIVE Wrist Trackers.
- Support for both Bluetooth Serial and Bluetooth Low Energy.
- On-device calibration for Android without the need for SenseCom.
- Haptic feedback including force feedback, buzz, and thumper commands.
- A customizable Grab component that could be added to any actor.
- A customizable Touch component that could be added to any actor.
- Ability to grab, release, and throw objects around.
- Separation of the real and virtual hand rendering.
- An out-of-the-box customizable SGPawn with the ability to be extended in C++ and Blueprint.
- Easy wrist/hand tracking debugging using the SenseGlove Debug module.
- A generic Settings module with the ability to override settings.
- C++/Blueprint interaction events such as OnGrabStateUpdated, OnTouchStateUpdated, OnActorGrabbed, OnActorReleased, OnActorBeginTouch, and OnActorEndTouch.
- A fall back to HMD and wrist tracker hardware auto-detection mechanism when automatic detection of the wrist tracker hardware is desired.
- OpenXR-compatible hand tracking (XR_EXT_hand_tracking) support.
-
FXRMotionControllerDatacompatible hand animation system on UE versions5.2,5.3, and5.4. -
FXRHandTrackingStatecompatible hand animation system on UE versions5.5+. -
FXRMotionControllerDatacompatible wrist tracking system on UE versions5.2,5.3, and5.4. -
FXRHandTrackingStatecompatible wrist tracking system on UE versions5.5+. -
FXRMotionControllerDatacompatible hand interaction manipulation system on UE versions5.2,5.3, and5.4. -
FXRHandTrackingStatecompatible hand interaction manipulation system on UE versions5.5+. - Ability to fallback to hand tracking when a glove is not present and use the bare hands for interactions, or a combination of glove and hand tracking if no motion controller input is detected.
- The SenseGlove grab/touch sockets one-click-setup ability on any Epic-compliant virtual hand mesh from within the Unreal Editor's Content Browser, Skeleton Editor, or Skeletal Mesh Editor.
- A flexible virtual hand animation system that can take the mesh bone's transforms into account for a more reliable hand animation.
- Ability to manage the Engine Scalability Settings through the SenseGlove plugin in order to change the graphics settings on the fly.
- Ability to automatically ask for the required permissions on Android when the plugin is enabled in any UE project.
-
ViveOpenXRplugin compatibility.
Upcoming features planned for the v2.8.x release
Planned features long-term
- Get tracking input from sources other than a SenseGlove device.
- Be able to assign behaviors to different objects (meshes) in the scene (e.g. Slider, Hinge, basic Grabables, etc).
- Make it so developers can define or extend their own behavior(s) to an object through Code / Blueprint (e.g. I want a car door that is like a slider, but follows a path rather than a straight line).
- Make the hand(s) able to push around physics-driven objects (for as much as their behaviors allow) (in backlog).
- Be able to grab objects with up to 2 hands (and move them around with both hands at the same time in a way that seems realistic).
- Ensure that our virtual hands (and the objects they hold) do not phase through other physics objects (e.g. walls and tables).
- Allow other scripts to force a grab and/or release to occur (for example, when you place it apart at the designated location, it gets removed from your hand and snaps into place).
- Have some form of weight simulation by making certain objects harder to push, lowering manipulation speed, or making objects only moveable with two hands.
- (Optional) Make it so the fingers of your virtual hands do not clip inside the meshes you are holding (certain people see this as an indicator of how fast the Force-Feedback activates - but it's basically just rendering).
Changelog
All notable changes to this project will be documented in this file.
The format is based on Keep a Changelog, and this project adheres to Semantic Versioning.
[Unreleased]
Added
- Added a
USGHapticsComponentto allow sending a variety of haptic feedbacks (force-feedback, vibrotactile, custom waveforms, and wrist-squeeze) to the gloves without touching SenseGlove's low-level API. - Added a
USGHandTrackerComponentto allow retrieval or visualization ofFXRHandTrackingStatewithout relying on low-level SenseGlove API or UE's genericGetHandTrackingState()functionality. This is useful when developing a custom hand-interaction system using SenseGlove/UE OpenXR API or interfacing with third-party OpenXR-compatible plugins such as VR Expansion Plugin (VRE). Using this component removes the need to calculate the wrist offsets manually, or an extra call toUSGHapticGlove::GetWristLocation(), in comparison to when theFXRHandTrackingStateis retrieved via UE'sGetHandTrackingState(). - A new
FSGDebugVirtualHand::Draw()overload has been added to allow visualizingFSGDebugGizmoSettingsdirectly. This is used internally by the newUSGHandTrackerComponentto visualize itsFXRHandTrackingStateifbVisualizeis enabled.
Fixed
- Fix some copyright notices with wrong copyright owner. These propably has happend during bulk replaces with class or struct names.
- Additional minor fixes and improvements that may not be listed here.
Changed
- List existing SenseGlove components under
SenseGloveClassGroupinside Unreal's Blueprint Editor. This chagnesClassGroupforUSGGrabComponent,USGTouchComponent,USGVirtualHandComponent, andUSGWristTrackerComponent. - Force
USGVirtualHandComponentandUSGWristTrackerComponentto update their XR hand-tracking data when their handedness is updated. - Bumped the SenseGlove Unreal Engine Marketplace Packager to
v0.6.1-85c5a6e. - Bumped the copyright years.
Removed
- Dropped support for Unreal Engine
5.4, which was already deprecated via thev2.7.xrelease series. - Dropped support for Epic Native/Cross Toolchains
v22(previously used for building UE5.3and5.4Linux dependencies), as they were already deprecated via previous releases. - Removed support for the deprecated
FXRMotionControllerData. The plugin now exclusively usesFXRHandTrackingState(introduced in Unreal Engine 5.5+ and supported by The SenseGlove Unreal Engine Plugin sincev2.2.0for OpenXR hand tracking. This affects only projects that directly consumeFXRMotionControllerDatafrom the SenseGlove plugin in their own custom hand-tracking or interaction systems. Please see the v2.7.x to v2.8.x migration guide for more details.
Documentation
- Added a v2.7.x to v2.8.x migration guide for transitioning from
FXRMotionControllerDatatoFXRHandTrackingStatefor projects that directly consume SenseGlove OpenXR data. - Updated Enabling XR_EXT_hand_tracking on VR Headsets documentation, replacing
FXRMotionControllerDatausage withFXRHandTrackingState. - Updated Setup the Virtual Hand Meshes documentation, replacing
FXRMotionControllerDatausage withFXRHandTrackingState. - Updated Plugin Configuration > Plugin Settings > Virtual Hand > Mesh documentation, replacing
FXRMotionControllerDatausage withFXRHandTrackingState. - Removed the Consuming FXRMotionControllerData documentation section as it's no longer relevant.
- Removed the Consuming FXRMotionControllerData > Blueprint documentation section as it's no longer relevant.
- Removed the Consuming FXRMotionControllerData > C++ documentation section as it's no longer relevant.
- Ensure deterministic dependency builds by pinning Rust toolchain.
- Changelog errata fixes.
- Minor changelog formatting fixes.
- Additional minor fixes and improvements that may not be listed here.
[2.7.3] - 2026-02-17
This patch release resolves documentation build pipeline failures by updating broken mdBook tooling.
Documentation
- Bumped mdBook to
v0.5.2 - Bumped the Michael-F-Bryan/mdbook-epub crate to
21a1c8134134201a2d555313447c96e56e2a8996, which addresses issue #133. This allowed upgrading mdBook from0.4.49tov0.5.2without breaking images inside the generated ePub version of the handbook. - Bumped HollowMan6/mdbook-pdf to
v0.1.13. - Removed lambdalisue/rs-mdbook-alerts as it's incompatible with mdBook
v0.5.x. The good news is that mdBook itself is now able to support this feature natively.
[2.7.2] - 2026-02-17
This patch release resolves build issues affecting Unreal Engine 5.7 on Linux Arm64 architecture.
Fixed
- Fixed an issue in UE
5.7projects where LinuxArm64builds were incorrectly linking against third-party libraries compiled with Epic Native/Cross Toolchainv25(shipped with UE5.6), instead of the required Toolchainv26binaries (shipped with UE5.7).
[2.7.1] - 2025-12-09
This patch release addresses a severe regression affecting UE 5.5 projects with specific settings.
Fixed
- Resolved a critical deadlock between the rendering and game threads in Unreal Engine
5.5that whenIHeadMountedDisplay::GetHMDMonitorInfo()is invoked fromFSGXRTracker::GetControllerTransform()in certain conditions; specifically while SenseCom is running and gloves are present and connected. This issue is related to critical deadlock issue (UE-212224), occurring during PipelinedFrameState acquisition, which had already been addressed for the plugin versions running on UE5.6+. Because it only gets triggered under specific project settings, we were previously unaware that it also affected IHeadMountedDisplay::GetHMDMonitorInfo() in UE5.5.
Documentation
- Locked the mdbook-pdf crate to
v0.1.11due to the followingv0.1.12panick during PDF generation: calledResult::unwrap()on anErrvalue: Unable to deserialize theRenderContext.
[2.7.0] - 2025-11-18
This minor release focuses on delivering performance improvements, made possible by major optimizations in the underlying proprietary SenseGlove libraries, while also introducing some breaking changes.
Added
- Added support for UE
5.7. - Added support for Android NDK
r27c, which is the recommend Android SDK since UE5.6.1and the default for UE5.7+for Android Standalone builds. - Added support for Epic Cross and Native Toolchains
v26, which is shipped with the UE5.7and GNU/Linux support. - Added prebuilt binaries for third-party library {fmt} Formatting Library on all supported platforms. This third-party library is a required dependency of SenseGlove libraries >=
v2.300.0. - Added prebuilt binaries for third-party library: Loguru Logging Library on all supported platforms. This third-party library is a required dependency of SenseGlove libraries >=
v2.300.0. - Added third-party module
SGCommonThirdPartyLibs. - Added third-party module
SGConnectShmThirdPartyLibs. - Added third-party module
SGCoreShmThirdPartyLibs. - Added third-party module
SGCoreThirdPartyHeaders. - Added third-party module
SGFmtThirdPartyLibs. - Added third-party module
SGLogThirdPartyLibs. - Added third-party module
SGLoguruThirdPartyLibs. - Added third-party module
SGWjwwoodSerialThirdPartyLibsto replaceSGSerialThirdPartyLibswhile retainingSGSerialThirdPartyLibsfor a different purpose. See the relevant comment in the Changed section below. - Added UPROPERTY
USGTouchComponent::VibrotactileAmplitude. - Added UPROPERTY
USGTouchComponent::VibrotactileFrequency. - Added method
USGTouchComponent::GetVibrotactileAmplitude(). - Added method
USGTouchComponent::SetVibrotactileAmplitude(). - Added method
USGTouchComponent::GetVibrotactileFrequency(). - Added method
USGTouchComponent::SetVibrotactileFrequency(). - Added Blueprint-accessible method
USGTouchComponentKismetLibrary::GetVibrotactileAmplitude(). - Added Blueprint-accessible method
USGTouchComponentKismetLibrary::SetVibrotactileAmplitude(). - Added Blueprint-accessible method
USGTouchComponentKismetLibrary::GetVibrotactileFrequency(). - Added Blueprint-accessible method
USGTouchComponentKismetLibrary::SetVibrotactileFrequency().
Fixed
- Fix a typo in the function name
SGDeviceList::SenseCommRunning(). This fix breaks ABI and API compatibility with previous versions of the plugin and affects both C++ and Blueprint code.
Changed
SGDeviceList::SenseCommRunning()has been renamed toSGDeviceList::SenseComRunning()due to a typo. This change breaks ABI and API compatibility with previous versions of the plugin and affects both C++ and Blueprint code.- Bumped the SenseGlove libraries to
v2.305.3-17a820b6e. This release of the SenseGlove libraries disables RTTI/Exceptions for the most parts and isolates it to a minor portion of the code base, which yields noticable performance gains. Futhermore, some optiomizations are done in the multi-threaded code, such as replacing Spinlocks with Adaptive Mutexes (a hybrid Mutex/Spinlock). - As a result of SenseGlove libraries >=
v2.300.0changing it's directory structure, theThirdPartyfolder's directory structure has been revamped. - Renamed third-party module
SGSerialThirdPartyLibstoSGWjwwoodSerialThirdPartyLibssince SenseGlove libraries >=v2.300.0ships a new static library namedsgserial. Thus, to avoid confusion and naming conflicts the third-partyserialstatic library is now provided by theSGWjwwoodSerialThirdPartyLibsmodule andsgserialis provided by theSGSerialThirdPartyLibsmodule. FSGGloveTrackingSettings::GloveConnectivityCheckIntervalsettings have been renamed toFSGGloveTrackingSettings::DataRetrievalRefreshRatefor adoption other than glove connectivity use cases.USGVirtualHandComponent::GetMotionControllerData()signature has changed.USGVirtualHandComponent::GetHandTrackingState()signature has changed.USGWristTrackerComponent::GetMotionControllerData()signature has changed.USGWristTrackerComponent::GetHandTrackingState()signature has changed.USGVirtualHandComponentKismetLibrary::GetMotionControllerData()signature has changed.USGVirtualHandComponentKismetLibrary::GetHandTrackingState()signature has changed.SGPawnandSGTouchComponentno longer use the legacyQueueVibroLevelsmethod for applying vibrotactile feedback. Instead it's been replaced withSendCustomWaveform.- Changed
USGTouchComponent::VibrotactileDurationUPROPERTY's maximum value to1.0f. Previously it was uncapped, and now any value beyond1.0fseconds is clamped.
Removed
- Dropped support for Unreal Engine
5.3, which was already deprecated in thev2.6.xrelease series. - Dropped support for MSVC
v142(Visual Studio 2019), since UE5.3was the last supported version relying on it. - Cleaned up remnants of the long-removed Unreal Engine
5.2from third-party module*.Build.csfiles. - Cleaned up remnants of the long-removed Unreal Engine
5.2fromSenseGlove.Build.cs,SenseGloveKismet.Build.cs,SenseGloveTracking.Build.cs, files. - Cleaned up remnants of the long-removed Unreal Engine
5.2fromSenseGloveTrackingmodule. USGVirtualHandComponent::GetMotionControllerState()has been removed.USGWristTrackerComponent::GetMotionControllerState()has been removed.USGVirtualHandComponentKismetLibrary::GetMotionControllerState()has been removed.USGWristTrackerComponentKismetLibrary::GetMotionControllerState()has been removed.USGTouchComponent::VibrotactileLevelUPROPERTY has been removed.USGTouchComponent::GetVibrotactileLevel()method has been removed.USGTouchComponent::SetVibrotactileLevel()method has been removed.USGTouchComponentKismetLibrary::GetVibrotactileLevel()method has been removed and is no longer available to Blueprint.USGTouchComponentKismetLibrary::SetVibrotactileLevel()method has been removed and is no longer available to Blueprint.
Deprecated
- This is the last major/minor release to support Unreal Engine
5.4, and its support will be removed in future minor or major releases. This is important to keep in mind if your target development and deployment platform is HTC VIVE in Standalone Mode. Unfortunately, HTC has not released any updates to their HTC ViveOpenXR plugin since December 6, 2024. Their latest release [1] [2], ViveOpenXR Pluginv2.5.0, supports only Unreal Engine5.3and5.4. HTC VIVE PCVR Mode is unaffected and will remain fully functional because, on Microsoft Windows, it is supported via the OpenXRViveTracker Plugin, which is bundled with Unreal Engine and officially maintained by Epic Games. If you still intend to target HTC in Standalone Mode, you are welcome to continue using the latest SenseGlove Unreal Engine Pluginv2.7.x, which will retain HTC Standalone Mode support. However, please keep in mind that once newer versions of the SenseGlove Unreal Engine Plugin are released and UE5.4is no longer supported, the latest release of the plugin supporting UE5.4will not receive new features, hardware support, or bug fixes. If at any point in the future HTC releases a new version of their ViveOpenXR plugin that supports any Unreal Engine version we actively support, in accordance with our support policy and Platform Support Matrix, we will make every reasonable effort to reintroduce HTC Standalone Mode support.
Documentation
- Added {fmt} Formatting Library License section.
- Added Loguru Logging Library License section.
- Updated Setting up the Touch System section to reflect the recent touch system changes.
- Added a third-party tutorial to the Android Standalone Mode Deployment section for UE
5.7which provides a one-click Android development and build environment setup, instructions on how to setup and use the new UE5.7project launcher, and how to enabled OpenXR hand-tracking support on Meta Quest and HTC VIVE devices.
[2.6.3] - 2025-06-27
This patch release contains no changes to the plugin code. It includes only documentation updates and improvements.
Documentation
- Added a new section to the handbook titled Third-Party OpenXR Integrations section.
- Additional minor fixes and improvements that may not be listed here.
[2.6.2] - 2025-06-10
This patch release contains no changes to the plugin code. It includes only documentation updates and improvements.
Documentation
[2.6.1] - 2025-06-05
This patch release addresses several critical build and linking issues.
Fixed
- Fix a linking issue on GNU/Linux with UE
5.6where SenseGlove libraries were built against dynamic versions oflibc++andlibc++abilibraries rather than the static versions. - Fix an issue where SenseGlove libraries for some targets were not actually built with
C++20and still were built againstC++17. - Fix an issue where SenseGlove libraries for some targets were built or linked with incorrect settings.
- Additional minor fixes and improvements that may not be listed here.
Changed
- Bumped the SenseGlove libraries to
v2.204.0-3a37b1977.
Removed
- SenseGlove plugin no longer ships Boost or wjwwood's Serial Communication Library header files as SenseGlove public headers shipped with
v2.204.0-3a37b1977render them redundant. This significantly removes clutter, free up disk space, and speed up builds to some extent.
Documentation
- Fix some changelog typos.
- Additional minor fixes and improvements that may not be listed here.
[2.6.0] - 2025-06-04
This minor release delivers broad compatibility, stability, and maintainability enhancements, focusing on bringing full Unreal Engine 5.6 support, C++20 migration, and resolving various GNU/Linux build issues.
Added
- Added support for Epic Native Toolchain
v25, which will be shipped with the upcoming UE5.6.
Fixed
- Resolved GNU/Linux build issues for Unreal Engine
5.5and5.6caused by incorrect linkage to GNU/GCC'slibstdc++instead of LLVM/Clang'slibc++. - Fix
SGLogbuild issues on GNU/Linux with UE5.6. - Fix type conversion safety and consistency issues across all
SGLogformatters. - Resolved a critical deadlock between the rendering and game threads in Unreal Engine
5.6that occurrs whenIHeadMountedDisplay::GetHMDMonitorInfo()is invoked fromFSGXRTracker::GetControllerTransform(). This is similar to another critical deadlock issue (UE-212224), occurring during PipelinedFrameState acquisition, addressed in thev2.5.0release. - Additional minor fixes and improvements that may not be listed here.
Changed
- Replaced Epic Native Toolchain
v24support with Epic Native Toolchainv25due to the fact that nowv25is the default Linux toolchain for UE5.6. - Revamped
FSGHMDTrackerto resolve a critical deadlock between the rendering and game threads in Unreal Engine5.6that occurrs whenIHeadMountedDisplay::GetHMDMonitorInfo()is invoked fromFSGXRTracker::GetControllerTransform(). This is similar to another critical deadlock issue (UE-212224), occurring during PipelinedFrameState acquisition, addressed in thev2.5.0release. - Revamped the UBT logic for importing third-party headers and libraries by introducing third-party dependency modules,
SGBleThirdPartyLibs,SGConnectThirdPartyHeaders,SGConnectThirdPartyLibs,SGCoreThirdPartyLibs, andSGSerialThirdPartyLibs, which significantly reduces UBT boilerplate code and increases maintainability. - Bumped the SenseGlove libraries to
v2.203.0-f3d3e676. - SenseGlove libraries have migrated to
C++20fromC++17. - Revamped the
SGLoglogging utility class to useTUniquePtrinstead ofstd::unique_ptr. SGLognow relies onTAtomic<bool>for thread-safe initialization.SGBackendnow relies onTAtomic<bool>for thread-safe initialization.USGBackend::IsBackendInitialized()is no longer inlined and the initialization flag has been moved to the private implementation ofUSGBackend.- Bumped the SenseGlove Unreal Engine Marketplace Packager to
v0.6.0-4108c6f.
Removed
- Dropped support for Epic Native Toolchain
v24, which was last shipped with the preview release of UE5.6, but has been removed from the5.6branch on GitHub.
Deprecated
- This is the last minor release to support Unreal Engine
5.3and its support will be removed from the next minor or major releases.
Documentation
- Revised the outdated Plugin Directory Structure section to accurately reflect the latest changes to the
Source/ThirdPartydirectory layout changes. - Lock the mdbook crate version to
v0.49.0to avoid layout issues introduced withv0.50.0. - Additional minor fixes and improvements that may not be listed here.
[2.5.0] - 2025-05-09
This minor release primarily focuses on bringing Bluetooth Low Energy support to the SenseGlove Unreal Engine integration.
Added
- Added support for Epic Native Toolchain
v24, which will be shipped with the upcoming UE5.6.
Fixed
- Backend initialization error handling on Android.
- Fix a critical issue introduced by UE
5.5that also affects the upcoming UE5.6. This is known as issueUE-212224, which leads to a deadlock duringPipelinedFrameStateacquisition between the game and rendering threads. - Additional minor fixes and improvements that may not be listed here.
Changed
- The error codes returned from
FSGConnectJNI::Initialize()andFSGCoreJNI::Initialize()have been changed. This is a breaking change for any code that relies on handling the return codes from those functions. - Bumped the SenseGlove libraries to the
v2.200.0-0cb715d0release with BLE (Bluetooth Low Energy) support.
Removed
- Dropped support for Unreal Engine
5.2and Epic Native Toolchainv21(previously used for building UE5.2Linux dependencies), as they were already deprecated in thev2.4.xrelease series.
Documentation
- Revamped SenseCom documentation in order to divide the SenseCom instructions section into Bluetooth Low Energy instructions for SenseCom and Bluetooth Serial instructions for SenseCom sections.
- Added Bluetooth Low Energy instructions for SenseCom.
- Added Bluetooth Serial instructions for Android.
- Added SGBLE and SGBLExx Rust Dependency Licenses.
- Bumped the mdbook-epub crate to
cac03b7f4b151f106f7f05b13da4c33fc098dd2c. - List the third-party tutorials inside the Extra Resources section in a categorized manner.
- Improved changelog formatting.
- Additional minor fixes and improvements that may not be listed here.
[2.4.2] - 2025-02-17
This is a patch release to address minor issues in the SenseGlove Unreal Engine Handbook, with no modifications to the plugin code.
Documentation
- List the third-party tutorials with a description in their corresponding parent sections.
- Additional minor fixes and improvements that may not be listed here.
[2.4.1] - 2025-02-14
This is a patch release to address minor issues in the SenseGlove Unreal Engine Handbook, with no modifications to the plugin code.
Documentation
- Fix a bug that breaks the custom CSS styles on the Handbook's release URLs (e.g.
https://unreal.docs.senseglove.com/2.4/) by reverting an unintentional change from thev2.4.0. - Applied a minor Handbook Makefile fix.
- Additional minor fixes and improvements that may not be listed here.
[2.4.0] - 2025-02-14
This minor release brings various improvements and, notably, the first version to add support for VIVE standalone mode with ViveOpenXR compatibility.
Added
- Added the ePub version of the SenseGlove Unreal Engine Handbook.
- Added
FSGConnectJNI::Initialize()andFSGCoreJNI::Initialize()return codes to Android logs for detailed debugging purposes throughadb logcat. - Introduced compatibility with the
ViveOpenXRplugin. - Added the
FSGPluginUtilsutility class for other plugins or modules availability detection such asMeta XRandViveOpenXR. - Added various HTC HMDs auto-detection support on Android.
- Added support for HTC VIVE Focus Vision HMD auto-detection.
- Added support for HTC Vive Wrist Trackers support on Android using the official
ViveOpenXRplugin's OpenXR positional tracking providerOpenXRViveWristTracker. - Added enum
ESGOpenXRPositionalTrackingProvider. - Added the
OpenXRPositionalTrackingProvideroption to the plugin's wrist-tracker settings to either manually set the positional tracking provider or auto-detect it based on a combination of tracker hardware settings, targeted platform, available OpenXR plugins, or the auto-detected HMD hardware.
Fixed
- Fix a critical issue where
HandStates->GetTransform(KeyPoint)was incorrectly resolving to(&HandStates[0])->GetTransform(KeyPoint), causing both hands to use the left hand's wrist transform under specific conditions. This occurred when thebFallbackToHandTrackingIfNoGloveDetectedoption was enabled, two gloves were present, and no hardware wrist-tracking device was active, resulting in both hands overlapping at the same transform. FSGArrayUtilsoptimizations that affect the plugin performance as a whole.- Additional minor fixes and improvements that may not be listed here.
Changed
- Now the motion sources for the wrist-tracking hardware or hand-tracking are queried and populated dynamically rather than relying on the hardcoded
EControllerHandenum. This allows the SenseGlove Unreal Engine Plugin to integrate better into other plugins such asViveOpenXR, which when enabled, provides many more options as the motion source for their various wrist-tracking hardware. FSGWristTrackingSettings::LeftHandMotionSourceandFSGWristTrackingSettings::RightHandMotionSourcetypes have changed fromEControllerHandtoFName.- Bumped the SenseGlove libraries to
v2.105.3-97ea18cb. - Bumped the SenseGlove Unreal Engine Marketplace Packager to
v0.5.0-7df1183. - Bumped the copyright years.
- This is the last release to support Unreal Engine
5.2. Fromv2.5.xonwards only UE5.3and newer will be supported. - The
ESGViveHMDDetectionPriorityenum items have changed and are no longer backward-compatible.
Deprecated
- This is the last minor release to support Unreal Engine
5.2and its support will be removed from the next minor or major releases.
Documentation
- Reintroduced the Handbook in ePub format.
- Revamped the Enabling XR_EXT_hand_tracking OpenXR Extension on VR Headsets and Deploying to Android (Standalone) documentation, and added the
ViveOpenXR-compatibile instructions as well. - Significantly improved the Setting Up the Wrist Tracking Hardware section by providing more detailed documentation and example configuration per HMD and wrist tracking hardware.
- Clarified how to set up the VIVE Wrist Trackers in various configurations.
- Added HTC VIVE specific optimization tips for running in standalone mode.
- Fixed a few broken URLs caused by bad markdown formatting.
- Applied various Handbook Makefile fixes.
- Clarified the HTC VIVE standalone support status in the platform support matrix.
- Bumped the mdbook-alerts crate to
v0.7.x. - Reintroduced mdbook-epub at
d1536bbbdc1ca00320522ad73a967e15057ef573from themasterbranch as the blocking issues in #115 have been address in1ca2a860f6ed405c00914a3aadd8057d5050b29b. - Added third-party tutorials to the following sections: Enabling XR_EXT_hand_tracking on VR Headsets, Deploying to Android (Standalone), and OpenXR.
- Additional minor fixes and improvements that may not be listed here.
- List the VRExpansionPlugin demo in the Extra Resources section.
[2.3.2] - 2025-01-28
This patch release addresses a critical issue backported from the upcoming 2.4.x release to 2.3.x.
Fixed
- Fix a critical issue backported from the upcoming
2.4.xrelease whereHandStates->GetTransform(KeyPoint)was incorrectly resolving to(&HandStates[0])->GetTransform(KeyPoint), causing both hands to use the left hand's wrist transform under specific conditions. This occurred when thebFallbackToHandTrackingIfNoGloveDetectedoption was enabled, two gloves were present, and no hardware wrist-tracking device was active, resulting in both hands overlapping at the same transform.
[2.3.1] - 2024-11-27
This patch release addresses a few issues with SenseGlove Sockets Editor.
Fixed
- Additional minor fixes and improvements that may not be listed here.
Changed
- The SenseGlove Sockets Editor now calculates hand bone reference transforms using the current virtual hand mesh being edited, rather than the reference mesh, when adding SenseGlove sockets.
[2.3.0] - 2024-11-13
This minor release includes some improvements and adds official Unreal Engine 5.5 Fab support.
Added
- Added
USGAndroidPermissionsto theSenseGloveAndroidmodule, enhancing the plugin's permission request process on Android. Now, a pop-up prompts the user to grant permissions, preventing silent crashes when permissions haven't been granted beforehand. - Added Unreal Engine
5.5Fab support.
Fixed
- Fix UE
5.5deprecation warnings insideUSGVirtualHandComponent. - Additional minor fixes and improvements that may not be listed here.
[2.2.2] - 2024-11-08
This patch release addresses a few issues with both glove and hand-tracking.
Fixed
- Fixed a chain of critical bugs that gets triggered due to
GloveConnectivityCheckIntervalgetting passed as seconds to the engine rather than milliseconds. Thus, the default or any large value forGloveConnectivityCheckIntervalcauses noticeable long delays between glove-connectivity-check intervals and consequently renders the hand-tracking state invalid in certain situations when thebFallbackToHandTrackingIfNoGloveDetectedoption is false.
[2.2.1] - 2024-10-23
This patch release focuses exclusively on updates to the documentation.
Documentation
- Updated all URLs, screenshots, and tutorials to reflect the transition from the Unreal Engine Marketplace to Fab, Epic’s new unified content marketplace.
- Revised documentation now points to the new home of the SenseGlove Unreal Engine Plugin on Fab, ensuring users have access to the latest resources and information.
[2.2.0] - 2024-10-22
This is a minor release with some breaking API and ABI changes, focusing mainly on migrating away from the deprecated FXRMotionControllerData in favor of FXRMotionControllerState and FXRHandTrackingState on Unreal Engine 5.5+.
Added
- Completed support for the upcoming Unreal Engine
5.5release. - Added
USGVirtualHandComponent::GetMotionControllerState()and the equivalent Blueprint functionUVirtualHandComponentKismetLibrary::GetMotionControllerStateon UE5.5+. - Added
USGVirtualHandComponent::GetHandTrackingState()and the equivalent Blueprint functionUVirtualHandComponentKismetLibrary::GetHandTrackingStateon UE5.5+. - Added
USGWristTrackerComponent::GetMotionControllerState()and the equivalent Blueprint functionUWristTrackerComponentKismetLibrary::GetMotionControllerStateon UE5.5+. - Added
USGWristTrackerComponent::GetHandTrackingState()and the equivalent Blueprint functionUWristTrackerComponentKismetLibrary::GetHandTrackingStateon UE5.5+. - Added a variant of
FSGDebugVirtualHand::Draw()and the equivalent Blueprint functionUSGDebugVirtualHandKismetLibrary::Draw_FXRHandTrackingState()which acceptFXRHandTrackingStateon UE5.5+. - Added the new member
bTrackedto theFSGXRHandStatestruct. - Added
FSGXRTracker::GetMotionControllerState()and the equivalent Blueprint functionUSGXRTrackerKismetLibrary::GetMotionControllerState(). - Added
FSGXRTracker::GetHandTrackingState()and the equivalent Blueprint functionUSGXRTrackerKismetLibrary::GetHandTrackingState().
Fixed
- Additional minor fixes and improvements that may not be listed here.
Changed
- Replaced all internal usages of the
FXRMotionControllerDatastruct with eitherFXRMotionControllerStateorFXRHandTrackingStateon UE5.5+. - Deprecated
USGVirtualHandComponent::GetMotionControllerData()on UE5.5+. - Deprecated
USGWristTrackerComponent::GetMotionControllerData()on UE5.5+. - Deprecated the variant of
FSGDebugVirtualHand::Draw()which acceptsFXRMotionControllerDataas a parameter on UE5.5+. - Renamed
USGDebugVirtualHandKismetLibrary::DrawtoUSGDebugVirtualHandKismetLibrary::Draw_FXRMotionControllerDatafor more clarification. - Renamed an
FSGXRHandStatemember frombReceivedJointPosestobHasReceivedJointPoses. - Changed the
FSGXRTracker::GetAllKeypointStates()signature on UE5.5+to match theIHandTrackerinterface API changes. - The animation system on UE
5.5+has been revamped to utilizeFXRHandTrackingStateinstead ofFXRMotionControllerData. - The wrist tracking system on UE
5.5+has been revamped to utilizeFXRHandTrackingStateinstead ofFXRMotionControllerData. - The hand interaction manipulation on UE
5.5+has been revamped to utilizeFXRHandTrackingState. - The virtual hand debugging system on UE
5.5+has been revamped to utilizeFXRHandTrackingState.
Documentation
- Added the documentation on consuming the
FXRHandTrackingStatestruct in both Blueprint and C++. - Updated the documentation on consuming the
FXRMotionControllerDatastruct. - Additional minor documentation fixes and improvements that may not be listed here.
[2.1.4] - 2024-10-22
This is a bugfix release that delivers some documentation fixes.
Documentation
- Updated the documentation on consuming the
FXRMotionControllerDatastruct. - Additional minor documentation fixes and improvements that may not be listed here.
[2.1.3] - 2024-10-11
This bugfix release centers on adding initial support for the upcoming Unreal Engine 5.5.
Added
- Added initial support for the upcoming Unreal Engine
5.5release. Please note that, while the plugin is functional, a few adjustments are still required to address deprecation warnings. Specifically, theFXRMotionControllerDatastruct needs to be replaced with the newly introducedFXRMotionControllerStateandFXRHandTrackingStatestructs, along with adjustments to adhere to the new hand-tracking API changes. - Added support for Epic Native Toolchain
v23.
Fixed
- Fix a bug inside
USGVirtualHandComponent::PostEditChangeProperty()where the get member name check happens against the wrong class and member names. - Additional minor fixes and improvements that may not be listed here.
Changed
- The SenseGlove libraries have been updated to
v2.105.0-02a2e508.
[2.1.2] - 2024-09-02
This is a bugfix release that addresses a few non-critical issues and documentation fixes.
Fixed
- Fix a bug where the hands are always visible even when
bVisibleWhenHandDataUnavailableis disabled. - Fix a bug where the
HandVisibilityChangedEventevent is not triggered on the virtual hand component visibility changes. - Fix the wrong script name for
USGHMDTrackerKismetLibrary. - Fix the wrong script name for
USGXRTrackerKismetLibrary. - Fix
LogPython: Warning: 'SGHMDTrackerKismetLibrary' and 'SGXRTrackerKismetLibrary' have the same name (SenseGloveHeadMountDisplayKismetLibrary) when exposed to Python. Rename one of them using 'ScriptName' meta-datawhen packaging the game. - Fix the non-existent default hand-mesh warnings polluting the logs when packaging the game.
- Expanded the clickable area on the handbook index page revision buttons.
- Minor documentation fixes.
[2.1.1] - 2024-08-18
This is a bugfix release with no actual plugin code changes, mostly addressing issues in the documentation and third-party dependencies caused by source control merge conflicts.
Fixed
- Fix the messed up changelog file caused by cherry-picking merge conflicts between the dev branch and the master branch.
- Fix a bug that causes a handbook revision mismatch when deploying the handbook from the dev branch.
- Fix a bug where
SG_GIT_IS_SHALLOW_CLONEwhile building the handbook is always set toyeseven if it's not a shadow clone becauseSG_DOT_GIT_SHALLOW_FILEevaluates to an empty string when the.git/shallowfile does not exist. - Fix some documentation typos.
Removed
- Removed Android NDK
r25armv7andx86dependencies brought back by mistake while mergingv2.1.0from the dev branch to the master branch.
[2.1.0] - 2024-08-16
This is a minor release focusing mainly on bringing OpenXR-compatible hand tracking support (XR_EXT_hand_tracking) and Head-mounted Display automatic detection for adjusting wrist tracker offsets automatically at runtime.
Added
- Added SenseGloveTracking and module which provides OpenXR-compatible hand tracking by implementing
XR_EXT_hand_trackingsupport, HMD auto-detection, and SenseGlove device tracking. - Added
USenseGloveTrackingKismetmodule in order to expose part of the SenseGloveTracking functionality to Blueprint. - Added
FSGXRTracker, the underlying main class that implements the OpenXR compatibility. - Added
USGXRTrackerKismetLibraryin order to allow Blueprint to retrieve theFXRMotionControllerDatadirectly from our tracking module. - Added the
SGTrackingTypesheader to theSenseGloveTypesmodule in order to define and shareSenseGloveTrackingmodule types through this header across the plugin modules. - A fallback to HMD and wrist tracker hardware auto-detection mechanism has been added to be triggered in situations when automatic detection of the wrist tracker hardware is desired, e.g., either by not setting it explicitly, or setting it to the default None value. Please note that this is still highly experimental and HTC VIVE Focus 3 and HTC XR Elite cannot be distinguished in the current iteration. Though, since the tracker devices and offsets for both headsets are the same in the end it does not make a difference if both headsets are detected as each other.
- Added
ESGHeadMountedDisplayDeviceenum with supported HMDs list. - Added
ESGViveHMDDetectionPriorityenum in order to choose which headset we attempt to detect between VIVE Focus 3 and VIVE XR Elite as we cannot distinguish them, yet. - Added the
FSGHMDTrackerutility class, in order to easily gather information about the HMD device at runtime. - Added
USGHMDTrackerKismetLibrarywhich exposes the equivalent C++ HMD auto-detection functionality to Blueprint. - Added
FSGHMDTrackingSettingsconfig struct. - Added the
FSGGloveTracerutility class, in order to easily check the left or right glove connectivity or retrieve the connected glove instances. - Added
USGGloveTrackerKismetLibrarywhich exposes the equivalent C++ functionality to Blueprint. - Added
FSGGloveTrackingSettingsconfig struct. - Added
FSGTrackingSettingsconfig struct. - Added
FSGHandTrackingSettingsconfig struct. - Added
FSGWristTrackingDebuggingSettingsconfig struct. - Added
FSGVirtualHandSettingsconfig struct. - Added
FSGVirtualHandAnimationSettingsconfig struct. - Added
FSGVirtualHandDebuggingSettingsconfig struct. - Added
FSGVirtualHandGrabSettingsconfig struct. - Added
FSGVirtualHandHapticsSettingsconfig struct. - Added
FSGVirtualHandMeshSettingsconfig struct. - Added
FSGVirtualHandPhalangesLengthSettingsconfig struct. - Added
FSGVirtualHandTouchSettingsconfig struct. - Added
USGVirtualHandComponent::OnHandVisibilityChanged()event in order to notify other components/actors whenever the virtual hand mesh appears or disappears (for example, this could happen when a glove is connected/disconnected). GetMotionControllerData()has been introduced to theUSGVitualHandComponentin order to retrieve the OpenXR-compatible glove data in Unreal'sFXRMotionControllerDataformat.- Added
FSGVirtualHandAnimInstanceProxy::GetMotionControllerData()and many more accessor methods usable only by child classes to allow consumption of the data required for manipulating the virtual hand mesh animations. GetMotionControllerData()has been introduced to theUSGWristTrackerComponentin order to retrieve the OpenXR-compatible glove data in Unreal'sFXRMotionControllerDataformat.- Added
USGGrabComponent::SimulatePhysics()method. - Added
FSGDebugCube. - Added
FSGDebugCubeSettings. - Added the
SenseGloveDebugKismetmodule in order to allow drawing of debugging, cubes, gizmos, and virtual hands from Blueprint. - Added
USGDebugCubeKismetLibraryin order to expose theFSGDebugCubefunctionalities to Blueprint. - Added
USGDebugGizmoKismetLibraryin order to expose theFSGDebugGizmofunctionalities to Blueprint. - Added
USGDebugVirtualHandKismetLibraryin order to expose theFSGDebugVirtualHandfunctionalities to Blueprint. - Added a new static
Draw()method overload toDebugGizmowhich allows passing anFQuatinstead of aFRotator. - Introduced a new
FXRMotionControllerDatacompatible hand animation system with the ability to take the mesh bone's transforms into account for a more reliable hand animation. - Introduced a new
FXRMotionControllerDatacompatible wrist tracking system. - Introduced a new
FXRMotionControllerDatacompatible hand interaction manipulation system. - Added the ability to fallback to hand tracking when a glove is not present and use the bare hands for interactions, or a combination of glove and hand tracking if no motion controller input is detected.
- Added the SenseGlove grab/touch sockets one-click-setup ability on any Epic-compliant virtual hand mesh from within the Unreal Editor's Content Browser, Skeleton Editor, or Skeletal Mesh Editor by extending the Unreal Editor.
- Added
FSGAssetUtilseditor-only class. - Added
FSGContentBrowserExtensioneditor-only class. - Added
FSGPluginStyleeditor-only class. - Added
FSGSocketsEditor editor-only class. - Added
FSGSocketsEditorCommandseditor-only class. - Added the
FSGInitializationSettingsconfig struct in order to control how the plugin is initialized. - Introduced the
FSGGameUserSettingsfor managing the Engine Scalability Settings through the SenseGlove plugin in order to change the graphics settings on the fly. - Added
USGGameUserSettingsKismetLibraryin order to allow all the Engine Scalability Settings to be managed from the Blueprint side. - Added
FSGGameUserSettingsSettingsconfig struct. - Added the SenseGlove console commands:
SG_GetEngineScalabilitySettings()andSG_SetEngineScalabilitySettings(Scalability). - Added
SGHardwareBenchmarkingSettingsconfig struct. - Introduced
ESGEngineScalabilitySettingsenum. - Added
FSGVirtualHandSettingsOverridesconfig struct used by the new settings override system. - Added
SGWristTrackingSettingsOverridesconfig structured by the new settings override system. - Added support for Android API level
32in addition to the API level29. - Introduced the SenseGlove Unreal Engine Handbook as an attempt at documenting the SenseGlove Unreal Engine Plugin.
- Merged the
packutility branch to the plugin's source code at/Packagerwhich adds the SenseGlove Unreal Engine Marketplace Packagerv0.4.0-a65bb20binaries and configurations.
Fixed
- Fixed a bug when the virtual hand inside the game is not visible but still collides with other objects inside the scene, mistakenly triggering events like
OnGrabStateUpdatedandOnTouchStateUpdated. - Fixed a bug where
USGGrabComponent'sbAffectPhysicsStatedoes not enables physics on its owning actor atBeginPlay(). - Fixed various wrong Kismet script names and their class exports.
- Fixed the display name for various overloads of the Blueprint-exposed function
Queue Command Vibro Levelto expose sensible display names. - Some Android UPL tweaks, permission, and build fixes.
- Many other large and small fixes and improvements that might not be listed here.
- A few small bugfixes that have already been backported to the
v2.0.xseries.
Changed
- Now, if
bValidateIfDefaultClassesAreSGCompliantoption fromFSGInitializationSettingsis enabled (default) the SenseGlove plugin checks for default SenseGlove-compliantGameMode,GameInstance, etc, at module initialization and tries to set to default, native SenseGlove classes, if any of those default classes are not a SenseGlove or a SenseGlove-derived class. - The
USGSettingshas been fully revamped with more customizations added and categorized in a different manner adding many new structs and removing some, in order to have fine-grained control over the various aspects and functionality of the plugin components. - The
USGSettingsconstructor visibility has been changed from public to private. - The Settings override system has been overhauled as well affecting how we override settings from the
USGVirtualHandComponentandUSGWristTrackerComponent. - The SenseGlove libraries have been updated to
v2.104.1-55fddbd2. GetHandPose()has been replaced byGetMotionControllerData()insideUSGVirtualHandComponent(see the relevant entry in the Added and Removed sections).- Many functions inside
USGVirtualHandComponentfor retrieving bone names or reference transforms has been renamed to return different data types; e.g.GetLeftHandFingerBoneNames(),GetRightHandFingerBoneNames(),GetLeftHandFingerBoneName(), andGetRightHandFingerBoneName()renamed toGetLeftHandBoneNames(),GetRightHandBoneNames(),GetLeftHandBoneName(), andGetRightHandBoneName()respectively. bHiddenInGameIfNoGloveDetecteduproperty fromUSGVirtualHandComponenthas been renamed tobVisibleWhenHandDataUnavailableand accordingly all of its getters and setters;bVisibleWhenHandDataUnavailable = falsenow acts asbHiddenInGameIfNoGloveDetected = true, and vice-versa.USGWristTrackerComponentnow usesFXRMotionControllerDatafor wrist tracking instead of calculating the wrist location by calling the SenseGlove API.FSGVirtualHandAnimInstanceProxynow relies onFXRMotionControllerDatato animate the hands instead of aTMapof bone names and rotations which allows it to also apply the bone locations.- The new OpenXR animation system now takes into account the mesh bone's transforms for a more reliable hand animation.
FSGDebugVirtualHand::Draw()now accepts aFXRMotionControllerDataparameter instead of allWristLocation,WristRotation,JointPositions, andJointRotationsparameters.FSGDebugVirtualHandSettingshas been renamed toFSGVirtualHandDebuggingSettings.- The value for
USGGrabComponent'sAttachmentSocketNameuproperty now defaults to the value of the plugin'sGrabAttachPointSocketNameinstead ofName_NONE. - The
SGGrabComponentnow enablesbGravityEnabled,bSimulatePhysics, and callsWakeRigidBodyon its owning actor atBeginPlay()ifbAffectPhysicsStateis enabled. - Updated the Directory Structure section of the main README file to reflect the latest toolchain support status.
- The
/CHANGELOG.mdfile has been migrated to/Handbook/src/overview/changelog.md - The
/LICENSE.mdfile has been migrated to/Handbook/src/license/senseglove-unreal-engine-plugin.md - The
/LICENSE-THIRD-PARTY.mdfile has been migrated to/Handbook/src/license/third-party.mdand every third-party component's license has been split; adding/Handbook/src/license/senseglove-sdk.mdfor the SenseGlove SDK,/Handbook/src/license/boost-cpp-libraries.mdfor the Boost C++ Libraries, and/Handbook/src/license/serial-communication-library.mdfor the Serial Communication Library. - The Platform Support Matrix section of the main README file has been migrated to
/Handbook/src/overview/platform-support-matrix.md. - The Planned Features Completion Status section of the main README file has been migrated to
/Handbook/src/overview/planned-features-completion-status.md. - The Directory Structure section of the main README file has been migrated to
/Handbook/src/overview/directory-structure.md. - The SenseGlove settings' main config struct is now marked as DefaultConfig which means it does not require to be saved when settings are changed and they take effect immediately as the user updates them.
- Replaced all bitfield uproperties with booleans.
- Changed the DocsURL from the old Blueprint docs website to the new SenseGlove Unreal Engine Handbook website.
- The Blueprint signature for various overloads of the Blueprint-exposed function
Queue Command Vibro Levelhas been changed to expose sensible display names.
Removed
- Dropped support for Unreal Engine
5.1and Epic Native Toolchainv20(used to build UE5.0and5.1Linux dependencies). - Removed the Allbreaker virtual hand model as it's no longer compatible with the SenseGlove plugin.
- Removed
ASGVirtualHandActoras it was experimental and we no longer maintain it and haven't been doing so for a long time. - Removed
FSGVirtualHandAnimInstanceProxy::GetBonesRotations(). - Removed
USGVirtualHandComponent::GetHandPose()and it's no longer possible to get the hand pose data fromUSGVirtualHandComponentasGetHandPose()has been removed. If you need it, you could always use the SenseGlove low-level API to retrieve it from the glove. - Removed also
GetFingerBoneName(),GetFingerBoneRefTransform(),GetFingerBoneRefRotation()andGetFingerBoneRefRotation()fromUSGVirtualHandComponent. - Removed some remnants of UE
5.1and older releases from the C++ code. - Removed the
packutility branch and merge it to the plugin's source code at/Packager.
Known Issues
- With the new OpenXR release, the separation of the real and virtual hand rendering is broken. The reason is the animation system now uses the OpenXR data in the world transforms which yields better animations, but comes at the cost of overriding the the hand position set by the wrist tracker component's position and rotation. If
FXRMotionControllerDatais invalid andbVisibleWhenHandDataUnavailableis enabled for example, the system works as expected, since the animation system won't proceed to animate the hand meshes without validFXRMotionControllerData. Since the animation system is only aware of the hand mesh it's animating versus the real hand and virtual hand meshes it means either it should become aware of the physics events like begin and end overlap events and also the real vs virtual hands, or it should resort back to animating the virtual hand meshes in local or component space. This release marks this feature as broken for now until we come up with a reasonable solution in the future. - The
UXRDeviceVisualizationComponentprovided by Unreal Engine is used in theSGPawnclass asControllerVisualizerLeftandControllerVisualizerRightfor implementing the wrist tracking hardware visualization feature. However, it is not compatible with the new OpenXR system in certain scenarios. For instance, when the motion controllers serve as wrist tracking hardware since the SenseGlove plugin is now introduced to the engine as anOpenXRHandTrackingsystem, it causes theUXRDeviceVisualizationComponentto visualize the wrist tracking hardware at coordinates (0.0f,0.0f,0.0f) instead of their actual location and rotation in the world. This happens because the component incorrectly registers them as inactive, possibly because it's assumed hand tracking and motion controllers cannot be in use at the same time. Currently, we use this feature solely for debugging, and we have an alternative in the form of wrist-tracking debug gizmos, which can be toggled on or off via the settings system. In future releases, we might remove this feature due to its incompatibility, unless we find a solution to make theUXRDeviceVisualizationComponentwork with the new system. Alternatively, we may develop our own version of theUXRDeviceVisualizationComponent. - Although the SenseGlove OpenXR implementation is fully compatible with the
IOpenXRHMDinterface and theFOpenXRHMDXRTrackingSystem, it is not compatible with theFOculusXRHMDbackend provided by the Meta XR plugin. The same issue likely applies to the VIVE OpenXR plugin. So, if these plugins are enabled in your project, the SenseGlove OpenXR will not function as intended, effectively breaking the plugin's functionality. It seems these plugins are necessary in order to make the fallback to the hand-tracking feature work on Android. While we may add support and compatibility with Meta XR and VIVE OpenXR plugins in the future, for the time being, if your project requires these plugins, we advise continuing with thev2.0.xrelease of the SenseGlove Unreal Engine plugin until this issue is addressed.
[2.0.8] - 2024-07-15
This is a bugfix release that contains a somewhat important bugfix backported from the next release of the plugin as documented below.
Fixed
- Fix a bug where the
SGPawnright-hand grab colliders' default size is mistakenly set to the default value for the left-hand grab colliders at CDO initialization time.
[2.0.7] - 2024-05-29
This is a bugfix release with no actual plugin code changes, only fixing issues with binary assets incompatible with UE versions earlier than 5.4.
Fixed
- Make the Allbreaker assets compatible with UE5.1+ again as the
v2.0.5update breaks compatibility with UE versions earlier than5.4, thus leaving the engine unable to load those assets.
[2.0.6] - 2024-05-29
This is a bugfix release with no actual plugin code changes, only removing development/test assets from UE 5.3 that were never meant to be shipped.
Removed
- Removed the dev/test virtual hand models that leaked into the
5.3branch.
Fixed
[2.0.5] - 2024-05-22
This is a bugfix release with no actual plugin code changes, only focusing on fixing the Allbreaker virtual hand model issues.
Fixed
- Fix the wrong palm bone names on the Allbreaker virtual hand models.
[2.0.4] - 2024-05-17
This is a bugfix release with no actual plugin's code change.
Fixed
- Fix our in-house Unreal Engine Marketplace submission tool's configurations where the Content folder (containing the Allbreaker hand model) is mistakenly ignored during the submission. This release reintroduces the Virtual Hand Model and its material missing from the previous release.
- Fix the
SenseGlove.uproject's wrong versioning submitted to the Unreal Engine Marketplace.
[2.0.3] - 2024-05-15
This is a bugfix release addressing mostly RunUAT build issues on Unreal Engine 5.4.
Fixed
- Fix UE
5.4RunUAT build issue: "Asking CppCompileEnvironment for a single Architecture, but it has multiple Architectures (arm64, x64)", affectingSenseGloveConnectImplandSenseGloveCoreImplmodues. - Improved target platform detection when building
SenseGloveConnectImplandSenseGloveCoreImplmodules and also distinguishing thex64builds fromarm64on Microsoft Windows. - Fix other UE
5.4RunUAT build issues, mostly caused by missing headers.
Removed
- Removed support for Android
armeabi-v7aandx86architectures as they are no longer supported by the supported engine versions.
[2.0.2] - 2024-04-25
This is a patch release with no code changes.
Added
- Introduce official Unreal Engine
5.4support to the Unreal Engine Marketplace.
Changed
- Updated the Platform Support Matrix with the latest changes. This is the last release to support Unreal Engine
5.1as we no longer are able to push updates for this release to the Unreal Engine Marketplace. Thev2.0.1release for Unreal Engine5.1can be obtained from the Unreal Engine Marketplace, andv2.0.2through our Microsoft Azure DevOps repositories. Please note that there are no actual code changes between these two releases and in terms of functionality they are almost identical.
[2.0.1] - 2024-04-15
This is a bugfix release.
Fixed
- Fix a bug inside both
SGVirtualHandComponentandSGWristTrackerComponentwhere the connected glove'sUObjectinstance gets destroyed and re-instantiated every frame. With this fix now the glove instance will be created or destroyed only when a glove connects to or disconnects from the system. - Update the outdated Platform Support Matrix and its remarks section to reflect the latest status information.
- Fix the wrong header file description sections for the header files inside
SenseGloveKismet/Public/SGKismet/.
Changed
- SenseGlove libraries have been updated to
v2.102.0-35d4de3f. - Together, SenseGlove libraries
v2.102.0-35d4de3fand SenseComv1.6.1remove the need to call ResetCalibration every time and are able to store and load calibration profiles from disk. - SesenGloveBackend module is no longer calling
FSGHandLayer::ResetCalibration()on every backend initialization.
[2.0.0] - 2024-03-22
This is the second major release of the SenseGlove Unreal Engine Plugin adding support for Nova 2 with enormous breaking changes to the current C++ and Blueprint APIs.
Added
- Added support for the SenseGlove Nova 2 devices.
- Added support for Quest 3 controllers.
- Various classes have been added to the API in order to implement the new functionalities and features from the latest upstream SenseGlove libraries.
- Added initial support for the upcoming Unreal Engine
5.4release. - Added a pair of default production-ready virtual hand meshes for the left and right hands, courtesy of Allbreaker LLC Columbia. For usage and redistribution, please consult the LICENSE-THIRD-PARTY.md file.
Fixed
- A few critical bug fixes that have already been backported to the
v1.x.xseries throughv1.9.3tov1.9.8releases. - Revamped the way we do
FVector<->SGVect3D,FQuat<->SGQuat, and SenseGlove <-> Unreal Engine angles conversions in order to properly translate between the SenseGlove and Unreal Engine coordinate systems. - Allow the C++ compiler the opportunity to perform RVO/NRVO if applicable.
- Fix the modules' order inside the
.upluginfile. - Fix a build issue inside
FSGArrayUtils::FromStdVector()introduced by newer MVSC updates due to stricter implicituint64toint32conversions. - Fix a build issues inside
FSGArrayUtilswhen performing non-Unity builds due to the missing<string>header. - Fix other build issues in
USGDevice,USGNovaGloveSensorData,FSGDeviceImpl, andFSGSenseGloveVarsImplwhen performing non-Unity builds due to the missing relevant headers. - Fix changelog formatting.
- Some other improverment and fixes.
Changed
- SenseGlove libraries have been updated to
v2.101.12-62b1be11. - The SenseGlove Unreal Engine Plugin now declares the OpenXR plugin as a dependency, so that the OpenXR plugin will be enabled automatically as soon as the SenseGlove Unreal Engine Plugin gets enabled.
- Various classes and parts of the API have been changed in order to reflect and adhere to upstream SenseGlove libraries.
- Reverse the Platform Support Matrix order from newer Unreal Engine versions to the older ones.
- Clarify the engine support policy in the main readme file by adding the corresponding references from the Epic Marketplace Guidelines and a URL to their guidelines page.
- The
SGTouchComponentuproperties BuzzDuration and BuzzLevel now utilize different different names in order to correspond to the underlying API changes. They have been renamed toVibrotactileDurationandVibrotactileLevel. - The
SGTouchComponentuproperties ForceFeedbackLevel and BuzzLevel (nowVibrotactileLevel) parameters type have changed fromint32tofloatwith the value range varying between0.0fto1.0finstead of1to100in order to correspond to the underlying API changes. - The
SGVirtualHandComponentnow assumes the default grab point's name asGenericGrabPointinstead ofGrabPointas default if not specified in the Unreal Blueprint Editor. - The
SGPawnon UE5.2+now utilizesUXRDeviceVisualizationComponentin order to properly display the controller meshes shipped with Unreal Engine's OpenXR plugin, or a user-provided mesh. On UE5.1this could still be set on theWristTrackerLeftandWristTrackerRightcomponents. Please note that despite the fact that on UE5.2+it's still possible to utilize theWristTrackerLeftandWristTrackerRightfor setting the controller meshes, this has been deprecated in UE5.2+and is no longer supported.
Removed
- Various classes and parts of the API have been removed in order to reflect and adhere to upstream SenseGlove libraries.
- Removed the redundant
SGIC_int32_Refinterop type.
[1.9.8] - 2024-03-12
This is a bugfix release that contains bugfixes backported from the next major release of the plugin as documented below.
Fixed
- Fix a bug where the right-hand mesh is always hidden inside the game no matter whether the right glove is connected or not.
- Fix a crash inside the
USGHandPose::FromHandAngles()method. - Some performance optimizations by utilizing
MoveTempin return statements. - Some improvements applied to the source code.
- Some other minor fixes.
Changed
- The BonesRotations TMap is no longer a public field of
FSGVirtualHandAnimInstanceProxyand instead could be retrieved by calling theGetBonesRotations()method.
[1.9.7] - 2024-02-18
This is a bugfix release that contains bugfixes backported from the next major release of the plugin as documented below.
Fixed
- Fix various bugs inside the
SGPlayerControllerwhich occur when the thumb and pinky fingers are simultaneously touching differentSGTouchComponents, or only one of them is in touch with such a component. In this case pinky's buzz and force-feedback levels are determined from theSGTouchComponentthat is in collision with the thumb instead of the one that is touched by the pinky. Or, the pinky could ignore the buzz and force-feedback level if the thumb is not in collision with anSGTouchComponent. Or, the pinky could have reacted with a buzz or force feedback while only the thumb is in contact with anSGTouchComponent. - Fix the
BuzzDurationuproperty range in order not to get clamped at100.0fand also usefloatvalues forClampMinandUIMinspecifiers instead of integer values.
[1.9.6] - 2024-02-14
This is a bugfix release.
Fixed
- Fix a few critical bugs inside the
NovaGloveclass where the higher levels of the API including constructors, Parse, andNewNovaGlovemethods mistakenly instantiate aSenseGloveImplclass instead of aNovaGloveImplclass.
[1.9.5] - 2024-02-09
This is a bugfix release.
Fixed
- Fix a wrong type-casting inside
SGDeviceModel::ParseFirmware()whereOutMainVersionandOutSubVersionarguments are getting passed to the lower levels of the API. This could potentially result in a segfault at the FFI boundary between lower and higher levels of the API.
[1.9.4] - 2024-02-08
This is a bugfix release addressing mostly Blueprint API issues with ABI breaking changes inside the Blueprint layer, backported from the next major release of the plugin as documented below.
Fixed
- Fix the Blueprint Parse function signature for the
NovaGloveInfoKismetLibrarywhere theOutGloveInfopassed by the caller was never actually assigned as it was not getting passed by reference. - Changelog formatting.
[1.9.3] - 2024-02-03
This is a hotfix release addressing a few critical issues that might result in crashes or malfunctions for users of the low-level SenseGlove API, backported from the next major release of the plugin as documented below.
Fixed
- Fix a potential memory corruption inside one of the
SGBasicHandModelconstructors where the StartPositions parameter gets passed as the StartRotations parameter to lower levels of the API. - Fix a potential memory corruption inside one of the
SGSenseGloveInfoconstructors where the StartPositions parameter gets passed as the Functions parameter to lower levels of the API. - Fix a potential memory corruption where inside the
SGHapticGloveCalibrationSequence::GetCurrentInstruction()method, the return statement of the function is getting assigned to the const parameterNextStepKey, thus the return statement of the function will always be empty as well. - Fix a potential memory corruption where inside one of the overloads of the
SGSenseGloveImpl::GetGlovePose()method, the out parameter of the method is getting passed as the SensorData parameter to the lower levels of the API. - Fix multiple Equals methods for a few classes such as
SGInterpolationSet,SGNovaGloveHandProfile,SGNovaGloveInfo,SGSenseGloveHandProfile,SenseGloveInfo,SenseGlovePose, where the Equal method compares the current instance against itself instead of the other instance passed to as the parameter to the method. - Removed a redundant code statement inside the
SGNovaGloveImpl::GetSubFirmwareVersion()method. - Some minor const correctness fixes.
- Some other minor code fixes and improvements.
- Fix the wrong version numbers inside the paltform support matrix and the main
.upluginfile. - Minor changelog fixes.
- Bumped the copyright years.
[1.9.2] - 2023-11-03
Added
- Added a list of planned features and their completion status to the main README file.
Fixed
- A bug where the released actor is going to be
NULLwhenever theOnActorReleasedevent fires.
[1.9.1] - 2023-10-11
Fixed
- Add the missing Unreal Engine C++ header to files that rely on the
ENGINE_*_VERSIONmacros in order to fix the Epic Store build failures on UE5.3.
[1.9.0] - 2023-10-10
Changed
- The
BlueprintImplementableEventufunction specifier for theOnGrabStateUpdated,OnTouchStateUpdated,OnActorGrabbed,OnActorReleased,OnActorBeginTouch, andOnActorEndTouchevents have been changed to BlueprintNativeEvent in order to allow them to be implemented from the child C++ classes as well. This won't break any existing Blueprint code that relies on the previous BlueprintImplementableEvent signature.
Fixed
- Add a missing release note entry for the
v1.8.0release to the changelog file.
[1.8.0] - 2023-10-10
Added
- Introduced new
SGPawnevents:OnActorGrabbed,OnActorReleased,OnActorBeginTouch, andOnActorEndTouch. - Exposed
OnGrabStateUpdated,OnTouchStateUpdated,OnActorGrabbed,OnActorReleased,OnActorBeginTouch, andOnActorEndTouchevents to Blueprint asBlueprintImplementableEvent.
Fixed
- Fix a bug where the
OnTouchStateUpdatedevent is mistakenly triggered instead of theOnGrabStateUpdatedwhen the right thumb fingertip grab collider overlaps with a grabbable actor. - Fix the
DECLARE_EVENTmacro signature forOnGrabStateUpdatedandOnTouchStateUpdatedevents.
[1.7.0] - 2023-09-14
Added
- Introduce
SGGameInstance, a customized SenseGlove game instance for future use. - Added the new
SenseGloveBackendandSenseGloveBackendKismetmodules. - Added
SG_CPP20C++ macro for C++20 detection, which is now default from UE5.3onwards. - Added
SG_CAPTURE_THISC++ macro as a workaround forerror C4855: implicit capture of 'this' via '[=]' is deprecated in /std:c++20in order to build the same lambda captures without extra#ifdefs on all supported engine versions.
Changed
- SenseGlove libraries have been updated to
v2.12.0-19c9854. SGCoreImpl/SGPlatformhas been moved toSGBuildHacks/SGPlatform.
Fixed
- Proper initialization of the SenseGlove backend in order to fix a bug in certain situations where
SGConnect::Init()gets called every frame. - Some other minor fixes and improvements.
[1.6.1] - 2023-08-14
Fixed
- Fix Unreal Engine
5.0build issues. - Minor documentation fixes.
[1.6.0] - 2023-08-14
Added
- Added support for the upcoming Unreal Engine
5.3. - Now, the hand's velocity is applied to grabbed actors after being released from the hand.
- Introduce the real hands to the
SenseGlovemodule (SGPawn) API. - Added separation of the virtual and real hand rendering.
Fixed
- Fix the wrong default debug virtual hand gizmo colors when initialized using the default constructor.
- Some minor performance fixes and improvements.
Changed
- SenseGlove libraries have been updated to
v2.11.0-b775a05.
[1.5.3] - 2023-07-19
This is a hotfix release mostly addressing Android Bluetooth performance issues.
Fixed
- Minor changelog fixes.
Changed
- SenseGlove libraries have been updated to
v2.10.1-3b0e7c9.
[1.5.2] - 2023-07-19
This is a hotfix release mostly addressing Android-related issues.
Fixed
- Fix a build issue with Android shipping builds due to
sgconnect.jarnot getting copied automatically in the AFSProject which is compiled for shipping builds whenAndroidFileServer (AFS)is enabled. - Minor changelog fixes and some source code formatting fixes.
[1.5.1] - 2023-07-13
This is a hotfix release addressing a few critical issues introduced by the recent changes.
Fixed
- Fix a wrist tracker bug where left and right hands' wrist trackers are mistakenly tracking the opposite hand's motion source.
- Fix a bug where the right hand is not able to do grab or release.
[1.5.0] - 2023-06-16
This release breaks ABI/API compatibility with the previous versions in some areas as documented below.
Added
- Added HTC VIVE Focus 3 positional tracking hardware enum.
- Added support for the Meta Quest Pro, HTC VIVE, and HTC VIVE Focus 3 positional tracking hardware.
- Added two options to the wrist tracker settings (to the global plugin settings and the overrides in the wrist tracker component) in order to be able to specify a custom motion source for the left and right hands, so that it allows SteamVR-based trackers such as HTC VIVE or HTC VIVE Focus 3 to operate with the
SGPawn.
Fixed
- Fix a bug where SteamVR trackers such as HTC VIVE and HTC VIVE Focus 3's wrist orientation and location were not being tracked.
Changed
- Fully refactored the top-level configurations in the settings system into ustructs.
- SenseGlove libraries have been updated to
v2.10.0-12133ac.
Removed
- Dropped support for the Epic Native Toolchain
v19, MSVCv141(Visual Studio 2017), and thus Unreal Engine4.27as it has been marked as deprecated sincev1.4.x. - Removed any kind of support for Oculus Touch (Oculus Rift S and Oculus Quest 1) positional tracking hardware, thus the enum as well.
- Removed any kind of support for Pico Neo 2 positional tracking hardware, thus the enum as well.
- Removed any kind of support for Pico Neo 3 positional tracking hardware, thus the enum as well.
[1.4.3] - 2023-06-01
This is a hotfix release addressing a critical Android crash.
Fixed
- Fix a critical Android crash that happens where the default development hand meshes are not found, which means almost always since we don't ship any default virtual hand mesh at the moment.
- Minor changelog release formatting fix in order to stay consistent.
[1.4.2] - 2023-06-01
This is a hotfix release addressing a few critical issues.
Fixed
- Fix build issues with certain compilers when the Unreal Engine version is older than
5.2. - Reintroduced the Virtual Hand and the Wrist Tracker debug gizmos which have temporarily been disabled due to a bug in the settings system.
- Some minor changelog fixes.
[1.4.1] - 2023-05-29
This is a bugfix release with a focus on Android build issues.
Fixed
- Fix an Android Gradle build issue that happens when the game's package name won't start with com.senseglove.*.
- Suppress a grade warning for non-arm64 architectures when the build target is Android.
Removed
- Remove dead Gradle code from the Android module.
[1.4.0] - 2023-05-19
This release breaks ABI/API compatibility with the previous versions.
Added
- Added support for the stable release of Unreal Engine
5.2(the preview release has been supported sincev1.2.0). - Added Linux
AArch64platform support. - Added a new Grab component that can turn any actor into a grabbable object.
- Added a new Touch component that enables haptic feedback such as Buzz and Force-Feedback commands.
- Added an optional feature in order to automatically stop all haptics on the EndPlay event, wherever the virtual hand component is used. By default, it's enabled.
Fixed
- Fix Blueprint signatures for
USGVirtualHandComponentKismetLibraryand make all the Blueprint exposed functions static.
Changed
- SenseGlove libraries have been updated to
v2.7.1-965f90cwith support for LinuxAArch64. - The Virtual Hand and the Wrist Tracker debug gizmos (the intended use is only for SenseGlove developers for really low-level stuff; thus won't affect the users of the plugin at all) have been disabled and will be ignored due to an esoteric bug in the settings systems which has been scheduled to be fixed in the future releases.
Removed
- Removed the redundant SenseGloveCoreTypes module which causes all kinds of packaging issues with certain versions of the engine.
Deprecated
- This is the last release to support Unreal Engine
4.27and please keep in mind that the current release is not obtainable through the Unreal Engine Marketplace. The latest published version on the Marketplace for4.27isv1.3.1. Per Epic's Marketplace policy regarding Code Plugins, we are only able to distribute or update the SenseGlove plugin for the last three stable versions of Unreal Engine. As a result, we won't be able to publish updates or bug fixes for the older versions of the Engine except on rare occasions and only through our official repository on Microsoft Azure DevOps.
[1.3.1] - 2023-04-28
Fixed
- Fix RunUAT build issues caused by missing headers.
- Minor documentation fixes.
[1.3.0] - 2023-04-28
This release breaks ABI/API compatibility with the previous versions in addition to breaking coordinates systems conversions between Unreal Engine and the SenseGlove libraries.
Added
- A new generic SenseGlove Debug module.
- A debug virtual hand.
Fixed
- Fix the wrist tracker miscalculations for the Quest 2 controllers (other headsets might need fixing as well, in that case, future releases will address that).
- Minor code improvement and fixes.
- Minor documentation fixes.
Changed
- Breaking API/ABI changes in the Settings and the main
SenseGlovemodule due to some settings refactoring. - Breaking changes in the SenseGlove/Unreal coordinates systems conversions due to underlying changes in the SenseGlove Core Libraries.
- SenseGlove libraries have been updated to
v2.6.0-aac3d56.
[1.2.1] - 2023-03-30
Fixed
- Fix RunUAT build issues with Android.
[1.2.0] - 2023-03-28
This release breaks ABI/API compatibility with the previous versions.
Added
- Android/Oculus on-device glove calibration.
- Introduced the animated Virtual Hand Model (as a set of virtual hand and wrist tracker components and an actor) with in-editor animation availability.
- Introduced
SGPawn,SGPlayerController,SGGameModeBase, etc classes. - Added an internal
SenseGloveCoreTypesmodule in order to share common SenseGloveCore types between various modules. - Segregated Android binaries for NDK
r21e(UE4.27and5.0) andr25b(UE5.1,5.2). - Fully functional and stable Linux development support.
- Fully functional and stable Unreal Engine
5.2preview support has been added. - Added a Plugin's settings manager and two new modules SenseGloveSettings and SenseGloveSettingsKismet.
Changed
- SenseGlove libraries have been updated to the Linux-aware version:
v2.5.0-8069342. - API has changed to use degrees instead of radians.
- SGCoordinates utility class name has been changed to
SGAnglesand now the plugin API uses degrees in contrast of SenseGlove libraries by default. - Migrate common nested array types into the SenseGloveTypes module from the SenseGloveCore module.
Removed
- Removed a few thousand lines of archaic pre-public-release dead code.
- Dropped Android NDK
r21bbinaries used by the older engine versions. - Purged the dead code for dropped engine versions by
v1.1.1(4.22,4.23,4.24,4.25, and4.26) that carried over to the current version. - Removed redundant
SGConnectImpl/SGPlatform. - Removed redundant
SGTypes/SGConnectTypes.
Known Issues
- Wrist Tracker's offsets are a bit off (e.g. on Quest 2), scheduled to be fixed in the next patch release.
[1.1.1] - 2023-02-07
Added
- Initial support for the upcoming Unreal Engine
5.2. - Add support for Android
armeabi-v7awithneon,x86-64, andx86builds in addition toarm64-v8a.
Fixed
- Fix various Android build issues.
- Some minor fixes and improvements.
Changed
- Bump SenseGlove libraries to
v2.1.2-95ec6e7.
[1.1.0] - 2023-02-03
Added
- Whitelist Android as a target platform.
- Introduce Android support.
- Add third-party library SGConnect for Android
v1.1.0.
Fixed
- Fix Android build issues caused by the log module.
Changed
- SGConnect and SGCore libraries have been updated to
v2.1.1-0569c74.
Removed
- Removed the enum utils class due to
ANY_PACKAGEdeprecation warnings in Unreal Engine5.1. - Support for older versions of the Engine (namely,
4.22,4.23,4.24,4.25, and4.26) has been dropped.
[1.0.4] - 2022-12-02
This is a minor release focusing mostly on adherence to the Unreal Engine Marketplace Guidelines based on the feedback from Epic Games.
Added
- Added support for MSVC 2017.
Changed
- Updated SenseGlove libraries (SGCore/SGConnect) to
v2.0.4.
[1.0.3] - 2022-11-29
This is a minor release focusing on adherence to the Unreal Engine Marketplace Guidelines based on the feedback from Epic Games.
Changed
- Adjust Config/FilterPlugin.ini in order to conform to Epic's Market Place Guidelines.
[1.0.2] - 2022-11-27
This is a minor release focusing on adherence to the Unreal Engine Marketplace Guidelines based on the feedback from Epic Games.
Added
- Added the newly acquired Unreal Engine Market Place Offer ID to the
.upluginfile. - List the dotfiles inside the FilterPlugin.ini file as well.
- Add the copyright notice to the source files missing it.
- Add the SenseGlove SDK license to the third-party license file.
Fixed
- Fix the readme typos and errors.
- Minor fixes in the changelog for previous releases.
[1.0.1] - 2022-11-25
Changed
- Exposed SenseGloveTypes as a public dependency in SenseGloveConnect and SenseGloveCore modules, so that the C++ users of the API don't need to explicitly add it as a dependency.
- Cleaned up the redundant headers/modules dependencies from SGCore headers.
Fixed
- Fix RunUAT build issues prior to Epic Store submission.
[1.0.0] - 2022-11-24
Added
- Initial public release of the SenseGlove haptic API for Unreal Engine with support for Microsoft Windows and GNU/Linux.
Directory Structure
/
  │
  ├── Config
  │
  ├── Documentation (this will be generated by running the <code>make</code> command inside the Handbook directory)
  │
  ├── Handbook (this is the mdBook source code, used to generate the Documentation folder and not distributed to [Fab](https://www.fab.com/))
  │
  ├── Resources
  │
  └── Source (various plug-in modules)
        │
        ├── SenseGlove (the UE-specific high-level API)
        │
        ├── SenseGloveAndroid (the Android-specific module)
        │
        ├── SenseGloveBackend (responsible for initialization and deinitialization of the backend libraries)
        │
        ├── SenseGloveBackendKismet (exposes Blueprint-specific functionality from the SenseGloveBackend module)
        │
        ├── SenseGloveBuildHacks (uses Exceptions and RTTI, internally used for compiler-specific build hacks)
        │
        ├── SenseGloveConnect (exposes part of the SGConnect low-level API to C++)
        │
        ├── SenseGloveConnectImpl (uses Exceptions and RTTI, intended for internal use only)
        │
        ├── SenseGloveConnectKismet (SGConnect functionality exposed to Blueprint)
        │
        ├── SenseGloveCore (exposes part of the SGCoreCpp low-level API to C++)
        │
        ├── SenseGloveCoreImpl (uses Exceptions and RTTI, intended for internal use only)
        │
        ├── SenseGloveCoreKismet (SGCoreCpp functionality exposed to Blueprint)
        │
        ├── SenseGloveDebug (a utility debug module)
        │
        ├── SenseGloveDebugKismet (exposes Blueprint-specific functionality from the SenseGloveDebug module)
        │
        ├── SenseGloveEditor (the Editor module)
        │
        ├── SenseGloveInterop (internally used for interoperability between RTTI disabled/enabled modules)
        │
        ├── SenseGloveKismet (exposes Blueprint-specific functionality from the SenseGlove module)
        │
        ├── SenseGloveLog (the internal log module)
        │
        ├── SenseGloveSettings (the plugin's settings manager)
        │
        ├── SenseGloveSettingsKismet (exposes Blueprint-specific functionality from the SenseGloveSettings module)
        │
        ├── SenseGloveTracking (provides XR_EXT_hand_tracking support, HMD auto-detection, and SenseGlove device tracking)
        │
        ├── SenseGloveTrackingKismet (exposes Blueprint-specific functionality from the SenseGloveTracking module)
        │
        ├── SenseGloveTypes (exposes various enums from the backend libraries and also types from the SenseGlove module)
        │
        ├── SenseGloveUtils (the internal utility module)
        │
        └── ThirdParty (3rd-party dependencies)
              │
              ├── android (.jar file Java libraries for Android)
              │     │
              │     ├── debug
              │     │
              │     └── release
              │
              ├── include (header files)
              │     │
              │     └── SenseGlove
              │           │
              │           ├── BLE (SGBLE headers)
              │           │
              │           ├── Common (SGCommon headers)
              │           │
              │           ├── Connect (SGConnect headers)
              │           │
              │           ├── Core (SGCore headers)
              │           │
              │           └── Log (SGLog headers)
              │
              ├── lib (platform-specific pre-built binary dependencies)
              │     │
              │     ├── android
              │     │     │
              │     │     └── r25b (Android NDK r25b dependencies for UE 5.1+)
              │     │           │
              │     │           ├── aarch64 (64-bit ARM variant of Android)
              │     │           │     │
              │     │           │     ├── debug
              │     │           │     │
              │     │           │     └── release
              │     │           │
              │     │           └── x86-64 (64-bit x86-64 variant of Android)
              │     │                 │
              │     │                 ├── debug
              │     │                 │
              │     │                 └── release
              │     │
              │     ├── linux
              │     │     │
              │     │     ├── rustc (GNU/Linux binary dependencies built with Rust)
              │     │     │     │
              │     │     │     ├── aarch64 (dependencies targeting GNU/Linux AArch64 architecture)
              │     │     │     │     │
              │     │     │     │     ├── debug
              │     │     │     │     │
              │     │     │     │     └── release
              │     │     │     │
              │     │     │     └── x86-64 (dependencies targeting GNU/Linux x86-64 architecture)
              │     │     │           │
              │     │     │           ├── debug
              │     │     │           │
              │     │     │           └── release
              │     │     │
              │     │     ├── v22 (5.4 GNU/Linux dependencies)
              │     │     │     │
              │     │     │     ├── aarch64 (dependencies targeting GNU/Linux AArch64 architecture)
              │     │     │     │     │
              │     │     │     │     ├── debug
              │     │     │     │     │
              │     │     │     │     └── release
              │     │     │     │
              │     │     │     └── x86-64 (dependencies targeting GNU/Linux x86-64 architecture)
              │     │     │           │
              │     │     │           ├── debug
              │     │     │           │
              │     │     │           └── release
              │     │     │
              │     │     ├── v23 (UE 5.5 GNU/Linux dependencies)
              │     │     │     │
              │     │     │     ├── aarch64 (dependencies targeting GNU/Linux AArch64 architecture)
              │     │     │     │     │
              │     │     │     │     ├── debug
              │     │     │     │     │
              │     │     │     │     └── release
              │     │     │     │
              │     │     │     └── x86-64 (dependencies targeting GNU/Linux x86-64 architecture)
              │     │     │           │
              │     │     │           ├── debug
              │     │     │           │
              │     │     │           └── release
              │     │     │
              │     │     └── v25 (UE 5.6 GNU/Linux dependencies)
              │     │           │
              │     │           ├── aarch64 (dependencies targeting GNU/Linux AArch64 architecture)
              │     │           │     │
              │     │           │     ├── debug
              │     │           │     │
              │     │           │     └── release
              │     │           │
              │     │           └── x86-64 (dependencies targeting GNU/Linux x86-64 architecture)
              │     │                 │
              │     │                 ├── debug
              │     │                 │
              │     │                 └── release
              │     │
              │     └── windows
              │           │
              │           ├── v143 (Microsoft Visual Studio 2022 dependencies)
              │           │     │
              │           │     └── x86-64 (dependencies targeting Microsoft Windows x86-64 architecture)
              │           │           │
              │           │           ├── debug
              │           │           │
              │           │           └── release
              │           │
              │           └── rustc (Microsoft Windows binary dependencies built with Rust)
              │                 │
              │                 └── x86-64 (dependencies targeting Microsoft Windows x86-64 architecture)
              │                       │
              │                       ├── debug
              │                       │
              │                       └── release
              │
              ├── SGBleThirdPartyLibs (Third-party module providing SGBLE headers and libraries)
              │
              ├── SGConnectThirdPartyHeaders (Third-party module providing SGConnect headers)
              │
              ├── SGConnectThirdPartyLibs (Third-party module providing SGConnect headers and libraries)
              │
              ├── SGCoreThirdPartyLibs (Third-party module providing SGCore headers and libraries)
              │
              └── SGSerialThirdPartyLibs (Third-party module providing github.com/wjwwood/serial headers and libraries)
Extra Resources
There are various resources available for older versions of the SenseGlove Unreal Engine Plugin prior to v2.1.x that might still be partially relevant. These include example projects, demo scenes, and tutorials. Plans are underway to provide new example projects, demo scenes, and tutorials for the latest release. In the meantime, the outdated resources can still be beneficial
Examples and Demo Projects
- A basic OpenXR-compatible Blueprint demo demonstrating basic functionality such as grab/release, touch with buzz and force-feedback, etc (compatible with versions v2.1.0+).
- A basic Blueprint demo demonstrating basic functionality such as grab/release, touch with buzz and force-feedback, etc (compatible with versions >= v1.4.x and <= v2.0.x).
- Example C++ API Project (only compatible with early v1.x.x releases)
- Example Blueprint API Project (only compatible with early v1.x.x releases)
Third-Party OpenXR Integration Demos
Tutorials
- Finding out your SenseGlove plugin version
- Plugin installation guide for Microsoft Windows
- C++ & Blueprint examples for Microsoft Windows
- Plugin and examples installation guide for GNU/Linux
- How to connect to Nova gloves on GNU/Linux using Blueman Bluetooth Manager
- How to connect to Nova gloves on GNU/Linux using command-line
- The basic C++ and Blueprint API usage
- How to setup the virtual hand model & the SenseGlove pawn
- How to deploy to Oculus Quest 2 and Android
- Setting up Grabbing and Haptic Feedback functionalities (SGBasicDemo)
- Setting up VIVE Pro & VIVE Trackers in Unreal Engine
- Setting up VIVE Focus 3 & VIVE Wrist Trackers in Unreal Engine
- SGBasicDemo: setup throwing objects and physics settings for the real and virtual hands
- SGBasicDemo v2: upgrading your projects to the SenseGlove Unreal Engine Plugin v2.0.0
Third-Party Tutorials
OpenXR Tutorials
- Introduction to Virtual Reality, OpenXR Hand-Tracking, and Gesture Detection in Unreal Engine
- Procedural Virtual Hand Mesh Animation Using OpenXR Hand-Tracking Data - Part 1
- Procedural Virtual Hand Mesh Animation Using OpenXR Hand-Tracking Data - Part 2
- Unreal Engine OpenXR Hand-Tracking on Android with Meta XR (Quest 3S/3/Pro/2) and HTC VIVE OpenXR (Focus Vision/XR Elite/Focus 3) Plugins
Android (Meta Quest / HTC VIVE) Tutorials
- Build & Deploy Unreal Engine 5.5 Projects APK to Android & Meta Quest 3S/3/Pro/2 in Standalone Mode
- Unreal Engine OpenXR Hand-Tracking on Android with Meta XR (Quest 3S/3/Pro/2) and HTC VIVE OpenXR (Focus Vision/XR Elite/Focus 3) Plugins
VR Optimization
SenseGlove Unreal Engine Plugin License
The SenseGlove Unreal Engine Plugin is licensed under the terms of the MIT License. Below is the MIT License:
MIT License

Copyright (c) 2020 - 2026 SenseGlove

Permission is hereby granted, free of charge, to any person obtaining a copy
of this software and associated documentation files (the "Software"), to deal
in the Software without restriction, including without limitation the rights
to use, copy, modify, merge, publish, distribute, sublicense, and/or sell
copies of the Software, and to permit persons to whom the Software is
furnished to do so, subject to the following conditions:

The above copyright notice and this permission notice shall be included in all
copies or substantial portions of the Software.

THE SOFTWARE IS PROVIDED "AS IS", WITHOUT WARRANTY OF ANY KIND, EXPRESS OR
IMPLIED, INCLUDING BUT NOT LIMITED TO THE WARRANTIES OF MERCHANTABILITY,
FITNESS FOR A PARTICULAR PURPOSE AND NONINFRINGEMENT. IN NO EVENT SHALL THE
AUTHORS OR COPYRIGHT HOLDERS BE LIABLE FOR ANY CLAIM, DAMAGES OR OTHER
LIABILITY, WHETHER IN AN ACTION OF CONTRACT, TORT OR OTHERWISE, ARISING FROM,
OUT OF OR IN CONNECTION WITH THE SOFTWARE OR THE USE OR OTHER DEALINGS IN THE
SOFTWARE.
Please note that while the SenseGlove Unreal Engine Plugin is made available under the MIT License, it utilizes a few third-party libraries with permissive free licenses as well, in order to power various components. For a list of these libraries and their own respective open-source licenses take a look at the third-party licenses, please.
SenseGlove Unreal Engine Handbook License
The SenseGlove Unreal Engine Handbook is licensed under the terms of the CC BY (Creative Commons Attribution) License. Below is the CC BY License:
Attribution 4.0 International

Copyright (c) 2020 - 2026 SenseGlove

=======================================================================

Creative Commons Corporation ("Creative Commons") is not a law firm and
does not provide legal services or legal advice. Distribution of
Creative Commons public licenses does not create a lawyer-client or
other relationship. Creative Commons makes its licenses and related
information available on an "as-is" basis. Creative Commons gives no
warranties regarding its licenses, any material licensed under their
terms and conditions, or any related information. Creative Commons
disclaims all liability for damages resulting from their use to the
fullest extent possible.

Using Creative Commons Public Licenses

Creative Commons public licenses provide a standard set of terms and
conditions that creators and other rights holders may use to share
original works of authorship and other material subject to copyright
and certain other rights specified in the public license below. The
following considerations are for informational purposes only, are not
exhaustive, and do not form part of our licenses.

     Considerations for licensors: Our public licenses are
     intended for use by those authorized to give the public
     permission to use material in ways otherwise restricted by
     copyright and certain other rights. Our licenses are
     irrevocable. Licensors should read and understand the terms
     and conditions of the license they choose before applying it.
     Licensors should also secure all rights necessary before
     applying our licenses so that the public can reuse the
     material as expected. Licensors should clearly mark any
     material not subject to the license. This includes other CC-
     licensed material, or material used under an exception or
     limitation to copyright. More considerations for licensors:
    wiki.creativecommons.org/Considerations_for_licensors

     Considerations for the public: By using one of our public
     licenses, a licensor grants the public permission to use the
     licensed material under specified terms and conditions. If
     the licensor's permission is not necessary for any reason--for
     example, because of any applicable exception or limitation to
     copyright--then that use is not regulated by the license. Our
     licenses grant only permissions under copyright and certain
     other rights that a licensor has authority to grant. Use of
     the licensed material may still be restricted for other
     reasons, including because others have copyright or other
     rights in the material. A licensor may make special requests,
     such as asking that all changes be marked or described.
     Although not required by our licenses, you are encouraged to
     respect those requests where reasonable. More considerations
     for the public:
    wiki.creativecommons.org/Considerations_for_licensees

=======================================================================

Creative Commons Attribution 4.0 International Public License

By exercising the Licensed Rights (defined below), You accept and agree
to be bound by the terms and conditions of this Creative Commons
Attribution 4.0 International Public License ("Public License"). To the
extent this Public License may be interpreted as a contract, You are
granted the Licensed Rights in consideration of Your acceptance of
these terms and conditions, and the Licensor grants You such rights in
consideration of benefits the Licensor receives from making the
Licensed Material available under these terms and conditions.


Section 1 -- Definitions.

  a. Adapted Material means material subject to Copyright and Similar
     Rights that is derived from or based upon the Licensed Material
     and in which the Licensed Material is translated, altered,
     arranged, transformed, or otherwise modified in a manner requiring
     permission under the Copyright and Similar Rights held by the
     Licensor. For purposes of this Public License, where the Licensed
     Material is a musical work, performance, or sound recording,
     Adapted Material is always produced where the Licensed Material is
     synched in timed relation with a moving image.

  b. Adapter's License means the license You apply to Your Copyright
     and Similar Rights in Your contributions to Adapted Material in
     accordance with the terms and conditions of this Public License.

  c. Copyright and Similar Rights means copyright and/or similar rights
     closely related to copyright including, without limitation,
     performance, broadcast, sound recording, and Sui Generis Database
     Rights, without regard to how the rights are labeled or
     categorized. For purposes of this Public License, the rights
     specified in Section 2(b)(1)-(2) are not Copyright and Similar
     Rights.

  d. Effective Technological Measures means those measures that, in the
     absence of proper authority, may not be circumvented under laws
     fulfilling obligations under Article 11 of the WIPO Copyright
     Treaty adopted on December 20, 1996, and/or similar international
     agreements.

  e. Exceptions and Limitations means fair use, fair dealing, and/or
     any other exception or limitation to Copyright and Similar Rights
     that applies to Your use of the Licensed Material.

  f. Licensed Material means the artistic or literary work, database,
     or other material to which the Licensor applied this Public
     License.

  g. Licensed Rights means the rights granted to You subject to the
     terms and conditions of this Public License, which are limited to
     all Copyright and Similar Rights that apply to Your use of the
     Licensed Material and that the Licensor has authority to license.

  h. Licensor means the individual(s) or entity(ies) granting rights
     under this Public License.

  i. Share means to provide material to the public by any means or
     process that requires permission under the Licensed Rights, such
     as reproduction, public display, public performance, distribution,
     dissemination, communication, or importation, and to make material
     available to the public including in ways that members of the
     public may access the material from a place and at a time
     individually chosen by them.

  j. Sui Generis Database Rights means rights other than copyright
     resulting from Directive 96/9/EC of the European Parliament and of
     the Council of 11 March 1996 on the legal protection of databases,
     as amended and/or succeeded, as well as other essentially
     equivalent rights anywhere in the world.

  k. You means the individual or entity exercising the Licensed Rights
     under this Public License. Your has a corresponding meaning.


Section 2 -- Scope.

  a. License grant.

       1. Subject to the terms and conditions of this Public License,
          the Licensor hereby grants You a worldwide, royalty-free,
          non-sublicensable, non-exclusive, irrevocable license to
          exercise the Licensed Rights in the Licensed Material to:

            a. reproduce and Share the Licensed Material, in whole or
               in part; and

            b. produce, reproduce, and Share Adapted Material.

       2. Exceptions and Limitations. For the avoidance of doubt, where
          Exceptions and Limitations apply to Your use, this Public
          License does not apply, and You do not need to comply with
          its terms and conditions.

       3. Term. The term of this Public License is specified in Section
          6(a).

       4. Media and formats; technical modifications allowed. The
          Licensor authorizes You to exercise the Licensed Rights in
          all media and formats whether now known or hereafter created,
          and to make technical modifications necessary to do so. The
          Licensor waives and/or agrees not to assert any right or
          authority to forbid You from making technical modifications
          necessary to exercise the Licensed Rights, including
          technical modifications necessary to circumvent Effective
          Technological Measures. For purposes of this Public License,
          simply making modifications authorized by this Section 2(a)
          (4) never produces Adapted Material.

       5. Downstream recipients.

            a. Offer from the Licensor -- Licensed Material. Every
               recipient of the Licensed Material automatically
               receives an offer from the Licensor to exercise the
               Licensed Rights under the terms and conditions of this
               Public License.

            b. No downstream restrictions. You may not offer or impose
               any additional or different terms or conditions on, or
               apply any Effective Technological Measures to, the
               Licensed Material if doing so restricts exercise of the
               Licensed Rights by any recipient of the Licensed
               Material.

       6. No endorsement. Nothing in this Public License constitutes or
          may be construed as permission to assert or imply that You
          are, or that Your use of the Licensed Material is, connected
          with, or sponsored, endorsed, or granted official status by,
          the Licensor or others designated to receive attribution as
          provided in Section 3(a)(1)(A)(i).

  b. Other rights.

       1. Moral rights, such as the right of integrity, are not
          licensed under this Public License, nor are publicity,
          privacy, and/or other similar personality rights; however, to
          the extent possible, the Licensor waives and/or agrees not to
          assert any such rights held by the Licensor to the limited
          extent necessary to allow You to exercise the Licensed
          Rights, but not otherwise.

       2. Patent and trademark rights are not licensed under this
          Public License.

       3. To the extent possible, the Licensor waives any right to
          collect royalties from You for the exercise of the Licensed
          Rights, whether directly or through a collecting society
          under any voluntary or waivable statutory or compulsory
          licensing scheme. In all other cases the Licensor expressly
          reserves any right to collect such royalties.


Section 3 -- License Conditions.

Your exercise of the Licensed Rights is expressly made subject to the
following conditions.

  a. Attribution.

       1. If You Share the Licensed Material (including in modified
          form), You must:

            a. retain the following if it is supplied by the Licensor
               with the Licensed Material:

                 i. identification of the creator(s) of the Licensed
                    Material and any others designated to receive
                    attribution, in any reasonable manner requested by
                    the Licensor (including by pseudonym if
                    designated);

                ii. a copyright notice;

               iii. a notice that refers to this Public License;

                iv. a notice that refers to the disclaimer of
                    warranties;

                 v. a URI or hyperlink to the Licensed Material to the
                    extent reasonably practicable;

            b. indicate if You modified the Licensed Material and
               retain an indication of any previous modifications; and

            c. indicate the Licensed Material is licensed under this
               Public License, and include the text of, or the URI or
               hyperlink to, this Public License.

       2. You may satisfy the conditions in Section 3(a)(1) in any
          reasonable manner based on the medium, means, and context in
          which You Share the Licensed Material. For example, it may be
          reasonable to satisfy the conditions by providing a URI or
          hyperlink to a resource that includes the required
          information.

       3. If requested by the Licensor, You must remove any of the
          information required by Section 3(a)(1)(A) to the extent
          reasonably practicable.

       4. If You Share Adapted Material You produce, the Adapter's
          License You apply must not prevent recipients of the Adapted
          Material from complying with this Public License.


Section 4 -- Sui Generis Database Rights.

Where the Licensed Rights include Sui Generis Database Rights that
apply to Your use of the Licensed Material:

  a. for the avoidance of doubt, Section 2(a)(1) grants You the right
     to extract, reuse, reproduce, and Share all or a substantial
     portion of the contents of the database;

  b. if You include all or a substantial portion of the database
     contents in a database in which You have Sui Generis Database
     Rights, then the database in which You have Sui Generis Database
     Rights (but not its individual contents) is Adapted Material; and

  c. You must comply with the conditions in Section 3(a) if You Share
     all or a substantial portion of the contents of the database.

For the avoidance of doubt, this Section 4 supplements and does not
replace Your obligations under this Public License where the Licensed
Rights include other Copyright and Similar Rights.


Section 5 -- Disclaimer of Warranties and Limitation of Liability.

  a. UNLESS OTHERWISE SEPARATELY UNDERTAKEN BY THE LICENSOR, TO THE
     EXTENT POSSIBLE, THE LICENSOR OFFERS THE LICENSED MATERIAL AS-IS
     AND AS-AVAILABLE, AND MAKES NO REPRESENTATIONS OR WARRANTIES OF
     ANY KIND CONCERNING THE LICENSED MATERIAL, WHETHER EXPRESS,
     IMPLIED, STATUTORY, OR OTHER. THIS INCLUDES, WITHOUT LIMITATION,
     WARRANTIES OF TITLE, MERCHANTABILITY, FITNESS FOR A PARTICULAR
     PURPOSE, NON-INFRINGEMENT, ABSENCE OF LATENT OR OTHER DEFECTS,
     ACCURACY, OR THE PRESENCE OR ABSENCE OF ERRORS, WHETHER OR NOT
     KNOWN OR DISCOVERABLE. WHERE DISCLAIMERS OF WARRANTIES ARE NOT
     ALLOWED IN FULL OR IN PART, THIS DISCLAIMER MAY NOT APPLY TO YOU.

  b. TO THE EXTENT POSSIBLE, IN NO EVENT WILL THE LICENSOR BE LIABLE
     TO YOU ON ANY LEGAL THEORY (INCLUDING, WITHOUT LIMITATION,
     NEGLIGENCE) OR OTHERWISE FOR ANY DIRECT, SPECIAL, INDIRECT,
     INCIDENTAL, CONSEQUENTIAL, PUNITIVE, EXEMPLARY, OR OTHER LOSSES,
     COSTS, EXPENSES, OR DAMAGES ARISING OUT OF THIS PUBLIC LICENSE OR
     USE OF THE LICENSED MATERIAL, EVEN IF THE LICENSOR HAS BEEN
     ADVISED OF THE POSSIBILITY OF SUCH LOSSES, COSTS, EXPENSES, OR
     DAMAGES. WHERE A LIMITATION OF LIABILITY IS NOT ALLOWED IN FULL OR
     IN PART, THIS LIMITATION MAY NOT APPLY TO YOU.

  c. The disclaimer of warranties and limitation of liability provided
     above shall be interpreted in a manner that, to the extent
     possible, most closely approximates an absolute disclaimer and
     waiver of all liability.


Section 6 -- Term and Termination.

  a. This Public License applies for the term of the Copyright and
     Similar Rights licensed here. However, if You fail to comply with
     this Public License, then Your rights under this Public License
     terminate automatically.

  b. Where Your right to use the Licensed Material has terminated under
     Section 6(a), it reinstates:

       1. automatically as of the date the violation is cured, provided
          it is cured within 30 days of Your discovery of the
          violation; or

       2. upon express reinstatement by the Licensor.

     For the avoidance of doubt, this Section 6(b) does not affect any
     right the Licensor may have to seek remedies for Your violations
     of this Public License.

  c. For the avoidance of doubt, the Licensor may also offer the
     Licensed Material under separate terms or conditions or stop
     distributing the Licensed Material at any time; however, doing so
     will not terminate this Public License.

  d. Sections 1, 5, 6, 7, and 8 survive termination of this Public
     License.


Section 7 -- Other Terms and Conditions.

  a. The Licensor shall not be bound by any additional or different
     terms or conditions communicated by You unless expressly agreed.

  b. Any arrangements, understandings, or agreements regarding the
     Licensed Material not stated herein are separate from and
     independent of the terms and conditions of this Public License.


Section 8 -- Interpretation.

  a. For the avoidance of doubt, this Public License does not, and
     shall not be interpreted to, reduce, limit, restrict, or impose
     conditions on any use of the Licensed Material that could lawfully
     be made without permission under this Public License.

  b. To the extent possible, if any provision of this Public License is
     deemed unenforceable, it shall be automatically reformed to the
     minimum extent necessary to make it enforceable. If the provision
     cannot be reformed, it shall be severed from this Public License
     without affecting the enforceability of the remaining terms and
     conditions.

  c. No term or condition of this Public License will be waived and no
     failure to comply consented to unless expressly agreed to by the
     Licensor.

  d. Nothing in this Public License constitutes or may be interpreted
     as a limitation upon, or waiver of, any privileges and immunities
     that apply to the Licensor or You, including from the legal
     processes of any jurisdiction or authority.


=======================================================================

Creative Commons is not a party to its public
licenses. Notwithstanding, Creative Commons may elect to apply one of
its public licenses to material it publishes and in those instances
will be considered the “Licensor.” The text of the Creative Commons
public licenses is dedicated to the public domain under the CC0 Public
Domain Dedication. Except for the limited purpose of indicating that
material is shared under a Creative Commons public license or as
otherwise permitted by the Creative Commons policies published at
creativecommons.org/policies, Creative Commons does not authorize the
use of the trademark "Creative Commons" or any other trademark or logo
of Creative Commons without its prior written consent including,
without limitation, in connection with any unauthorized modifications
to any of its public licenses or any other arrangements,
understandings, or agreements concerning use of licensed material. For
the avoidance of doubt, this paragraph does not form part of the
public licenses.

Creative Commons may be contacted at creativecommons.org.
Third Party Licenses
Please note that while the SenseGlove Unreal Engine Plugin is made available under the MIT License, it utilizes a few third-party libraries with permissive free licenses as well, in order to power various components.
The following third-party software are used and shipped with the SenseGlove Unreal Engine Plugin:
- The SenseGlove SDK (a.k.a. SenseGlove Backend Libraries, or SenseGlove Core Libraries)
- SGBLE and SGBLExx Rust Dependencies
- The Boost C++ Libraries
- The {fmt} Formatting Library
- The Loguru Logging Library License
- The Serial Communication Library
For more information consult their own respective open-source licenses, please.
SenseGlove SDK License
SENSEGLOVE SDK LICENSE

Copyright (c) 2020 - 2026 SenseGlove

Purchase of the Product does not entitle you to ownership or a license to any
software generated by SenseGlove for use with the Product (the “Software”).
To the extent that SenseGlove, in its sole discretion, grants you access to any
such Software, the Software is licensed by us or by the relevant licensor/owner
subject to the relevant end-user license agreement or other license terms
included with the Product and/or on the SenseGlove Websites including the Github
page of SenseGlove (the “License Terms“).

Specifically, SenseGlove shall have sole discretion to determine and change the
availability, nature, features, content, versioning of any Software that it
makes available to you, for download through the the Github page of SenseGlove
or otherwise (including the SenseGlove software developer kit (“SDK”)).
Purchase of a Product does not entitle you to access to any specific features,
content or version of the SDK, including and especially versions of the SDK that
have not yet been made available to the public. SenseGlove will have no
obligation to provide any updates or upgrades to any Software it makes available
to you, but in the event that it does, such updates, upgrades and any
documentation will be subject to the License Terms available at
https://www.senseglove.com/solutions/.

Except to the extent expressly provided by us in writing or under the License
Terms, the Software is provided “AS IS” without any warranties, terms or
conditions as to quality, fitness for purpose, non-infringement, performance or
correspondence with description and we do not offer any warranties or guarantees
in relation to the Software installation, configuration or error/defect
correction.
SGBLE and SGBLExx Rust Dependency Licenses
SGBLE and SGBLExx, components of the SenseGlove SDK, are built using the Rust programming language. These libraries rely on a variety of open-source Rust crates. To ensure commercial developers can use our SDK without licensing concerns, we strictly rely on crates with permissive licenses at runtime.
Some dependencies, like r-efi, are dual-licensed and allow permissive use. The only copyleft tool used is cbindgen, which is solely a build-time dependency. It is employed to automatically generate C FFI bindings for SGBLE, which is implemented in pure Rust. Since cbindgen is not required at runtime and acts more like a transpiler (source-to-source compiler), it does not introduce any licensing risks for commercial applications.
Below is a comprehensive list of all third-party crates and their corresponding licenses used in SGBLE and SGBLExx:
(MIT OR Apache-2.0) AND OFL-1.1 AND Ubuntu-font-1.0 (1): epaint_default_fonts
(MIT OR Apache-2.0) AND Unicode-3.0 (1): unicode-ident
0BSD OR Apache-2.0 OR MIT (1): adler2
Apache-2.0 (15): ab_glyph, ab_glyph_rasterizer, accesskit_winit, codespan-reporting, dpi, gethostname, gl_generator, glutin, glutin_egl_sys, glutin_glx_sys, glutin_wgl_sys, khronos_api, owned_ttf_parser, spirv, winit
Apache-2.0 OR Apache-2.0 WITH LLVM-exception OR MIT (7): linux-raw-sys, linux-raw-sys, rustix, rustix, wasi, wasi, wit-bindgen-rt
Apache-2.0 OR BSD-2-Clause OR MIT (4): zerocopy, zerocopy, zerocopy-derive, zerocopy-derive
Apache-2.0 OR BSD-3-Clause OR MIT (3): btleplug, num_enum, num_enum_derive
Apache-2.0 OR BSL-1.0 (1): ryu
Apache-2.0 OR LGPL-2.1-or-later OR MIT (1): r-efi
Apache-2.0 OR MIT (286): accesskit, accesskit_atspi_common, accesskit_consumer, accesskit_macos, accesskit_unix, accesskit_windows, addr2line, ahash, android-activity, android_log-sys, android_logger, android_system_properties, anstream, anstyle, anstyle-parse, anstyle-query, anstyle-wincon, arboard, arrayvec, as-raw-xcb-connection, ash, async-broadcast, async-channel, async-executor, async-fs, async-io, async-lock, async-process, async-recursion, async-signal, async-task, async-trait, atomic-waker, atspi, atspi-common, atspi-connection, atspi-proxies, autocfg, backtrace, bit-set, bit-vec, bitflags, bitflags, block-buffer, blocking, bluez-async, bluez-generated, bumpalo, cc, cesu8, cfg-if, cgl, clap, clap_builder, clap_lex, colorchoice, concurrent-queue, core-foundation, core-foundation, core-foundation-sys, core-graphics, core-graphics-types, cpufeatures, crc32fast, crossbeam-utils, crypto-common, ctor, ctor-proc-macro, dbus, dbus-tokio, digest, displaydoc, document-features, downcast-rs, dtor, dtor-proc-macro, ecolor, eframe, egui, egui-wgpu, egui-winit, egui_glow, either, emath, enumflags2, enumflags2_derive, env_filter, env_logger, epaint, equivalent, errno, event-listener, event-listener-strategy, fastrand, fdeflate, flate2, foreign-types, foreign-types-macros, foreign-types-shared, form_urlencoded, futures, futures-channel, futures-core, futures-executor, futures-io, futures-lite, futures-macro, futures-sink, futures-task, futures-util, getrandom, getrandom, gimli, gpu-alloc, gpu-alloc-types, gpu-descriptor, gpu-descriptor-types, hashbrown, heck, heck, hermit-abi, hermit-abi, hex, home, humantime, idna, idna_adapter, image, immutable-chunkmap, indexmap, is_terminal_polyfill, itertools, itoa, jni, jni, jni-sys, jobserver, jpeg-decoder, js-sys, khronos-egl, lazy_static, libc, libdbus-sys, litrs, lock_api, log, memmap2, metal, naga, ndk, ndk-context, ndk-sys, ndk-sys, nohash-hasher, num-traits, object, once_cell, ordered-stream, parking, parking_lot, parking_lot_core, paste, percent-encoding, pin-project, pin-project-internal, pin-project-lite, pin-utils, piper, pkg-config, png, polling, ppv-lite86, pretty_env_logger, proc-macro-crate, proc-macro2, profiling, quote, rand, rand, rand_chacha, rand_chacha, rand_core, rand_core, regex, regex-automata, regex-syntax, renderdoc-sys, rustc-demangle, rustc-hash, rustversion, scoped-tls, scopeguard, serde, serde_derive, serde_json, serde_repr, serde_spanned, sha1, shlex, signal-hook-registry, smallvec, smol_str, socket2, stable_deref_trait, static_assertions, syn, tempfile, thiserror, thiserror, thiserror-impl, thiserror-impl, thread_local, toml, toml_datetime, toml_edit, ttf-parser, type-map, typenum, unicode-segmentation, unicode-width, unicode-xid, url, utf16_iter, utf8_iter, utf8parse, uuid, version_check, wasm-bindgen, wasm-bindgen-backend, wasm-bindgen-futures, wasm-bindgen-macro, wasm-bindgen-macro-support, wasm-bindgen-shared, web-sys, web-time, webbrowser, weezl, wgpu, wgpu-core, wgpu-hal, wgpu-types, winapi, winapi-i686-pc-windows-gnu, winapi-x86_64-pc-windows-gnu, windows, windows, windows-core, windows-core, windows-implement, windows-implement, windows-interface, windows-interface, windows-result, windows-result, windows-strings, windows-sys, windows-sys, windows-sys, windows-targets, windows-targets, windows-targets, windows_aarch64_gnullvm, windows_aarch64_gnullvm, windows_aarch64_gnullvm, windows_aarch64_msvc, windows_aarch64_msvc, windows_aarch64_msvc, windows_i686_gnu, windows_i686_gnu, windows_i686_gnu, windows_i686_gnullvm, windows_i686_msvc, windows_i686_msvc, windows_i686_msvc, windows_x86_64_gnu, windows_x86_64_gnu, windows_x86_64_gnu, windows_x86_64_gnullvm, windows_x86_64_gnullvm, windows_x86_64_gnullvm, windows_x86_64_msvc, windows_x86_64_msvc, windows_x86_64_msvc, write16, x11rb, x11rb-protocol
Apache-2.0 OR MIT OR Zlib (12): bytemuck, bytemuck_derive, cursor-icon, glow, miniz_oxide, objc2-app-kit, objc2-core-bluetooth, objc2-core-foundation, objc2-core-graphics, objc2-io-surface, raw-window-handle, xkeysym
BSD-2-Clause (1): arrayref
BSD-3-Clause (3): jni-utils, tiny-skia, tiny-skia-path
BSL-1.0 (2): clipboard-win, error-code
CC0-1.0 (1): hexf-parse
ISC (1): libloading
MIT (91): android-properties, block, block2, block2, bytes, calloop, calloop-wayland-source, cfg_aliases, combine, dashmap, dispatch, dlib, endi, generic-array, glutin-winit, is-terminal, libredox, malloc_buf, memoffset, mio, nix, objc, objc-sys, objc2, objc2, objc2-app-kit, objc2-cloud-kit, objc2-contacts, objc2-core-data, objc2-core-image, objc2-core-location, objc2-encode, objc2-foundation, objc2-foundation, objc2-link-presentation, objc2-metal, objc2-quartz-core, objc2-symbols, objc2-ui-kit, objc2-uniform-type-identifiers, objc2-user-notifications, orbclient, ordered-float, quick-xml, quick-xml, redox_syscall, redox_syscall, sctk-adwaita, serde-xml-rs, simd-adler32, slab, smithay-client-toolkit, smithay-clipboard, strict-num, strsim, strum, strum_macros, synstructure, tiff, tokio, tokio-macros, tokio-stream, tokio-util, tracing, tracing-attributes, tracing-core, uds_windows, wayland-backend, wayland-client, wayland-csd-frame, wayland-cursor, wayland-protocols, wayland-protocols-plasma, wayland-protocols-wlr, wayland-scanner, wayland-sys, winnow, x11-dl, xcursor, xdg-home, xkbcommon-dl, xml-rs, zbus, zbus-lockstep, zbus-lockstep-macros, zbus_macros, zbus_names, zbus_xml, zvariant, zvariant_derive, zvariant_utils
MIT OR Unlicense (7): aho-corasick, byteorder-lite, memchr, same-file, termcolor, walkdir, winapi-util
MPL-2.0 (1): cbindgen
N/A (2): sgble, sgblueman
Unicode-3.0 (19): icu_collections, icu_locid, icu_locid_transform, icu_locid_transform_data, icu_normalizer, icu_normalizer_data, icu_properties, icu_properties_data, icu_provider, icu_provider_macros, litemap, tinystr, writeable, yoke, yoke-derive, zerofrom, zerofrom-derive, zerovec, zerovec-derive
Zlib (2): foldhash, slotmap
For detailed terms of use, please refer to the license files in each project's upstream repository.
Boost C++ Libraries License
Boost Software License - Version 1.0 - August 17th, 2003

Permission is hereby granted, free of charge, to any person or organization
obtaining a copy of the software and accompanying documentation covered by
this license (the "Software") to use, reproduce, display, distribute,
execute, and transmit the Software, and to prepare derivative works of the
Software, and to permit third-parties to whom the Software is furnished to
do so, all subject to the following:

The copyright notices in the Software and this entire statement, including
the above license grant, this restriction and the following disclaimer,
must be included in all copies of the Software, in whole or in part, and
all derivative works of the Software, unless such copies or derivative
works are solely in the form of machine-executable object code generated by
a source language processor.

THE SOFTWARE IS PROVIDED "AS IS", WITHOUT WARRANTY OF ANY KIND, EXPRESS OR
IMPLIED, INCLUDING BUT NOT LIMITED TO THE WARRANTIES OF MERCHANTABILITY,
FITNESS FOR A PARTICULAR PURPOSE, TITLE AND NON-INFRINGEMENT. IN NO EVENT
SHALL THE COPYRIGHT HOLDERS OR ANYONE DISTRIBUTING THE SOFTWARE BE LIABLE
FOR ANY DAMAGES OR OTHER LIABILITY, WHETHER IN CONTRACT, TORT OR OTHERWISE,
ARISING FROM, OUT OF OR IN CONNECTION WITH THE SOFTWARE OR THE USE OR OTHER
DEALINGS IN THE SOFTWARE.
{fmt} Formatting Library License
Copyright (c) 2012 - present, Victor Zverovich and {fmt} contributors

Permission is hereby granted, free of charge, to any person obtaining
a copy of this software and associated documentation files (the
"Software"), to deal in the Software without restriction, including
without limitation the rights to use, copy, modify, merge, publish,
distribute, sublicense, and/or sell copies of the Software, and to
permit persons to whom the Software is furnished to do so, subject to
the following conditions:

The above copyright notice and this permission notice shall be
included in all copies or substantial portions of the Software.

THE SOFTWARE IS PROVIDED "AS IS", WITHOUT WARRANTY OF ANY KIND,
EXPRESS OR IMPLIED, INCLUDING BUT NOT LIMITED TO THE WARRANTIES OF
MERCHANTABILITY, FITNESS FOR A PARTICULAR PURPOSE AND
NONINFRINGEMENT. IN NO EVENT SHALL THE AUTHORS OR COPYRIGHT HOLDERS BE
LIABLE FOR ANY CLAIM, DAMAGES OR OTHER LIABILITY, WHETHER IN AN ACTION
OF CONTRACT, TORT OR OTHERWISE, ARISING FROM, OUT OF OR IN CONNECTION
WITH THE SOFTWARE OR THE USE OR OTHER DEALINGS IN THE SOFTWARE.

--- Optional exception to the license ---

As an exception, if, as a result of your compiling your source code, portions
of this Software are embedded into a machine-executable object form of such
source code, you may redistribute such embedded portions in such object form
without including the above copyright and permission notices.
Loguru Logging Library License
This is free and unencumbered software released into the public domain.

Anyone is free to copy, modify, publish, use, compile, sell, or
distribute this software, either in source code form or as a compiled
binary, for any purpose, commercial or non-commercial, and by any
means.

In jurisdictions that recognize copyright laws, the author or authors
of this software dedicate any and all copyright interest in the
software to the public domain. We make this dedication for the benefit
of the public at large and to the detriment of our heirs and
successors. We intend this dedication to be an overt act of
relinquishment in perpetuity of all present and future rights to this
software under copyright law.

THE SOFTWARE IS PROVIDED "AS IS", WITHOUT WARRANTY OF ANY KIND,
EXPRESS OR IMPLIED, INCLUDING BUT NOT LIMITED TO THE WARRANTIES OF
MERCHANTABILITY, FITNESS FOR A PARTICULAR PURPOSE AND NONINFRINGEMENT.
IN NO EVENT SHALL THE AUTHORS BE LIABLE FOR ANY CLAIM, DAMAGES OR
OTHER LIABILITY, WHETHER IN AN ACTION OF CONTRACT, TORT OR OTHERWISE,
ARISING FROM, OUT OF OR IN CONNECTION WITH THE SOFTWARE OR THE USE OR
OTHER DEALINGS IN THE SOFTWARE.

For more information, please refer to <https://unlicense.org>
Serial Communication Library License
Copyright (c) 2012 William Woodall, John Harrison

Permission is hereby granted, free of charge, to any person obtaining a copy of
this software and associated documentation files (the "Software"), to deal in
the Software without restriction, including without limitation the rights to
use, copy, modify, merge, publish, distribute, sublicense, and/or sell copies of
the Software, and to permit persons to whom the Software is furnished to do so,
subject to the following conditions:

The above copyright notice and this permission notice shall be included in all
copies or substantial portions of the Software.

THE SOFTWARE IS PROVIDED "AS IS", WITHOUT WARRANTY OF ANY KIND, EXPRESS OR
IMPLIED, INCLUDING BUT NOT LIMITED TO THE WARRANTIES OF MERCHANTABILITY, FITNESS
FOR A PARTICULAR PURPOSE AND NONINFRINGEMENT. IN NO EVENT SHALL THE AUTHORS OR
COPYRIGHT HOLDERS BE LIABLE FOR ANY CLAIM, DAMAGES OR OTHER LIABILITY, WHETHER
IN AN ACTION OF CONTRACT, TORT OR OTHERWISE, ARISING FROM, OUT OF OR IN
CONNECTION WITH THE SOFTWARE OR THE USE OR OTHER DEALINGS IN THE SOFTWARE.
Build Information
| The SenseGlove Unreal Engine Handbook | |
|---|---|
| Handbook Revision | next |
| Handbook Revision URL | https://unreal.docs.senseglove.com/next |
| Handbook PDF URL | https://unreal.docs.senseglove.com/next/the-senseglove-unreal-engine-handbook-next.pdf |
| Handbook ePub URL | https://unreal.docs.senseglove.com/next/the-senseglove-unreal-engine-handbook-next.epub |
| Git Branch | dev |
| Git Tag | |
| Git Commit | 303e7176 |
| Git Commits Since Tag | 0 |
| Git Tree State | clean |
| Git Is Shallow Clone | no |
| Git Latest Remote Tag | v2.7.3 |
| Git Version | |
| Git Version Major | 0 |
| Git Version Minor | 0 |
| Git Version Patch | 0 |
| Plugin Version | v2.7.3 |
| Plugin Version Major | 2 |
| Plugin Version Minor | 7 |
| Plugin Version Patch | 3 |
| Build Host | mamadou-dev-pc |
| Build Time | Thu Feb 19, 2026 10:20 CET +0100 |
