Plugin Installation through Microsoft Azure DevOps Repositories
While plugin installation through the Epic Games Launcher is the most convenient method for most users to obtain and install the latest version of the SenseGlove Unreal Engine Plugin marketplace page, there might be valid reasons to instead download and install the plugin directly from the SenseGlove Unreal Engine Plugin Microsoft Azure DevOps Repository. These reasons may include:
- Downloading an older version that is no longer available on the Unreal Engine Marketplace.
- Downloading a recent version that has been submitted to the Unreal Engine Marketplace, but is still awaiting approval and publication by the Unreal Engine Marketplace Team.
- Downloading an under-development, unstable release of the plugin for testing purposes.
- Or, any other specific needs that require direct access to the repository.
Nonetheless, here is a step-by-step guide to downloading and installing the plugin from the Microsoft Azure DevOps Repositories.
Download a Specific Version
To download a specific version of the plugin, follow these steps:
-
Navigate to the the SenseGlove Unreal Engine Plugin Microsoft Azure DevOps Repository.
-
Locate the branch dropdown menu at the top of the page, just below the navigation bar, and next to the
Copy to clipboardicon. There you'll find a dropdown menu. By default, it usually selects the master branch.
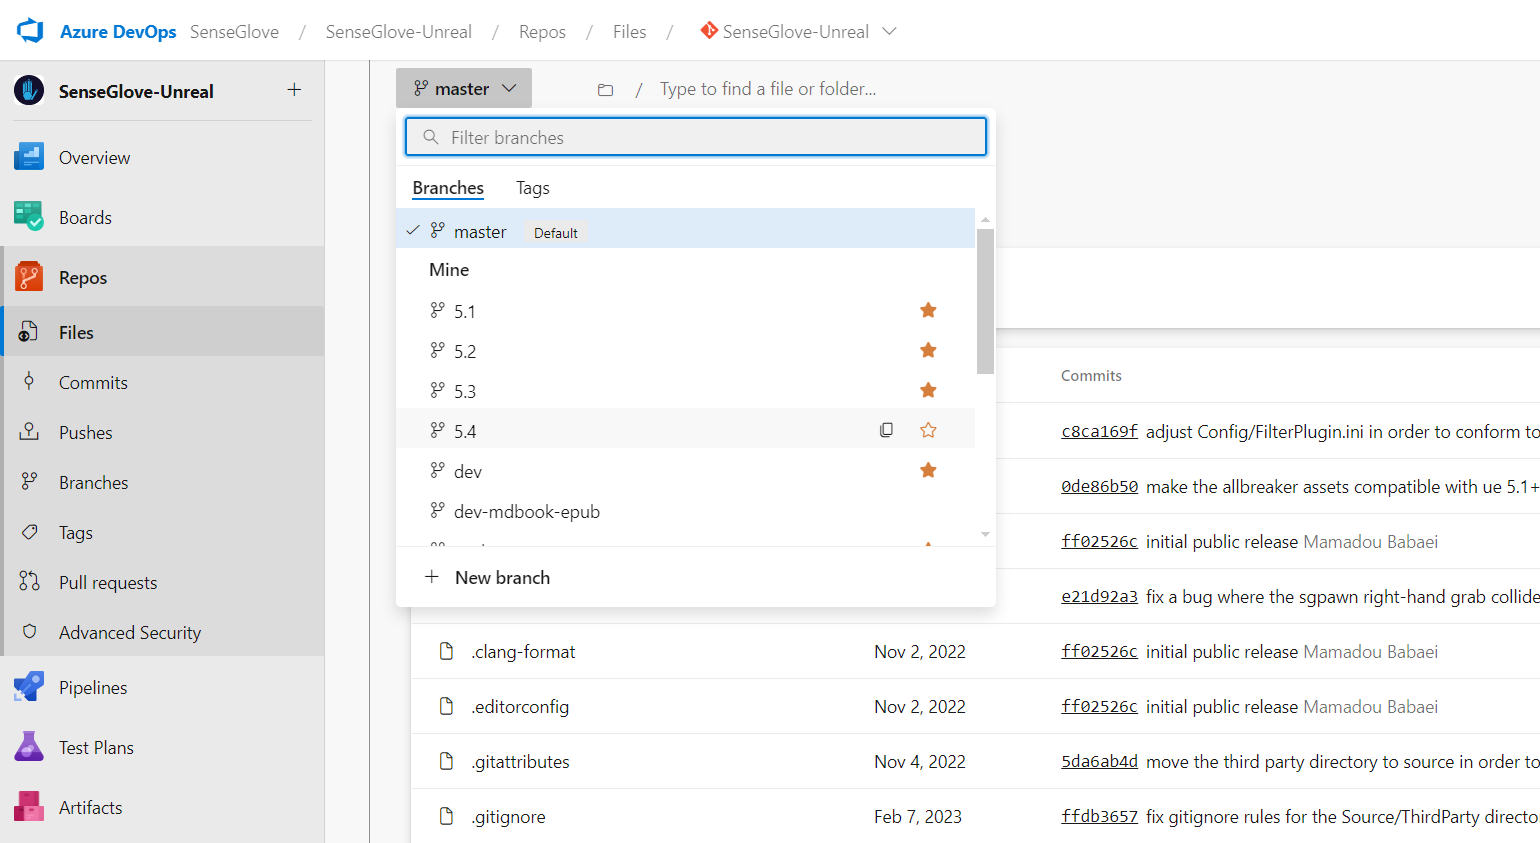
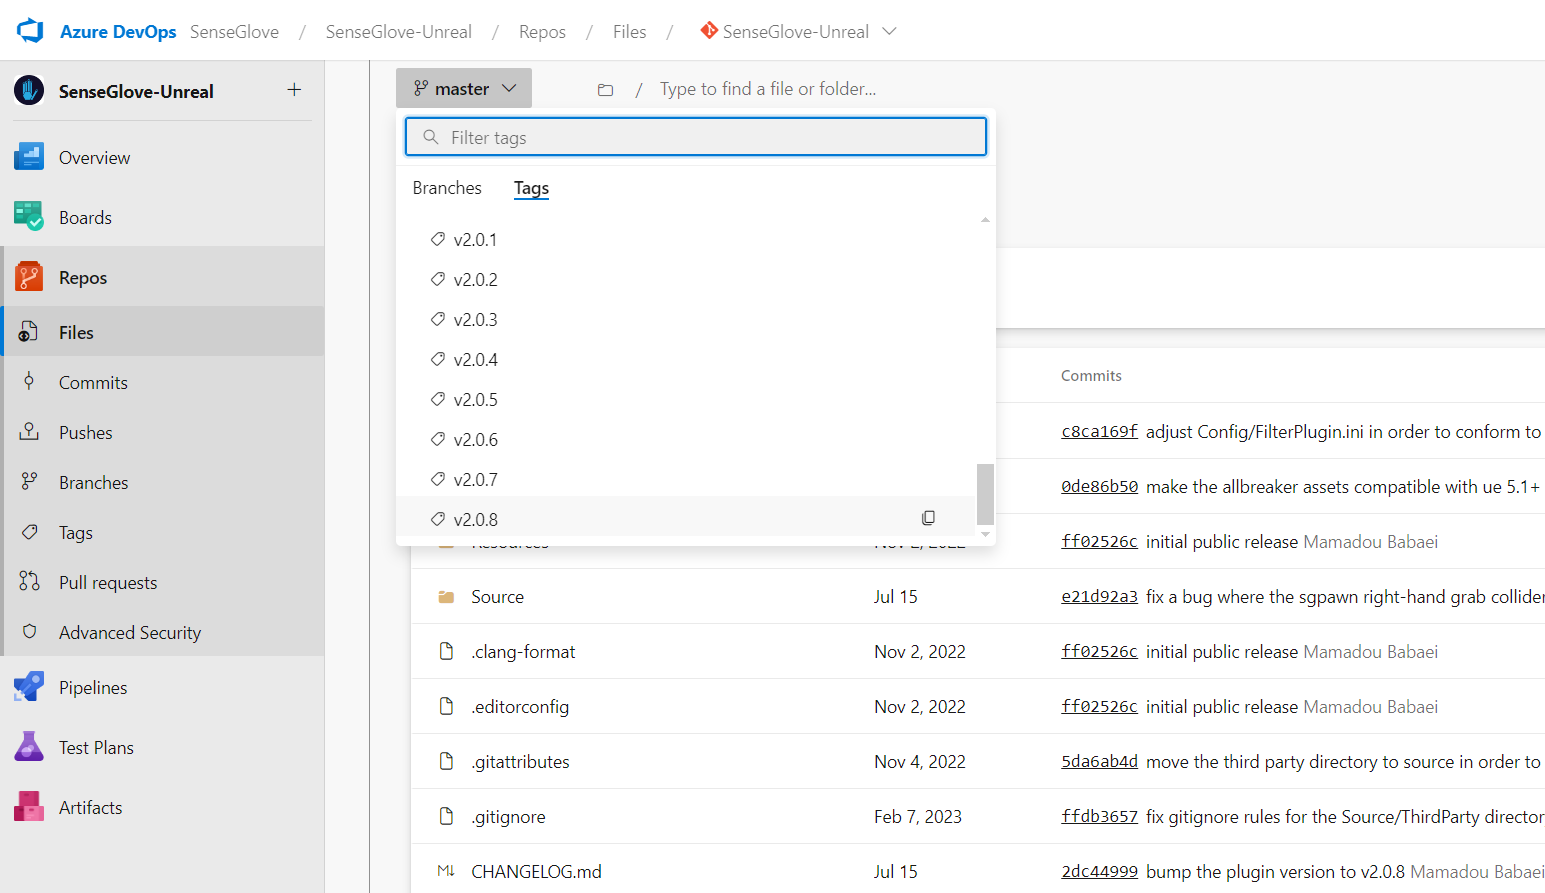
- Use the dropdown menu to choose a desired branch containing the source code for a specific version of Unreal Engine or a specific release of the plugin marked with a release tag.
note
A branch named with engine version numbers, such as 5.4, 5.3, etc.,
ususally contains the source code for the latest stable version of the plugin
compatible with that specific Unreal Engine version, provided that version is
still supported.
For a comprehensive list of supported engine versions please refer to
the Platform Support Matrix.
As a general rule of thumb, the master branch should work with any supported
Unreal Engine version. This is because it does not specify any EngineVersion
inside the main .uplugin file. However, there may be rare exceptions where
it does not work due to breaking changes between engine versions that the
plugin cannot accommodate. One such a instance occurred with version 2.0.x
of the plugin, where
some breaking changes prevented UE 5.1 from sharing similar code with versions 5.2+.
For this reason, it is generally recommended to select a branch specific to
the version of the Unreal Engine you intend to use with the plugin.
The same principles that apply to the master branch also apply to the dev
branch, which will discuss later.
We will also cover how to obtain a working version from a tag for scenarios like the one mentioned above.
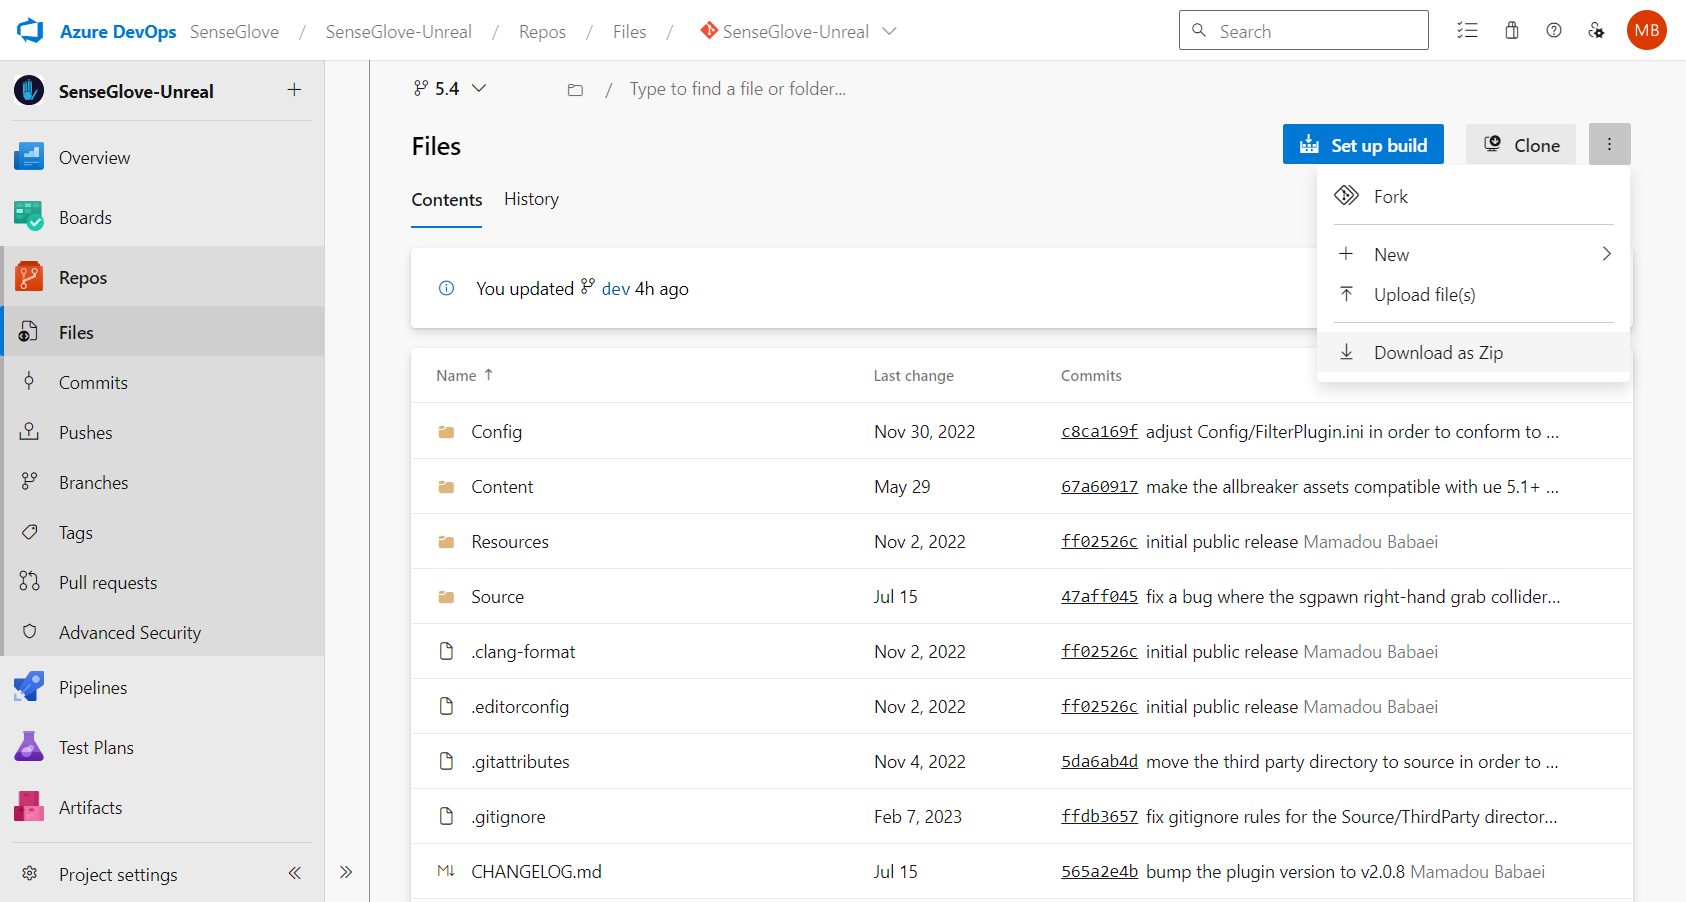
- After selecting your desired branch or tag, click on the kebab menu (three vertical dots) located at the top right of the screen and choose
Download as Zipto obtain the source code for that branch or tag.
Download a Specific Version for a Specifc Unreal Engine Version
As mentioned earlier, due to breaking changes between Unreal Engine versions, it might not be feasible to share the same source code across different Unreal Engine versions. Since release tags are created from the master branch, they contain code compatible only with the latest version of Unreal Engine. Therefore, the instructions for downloading a specific version from a release tag might not work with some Unreal Engine versions. In such cases, you can use an alternative approach:
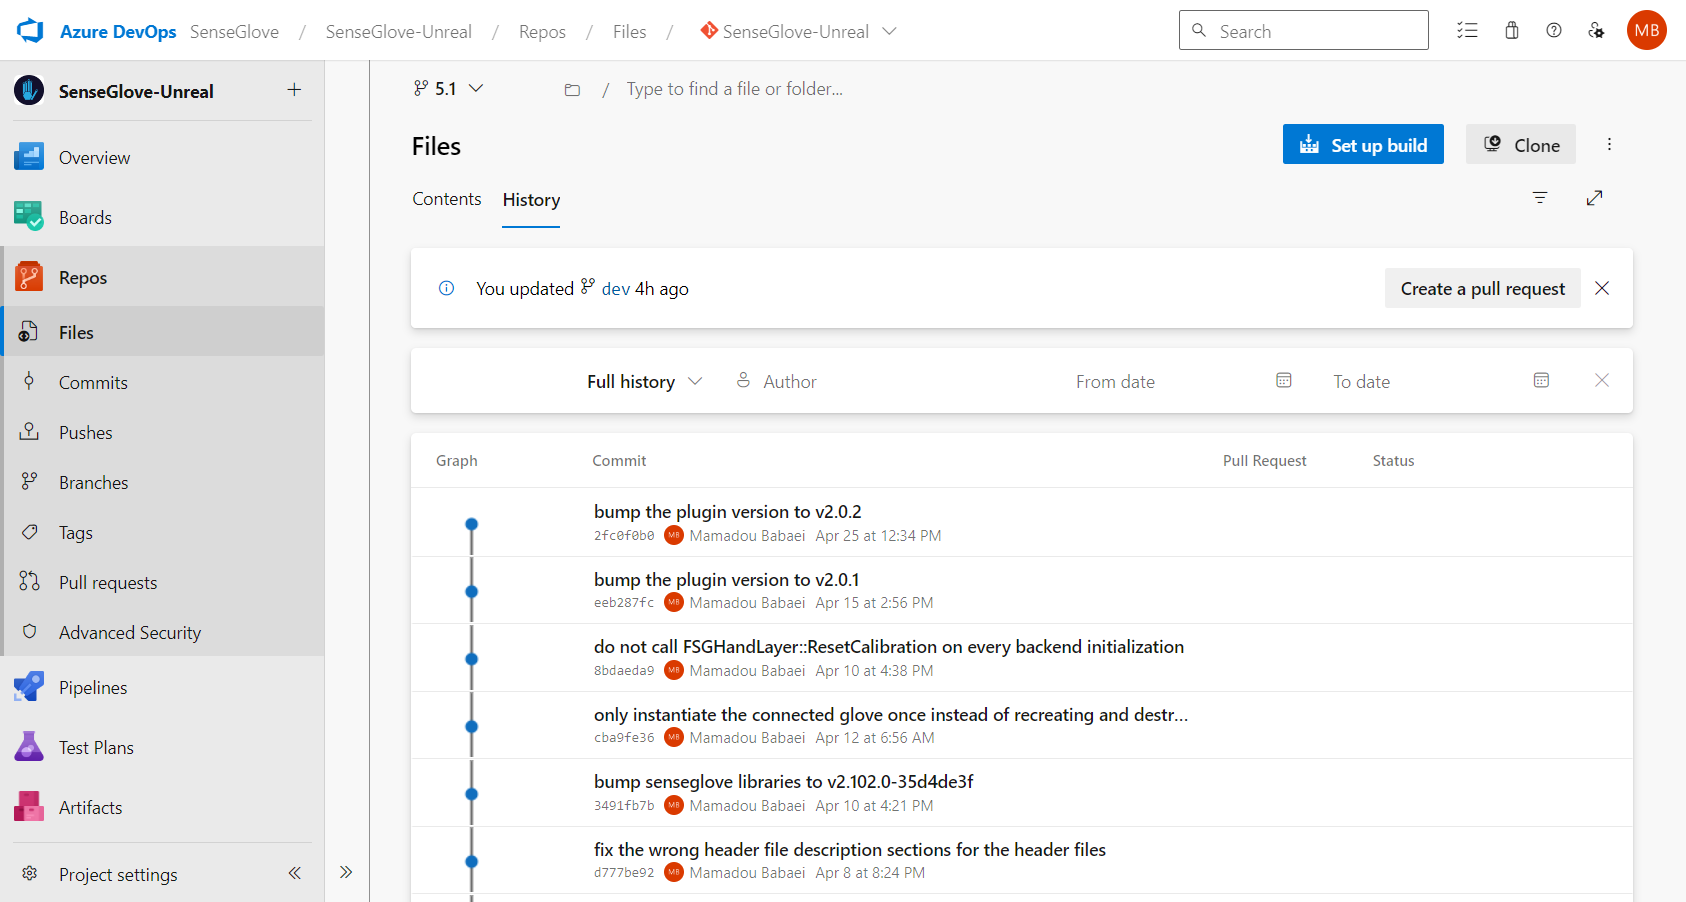
- First, choose the appropriate branch for your desired Unreal Engine version from the branch dropdown menu, as discussed earlier. Then navigate to the
Historytab.
-
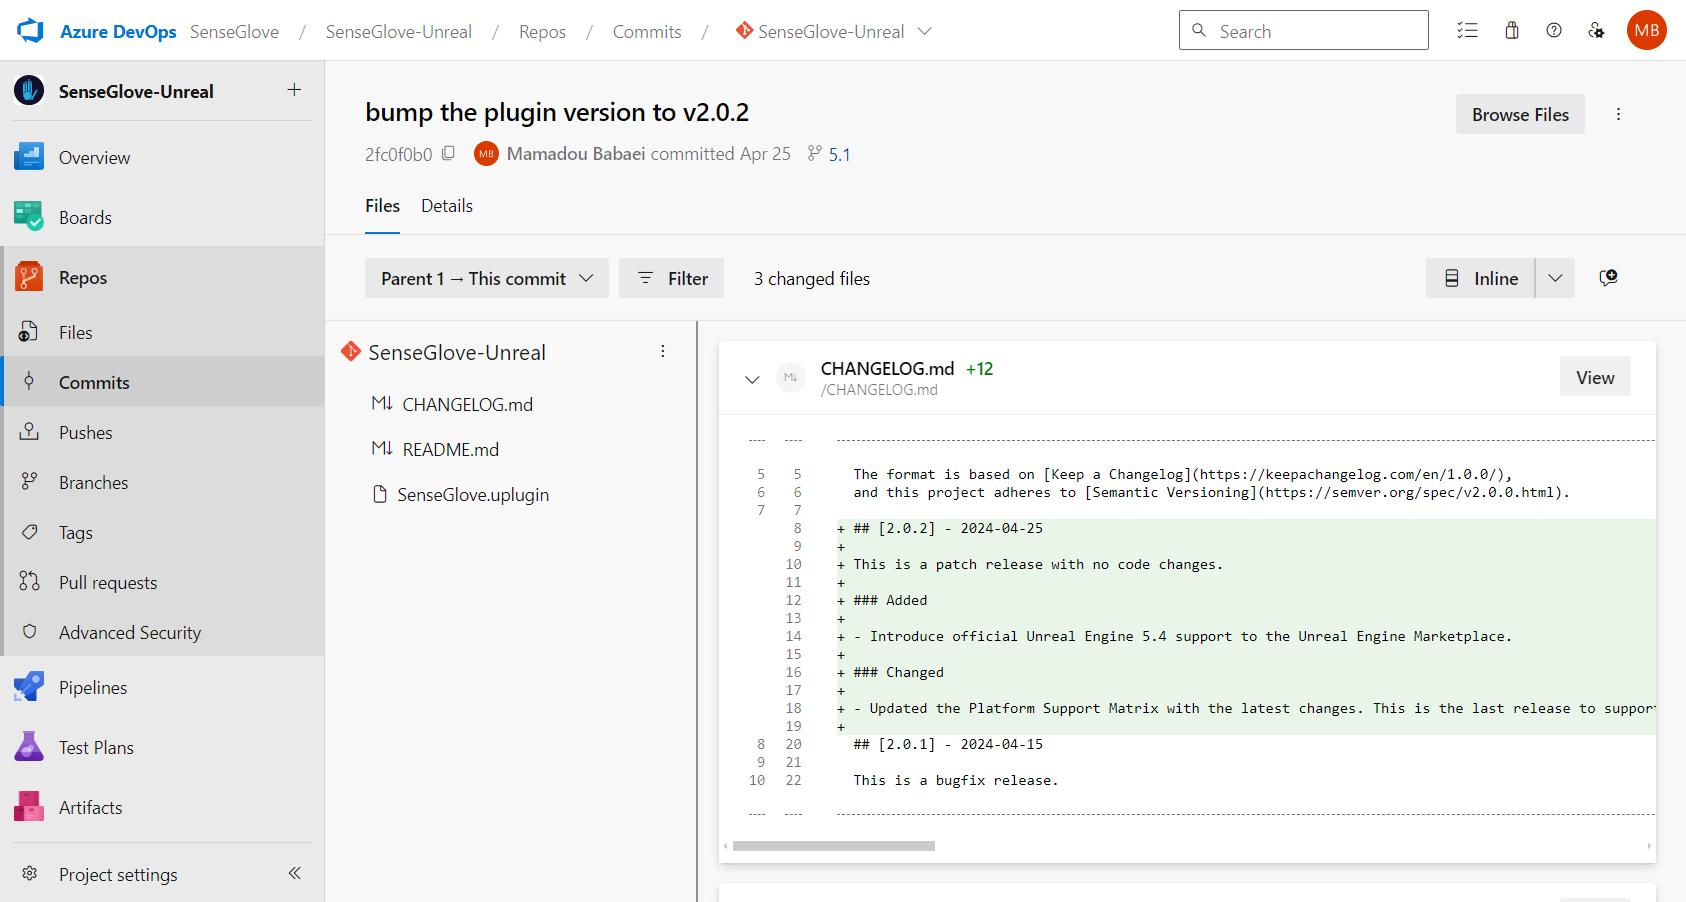
Look through the commit history for a commit message that says
bump the plugin version to vX.X.Xas all releases are finalized with this exact commit message and the plugin version. Next, click on the commit message for the version you are looking for. -
Once you've selected the correct commit, click on the
Browse Filesbutton next to the kebab menu (three vertical dots) at the top right of the screen.
- You should now be in the
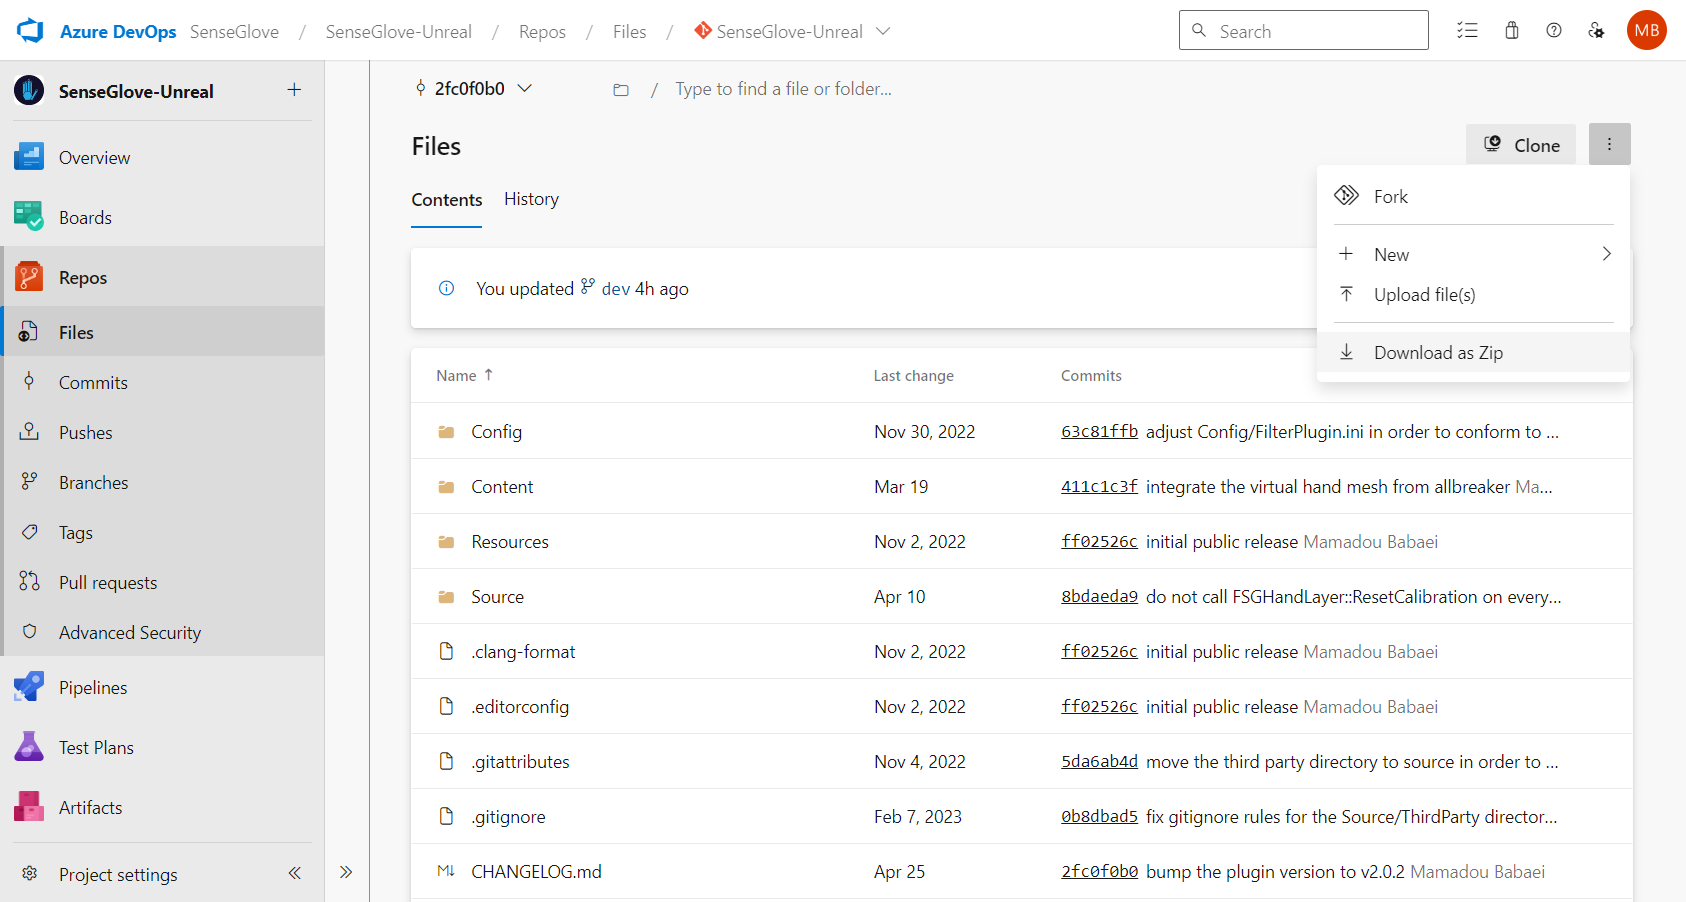
Contenttab, with the branch dropdown menu displaying the commit hash instead of a branch name or tag. Click on the kebab menu (three vertical dots) again, and selectDownload as Zip. This will give you a zip file containing the exact release you need, compatible with your chosen Unreal Engine version.
Download the Bleeding-edge Development Branch
caution
The dev branch is an active development branch that is constant and
ongoing changes. As a result, the code on this branch is primarily untested
and therefore not production-ready. It may not even compile successfully or
may lack comprehensive documentation.
For any serious development, it is generally recommended to use a stable
release of the plugin. The dev branch is publicly accessible to give you a
preview of upcoming features and for trial purposes only.
The most up-to-date documentation for the dev branch can usually be found at: at: https://unreal.dev.senseglove.com/next.
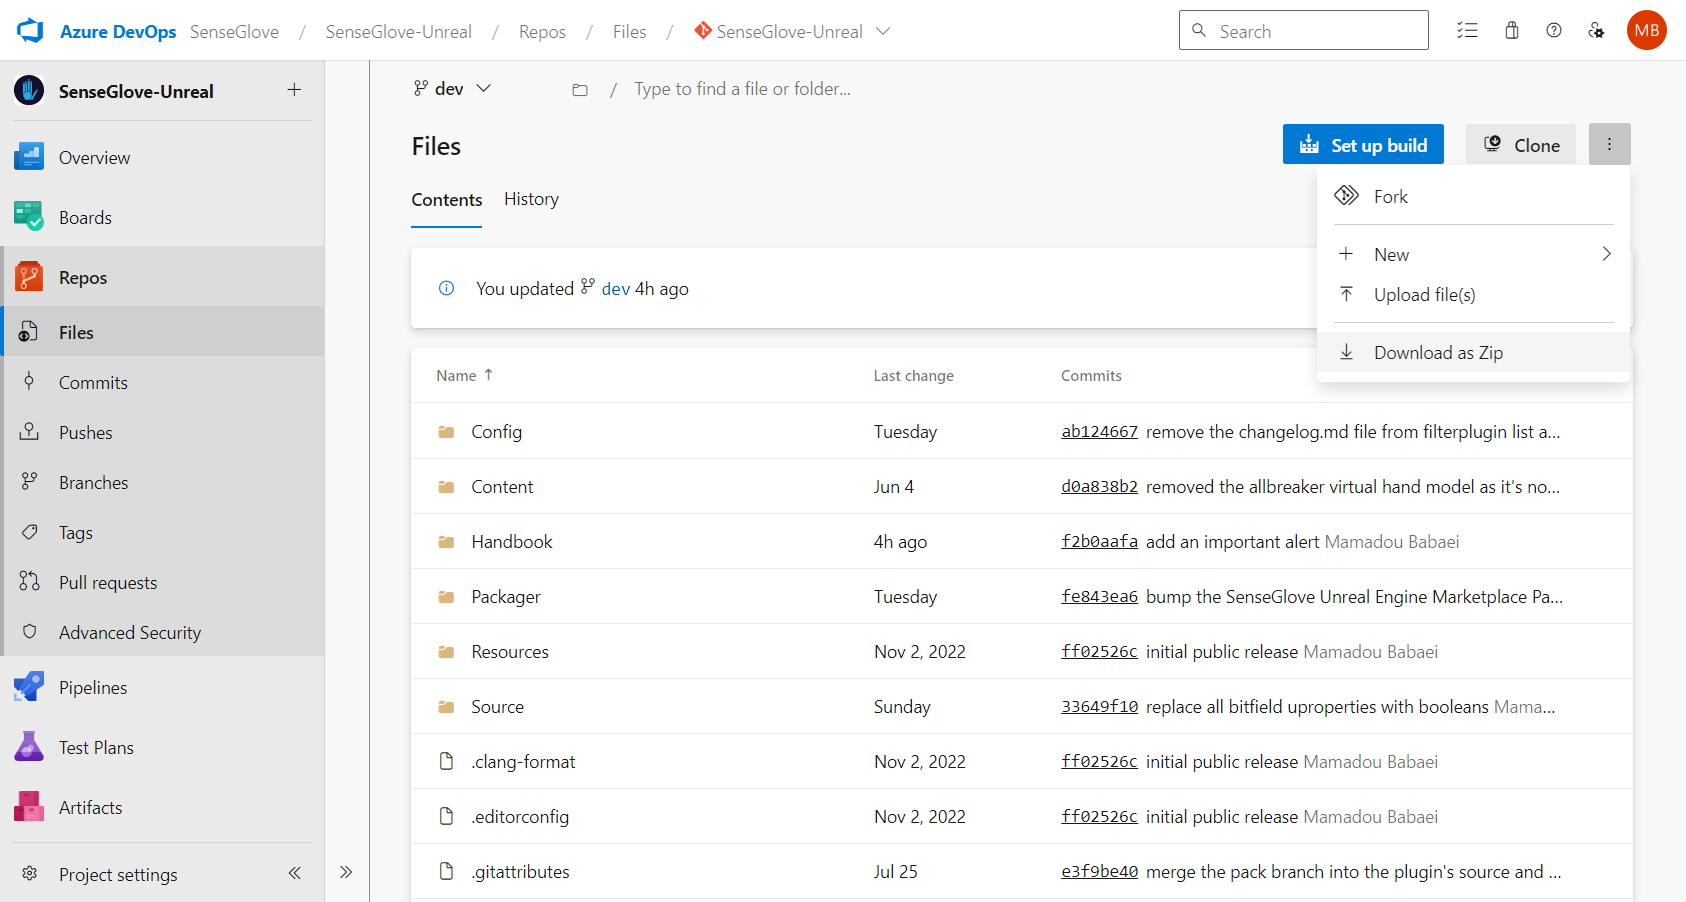
Downloading the dev branch is as easy as choosing the dev branch from the branch dropdown menu (as discussed earlier) and then choosing Download as Zip from the kebab menu (three vertical dots).
Installation
Once you have obtained the desired plugin version compatible with the Unreal Engine version you have in mind using any of the methods mentioned above, it's time to build and install the plugin. There are two ways to install the SenseGlove Unreal Engine Plugin, one is at the engine level, and the other is per project.
-
Engine-level installation: this method makes the plugin accessible to any project within that Unreal Engine version.
-
Per-project installation: this method makes the plugin accessible only to a specific project.
warning
Please note that it is best practice to install the plugin either at the project level or the engine level, but not both. Having the plugin installed in both locations, at the same time, can lead to various issues, especially if the version of the plugin installed at the engine level differs from the one installed at the plugin level. A guide on verifying the plugin version is also available as well.
Engine-level installation
Per-project installation
- Locate your existing C++ or Blueprint project, or create a new project from scratch.
important
Before proceeding, make sure your project's Unreal Editor is closed, and you do not have your project open in your C++ IDE to avoid any issues.
-
Inside your project's root directory create a new
Pluginsdirectory if you don't have one already. -
Inside the
Pluginsdirectory create a new directory namedSenseGlove. -
Extract the content of your downloaded zip file into the
SenseGlovedirectory. -
Remove any directories or files that are only meant for use by the SenseGlove Unreal Engine Plugin maintainers. These are not part of the distributed plugin package and are not required by either Unreal Engine or the SenseGlove Unreal Engine Plugin to function correctly.
The mandatory files and folders to stay are as follows:
Config
Content
Resources
Source
SenseGlove.uplugin
Anything else can be safely removed. For example, these files and folders can be safely deleted:
Handbook
Packager
.clang-format
.editorconfig
.gitattributes
.gitignore
README.md
- Ensure your project has the correct structure.
For a Blueprint-only project, it should look something like this:
MyBlueprintProject
  │
  ├── Config
  │
  ├── Content
  │
  ├── Plugins
  │     │
  │     └── SenseGlove
  │           │
  │           ├── Config
  │           │
  │           ├── Content
  │           │
  │           ├── Resources
  │           │
  │           ├── SenseGlove.uplugin
  │           │
  │           └── Source
  │
  └── MyBlueprintProject.uproject
For a C++ project, the structure should look like this:
MyCppProject
  │
  ├── Config
  │
  ├── Content
  │
  ├── Plugins
  │     │
  │     └── SenseGlove
  │           │
  │           ├── Config
  │           │
  │           ├── Content
  │           │
  │           ├── Resources
  │           │
  │           ├── SenseGlove.uplugin
  │           │
  │           └── Source
  │
  ├── Source
  │
  └── MyCppProject.uproject
tip
If you are keeping your project under Git and Git LFS, consider keeping the .gitignore and .gitattributes as they help keep irrelevant files out of the remote repository, or manage binary blobs efficiently.
- OK, now it's time to build the plugin.
note
For Linux build instructions see the Linux Build Instructions section.
For a Blueprint-only project, on Microsoft Windows simply double-clicking the project's .uproject file should present you with a pop-up informing you that some binary modules are missing.
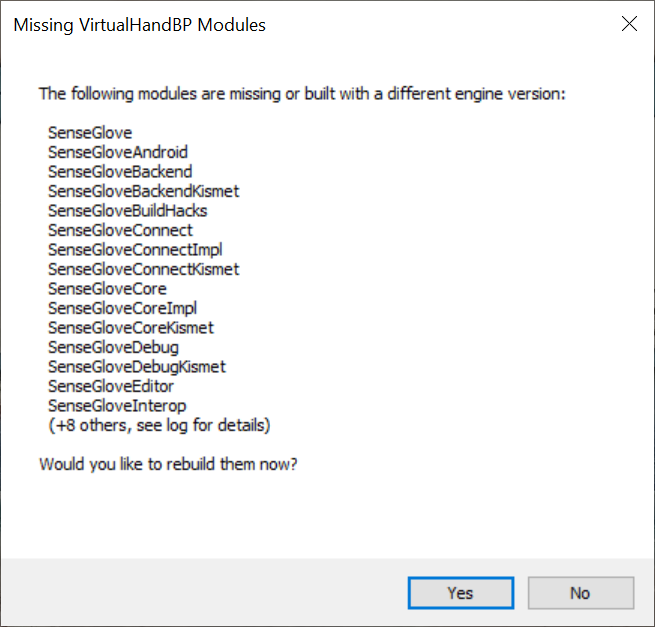
After confirming, the build process will start automatically, and a dialog indicating the build progress will be shown:
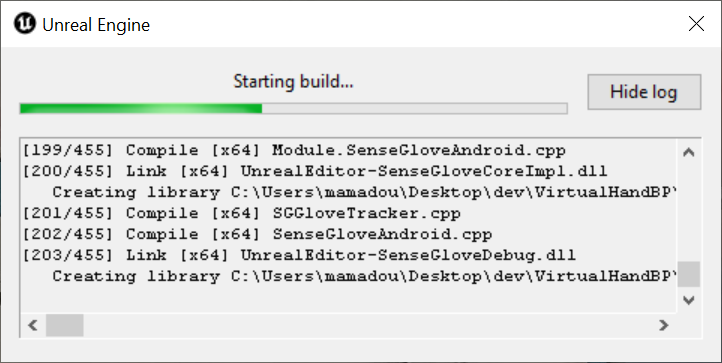
Once finished successfully, the project will be loaded.
note
Sometimes, due to an esoteric bug in some versions of Unreal Engine, the build process for Blueprint-only projects may immediately fail after choosing Yes in the Missing Modules dialog. If this happens, one workaround would be to try to build the plugin inside a temporary C++ project, then copy the Plugins/SenseGlove folder containing the binaries, from the C++ project to your Blueprint project and then try to reopen the project again.
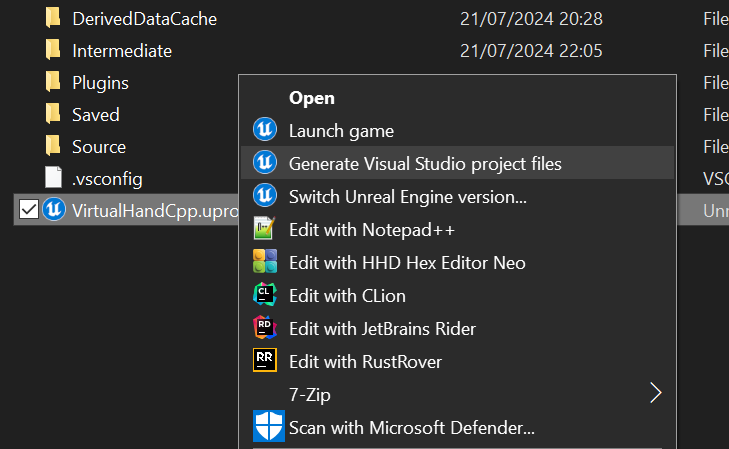
For C++ projects, on Microsoft Windows, right-click on your C++ .uproject file and choose Generate Visual Studio project files:
A dialog will pop up shows you the progress of generating the Visual Studio project files:
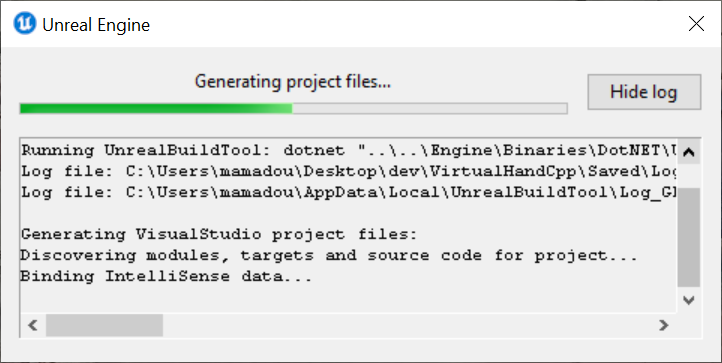
Once the project files are generated, open up the C++ project in your preferred C++ IDE and build the project. After this, the project can be loaded in the Unreal Editor.
- Once the plugin has been built successfully, ensure the SenseGlove Unreal Engine is enabled and verify the plugin version matches the expected version.
Linux Build Instructions
When building the SenseGlove Unreal Engine Plugin on Linux, you won't encounter the Missing Modules dialog that appears on Microsoft Windows. Instead, examining the Unreal Editor logs reveals that the Unreal Editor automatically chooses No in response to the Would you like to rebuild them now? question as the No is implied states.
$ /path/to/UnrealEngine/Engine/Binaries/Linux/UnrealEditor \
    /path/to/MyBlueprintProject/MyBlueprintProject.uproject

LogLinux: Warning: MessageBox: The following modules are missing or built with a different engine version:

  SenseGlove
  SenseGloveAndroid
  SenseGloveBackend
  SenseGloveBackendKismet
  SenseGloveBuildHacks
  SenseGloveConnect
  SenseGloveConnectImpl
  SenseGloveConnectKismet
  SenseGloveCore
  SenseGloveCoreImpl
  SenseGloveCoreKismet
  SenseGloveDebug
  SenseGloveDebugKismet
  SenseGloveEditor
  SenseGloveInterop
  (+8 others, see log for details)

Would you like to rebuild them now?: Missing MyBlueprintProject Modules: No is implied.
LogCore: Engine exit requested (reason: EngineExit() was called)
LogExit: Preparing to exit.
LogPakFile: Destroying PakPlatformFile
LogExit: Exiting.
LogInit: Tearing down SDL.
Exiting abnormally (error code: 1)
If your Unreal Engine installation on Linux was obtained from the GitHub Sources y you can generate the project files using the following command:
$ /path/to/UnrealEngine/GenerateProjectFiles.sh \
    /path/to/MyProject/MyProject.uproject \
    -editor -game -makefile
However, if you are using a prebuilt Linux version of Unreal Engine, the main GenerateProjectFiles.sh script at the engine root does not exists. Instead, we have to invoke the underlying GenerateProjectFiles.sh script located elsewhere. This is a different script which shares the same name and is also present in the GitHub sources. The main GenerateProjectFiles.sh script at the engine root is actually a wrapper around this script.
$ /path/to/UnrealEngine/Engine/Build/BatchFiles/Linux/GenerateProjectFiles.sh \
    /path/to/MyProject/MyProject.uproject \
    -editor -game -makefile
Still, running the any of the above commands on a Blueprint project results in the following error:
$  /path/to/UnrealEngine/Engine/Build/BatchFiles/Linux/GenerateProjectFiles.sh \
    /path/to/MyBlueprintProject/MyBlueprintProject.uproject \
    -editor -game -makefile

Setting up Unreal Engine project files...

Setting up bundled DotNet SDK
Log file: /home/mamadou/.config/Epic/UnrealBuildTool/Log_GPF.txt
Project file formats specified via the command line will be ignored when generating
project files from the editor and other engine tools.

Consider setting your desired IDE from the editor preferences window, or modify your
BuildConfiguration.xml file with:

<?xml version="1.0" encoding="utf-8" ?>
<Configuration xmlns="https://www.unrealengine.com/BuildConfiguration">
  <ProjectFileGenerator>
    <Format>Make</Format>
  </ProjectFileGenerator>
</Configuration>


Generating Make project files:
Discovering modules, targets and source code for project...
Total execution time: 0.35 seconds
Directory '/path/to/MyBlueprintProject/MyBlueprintProject' is missing 'Source' folder.
For a C++ project, however, the project files will generate without any issues:
$ /path/to/UnrealEngine/Engine/Build/BatchFiles/Linux/GenerateProjectFiles.sh \
    /path/to/MyCppProject/MyCppProject.uproject \
    -editor -game -makefile

Setting up Unreal Engine project files...

Setting up bundled DotNet SDK
Log file: /home/mamadou/.config/Epic/UnrealBuildTool/Log_GPF.txt
Project file formats specified via the command line will be ignored when generating
project files from the editor and other engine tools.

Consider setting your desired IDE from the editor preferences window, or modify your
BuildConfiguration.xml file with:

<?xml version="1.0" encoding="utf-8" ?>
<Configuration xmlns="https://www.unrealengine.com/BuildConfiguration">
  <ProjectFileGenerator>
    <Format>Make</Format>
  </ProjectFileGenerator>
</Configuration>


Generating Make project files:
Discovering modules, targets and source code for project...
Generating data for project indexing... 100%

Generating QueryTargets data for editor...
Total execution time: 2.98 seconds
So, the workaround for Blueprint projects is to build the plugin inside a C++ project and then copy the Plugin/SenseGlove directory, which contains the built binary modules, to the corresponding directory in your Blueprint project.
$ /path/to/UnrealEngine/Engine/Build/BatchFiles/Linux/GenerateProjectFiles.sh \
    /path/to/MyCppProject/MyCppProject.uproject \
    -editor -game -makefile
$ make MyCppProjectEditor -C /path/to/MyCppProject/
$ cp -vr \
    /path/to/MyCppProject/Plugins/SenseGlove \
    /path/to/MyBlueprintProject/Plugins/
$ /path/to/UnrealEngine/Engine/Binaries/Linux/UnrealEditor \
    /path/to/MyBlueprintProject/MyBlueprintProject.uproject